Page is loading ...

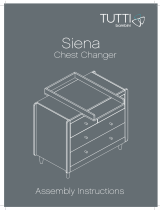
Modena
Chest Changer
Assembly Instructions

Conforms to BS EN 12221:2008+A1:2013
Tutti Frutti Direct Ltd. Unit 3, 1000 North Circular Road, London, UK, NW2 7JP
t: +44 (0) 208 368 5800
e: customerservice@tuttibambini.co.uk
www.tuttibambini.com
IMPORTANT: RETAIN FOR FUTURE REFERENCE. READ CAREFULLY
Modena
Chest Changer
211437

Parts List
3
www.tuttibambini.com
Hardware List
-L
2
1
3
3
3
2
4
4
5
5
6
-R
3
3
6
7
9
8
10
10 -R
-L
x3
A
ID#
55 pc
Qty
B
ID#
56 pc
Qty
C
ID#
1 pc
Qty
D
ID#
18 pc
Qty
3.5x14mm
E
ID#
1 pc
Qty
F
ID#
1 pc
Qty
G
ID#
1 pc
Qty
4x16mm
6.5x40mm
15x11.5mm
750mm
10/6mm
200x30mm
1pc for replacement

4www.tuttibambini.com
Hello,
PLEASE READ THIS LEAFLET BEFORE ASSEMBLY
Dear Customer,
Thankyou for buying Tutti Bambini furniture.
Follow the instructions carefully and check that you have
all the elements including the fittings before attempting
assembly. If there are any missing or damaged parts, please inform
us before you start the assembly. Please note that
incorrect assembly of your furniture will not be a basis for
a claim against the product being damaged.
In the unlikely event that your furniture is found to be faulty,
we ask that you send an email to:
customerservice@tuttibambini.co.uk with the following
information that can be found on the white label on
the outside parcel.
• Name
• Postcode
• Contact telephone number
• Sales order number (found on white label)
• Product name & colour
• Damaged part number
• A photo or video of the damaged part
Tutti Bambini guarantee your product against faulty manufacture for
a period of 12 months from date of receipt of purchase. This does
not affect your statutory rights.
Team Tutti

4
4
C x 1 PC
C
B x 6 PCS
1
B
B x 20 PCS
2
2
3
3
3
3
3
-R
-L
B
A x 26 PCS
1
A
2-L
2-R
Assembling into chest
5
www.tuttibambini.com
Screw metal pins into top and side
Assemble top to frame using
6 x B locking nuts
Assemble support bar to 2 side panels
using 20 x B locking nuts
Connect two backs with H slat,
attach to the frame
1
3
2
4

Assembling into chest
6www.tuttibambini.com
B x 12 PCS
9
10 -L
10 -R
x3
B
D x 18 PCS
D
4
4
3.5x14mm
A x 12 PCS
A
x3
10
10
9
-L
-R
Assemble back using 18 x D screws
Assemble two drawer sides to drawer back
using 12 x B locking nuts
Screw metal pins into drawer side
Slide drawer bottom into the grooves
5
7
6
8
8
x3

B x 4 PCS
6
5
5
B
6
A x 4 PCS
x2
A
A
6
B x 12 PCS
B
x3
7
A
A x 12 PCS
Assembling into chest
Assembling into chest
7
www.tuttibambini.com
Assemble drawer front to drawer frame
using 12 x A metal pins and
12 x B locking nuts
Screw metal pins into short top
support bars
Slide the drawers onto runners
Assemble 2 short top support bars to
long rails using 4 x D locking nuts
9
11
10
12

F x 1 PC
E x 1 PC
4x16mm
G x 1 PC
F
E
G
Assembling into chest
8www.tuttibambini.com
Assemble top frame to cabinet body
13 14
Fittings to attach the strap to the wall are not provid-
ed and suitable fittings for the wall type should be
used. Caution: The drawer is not provided with end
stops that prevent it from being pulled out of the unit
15 16

Safety advice and maintenance
IMPORTANT! KEEP FOR FUTURE REFERENCE:
READ CAREFULLY
1. WARNING: Never leave your child unattended. The safety of your child is your responsibility.
2. WARNING: Do not allow children to climb on the chest changer..
3. WARNING: Never leave your child unattended on the chest changer.
4. WARNING: Do not use the chest changer if it is damaged or broken or there are parts missing.
Use only spare parts approved by Tutti Bambini.
5. WARNING: Do not place the chest changer in or near the vicinity of open fires or other surfaces of
strong heat, such as gas or electric fires.
6. Always leave the chest changer clean and dry. Wipe away any spillage straight away. The chest
changer may be cleaned with a damp cloth. Do not use aggressive cleaning agents such as
bleach or strong detergents.
7. Check on a regular basis that all fittings and screws are correctly tightened and are not damaged.
Loose screws can pinch parts of the body and clothing resulting in the risk of strangulation.
8. Do not twist or pivot the chest changer, if it is to be moved always lift with two people.
9. Maximum weight / age of the child for use with the chest changer is 15kg, or 12 months.
Product development dictates that components may occasionally differ from the ones shown in the
diagrams of these instructions. The right to change the specifications and design of the furniture
without prior notice remains with the manufacturer.
Guarantee
All our products are produced from the finest quality materials and are manufactured under the strictest
quality controls. We guarantee all our products or parts thereof against faulty manufacture for a period of
one year from date of purchase This guarantee is not effective against accidental damage or damage
caused by incorrect use or neglect. This does not affect your statutory rights.
Assembling into chest

Notes

PT
Join Us
Follow us on Facebook
TuttiBambiniUK
Follow us on Twitter
TuttiBambiniUK
Follow us on Instagram
TuttiBambiniUK

www.tuttibambini.com
/


