Assembly
/Operation Instructions
/Parts
|ll(lIlEl#913llll
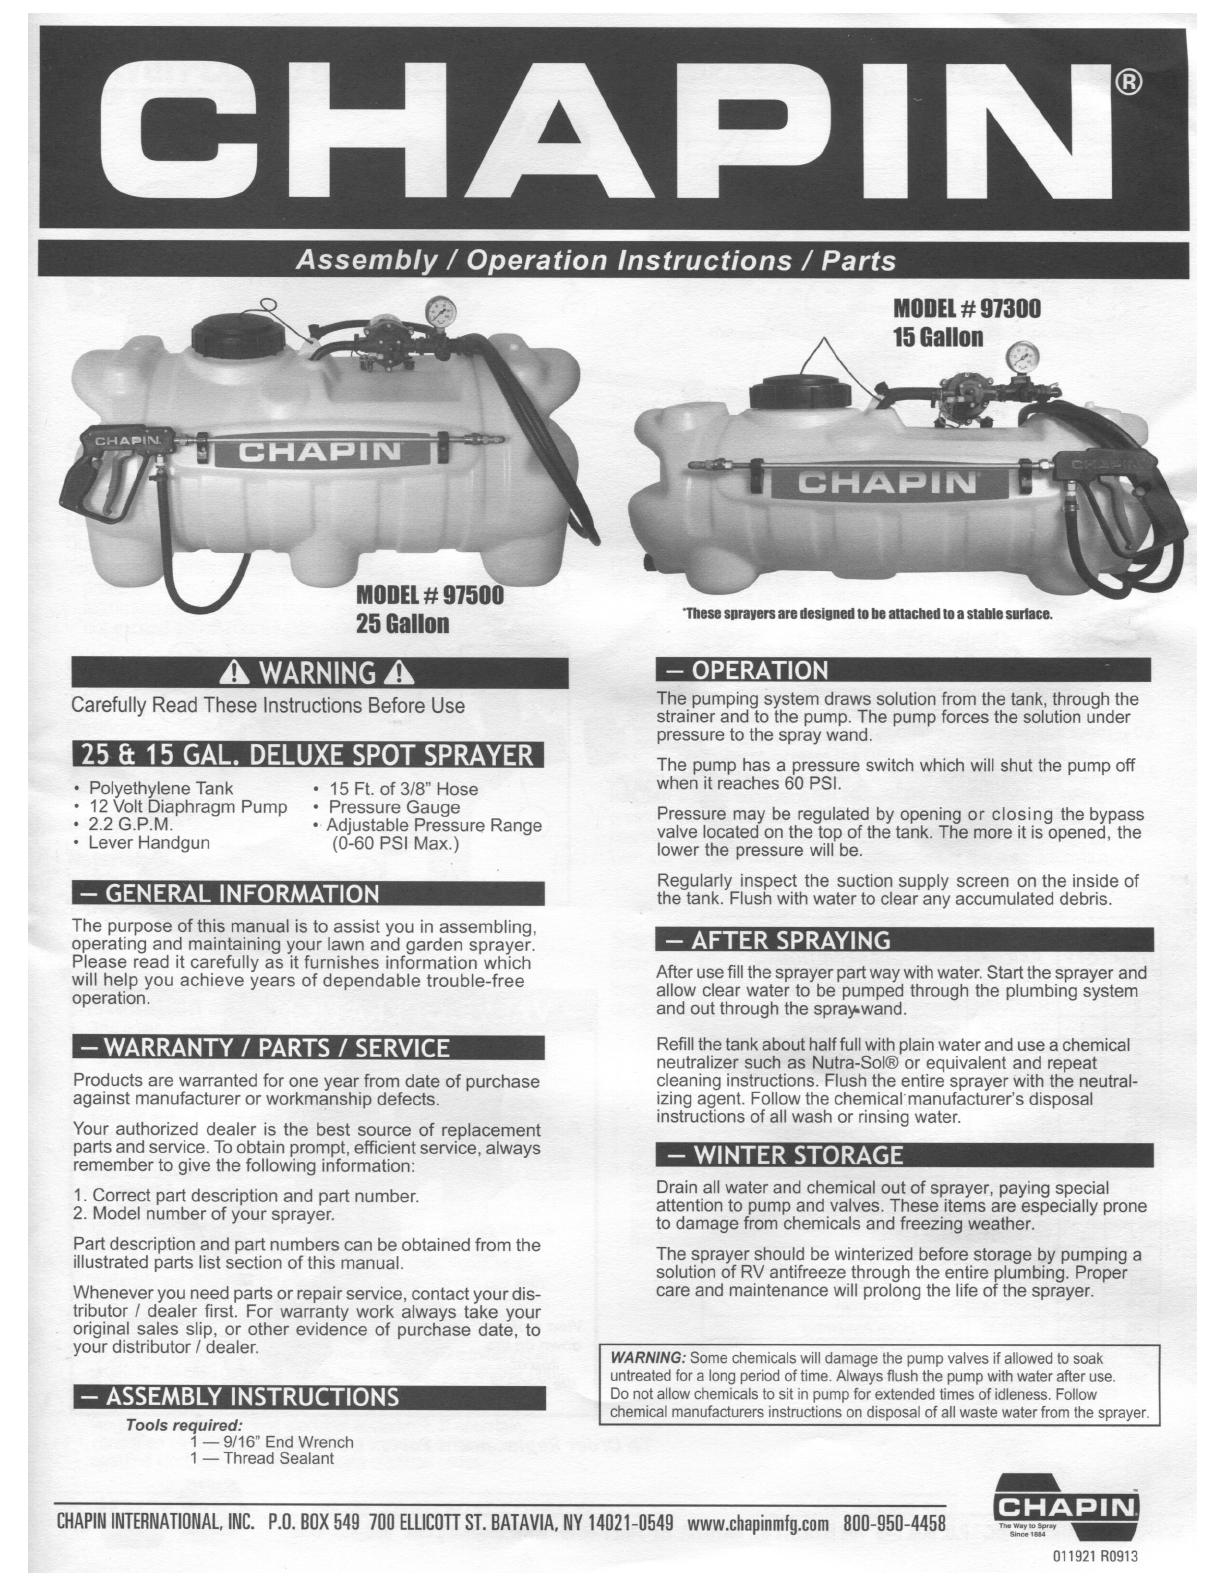
15 lillllllll
" Mllllil
#
‘These snraiiers
are ilesiuneiltn
he attaeheil
to a stablesurface.
25 liallnn
A
WARNING
A
— OPERATION
-
The
pumping system draws
solution from the tank, through the
Careruny Read These rnsrrucrrorrs
Berore use
strainer and to the
pump. The pump forces the solution
under
pressure
to the spray wand.
25 &
15
GAL.
DELUXE
SPOT SPRAYER
Th
h
e pump
as a pressure switch which will shut
the pump off
- Polyethylene Tank
- 15 Ft.
of 3/8" Hose
Whe"
" 'ea°he$ 6° PS‘-
' 12 V0“ Diaphragm
Pump ' Pressure Gauge
Pressure may be regulated by opening
or closing the bypass
' 2-2 G-P-M
' Adjusrame
Pressure Range
valve located
on the top of the tank. The more
it is opened
the
' Lever
Handgun (0450
Psr Max-)
lower the pressure will
be.
A Regularly
inspect the suction
supply screen on the inside of
—- GENERAL
|NFORMAT|ON
the tank. Flush with
water to clear any accumulated debris.
The purpose of
this manual is to
assist you in assembling,
operating
and maintaining
your lawn and
garden sprayer.
_ AFTER
SPRAY|NG
Please read
it carefully as it
furnishes information which
Aeruse u
mes -
- .
prayer partway
with water. Start the sprayer and
rgrrregiignyou achreve
years or dependabie rroume
rree allow
clear water to be pumped through the plumbing
system
p '
and out through the
spray-wand.
_
WARRANTY
/ PARTS
/ SERV|CE
Rell the tank about
halffull with plain water and use a
chemical
neutralizer
such as Nutra-Sol®
or equivalent and repeat
Products are warranted
for one year fr0m date
of purchage
cleaning instructions.
Flush the entire sprayer
with the neutral-
against manufacturer
or workmanship defects
izing
agent. Follow the chemical'manufacturer‘s
disposal
instructions
of all wash or rinsing water.
Your authorized
dealer
is the best source
of replacement
rt d .
.
.
. .
pa
s an service.
To obtain prompt,
efficient service,
always
remember
to give the following
information:
WINTER STORAGE
1 Correct part descri
non and an number
Drain
all water and
chemical out of sprayer paying
special
'
p p '
attention to
pump and valves. These items
are
especially
prone
2' Mode‘ number or your Sprayer‘
to damage from chemicals and
freezing weather.
Part description
and part numbers
can be obtained
from the The S
- -
-
.
.
. .
prayer
should be winterized
before storage by pumping a
ruusrrared parrs rrsr
Secrrorr Orrms manual"
solution
of RV antifreezethrough the
entire plumbing. Proper
Whenever
you need
parts or repair
service, contact your dis- Pare and malntename Wm prolong the life Of the 5PFaYeF-
tributor /
dealer first. For warranty
work always
take your
original
sales slip,
or other evidence
of purchase date,
to
your drsrriburor
r dealer‘
WARNING:
Some chemicals will damage
the pump valves if allowed to soak
untreated for a long period
of time. Always flush the pump with water
after use.
Do not
allow chemicals to sit in pump for
extended times of idleness. Follow
chemical
manufacturers instructions on disposal
of all
waste
water from the sprayer.
Tools
required:
1 -— 9/16" End
Wrench
1 —
Thread Sealant
[IHAPlNlNTERNATll]NAl.,lN[I.
P.[].Bl]X
549 7[ll] ELLICUTT
ST. BATAVIA. NY l4l]2l-[1549 www.cha|iinmlg.com
Bill]-95!]-4458
011921
R0913


