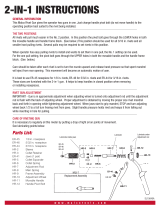
Cherry GH-703 Maintenance Manual

Type
Maintenance Manual

Cherry GH-703 is a pneumatic-hydraulic power riveter designed for efficient installation of commercial rivets. Weighing only 5 pounds, it can be operated in any position with one hand. It has a full 3/4" rivet setting stroke and a rated pull load of 2000 pounds. The GH-703 can set a wide variety of rivet sizes and styles, making it a versatile tool for various applications. It operates on a wide range of air pressure, with 90 to 120 psi providing the maximum efficiency. Safety features include an approved eye protection recommendation and a mandrel catcher bag to eliminate costly cleanup.

Cherry GH-703 is a pneumatic-hydraulic power riveter designed for efficient installation of commercial rivets. Weighing only 5 pounds, it can be operated in any position with one hand. It has a full 3/4" rivet setting stroke and a rated pull load of 2000 pounds. The GH-703 can set a wide variety of rivet sizes and styles, making it a versatile tool for various applications. It operates on a wide range of air pressure, with 90 to 120 psi providing the maximum efficiency. Safety features include an approved eye protection recommendation and a mandrel catcher bag to eliminate costly cleanup.

GH-703
Power Riveter
MAINTENANCE MANUAL
1224 East Warner Ave,
Santa Ana, CA 92705
Tel: 1-714-545-5511
Fax: 1-714-850-6093
www.cherryaerospace.com
1
G H-703
Power Riveter
The Cherry® GH-703 is a pneumatic-
hydraulic tool designed specifically for the most
efficient installation of commercial fasteners. It
weighs only 5 pounds and can be operated in
any position with one hand. It has a full 3/4”
rivet setting stroke and a rated pull load of 2000
pounds.
The GH-703 riveter operates on a wide range of
air pressure, with 90 to 120 psi providing the
maximum efficiency. At 90 lbs. air pressure, the
GH-703 has a decibel rating of 80dB(A) and
consumes 3 CFM at 20 cycles per minute.
A mandrel catcher bag may be attached to
eliminate costly cleanup.
The GH-703 comes equipped with nose-
piece 728A9-6 to set:
N Rivets - 3/16” diameter
Q Rivets - 3/16” diameter
Cherrymate
® Rivets - 1 /4” diameter
There is also a spare nosepiece, 728A9-4,
included for setting:
N Rivets - 1 /8” diameter
Q Rivets - 1 /8” diameter
Cherrymate
® Rivets - 3/16” diameter
Warning: Approved eye protection
should be worn when operating, re-
pairing, or overhauling this tool.
MANY OTHER STYLES AND SIZES OF COMMERCIAL RIVETS CAN BE SET WITH THIS
TOOL. REFER TO THE NOSEPIECE SELECTION CHART ON PAGE 8 FOR APPLICABLE
PART NUMBERS.
How the GH-703 Operates
When the tool is pressurized by hooking up to an
air line, the valve spool is forced upward. This
movement aligns the port in the spool with the lower
port within the handle, allowing air pressure to enter
the bottom port of the power air cylinder. This forces
the air piston upward.
When the trigger is depressed, air bleeds out from
behind the trigger, lowering air pressure against the
bottom of the spool. Air pressure is now greater on
top of the spool, forcing it down. This action shuts
off the air path to the bottom of the power air cylinder,
and simultaneously opens the upper port, allowing
pressure to enter directly into the top of the air
cylinder. This forces the air piston downward.
The air piston is connected to the hydraulic power
piston with a common connecting rod. When the
air piston is activated by changes in the air valve,
it in turn activates the hydraulic power piston. Air
pressure also travels up through a port in the handle
to enter the rear of the head cylinder. This air
pressure forces the return of the head piston to its
full forward position.
The center area of the handle (that part held by the
hand during riveting) contains the hydraulic system.
The hydraulic power piston has its own cylinder
containing the fluid which is pressurized by the
downward travel of the piston. This forces the fluid
up through the handle into the front of the head
cylinder, thereby exerting the force needed to push
the head piston back in a full 3/4” rivet setting stroke.
This same fluid then returns to the power cylinder
by the forward action of the head piston under air
pressure.
SPECIFICATIONS ARE SUBJECT TO CHANGE WITHOUT NOTICE.
2
3
PART LIST FOR GH-703 RIVETER
REF.
NO.
PART
NUMBER
DESCRIPTION
QTY.
REQ.
1 703C2 703C2 HEAD CYLINDER 1
2 P722 O-RING,(.816,.676,.070) 2
3 P860 BACK-UP RING, (.794,.688,.053) 1
4 703B3 HEAD PISTION 1
5 P872 O-RING,(1.130,.924,.103) 1
6 P868 BACK-UP RING, (1.129,.957,.103) 1
7 P724 O-RING, (1.129,.898,.070) 2
8 P112 O-RING,(.504,.364,.070) 2
9 703A5 SEAL TUBE 1
10 P109 RETAINING RING (EXT. .375 DIA) 2
11 703B4 CAP 1
12 P880 RETAINING RING (NON-STANDARD) 1
13 703A13 DEFLECTOR FITTING 1
14 530A16 DEFLECTOR PIN 1
15 P126 WASHER 1
16 P90
BUTTON HEAD SOC. SCREW, 10-32 X
.375 LG
1
17 P838 O-RING, (568,.362,.103) 2
18 P115 BACK-UP RING,(.551,.375,.088) 2
19 P727 O-RING,(1.318,1.112,.103) 1
20 700B93 PACKING PLUG 1
21 P731 BACK-UP RING,(3.365,3.125,.120) 2
22 P730 QUAD RING,(3.387,3.109,.139) 1
62 700A115 AIR PISTON SUB-ASSY.
23 700A110 WASHER, AIR PISTON 1
24 700C106 AIR PISTON 1
25 700A111 WASHER, AIR PISTON 1
26 P737 CONELOK NUT 1
27 P725 O-RING,(3.129,2.989,.070) 1
28 700C112 HANDLE BASE 1
29 P735 RETAINING RING, (INT. 3.500 DIA) 1
30 700B109 BASE COVER 1
31 P736 RETAINING RING,(EXT. 2.250 DIA) 1
32 703A33 TRIGGER ASSEMBLY 1
33 P223 O-RING,(.285,.145,.070) 1
34 703A11 HANDLE 1
35 P734 RETAINING RING, (.689,.599,.025) 1
36 700B7 POWER CYLINDER 1
37 P833 O-RING, (1.068,.862,.103) 2
38 P739 BACK-UP RING,(.624,.518,.053) 1
39 P294 O-RING, (.629,.489,.070) 1
63 700A8 POWER PISTION & ROD SUB- ASSY.
40 702A11 PISTON ROD CAP 1
41 700A9 POWER PISTON 1
42 702A12 PISTON STOP 1
43 700A10 POWER PISTON ROD 1
44 P653 O-RING, (.691,.551,.070) 4
45 700B73 VALVE SLEEVE 1
46 700A67 SPRING 1
47 P829 O-RING,(.504,.364,.070) 3
64 700A15 VALVE SPOOL SUB- ASSY.
48 700D15-2 VALVE SPOOL 1
49 700A18 FILTER 1
50 700A69 METERING SCREW 1
51 P834 O-RING, (.816,.676,.070) 2
52 700A16 VALVE PLUG 1
53 700A17 MUFFLER 1
54 P279 RETAINING RING, (INT .906) 1
55 700A22 GASKET 1
56 P832 O-RING,(.379,.239,.070) 1
57 P27 SOC. HD. CAP SCREW, 8/32 X 1/2 4
58 *670A20 MANDREL CATCHER BAG 1
59 *P948 HOSE 1
60 *703A22 HANGER 1
61 *P881 BUTTON HEAD SOC. SCREW, 10-32 X 3/8 2
** Components can not be ordered separately. Sold as an assembly only.
* Furnished only on special order
4
Maintenance and Repair:
The GH-703 Power Riveter has been manufactured to
give maximum service with minimum care. In order that
this may be accomplished, the following recommendations
should be followed:
1.
The hydraulic system should be full of oil and free from
air at all times.
2.
Keep excessive moisture and dirt out of the air supply
to prevent wear.
3.
Do not pound on the rear of the tool head to force
rivets into holes, as this will damage the tool.
4.
Make sure the pulling head is correctly and
securely attached.
To fill riveter with oil:
1.
Remove head body assembly from handle assembly.
2.
Fill handle assembly with automatic transmission fluid
(ATF-Dexron
®
) to within 1/8” of the top of the handle
casting.
3.
Replace head body assembly, being sure gasket (55)
and O-ring (56) are properly in place. Tighten cap screws
(57) uniformly to prevent leakage around gasket.
4.
Connect tool to air line and cycle ten times to fully
circulate hydraulic system with oil.
5.
With tool connected to the air line, remove cap screw
(16) being sure NOT to cycle tool. Attach Avdeair
bleeder 700A77 according to instructions included with
bleeder and purge system of air by cycling the tool until oil
flow is free of air bubbles.
6.
Remove air bleeder and allow excess oil to drain from
screw hole.
7.
Reinstall cap screw (16) and Stat-O-Seal washer (15)
and test tool for proper function by installing rivets.
NOTE: Steps 1 through 4 may be eliminated when replacing
just a small amount of oil.
Troubleshooting:
1.
Check air line for correct pressure at the tool. It must
be 90 to 120 psi.
2.
Check tool for lack of hydraulic fluid (see oil filling
instructions).
3.
Check for oil leakage.
a.
Oil leaking around the cap screw (16) in the head
indicates that the screw is loose or the washer gasket
(15) needs replacing.
b.
If oil should leak through the bypass hole at the base
of the handle (34), the O-rings (18 or 37) are worn
or damaged.
c.
Oil leakage from the front of the head (1) indicates
that O-rings (2) are worn or damaged.
4.
Check for excessive air leakage from air bleed valve.
a.
If spring (46) is broken or dislodged, replace per
instructions on page 7.
b.
If O-rings (51) on plug (52) are worn or damaged,
replace.
c.
If O-rings (47) on valve spool (48) are worn or damaged,
replace.
5.
Check movement of piston (4). If it does not move freely or
is slow in operation:
a.
O-rings (2), (5), or (7) may be damaged and require
replacement.
b.
Piston (4) may be mechanically locked due to
damaged parts.
c.
Power piston may be held off its seat on rod (43)
allowing oil to bypass. Drain tool, flush thoroughly,
and refill with fresh fluid.
d.
Muffler (53) or air filter inside spool (48) may be plugged
with dirt. Clean them thoroughly with normal solvent
and back-blow with compressed air.
e.
Hole in metering screw in valve spool (48) may be
blocked or damaged. Hole diameter should be .028”.
Clear and size or replace valve spool.
6.
If the tool cycles repeatedly, even though the trigger has
not been pulled, it indicates that the spring (46) which holds the
valve sleeve (45) is broken or dislodged. See air bleed valve
instructions on page 7.
7.
If the mandrel sticks in pulling head:
a.
Pulling head components need maintenance.
Disassemble pulling head, clean, and replace worn
parts. Reassemble following instructions on page 8.
b.
There may be excess oil in front of the head piston.
With tool attached to air line, remove cap screw (16)
and allow excess oil to run out. Replace cap screw
and tighten.
c.
The mandrels are wedged side by side in jaw follower
(3)or tube (10) from failure to eject spent mandrel from
tool prior to inserting next rivet. Disassemble pulling
head, clear jaw follower, and reassemble following
instructions on page 8.
8.
If the mandrel breaks above designed breaknotch:
a.
Jaws (2) are not seating on mandrel properly due to
wear. Replace if worn.
b.
Jaws (2) are not seating properly due to worn jaw spring.
Replace if spring is less than 2” long.
5
Overhaul:
The disassembly and reassembly procedure can be accomplished
by utilizing the following instructions and the drawings on pages
4 and 5. Use extreme care during disassembly and reassembly
not to mar, nick, of burr any smooth surface that comes in
contact with O-rings. Before installing O-rings, be sure to apply
a good rubber lubricant, such as Lubriplate, to the
surfaces. It is recommended that the special assembly tools
shown here be used to facilitate the overhaul.
Virtually all of the moving parts in this tool ride on O-rings,
protected by backup rings where high pressure dictates. This
means no metal to metal wear. By use of close tolerances and
low microinch surfaces against which the O-rings seal, a
long life can be expected before any overhaul becomes
necessary. At that time, a complete overhaul can be achieved
by the use of Service Kit G703KS, which contains a complete
set of O-rings, backup rings, screws, washers, and gaskets.
Air Bleed Valve:
To disassemble, first disconnect the tool from its air
source. Remove retaining ring (54) and muffler (53). Insert
a 5/16-18 threaded rod or bolt into end of valve plug (52)
and pull it out. Using the same procedure, pull out spool (48).
NOTE: It should never be necessary to remove valve sleeve
(45)
unless the ports in the sleeve are plugged up tightly
from contaminated air. The O-rings on this sleeve are static
and hence do not wear. If it is suspected that the ports are
plugged up, use needle nose pliers to grasp end of spring
(46), turning clockwise and pulling to dislodge from groove in
casting. With spring removed, valve sleeve (45) can be pulled
out using an 837B10 valve sleeve removal tool.
To reassemble, reverse the above procedure, being certain that
all O-rings are properly lubricated before installation. The spring
(46)
is best installed using an 836B10 spring inserting tool to
push the large diameter coil into the casting groove. This
requires care, as the tool will not operate if this spring is not
anchored firmly.
Handle:
To inspect the air cylinder bore, remove only parts 27
through 31. Any further disassembly will require removal of
the head assembly first.
For this complete disassembly, start by removing parts 27
through 31. Next, holding tool upright, remove four socket-
head cap screws (57). Lift head assembly from handle (34)
and set aside O-ring (56) and gasket (55). Empty all
hydraulic fluid into a container by pouring from the handle.
Place piston rod wrench 700A61 down into top of handle,
onto the hex head of the power piston (63). While holding
this wrench, remove the conelok nut (26) using a 7/16”
socket wrench. Still holding piston rod wrench, remove the
air piston (24) using packing plug wrench 700B65, by
turning counterclockwise. When the air piston is completely
freed from the piston rod, tap or push on the piston rod
wrench to eject piston from the bottom of the handle.
After the removal of the air piston, slide piston rod (63)
back up to the end of its travel. Using the packing plug
wrench remove packing plug (20). It may be necessary to
hold the handle upside down in a vise while loosening the
packing plug. With packing plug removed, the power
cylinder (36) can be tapped out by lowering the power
cylinder tool down into the top of the handle onto the top of
the cylinder. The O-rings and backup rings (17 & 18) are
best removed (and replaced) by using a thin, bent hook.
Care must be taken to avoid damaging the O-ring grooves
or cylinder.
Head:
Always remove the complete pulling head from the tool
before attempting disassembly of head body.
Remove end cap (11). Seal tube (9) comes out with cap as
it is held in place by two retaining rings (10). These need
not be removed.
Push against threaded end of head piston (4) to slide it out
of head body (1). Be careful not to damage threads or
cause burrs on polished piston rod surface. O-rings (2) and
backup ring (3) can now be removed using a bent hook. O-
rings (8) can be removed in the same manner.
Upon reassembly, be sure to install O-rings and backup
rings carefully to avoid cutting them. Also, always lubricate
any O- rings with Lubriplate. The reassembly sequence is
the opposite of disassembly. This includes filling the handle
(34) with hydraulic fluid before replacing gasket (55) and
O-ring (56), just prior to replacing head assembly. (See oil
filling instructions.)
Tighten the four socket-head cap screws (57) uniformly to
prevent leakage around the gasket. When assembled,
purge the system of air by using Avdel Cherry air bleeder
700A77 according to instructions included with bleeder.
(See oil filling instructions.)
6
7
Installing th e H703 and H743A Pulling Heads
1.
Connect the tool to the air supply. Without depressing the
trigger, place spring (9) over tube (10 or 3) as shown, and
insert as far as possible into head piston.
2.
H743A. Place jaws (2) inside collet (5). Place 2 O-rings (6)
over jaw follower (3) and cushion (8) over spring follower (7).
Assemble jaw follower (3) and spring follower (7) and insert
into collet (5). Screw this assembly onto the head piston,
making sure the tapered end of the jaw follower (3) is properly
aligned in the bevel in the back end of the jaws (2).
3.
Thread nosepiece (1) completely into sleeve (4) and place
(4) into end of head body while depressing the trigger. Tighten
snugly.
5.
Tighten jam-nut (11) securely.
6.
These pulling heads will give long life if properly maintained.
This includes keeping the head clean and dry and all the
parts securely tightened. The only lubrication required is a
little Lubriplate inside the cone of the collet to assure a
sliding action against the back of the jaws.
7.
In case of damage or wear to pulling head parts, dismantle
and replace with parts selected from the following list.
8
REF.
NO.
QTY,
REQD
NOSEPIECE PART NUMBER
USING LISTED PULLING
HEADS
RIVET
DIAM.
COMMERCIAL FASTENER TYPE
N
RIVET
Q
RIVET
C-M
RIVET
T
RIVET
MONO
BOLT
KT
RIVET
G
RIVET
H703
H743A
1
1
*
728A93Z
3/32 ALL
728A9-4
7/8 ALL ALL
*
728A9-704
5/32 ALL ALL
728A9-4
3/16
ALL
728A9-6
*743A7-5C6Z
ALL
ALL
*
703A25-6T
*703A25-6T
BSPT
*
703A25-6TA
*703A25-6TA
BAPTS
*743B35A ALL ALL
*743053
ALL (2)
728A9-6 *743A7-5C6Z
1/4
ALL
*743A7-8Z
(7)
(3)
*743A25-8TA
BAPTS
*743B32A
BAPV BAPG
*743051 ALL(2)
REF.
NO .
QTY.
REQD .
PART NUMBER FOR
LISTED PULLING HEADS
DESCRIPTION
H703 *H743A
4 1 703B7 743B91
SLEEVE
11 1 743A18 743A18
JAM NUT
5 1 703A8 743B92
COLLET
2 1(SET) 728B4(2PC) 743C55(3PC)
JAWS
3 1 743A8-8Z 743B93
JAW FOLLOWER
6 2 P1195
O-RING
8 1 743A95
CUSHION
7 1 743B94
SPRING
FOLLOWER
9 1 732A8 732A8
JAW SPRING
10 1 743A14-8Z
EJECTION TUBE
(1)
AAP AND BSP.
(2)
REQUIRES TWO PULLING STROKES TO SET RIVET.
(3)
AAPQ and BSPQ.
*MUST BE ORDERED SEPARATELY.
Seller warrants the goods conform to applicable specifications and drawings and will be manufactured and inspected according to generally accepted practices of
companies manufacturing industrial or aerospace fasteners. In the event of any breach of the foregoing warranty, Buyer’s sole remedy shall be to return defective
goods (after receiving authorization from Seller) for replacement or refund of the purchase price, at the Seller’s option. Seller agrees to any freight costs in
connection with the return of any defective goods, but any costs relating to removal of the defective or nonconforming goods or installation of replacement goods
shall be Buyer’s responsibility. SELLER’S WARRANTY DOES NOT APPLY WHEN ANY PHYSICAL OR CHEMICAL CHANGE IN THE FORM OF THE
PRODUCT IS MADE BY BUYER.
THE FOREGOING EXPRESS WARRANTY AND REMEDY ARE EXCLUSIVE AND ARE IN LIEU OF ALL OTHER WARRANTIES AND REMEDIES;
ANY IMPLIED WARRANTY AS TO QUALITY, FITNESS FOR PURPOSE, OR MERCHANTABILITY IS HEREBY SPECIFICALLY DISCLAIMED AND
EXCLUDED BY SELLER.
THIS WARRANTY IS VOID IF SELLER IS NOT NOTIFIED IN WRITING OF ANY REJECTION OF THE GOODS WITHIN ONE
(1) YEAR AFTER INITIAL USE BY BUYER OF ANY POWER RIVETER OR NINETY (90) DAYS AFTER INITIAL USE OF ANY OTHER PRODUCT.
Seller shall not be liable under any circumstances for incidental, special or consequential damages arising in whole or in part from any breach by Seller, AND SUCH
INCIDENTAL
,
SPECIAL
,
OR CONSE
Q
UENTIAL DAMAGES ARE HEREBY EXPRESSLY EXCLUDED.
LOCTITE
®
is a registered trademark of Henkel Corporation
DEXRON
®
is a registered trademark of GM corporation.
PARKER
®
is a trademark of Parker Hannifin Corporation
LUBRRIPLATE
®
is a trademark of Fiske Brothers Refining Co.
1224 East Warner Ave,
Santa Ana, Ca 92705
Tel: 1-714-545-5511
Fax: 1-714-850-6093
www.cherryaerospace.com
© 2007 Cherry Aerospace
Supplier’s Federal Identification Code: 11815
TM-GH-703
Rev.: B
Date: 06/18/13
CR# 13-1230
WARRANTY
For more information
p
lease contact our Technical Services De
p
artment at Tel. 714-850-6022
  • Page 1 1
  • Page 2 2
  • Page 3 3
  • Page 4 4
  • Page 5 5
  • Page 6 6
  • Page 7 7
  • Page 8 8
  • Page 9 9
  • Page 10 10

Cherry GH-703 Maintenance Manual

Type
Maintenance Manual

Cherry GH-703 is a pneumatic-hydraulic power riveter designed for efficient installation of commercial rivets. Weighing only 5 pounds, it can be operated in any position with one hand. It has a full 3/4" rivet setting stroke and a rated pull load of 2000 pounds. The GH-703 can set a wide variety of rivet sizes and styles, making it a versatile tool for various applications. It operates on a wide range of air pressure, with 90 to 120 psi providing the maximum efficiency. Safety features include an approved eye protection recommendation and a mandrel catcher bag to eliminate costly cleanup.

Ask a question and I''ll find the answer in the document

Finding information in a document is now easier with AI