Asus H110M-D Owner's manual

Category
Motherboards
Type
Owner's manual
ASUS 100 Series AI Suite 3 1
DE162 / First Edition / July 2015
Installing AI Suite 3 ..................................................................................................... 2
Launching AI Suite 3 ................................................................................................... 4
DIGI+ VRM .................................................................................................................... 6
EPU ........................................................................................................................ 7
Fan Xpert 3 ................................................................................................................. 10
PC Cleaner ................................................................................................................. 12
USB 3.1 Boost............................................................................................................ 13
EZ Update................................................................................................................... 14
System Information ................................................................................................... 15
Mobo Connect ........................................................................................................... 16
Push Notice................................................................................................................ 17
LED Control ............................................................................................................... 20
Version ...................................................................................................................... 21
AI Suite 3 User Guide
100 Series
2ASUS 100 Series AI Suite 3
Installing AI Suite 3
AI Suite 3 is an all-in-one interface that integrates several ASUS utilities and allows users to
launch and operate these utilities simultaneously.
Ensure that you have an Administrator account before installing AI Suite 3 in Windows® 7,
windows® 8, Windows® 8.1 or Windows® 10 operating systems.
To install AI Suite 3 on your computer:
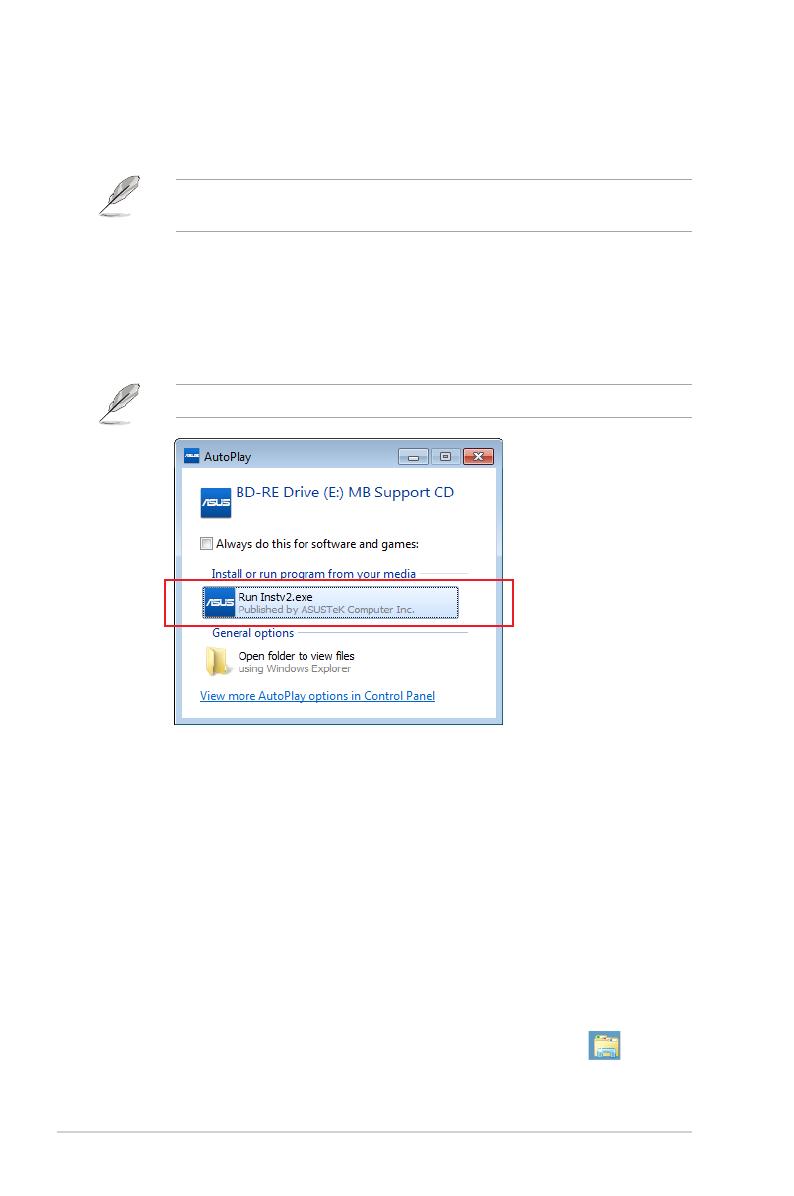
Windows® 7 OS
1. Place the Support DVD into the optical drive.
2. In the AutoPlay dialog box, click or tap Run ASSETUP.exe then select the Utilities
tab.
The main screen of the AI Suite 3 is for reference only and vary with models.
3. From the Utilities tab, click or tap AI Suite 3 then follow the succeeding onscreen
instructions.
Windows® 8 and Windows® 8.1 OS
1. Place the Support DVD into the optical drive then follow onscreen instructions.
2. From the ASUS motherboard support DVD main menu, select the Utilities tab and
click or tap AI Suite 3.
3. Follow the succeeding onscreen instructions.
If the ASUS motherboard support DVD main menu did not appear, try the following:
a. Go to the Start Screen then click or tap the Desktop app.
b. On the lower left corner of the Desktop, click or tap File Explorer then
select your DVD drive and tap or double-click or tap the Setup application.
ASUS 100 Series AI Suite 3 3
Windows® 10 OS
1. Place the Support DVD into the optical drive then follow onscreen instructions.
2. From the ASUS motherboard support DVD main menu, select the Utilities tab and
click or tap AI Suite 3.
4ASUS 100 Series AI Suite 3
Launching AI Suite 3
Windows® 7 OS
From the Desktop, click or tap Start > All Programs > ASUS > AI Suite 3 > AI Suite 3.
You can also launch AI Suite in Windows® 7 by clicking or tapping on the Notication
area.
Windows® 8 and Windows® 8.1 OS
To launch AI Suite 3 in Windows® 8 or Windows® 8.1, tap the AI Suite
3 app on the Start Screen (or if you’re using a mouse, click or tap the
AI Suite 3 app on the Start Screen).
AI Suite 3 Main menu
The AI Suite 3 main menu gives you easy-access controls and insight to what’s going on
with your computer - allowing you to optimize performance settings while at the same time
ensuring system stability.
The AI Suite 3 main menu includes a quick-access menu bar that allows you to swiftly launch
any of the integrated ASUS utilities. Click on the left of the menu to launch the menu bar.
The AI Suite 3 screenshots in this manual are for reference only and can vary depending
on motherboard model.
Click to launch AI Suite 3
menu bar
Windows® 10 OS
From the Desktop, click or tap Start > All apps > ASUS > AI Suite 3.
ASUS 100 Series AI Suite 3 5
AI Suite 3 main menu bar
The screenshots of AI Suite 3 in this user manual are for reference only. The actual
screenshots vary with models.
Refer to the software manual in the support DVD or visit the ASUS website at
www.asus.com for detailed software conguration.
AI Suite 3 mini-menu
The AI Suite 3 mini-menu appears on the desktop and can be conveniently accessed and
moved around. The AI Suite 3 mini-menu allows you to quickly access the important items in
the AI Suite 3.
Click to expand the quick launch area or start quick launch
Click to select the available features for AI Suite 3 mini-menu
Quick launch area
6ASUS 100 Series AI Suite 3
DIGI+ VRM
ASUS DIGI+ VRM allows you to adjust VRM voltage and frequency modulation to enhance
reliability and stability. It also provides the highest power efciency, generating less heat to
longer component lifespan and minimize power loss.
Launching DIGI+ VRM
To launch DIGI+ VRM, click on the left of the menu to launch the menu bar, then select
DIGI+ VRM.
4
3
1
2
5
Help
Click to undo all the
changes
Click to apply all the
changes
1CPU Power Phase Control
Increase phase number under heavy system loading to get more transient and better thermal
performance. Reduce phase number under light system loading to increase VRM efciency.
2CPU VRM Switching Frequency
Changing frequency affects the transient response and component thermal conditions. Higher
frequency gets quicker transient response.
3CPU Load-line Calibration
It allows you to adjust the voltage range to control the CPU Load-line. Adjust to a high value for
system performance or to a low value for power efciency.
4CPU Current Capability
CPU Current Capability provides wider total power range for overclocking. A higher value brings
a wider total power range and extends the overclocking frequency range simultaneously.
5CPU Power Duty Control
CPU Power Duty Control adjusts the current of every VRM phase and the thermal of every
phase component.
The actual performance boost may vary depending on your CPU specication.
Do not remove the thermal module. The thermal conditions should be monitored.
Visit the ASUS website at www.asus.com for detailed software conguration.
ASUS 100 Series AI Suite 3 7
EPU
EPU is an energy-saving utility that allows you to adjust the CPU and Fan Control settings to
their power-saving conditions.
Launching EPU
To launch EPU, click on the left of the menu to launch the menu bar, then select EPU.
Click or to
select a power
plan
Click to configure
the settings in Away
mode
Click to configure
the settings in
Performance mode
Click to configure
the settings in Power
Saving mode
Tick to enable the
Away Mode
8ASUS 100 Series AI Suite 3
TurboV EVO
ASUS TurboV EVO allows you to manually adjust the CPU frequency, CPU Cache and Core
frequencies, and related voltages for an enhanced system stability and boost performance.
It also provides the Auto Tuning function that offers automatic and easy overclocking and
system level up.
Launching TurboV EVO
To launch TurboV EVO, click on the left of the menu to launch the menu bar, then select
TurboV EVO.
Visit the ASUS website at www.asus.com for detailed software conguration.
Refer to the CPU documentation before adjusting CPU voltage settings. Setting a high
voltage may damage the CPU permanently, and setting a low voltage may make the
system unstable.
For system stability, all changes made in TurboV EVO will not be saved to BIOS settings
and will not be kept on the next system boot. Use the Save Prole function to save your
customized overclocking settings and manually load the prole after Windows starts.
Click or to adjust
DRAM Voltage and CPU
System Agent
Click or to adjust
the BCLK Frequency
and Ratio
Click to undo all the
changes
Click to apply all the
changes
Click to load the
saved profile
Click to save the
changes into a
profile
Using TurboV EVO
CPU Frequency
Tick to group tuning
Click or to
adjust CPU Core
Voltage, CPU
VCCIO Voltage,
and PCH Core
Voltage
ASUS 100 Series AI Suite 3 9
Auto Tuning
Click to automatically
overclock and
achieve a total
system level up.
GPU Boost
Click to apply GPU
Boost
10 ASUS 100 Series AI Suite 3
Fan Xpert 3
Fan Xpert 3 automatically detects and tweaks the fan speeds, and provides you with
optimized fan settings based on the fans’ specications and positions.
Fan Xpert 3 has same features and interface with Fan Xpert 2+ except the CPU DC Mode.
Launching Fan Xpert 3
To launch Fan Xpert 3, click on the left of the menu to launch the menu bar, then select
Fan Xpert 3.
Click a screen to select the
type of fan that you want to
customize
Click to set the
fan’s speed to
silent mode
Click to set the balanced
configuration between the
fan’s noise level and speed
Click to increase the fan’s
speed for a high cooling
capability
Click to maximize the
fan speed
Click to switch between CPU
and chassis fan screens
Customizing the fan settings
Smart Mode
Smart Mode allows you to customize the fans’ rotation speeds and responsiveness based on
your system’s temperature.
Click to switch between
the CPU and chassis
fan screens
Click to apply the
changes
Click to undo
the changes
Click to go back to
the previous screen
Click and drag
to set the fan’s
rotation speed
Click and drag
the sliders to
adjust the fan’s
responsiveness
ASUS 100 Series AI Suite 3 11
RPM Fixed Mode
RPM Fixed Mode allows you to set the fan speed when the CPU temperature is below 75oC.
When the CPU temperature reaches 75o C, the fan will automatically run at full speed
to protect the CPU.
For motherboard models without the CPU fan detection latch, only 4-pin CPU fans are
controllable in Fan Xpert 3.
The Fan Xpert 3 may not be able to detect the fan speed if your fan is installed with an
external control kit for rotation speed.
Fan Xpert 3 does not support 2-pin fans. If you install a 2-pin fan, it can only run at its
full speed.
If the CPU or chassis fans have been changed, the Fan Auto Tuning process should
be repeated.
DO NOT remove your fan during the Fan Auto Tuning process.
Click and
drag to adjust
the fan’s
speed
Click to switch between the
CPU and chassis fan screens
Click to go back
to the previous
screen
12 ASUS 100 Series AI Suite 3
PC Cleaner
PC Cleaner scans your PC and cleans junk les to free up disc space.
Launching PC Cleaner
To launch PC Cleaner, click on the left of the menu to launch the menu bar, then select
PC Cleaner.
Click to restore to
defaults values Click to scan
Tick to select the
files to be scanned
Click to clean
the junk files
ASUS 100 Series AI Suite 3 13
USB 3.1 Boost
USB 3.1 Boost technology supports USB 3.1 that automatically speeds up the transfer rates
of your USB storage devices.
USB 3.1 Boost and USB 3.0 Boost have same features and interface.
Launching USB 3.1 Boost
To launch USB 3.1 Boost, click on the left of the AI Suite 3 main menu, then select USB
3.1 Boost.
Using the USB 3.1 Boost
USB 3.1 Boost automatically detects the USB 3.1 devices.
The data transfer speed varies with USB devices. For a higher data transfer
performance, use a USB 3.1 device.
Click to select a USB device
Click to enable the
USB device’s normal
data transfer rate
Click to enable
Turbo Mode for a
faster data transfer
rate
Ensure to connect your USB 3.1 devices to the USB 3.1 ports that support USB 3.1 Boost.
14 ASUS 100 Series AI Suite 3
EZ Update
EZ Update is a utility that allows you to automatically update your motherboard’s softwares,
drivers and the BIOS version easily. With this utlity, you can also manually update the saved
BIOS and select a boot logo when the system goes into POST.
Launching EZ Update
To launch EZ Update, click on the left of the AI Suite 3 main menu, then select EZ
Update.
Click to automatically
update your
motherboard’s
driver, software and
firmware
Click to find and select the
BIOS from file Click to select a
boot logo Click to update
the BIOS
Manually update the BIOS and selecting a boot logo
Click or tap to search an image file for your boot logo
Click or tap to go back to
EZ Update main screen
Click or tap to proceed the updating
BIOS and boot logo
After you click or tap BIOS Update button, click or tap Flash to update the BIOS and upload
the boot logo in your system.
ASUS 100 Series AI Suite 3 15
System Information
This utility allows you to get the detailed information of the motherboard, CPU, and memory
settings.
Launching System Information
To launch System Information, click on the left of the AI Suite 3 main menu, then select
System Information.
Viewing the motherboard information
From the System Information screen,
click MB tab to view the motherboard’s
information.
Viewing the CPU information
From the System Information screen,
click CPU tab to view the processor’s
information.
Viewing the SPD information
From the System Information screen,
click SPD tab to view the memory’s
information.
16 ASUS 100 Series AI Suite 3
Mobo Connect
This utility allows you to share PC’s keyboard/mouse for the smart device, or stream audio
playback from the smart device to PC.
Launching Mobo Connect
To launch Mobo Connect, click on the left of the AI Suite 3 main menu, then select Mobo
Connect.
The le synchronizing function will be disabled when the Keyboard/Mouse sharing or Audio
Mode is enabled.
Click to
select a device
Click or tap to
apply the settings
Click to select
keys combination
for hotkey
Click to select
keys combination
for hotkey
Click to
select a device
* The Audio Mode
appears under
Window® 8,
Windows® 8.1 and
Windows® 10 only
ASUS 100 Series AI Suite 3 17
Push Notice
This utility allows you get the detailed status of your system to your smart device. You can
also send messages to your smart device using this utility.
Before using this utility, ensure that you pair your computer with your smart device. For
pairing information, refer to section Pairing your computer and smart device.
Launching Push Notice on your computer
To launch Push Notice, click on the left of the AI Suite 3 main menu, then select Push
Notice.
Push Notice screen
Click or tap to enable Push Notice
Click or tap to
apply the settings
Click or tap to
discard the settings
Tick to select
the smart
device
Pairing your computer and smart device
To pair your computer and smart device:
1. On your smart device, tap to launch Push Notice.
2. Tap Push Scan then tap the name of your computer that you want to pair with.
To pair your computer and smart device, ensure that both are connected to the same
wireless network.
18 ASUS 100 Series AI Suite 3
Setting up PC Mode alerts of your computer
This feature allows you to restart, shut down, or put your computer to sleep mode and sends
an alert to your smart device.
Tick these to
enable mode alerts
Set the day and time to
enable the PC modes
Set the minutes to send
the alert before the PC
mode/s activatation
Key in your messages for
more information
Tick to select the
smart device
Setting up PC Status alerts
This feature allows you to send alerts of the unusual activities of the voltage, temperature,
and fan settings of your computer to your smart device.
Tick to select and send
alerts to your smart
device
Tick to send alert when the components
selected are back to its normal status
Tick to select the
smart device
ASUS 100 Series AI Suite 3 19
Viewing your computer status on your smart device
Tap on your smart device to launch Push Notice.
Sending messages to your smart device
This feature allows you to send messages to your smart device.
Click or tap to key
in your message
Tick to select the
smart device
Click or tap to send
your message
Tap to view PC
mode alerts
Tap to view PC
status alerts
Tap to view PC
sent messages
Tap to scan more
host computers
Tap to delete PC
alerts
20 ASUS 100 Series AI Suite 3
LED Control
This utility allows you to enable or disable Audio LED Control.
Launching LED Control
To launch LED Control, click on the left of the AI Suite 3 main menu, then select LED
Control.
Select the LED lighting
mode
Click to turn on / turn
off Audio LED Control Click or tap to
apply the settings
  • Page 1 1
  • Page 2 2
  • Page 3 3
  • Page 4 4
  • Page 5 5
  • Page 6 6
  • Page 7 7
  • Page 8 8
  • Page 9 9
  • Page 10 10
  • Page 11 11
  • Page 12 12
  • Page 13 13
  • Page 14 14
  • Page 15 15
  • Page 16 16
  • Page 17 17
  • Page 18 18
  • Page 19 19
  • Page 20 20
  • Page 21 21

Asus H110M-D Owner's manual

Category
Motherboards
Type
Owner's manual

Ask a question and I''ll find the answer in the document

Finding information in a document is now easier with AI