Page is loading ...

3411DI - 3413DI - 3415DI - 3417DI - 3417AS - 3417SW Saddle
1
2
3
5
5
6
INSTALLATION SHEET - SADDLES
GENERAL NOTES:
Notes:
● Over torqueing will not increase the
ability of the saddles to seal
● Suitable pipe thread sealant is
recommended
● Length of bolt thread protruding past top
of nut should be equal distance on both
sides
● Use cave-in protection during excavation
and back-fill operations.
● Verify pipe O.D. to make certain that the
correct range saddle is being used.
● Keep bolt threads clean and free from
nicks, dents or other damage.
● Lubrication of the gasket with soap
solution reduces friction and more
evenly distributes clamping force.
Always re-tighten nuts after installation of
the valve or service line.
RECOMMENDED TORQUE 3411 - 3413
Bolt Diameter Torque (ft-lb)
½” 30-50
5/8” 50-70
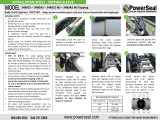
Clean outside of pipe thoroughly,
particularly in area where Twin
Seal gasket will compress.
Confirm the PowerSeal Twin Seal
saddle gasket is in the proper
position in the saddle body.
Tighten nuts evenly per the
specifications below until saddle
body conforms to pipe.
Lubricate pipe and face of gasket
with soap and water. For cold
weather lubrication, ethylene
glycol can be added to the soap
solution to prevent freezing.
Loosen nuts to the end of the
bolt and install saddle Back (s),
around the pipe and through the
saddle body bolt opening.
4
Position the saddle Top on the
pipe in the location where it is to
be tapped. Rotation of the
saddle should be avoided at all
times.

To ensure proper seal of the gasket, the
corporation stop or other fittings should be
connected to the saddle prior to final
tightening. Always re-tighten after
installation of the valve or service.
7
PRE-INSTALL CHECKLIST:
DID YOU:
● Clean pipe surface thoroughly? [Y] [N]
● Check O.D. of pipe with measuring tape? [Y] [N]
● Lubricate the Pipe with Dishwashing Soap? [Y] [N]
● Verify Proper Torque Required? [Y] [N]
Warranty Checklist (*):
● Date of Installation __/__/____
● Time of Installation ______ [AM] [PM]
● Was Pre-Tap Pressure Test completed to appropriate pressure level? [Y] [N]
● What Pressure was it tested to? ____ psi
● Was standard re-torqueing applied 5 minutes after reaching torque requirements? [Y] [N]
• Signature of On-Site Leadman: _______________________
* Must be completed on day of installation to Validate Warranty
3411DI - 3413DI - 3415DI - 3417DI - 3417AS - 3417SW Saddle
INSTALLATION SHEET - SADDLES
/
