Lifetime 60326 Owner's manual

Type
Owner's manual
Icon Legend...................................................4
Warnings & Notices......................................5
Parts Identifi er..............................................6
Floor & Wall Assembly..................................7
Door Assembly.............................................23
Shelf Installation........................................42
Shed Anchoring...........................................46
Cleaning & Care..........................................51
Registration..............................................52
Warranty....................................................53
TOOLS REQUIRED TABLE OF CONTENTS
7/16" (11 mm)
CONTACT LIFETIME CUSTOMER SERVICE:
Call: 1-800-225-3865
7:00 am–5:00 pm (Monday–Friday) MST
and 9:00 am–1:00 pm Saturday MST
Live Chat: www.lifetime.com
(click on “LIVE CHAT” tab)
Video Instructions: www.youtube.com/lifetimeproducts
QUESTIONS?
MODEL# AND PRODUCT ID (both are needed when contacting us)
Model Number: 60326
Product ID:
BEFORE ASSEMBLY:
Assemble on a level surface
3 people are recommended for setup
Videos and help guides available
Scan the code below to see how it all comes
together.
http://go.lifetime.com/vscplaylist
Pour le français, voir la page 2. Para el español, ver la página 3.
ASSEMBLY INSTRUCTIONS
MODEL #60091
VERTICAL
STORAGE SHED
MODEL 60326
FRS 1/4" (6,4 mm) Drill Bit
(Included)
ARA 1/8" (3,2 mm) Drill Bit
(Included)
ADC #2 Phillips Bit
(Included)
Electric Drill
FOR DOMESTIC OUTDOOR USE ONLY!
IMPORTANT, RETAIN FOR FUTURE REFERENCE: READ CAREFULLY.
For customer service in the United Kingdom and continental Europe:
Copy
5
TOOLS & HARDWARE REQUIRED / OUTILS ET QUINCAILLERIE REQUIS / INSTRUMENTAL Y HERRAJE REQUERIDOS
English:
Failure to follow these warnings may result in serious injury or property damage and will void warranty.
To ensure safety, do not attempt to assemble this product without following the instructions carefully.
• The surface on which you build and set your product must be level. If the surface is not properly leveled, the product will
not assemble correctly. Proper surface leveling will save you time in the long run—so please do not ignore this step.
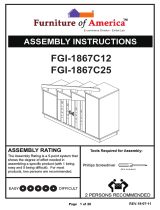
• Be aware that plastic pieces can be damaged by overtightening the screws. To avoid damage, we strongly recommend
the use of a drill with a low torque setting. A #2 Phillips screwdriver may also be used.
Two capable adults are required for assembly.
• All who participate in the assembly process should wear safety glasses throughout the assembly.
• In heavy snowfall areas, we recommend removing snow from the roof.
Do not use or store hot objects near the product.
• Proper and complete assembly are essential to reduce the risk of accident or injury.
Most injuries are caused by misuse and/or not following instructions. Use caution when using this product.
Français :
Le non-respect de ces avertissements peut entraîner en conséquence des blessures sérieuses ou dommages à la propriété et annulera la
garantie.
Pour assurer votre sécurité, ne tentez pas d’assembler ce produit sans suivre attentivement les instructions.
• La surface sur laquelle vous assemblez et posez ce produit doit être de niveau. Si la surface n’est pas correctement
nivelée, l’assemblage du produit ne se joindra pas correctement. Vous gagnerez du temps sur le long terme grâce à une
surface bien nivelée — ne négligez pas cette étape.
• Il est possible d’endommager les pièces en plastique en serrant les vis excessivement. Pour éviter d’endommager le
plastique, nous recommandons vivement l’usage d’une perceuse électrique de faible puissance. Vous pouvez aussi
utiliser un tournevis cruciforme n°. 2.
• Deux adultes capables sont requis pour assembler ce produit.
• Toutes les personnes qui participent à l’assemblage doivent porter des lunettes de sécurité tout le long de l’assemblage.
• Dans les régions de grosses chutes de neige, nous recommandons que vous enleviez la neige du toit.
• N’utilisez pas ni conservez pas les objets chauds dans/sur ce produit.
• L’assemblage correct et complet est essentiel pour réduire le risque des dangers ou des blessures.
La plupart des blessures sont causées par l’abus et/ou par le non-respect des instructions. Faites attention lorsque vous utilisez ce produit.
Español:
El incumplimiento de seguir estas advertencias puede resultar en lesiones graves o daño a la propiedad y anulará la garantía.
Para asegurar la seguridad, no intente armar este producto sin seguir detenidamente las instrucciones.
• La superfi cie en la cual usted ensembla y coloca este producto debe estar nivelada. Si la superfi cie no está nivelada de
manera adecuada, el producto no podrá ensamblarse correctamente. La nivelación de la superfi cie le ahorrará tiempo de
trabajo, por lo tanto, le pedimos que no ignore este paso.
• Es posible endañar las piezas de plástico por apretar los tornillos. Para evitar dañar el plástico, recomendamos que use
un taladro eléctrico de baja potencia. Se puede usar también un destornillador de punta Phillips n°. 2.
• Dos adultos competentes son requeridos para ensamblar el producto.
• Todos los que participan en el ensamble del producto deben llevar gafas de seguridad a lo largo del ensamble.
• En las áreas de nevadas fuertes, recommendamos que quite la nieve del tejado.
• No use ni almacene objetos calientes en el producto.
• El armado propio y completo son esenciales para reducir el riesgo de accidentes y lesiones.
La mayoría de las lesiones son causadas por el uso erróneo y/o el incumplimiento de seguir las instrucciones. Tenga cuidado al usar este
producto.
WARNINGS & NOTICES / AVERTISSEMENTS ET AVIS / ADVERTENCIAS Y AVISOS
5
7
1
Metal Parts / Pièces en métal / Piezas de metal
Holes / Trous / Agujeros
PARTS REQUIRED / PIÈCES REQUISES / PIEZAS REQUERIDAS
TOOLS REQUIRED / OUTILS REQUIS / INSTRUMENTAL REQUERIDO
HARDWARE REQUIRED / QUINCAILLERIE REQUISE / HERRAJE REQUERIDO
FLOOR & WALL ASSEMBLY / ASSEMBLAGE DU PLANCHER ET DES PORTES / ENSAMBLE DEL PISO Y LAS PUERTAS
Blister Pack / Blister / Blíster
FFH
AHS (x2)
ADZ (x26)
FEI (x1)
FEJ (x2)
EXO (x8)
CHK (x2)
ADC (x1)
ADC (x1)
ADV (x14)
Plastic Parts / Pièces en plastique / Piezas de plástico
AGN (x1)
ANA (x2)
AGQ (x1)
ANC (x1)
AGY (x1)
(1) (1) (1)
ADW (x10)
FEF (x1)
9
TOOLS & HARDWARE REQUIRED / OUTILS ET QUINCAILLERIE REQUIS / INSTRUMENTAL Y HERRAJE REQUERIDOS
1.2
1.3
u SECTION 1 (CONTINUED) / SECTION 1 (SUITE) / SECCIÓN 1 (CONTINUACIÓN)
• Insert an End Cap (AHS) into the end of the Tube, and continue inserting the Tube until the Cap is flush with the
bottom of the Panel.
• Insérer un capuchon (AHS) dans l’extrémité du tube, et continuer à insérer le tube jusqu’à ce que le capuchon soit
au ras du bord inférieur du panneau.
• Insertar un tapón (AHS) en el extremo del tubo, y continuar insertando el tubo hasta que el tapón esté a ras del
borde inferior del panel.
• Repeat steps 1.1–1.2 for the the Right Side Wall Panel (AGY).
• Répéter les étapes 1.1 – 1.2 pour le panneau mural latéral droit (AGY).
• Repetir los pasos 1.1–1.2 para el panel mural lateral derecho (AGY).
AHS
AHS
AHS (x2)
AGY
FEJ
10
TOOLS & HARDWARE REQUIRED / OUTILS ET QUINCAILLERIE REQUIS / INSTRUMENTAL Y HERRAJE REQUERIDOS
u SECTION 1 (CONTINUED) / SECTION 1 (SUITE) / SECCIÓN 1 (CONTINUACIÓN)
1.5
1.4
AGY
• Lay the Floor Panel (ANC) down on level ground, and insert the three center tabs at the
bottom of the Right Wall Panel (AGY) into the slots in the Floor panel.
• Mettre le panneau de plancher (ANC) sur terrain plat, et insérer les trois languettes
centrales au bord inférieur du panneau mural droit (AGY) dans les fentes dans le panneau
de plancher.
• Colocar el panel de piso (ANC) sobre terreno llano, e insertar las tres lengüetas centrales
al borde inferior del panel mural derecho (AGY) dentro de las ranuras en el panel de piso.
• The Square Tube is here.
• Le tube carré est ici.
• El tubo cuadrado está aquí.
• Slide the Panel toward the rear of the Floor Panel.
• Faire glisser le panneau vers l’arrière du panneau de plancher.
• Deslizar el panel hacia el borde trasero del panel de piso.
11
TOOLS & HARDWARE REQUIRED / OUTILS ET QUINCAILLERIE REQUIS / INSTRUMENTAL Y HERRAJE REQUERIDOS
u SECTION 1 (CONTINUED) / SECTION 1 (SUITE) / SECCIÓN 1 (CONTINUACIÓN)
1.6
• Fold the edges of the Panel. Tilt the Panel to locate the end tabs over the slots in the Floor Panel. Insert the tabs into the slots.
• Plier les bords du panneau. Incliner le panneau pour poser les languettes sur les fentes dans le panneau de plancher. Insérer les
languettes dans les fentes.
• Doblar los bordes del panel. Inclinar el panel para ubicar las lengüetas encima de las ranuras en el panel de piso. Insertar las
lengüetas en las ranuras.
12
TOOLS & HARDWARE REQUIRED / OUTILS ET QUINCAILLERIE REQUIS / INSTRUMENTAL Y HERRAJE REQUERIDOS
u SECTION 1 (CONTINUED) / SECTION 1 (SUITE) / SECCIÓN 1 (CONTINUACIÓN)
1.7
• Insert the three tabs at the bottom of the right Rear Wall
Panel (ANA) into the 2nd, 3rd, and 4th slots from the right
corner of the Floor panel. The right edge of the Rear Panel is
behind the left edge of the Right Side Panel.
• Insérer les trois languettes au bord inférieur du panneau
mural arrière (ANA) droit dans les 2e, 3e, et 4e fentes
du côté droit du panneau de plancher. Le bord droit du
panneau de plancher est arrière du bord gauche du panneau
latéral droit.
• Insertar las lengüetas al borde inferior del panel mural
trasero (ANA) derecho dentro de las 2ª, 3ª, y 4ª ranuras
del lado derecho del panel de piso. El borde derecho del
panel arrière se ubica detrás del borde izquierdo del panel lateral
derecho.
ANA
13
TOOLS & HARDWARE REQUIRED / OUTILS ET QUINCAILLERIE REQUIS / INSTRUMENTAL Y HERRAJE REQUERIDOS
u SECTION 1 (CONTINUED) / SECTION 1 (SUITE) / SECCIÓN 1 (CONTINUACIÓN)
1.8
• Align the six holes along the edges of the Panels,
and secure the Panels together with six (6) Screws
(ADZ).
• Aligner les six trous le long des bords des panneaux,
et fixer les panneaux l’un l’autre à l’aide de six (6) vis
(ADZ).
• Alinear los seis agujeros a lo largo de los bordes de
los paneles, y fijar los paneles el uno al otro usando
seis (6) tornillos (ADZ).
ADZ (x6)
ADZ
ADZ
ADZ
ADZ
ADZ
ADZ
14
TOOLS & HARDWARE REQUIRED / OUTILS ET QUINCAILLERIE REQUIS / INSTRUMENTAL Y HERRAJE REQUERIDOS
u SECTION 1 (CONTINUED) / SECTION 1 (SUITE) / SECCIÓN 1 (CONTINUACIÓN)
1.9
• Insert the three tabs at the
bottom of the second Rear Wall
Panel (ANA) into the 2nd, 3rd,
and 4th slots from the left
corner of the Floor panel. The
right edge of the Left Panel is behind
the left edge of the Right Panel.
Secure with six (6) Screws (ADZ).
• Insérer les trois languettes au
bord inférieur du panneau mural
arrière (ANA) dans les 2e, 3e, et
4e fentes du côté gauche du
panneau de plancher. Le bord
droit du panneau de plancher est
arrière du bord gauche du panneau
droit. Fixer avec six (6) vis (ADZ).
• Insertar las lengüetas al borde
inferior del panel mural trasero
(ANA) dentro de las 2ª, 3ª, y
4ª ranuras del lado izquierdo
del panel de piso. El borde
derecho del panel izquierdo se
ubica detrás del borde izquierdo del
panel derecho. Fijar con seis (6)
tornillos (ADZ).
ADZ (x6)
ANA
16
TOOLS & HARDWARE REQUIRED / OUTILS ET QUINCAILLERIE REQUIS / INSTRUMENTAL Y HERRAJE REQUERIDOS
u SECTION 1 (CONTINUED) / SECTION 1 (SUITE) / SECCIÓN 1 (CONTINUACIÓN)
1.11
• Flip the assembly on its back, and insert a Screw (ADW) through each of the tabs underneath the Floor Panel as
shown. You can drill first and then insert the Screws.
• Tourner l’assemblage sur son dos, et insérer une vis (ADW) à travers chacune des languettes dessous le panneau
de plancher comme indiqué. On peut percer en premier et ensuite insérer les vis.
• Volcar el ensamble en su reverso, e insertar un tornillo (ADW) por cada una de las lengüetas debajo el panel de
piso como se muestra. Se puede taladrar primero y entonces insertar los tornillos.
ADW (x10)
ADW
ADW
ADW
ADW
ADW
ADW
ADW
ADW
ADW
ADW
ADW
ARA (x1)
17
TOOLS & HARDWARE REQUIRED / OUTILS ET QUINCAILLERIE REQUIS / INSTRUMENTAL Y HERRAJE REQUERIDOS
u SECTION 1 (CONTINUED) / SECTION 1 (SUITE) / SECCIÓN 1 (CONTINUACIÓN)
1.12
ADZ (x6)
• Stand the assembly upright. Align the holes in the Support Channel (FEF) with those along the groove just to the right
of the seam between the two Rear Wall Panels. Secure the Channel to the Wall using six (6) Screws (ADZ). The slits
should be on the right edge of the Channel.
• Mettre l’assemblage vertical. Aligner les trous dans le canal de support (FEF) avec ceux le long de la rainure juste à
droite de la jointure entre les deux panneaux muraux arrières. Fixer le canal au mur à l’aide de six (6) vis (ADZ). Les
fentes doivent être sur le bord droit du canal.
• Poner el ensamble vertical. Alinear los agujeros en el canal de soporte (FEF) con ellos a lo largo de la ranura justo a
la derecha de la juntura entre los dos paneles murales traseros. Fijar el canal al muro usando seis (6) tornillos (ADZ).
Las rendijas deben estar en el borde derecho del canal.
Hole in Channel / Trou dans le canal / Agujero en el canal
Slits on the right edge of the Channel / Fentes sur le bord
droit du canal / Rendijas en el borde derecho del canal
ADZ
ADZ
ADZ
ADZ
ADZ
ADZ
FEF
Seam / Jointure / Juntura
19
TOOLS & HARDWARE REQUIRED / OUTILS ET QUINCAILLERIE REQUIS / INSTRUMENTAL Y HERRAJE REQUERIDOS
1.13
• Orient the Roof Support (FEI) as shown, and set it against the front edge of the Roof Panel. Insert six (6) Screws (ADV)
to secure it in place.
• Orienter le support de toit (FEI) comme illustré, et mettre-le contre le bord avant du panneau de toit. Insérer six (6)
vis (ADV) pour le fixer en place.
• Orientar el soporte de techo (FEI) como se muestra, y colocarlo contra el borde anterior del panel de tejado. Insertar
seis (6) tornillos (ADV) para fijarlo en su lugar.
• Notch
• Encoche
• Muesca
• Notch
• Encoche
• Muesca
u SECTION 1 (CONTINUED) / SECTION 1 (SUITE) / SECCIÓN 1 (CONTINUACIÓN)
ADV (x6)
ADV
ADV
ADV ADV
ADV ADV
24
AGO (x1)
AGZ (x1)
(1)
(1)
(1)
Plastic Parts / Pièces en plastique / Piezas de plástico
TOOLS REQUIRED / OUTILS REQUIS / INSTRUMENTAL REQUERIDO
7/16 in/po
11 mm
FRS (x1)
2
DOOR ASSEMBLY / ASSEMBLAGE DES PORTES / ENSAMBLE DE LAS PUERTAS
PARTS REQUIRED / PIÈCES REQUISES / PIEZAS REQUERIDAS
ADC (x1)
ARA (x1)
25
TOOLS & HARDWARE REQUIRED / OUTILS ET QUINCAILLERIE REQUIS / INSTRUMENTAL Y HERRAJE REQUERIDOS
u SECTION 2 (CONTINUED) / SECTION 2 (SUITE) / SECCIÓN 2 (CONTINUACIÓN)
AGO
2.1
• Flip the Left Door (AGO) upside down, and attach the locking hardware to the Door as shown. Hand tighten for now.
• Retourner la porte gauche (AGO), et attacher la quincaillerie de verrouillage à la porte comme illustré. Serrer à la main en
ce moment.
• Volcar la puerta izquierda (AGO), y sujetar el herraje de cierre a la puerta como se muestra. Apretar solo a mano en este
momento.
LEFT DOOR ASSEMBLY / ASSEMBLAGE DE LA PORTE GAUCHE / ENSAMBLE DE LA PUERTA IZQUIERDA
ACA (x2)
ACA
ACA
7/16 in/po
11 mm
AAB (x2)
AAB
AAB
AEB (x2)
AEB
AEB
FGM (x1)
FGM
AGO
• If you have trouble with this section, follow the code below to view a video on how to assemble this section.
• En cas d’avoir des problèmes avec cette section, suivre le code en bas pour voir un vidéo sur l’assemblage de cette section.
• En caso de tener problemas con esta sección, seguir el código debajo para ver un video sobre el ensamble de esta sección.
http://go.lifetime.com/vscdoor
LIFETIME
©
26
TOOLS & HARDWARE REQUIRED / OUTILS ET QUINCAILLERIE REQUIS / INSTRUMENTAL Y HERRAJE REQUERIDOS
u SECTION 2 (CONTINUED) / SECTION 2 (SUITE) / SECCIÓN 2 (CONTINUACIÓN)
2.2
2.3
• While holding the Channel tight against the Door, insert four (4) Screws (ADZ) to secure the Channel in place.
• Garder bien le canal contre la porte, et insérer quatre (4) vis (ADZ) pour le fixer en place.
• Mantener bien el canal contra la puerta, e insertar cuatro (4) tornillos (ADZ) para fijarlol en su lugar.
• Set the Lateral Door Channel (FEM) into the groove along the edge of the Door, and align the four holes indicated.
• Mettre le canal latéral de la porte (FEM) dans la rainure le long du bord de la porte, et aligner les trous indiqués.
• Meter el canal lateral de la puerta (FEM) en la ranura a lo largo del borde de la puerta, y alinear los agujeros indicados.
ADZ (x4)
FEM
ADZ
ADZ
ADZ
ADZ
ADZ
28
TOOLS & HARDWARE REQUIRED / OUTILS ET QUINCAILLERIE REQUIS / INSTRUMENTAL Y HERRAJE REQUERIDOS
u SECTION 2 (CONTINUED) / SECTION 2 (SUITE) / SECCIÓN 2 (CONTINUACIÓN)
2.6
DXW
DXW
DXW
DXW
DXW
DXW
DXW
DXW
DXW
DXW
DXW (x6)
DWJ (x3)
DWJ
• These Screws (DXW) go through the Hinge, Door, and through the holes in the Channel. Start with the center Hinge.
• Ces vis (DXW) vont à travers la charnière, la porte, et les trous dans le canal. Commencer avec la charnière centrale en premier.
• Estos tornillos (DXW) atravesan la bisagra, la puerta, y los agujeros en el canal. Comenzar con la bisagra central primero.
Note: Chamfered side faces away from Door.
Remarque : Le côté chanfreiné doit être opposé à la porte.
Nota: El lado biselado debe dar la espalda a la puerta.
Note: Start with the center Hinge.
Remarque : Commencer avec la charnière centrale.
Nota: Comenzar con la bisagra central.
!
!
29
TOOLS & HARDWARE REQUIRED / OUTILS ET QUINCAILLERIE REQUIS / INSTRUMENTAL Y HERRAJE REQUERIDOS
u SECTION 2 (CONTINUED) / SECTION 2 (SUITE) / SECCIÓN 2 (CONTINUACIÓN)
2.7
RIGHT DOOR ASSEMBLY / ASSEMBLAGE DE LA PORTE DROITE / ENSAMBLE DE LA PUERTA DERECHA
• Set the Lateral Door Channel (FEM) into the groove along the edge of the Door.
• Mettre le canal latéral de la porte (FEM) dans la rainure le long du bord de la porte.
• Meter el canal lateral de la puerta (FEM) en la ranura a lo largo del borde de la puerta.
2.8
• While holding the Channel tight against the Door, insert four (4) Screws (ADZ) to secure the Channel in place.
• Garder bien le canal contre la porte, et insérer quatre (4) vis (ADZ) pour fixer le canal en place.
• Mantener bien el canal contra la puerta, e insertar cuatro (4) tornillos (ADZ) para fijar el canal en su lugar.
ADZ (x4)
FEM
AGZ
31
TOOLS & HARDWARE REQUIRED / OUTILS ET QUINCAILLERIE REQUIS / INSTRUMENTAL Y HERRAJE REQUERIDOS
u SECTION 2 (CONTINUED) / SECTION 2 (SUITE) / SECCIÓN 2 (CONTINUACIÓN)
2.10
2.11
• Insert a Square Tube (FEK) into the hole at the bottom of the Door until it hangs out a few inches.
• Insérer un tube carré (FEK) dans le trou au coin inférieur de la porte jusqu’à ce qu’il sorte quelques centimètres.
• Insertar un tubo cuadrado (FEK) en el agujero a la esquina inferior de la puerta hasta que se cuelgue unos centímetros.
• Insert an End Cap (AHS) into the Tube, and continue inserting the Tube until the two holes in the Tube are
aligned with those in the Door.
• Insérer un capuchon (AHS) dans le tube, et continuer à insérer le tube jusqu’à ce que les deux trous dans
le tube s’alignent avec ceux de la porte.
• Insertar un tapón (AHS) en el tubo, et continuar insertando el tubo hasta que los dos agujeros estén
alineados con ellos en la puerta.
AHS (x1)
FEK
AHS
32
TOOLS & HARDWARE REQUIRED / OUTILS ET QUINCAILLERIE REQUIS / INSTRUMENTAL Y HERRAJE REQUERIDOS
2.12
• Now, drill completely through the Door and Square Tube using the 1/4" (6,4 mm) bit. Use the holes in the Square Tube as
a guide.
• Maintenant, percer complètement la porte et le tube en utilisant une mèche de 6,4 mm (1/4 po). Employer les trous
dans le tube carré comme référence.
• Ahora, taladrar por la puerta entera y el tubo usando una broca de 6,4 mm (1/4 in). Usar los agujeros en el tubo
cuadrado como una guía.
FRS
• Drill completely through the Door here.
• Percer complètement la porte ici.
• Taladrar por completo la puerta aquí.
u SECTION 2 (CONTINUED) / SECTION 2 (SUITE) / SECCIÓN 2 (CONTINUACIÓN)
35
TOOLS & HARDWARE REQUIRED / OUTILS ET QUINCAILLERIE REQUIS / INSTRUMENTAL Y HERRAJE REQUERIDOS
u SECTION 2 (CONTINUED) / SECTION 2 (SUITE) / SECCIÓN 2 (CONTINUACIÓN)
2.16
DXW (x6)
DXW
DXW
DXW
DXW
DXW
DXW
DXW
DXW
DWJ (x3)
DWJ
• These Screws (DXW) go through the Hinge, Door, and through the holes in the Channel. Start with the center Hinge.
• Ces vis (DXW) vont à travers la charnière, la porte, et les trous dans le canal. Commencer avec la charnière centrale en premier.
• Estos tornillos (DXW) atravesan la bisagra, la puerta, y los agujeros en el canal. Comenzar con la bisagra central primero.
Note: Chamfered side faces away from Door.
Remarque : Le côté chanfreiné doit être opposé à la porte.
Nota: El lado biselado debe dar la espalda a la puerta.
!
DWJ
DXW
DXW
Note: Start with the center Hinge.
Remarque : Commencer avec la charnière centrale.
Nota: Comenzar con la bisagra central.
!
  • Page 1 1
  • Page 2 2
  • Page 3 3
  • Page 4 4
  • Page 5 5
  • Page 6 6
  • Page 7 7
  • Page 8 8
  • Page 9 9
  • Page 10 10
  • Page 11 11
  • Page 12 12
  • Page 13 13
  • Page 14 14
  • Page 15 15
  • Page 16 16
  • Page 17 17
  • Page 18 18
  • Page 19 19
  • Page 20 20
  • Page 21 21
  • Page 22 22
  • Page 23 23
  • Page 24 24
  • Page 25 25
  • Page 26 26
  • Page 27 27
  • Page 28 28
  • Page 29 29
  • Page 30 30
  • Page 31 31
  • Page 32 32
  • Page 33 33
  • Page 34 34
  • Page 35 35
  • Page 36 36
  • Page 37 37
  • Page 38 38
  • Page 39 39
  • Page 40 40
  • Page 41 41
  • Page 42 42
  • Page 43 43
  • Page 44 44
  • Page 45 45
  • Page 46 46
  • Page 47 47
  • Page 48 48
  • Page 49 49
  • Page 50 50
  • Page 51 51
  • Page 52 52
  • Page 53 53
  • Page 54 54
  • Page 55 55
  • Page 56 56

Lifetime 60326 Owner's manual

Type
Owner's manual

Ask a question and I''ll find the answer in the document

Finding information in a document is now easier with AI