Philips qc 5050 User manual

Category
Hair trimmers & clippers
Type
User manual

This manual is also suitable for

6
Introduction
Congratulations on your purchase and welcome to Philips! To fully benet
from the support that Philips offers, register your product at www.philips.
com/welcome.
Your new Philips super-easy hair clipper adapts to the contours of the
head and enables comfortable use. To enjoy using the hair clipper we
advise you to read the following information.
General description (Fig. 1)
A Small comb
B Main cutting element
C On/off slide
D Length indicator
E Length lock (locks the hair length setting)
F Cleaning brush
G Adapter
H Appliance plug
I Scissors (QC5050 only)
J Styling comb (QC5050 only)
Important
Read this user manual carefully before you use the appliance and save it
for future reference.
Danger
Keep the appliance and the adapter dry (Fig. 2).
Warning
Check if the voltage indicated on the appliance corresponds to the
local mains voltage before you connect the appliance.
The adapter contains a transformer. Do not cut off the adapter to
replace it with another plug, as this causes a hazardous situation.
This appliance is not intended for use by persons (including children)
with reduced physical, sensory or mental capabilities, or lack of
experience and knowledge, unless they have been given supervision
-
-
-
-
ENGLISH
4203.000.5451.4.indd 6 20-11-2008 14:02:51
or instruction concerning use of the appliance by a person
responsible for their safety.
Children should be supervised to ensure that they do not play with
the appliance.
Caution
Only use the adapter supplied.
Do not use a damaged adapter.
Use, charge and store the appliance at a temperature between 15°C
and 35°C.
If the adapter is damaged, always have it replaced with one of the
original type in order to avoid a hazard.
Do not use the appliance when one of the attachments is damaged
or broken as this may cause injury.
This appliance is suitable for mains voltages from 220 to 240 volts.
This appliance is only intended for clipping human scalp hair. Do not
use it for another purpose.

This Philips appliance complies with all standards regarding
electromagnetic elds (EMF). If handled properly and according to the
instructions in this user manual, the appliance is safe to use based on
scientic evidence available today.
Charging (QC5050 only)
Charge the appliance for 8 hours (NiCd battery) or 12 hours (NiMh
battery) before you start to use it for the rst time.
A fully charged appliance has a cordless clipping time of up to 35 minutes
(NiCd battery) or 50 minutes (NiMh battery).
Do not charge the appliance for more than 24 hours.
1 Switch off the appliance before you charge it.
2 Insert the appliance plug into the appliance (Fig. 3).
3 Insert the adapter into the wall socket.
The charging light goes on to indicate that the appliance is
charging (Fig. 4).
-
-
-
-
-
-
-
-
,
ENGLISH 7
4203.000.5451.4.indd 7 20-11-2008 14:02:52
The charging light does not go out or change colour when the
appliance is fully charged.
Optimising the lifetime of the battery
After the appliance has been charged for the rst time, do not recharge it
between clipping sessions. Continue to use it and recharge it only when
the battery is (almost) empty.
Discharge the battery completely twice a year by letting the motor
run until it stops.
Do not keep the appliance plugged into a wall socket all the time.
If the appliance has not been used for a long time, it must be
recharged for 8 hours (NiCd battery) or 12 hours (NiMh battery).
Corded clipping
QC5050 only:
Do not run the appliance from the mains when the battery is fully
charged.
To use the hair clipper connected to the mains: switch the hair
clipper off, connect it to the mains and wait a few seconds before
switching it on.
QC5010 only:
1 Insert the appliance plug into the appliance. (Fig. 3)
2 Insert the adapter into the wall socket.
Using the appliance
Clipping with comb attachment
The hair length after cutting is indicated in millimetres on the display.
The settings correspond to the remaining hair length after cutting.
The hair length after cutting is only visible when the comb is attached.
1 Slide the comb attachment into the guiding grooves of the
appliance (‘click’). (Fig. 5)
-
-
-
,
-
-
ENGLISH8
4203.000.5451.4.indd 8 20-11-2008 14:02:53
Make sure that the arms of the comb attachment have been properly slid
into the grooves on both sides.
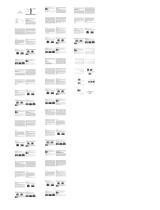
2 Set the comb to the desired hair length (3, 6, 9, 12, 15, 18 or 21
millimetres) by turning the length lock (Fig. 6).
3 Switch on the appliance (Fig. 7).
Tips
We advise you to start clipping at the highest setting and to reduce
the hair length in small steps until you reach the desired hair length.
If a lot of hair has accumulated in the comb, remove the comb
attachment and blow and/or shake the hair from the comb. Removing
the comb does not change the selected hair length setting.
Write down the hair length settings used to create a certain hairstyle
as a reminder for future clipping sessions.
Clipping without comb attachment:
You can use the clipper without comb attachment to contour the
neckline and the area around the ears.
Remove the comb attachment by pulling it off the appliance (Fig. 8).
Never pull at the exible top of the comb attachment. Always pull at the
bottom part.
The comb attachment keeps the cutting unit at a certain distance
from your head. This means that, if you use the clipper without the
comb attachment, your hair will be cut off very close to the skin.
Cleaning
Clean the appliance every time you have used it.
Do not use abrasives, scourers or liquids such as alcohol, petrol or
acetone to clean the appliance.
The appliance and the adapter may only be cleaned with the brush
supplied.
1 Switch off the appliance and unplug it before you clean it.
2 Remove the comb attachment by pulling it off the appliance (Fig. 8).
-
-
-
-
-
ENGLISH 9
4203.000.5451.4.indd 9 20-11-2008 14:02:53
3 Push the middle part of the cutting unit upwards with your thumb
until it opens and then pull it off the appliance (Fig. 9).
Be careful that the cutting unit does not fall to the oor.
4 Clean the cutting unit with the brush supplied (Fig. 10).
5 Also clean the inside of the appliance with the brush
supplied (Fig. 11).
6 Place the lug of the cutting unit into the slot and push the unit back
onto the appliance (‘click’) (Fig. 12).
This appliance does not need any lubrication.
Replacement
A worn or damaged cutting unit should only be replaced with an original
Philips cutting unit.
1 Push the middle part of the cutting unit upwards with your thumb
until it opens and then pull it off the appliance (Fig. 9).
Be careful that the cutting unit does not fall to the oor.
2 Place the lug of the new cutting unit into the slot and push the unit
back onto the appliance (‘click’) (Fig. 12).
Environment (QC5050 only)
Do not throw away the appliance with the normal household waste
at the end of its life, but hand it in at an ofcial collection point for
recycling. By doing this, you help to preserve the
environment (Fig. 13).
The built-in rechargeable battery contains substances that may
pollute the environment. Always remove the battery before you
discard and hand in the appliance at an ofcial collection point.
Dispose of the battery at an ofcial collection point for batteries. If
you have trouble removing the battery, you can also take the
appliance to a Philips service centre. The staff of this centre will
remove the battery for you and will dispose of it in an
environmentally safe way. (Fig. 14)
-
-
ENGLISH10
4203.000.5451.4.indd 10 20-11-2008 14:02:54
Disposal of the battery
Only remove the battery if it is completely empty.
1 Disconnect the appliance from the mains and let the appliance run
until the motor stops.
2 Push the middle part of the cutting unit upwards with your thumb
until it opens and then pull it off the appliance (Fig. 9).
Be careful that the cutting unit does not fall to the oor.
3 Remove the upper housing part from the inner part of the
appliance by means of a screwdriver (Fig. 15).
4 Separate the lower housing part from the appliance (Fig. 16).
5 Remove the battery by prying it out of the appliance (Fig. 17).
6 Cut the wires and dispose of the battery in an environmentally safe
way.
Do not connect the appliance to the mains again after it has been
opened.
Guarantee & service
If you need service or information or if you have a problem, please visit
the Philips website at www.philips.com or contact the Philips Consumer
Care Centre in your country (you nd its phone number in the
worldwide guarantee leaet). If there is no Consumer Care Centre in
your country, go to your local Philips dealer.
ENGLISH 11
4203.000.5451.4.indd 11 20-11-2008 14:02:54
4203.000.5451.4www.philips.com
u
4203.000.5451.4.indd 92 20-11-2008 14:03:40
  • Page 1 1
  • Page 2 2
  • Page 3 3
  • Page 4 4
  • Page 5 5
  • Page 6 6
  • Page 7 7
  • Page 8 8
  • Page 9 9
  • Page 10 10
  • Page 11 11
  • Page 12 12
  • Page 13 13
  • Page 14 14
  • Page 15 15
  • Page 16 16
  • Page 17 17
  • Page 18 18
  • Page 19 19
  • Page 20 20
  • Page 21 21
  • Page 22 22
  • Page 23 23
  • Page 24 24
  • Page 25 25
  • Page 26 26
  • Page 27 27
  • Page 28 28
  • Page 29 29
  • Page 30 30
  • Page 31 31
  • Page 32 32
  • Page 33 33
  • Page 34 34
  • Page 35 35
  • Page 36 36
  • Page 37 37
  • Page 38 38
  • Page 39 39
  • Page 40 40
  • Page 41 41
  • Page 42 42
  • Page 43 43
  • Page 44 44
  • Page 45 45
  • Page 46 46
  • Page 47 47
  • Page 48 48
  • Page 49 49
  • Page 50 50
  • Page 51 51
  • Page 52 52
  • Page 53 53
  • Page 54 54
  • Page 55 55
  • Page 56 56
  • Page 57 57
  • Page 58 58
  • Page 59 59
  • Page 60 60
  • Page 61 61
  • Page 62 62
  • Page 63 63
  • Page 64 64
  • Page 65 65
  • Page 66 66
  • Page 67 67
  • Page 68 68
  • Page 69 69
  • Page 70 70
  • Page 71 71
  • Page 72 72
  • Page 73 73
  • Page 74 74
  • Page 75 75
  • Page 76 76
  • Page 77 77
  • Page 78 78
  • Page 79 79
  • Page 80 80
  • Page 81 81
  • Page 82 82
  • Page 83 83
  • Page 84 84
  • Page 85 85
  • Page 86 86
  • Page 87 87
  • Page 88 88
  • Page 89 89
  • Page 90 90
  • Page 91 91
  • Page 92 92

Philips qc 5050 User manual

Category
Hair trimmers & clippers
Type
User manual
This manual is also suitable for

Ask a question and I''ll find the answer in the document

Finding information in a document is now easier with AI