Germanica GEAF5L3LD User manual
- Category
- Deep fryers
- Type
- User manual
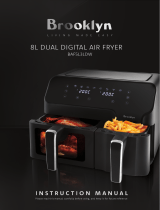
Germanica GEAF5L3LD is a kitchen appliance with innovative features such as two separate cooking zones and the ability to air fry. With its 1700 watts of power, this model is likely very efficient. It also comes with a number of preset cooking programs, making it easy to cook a variety of foods. Some of the possible use cases for this device include:
-
Air frying: The Germanica GEAF5L3LD can be used to air fry a variety of foods, including French fries, chicken nuggets, and onion rings. Air frying is a healthier alternative to traditional frying, as it uses little to no oil.
-
Dual cooking zones: This model features two separate cooking zones, which allows you to cook two different foods at the same time. This can be helpful for preparing a meal for a family or for cooking side dishes.


-
 1
1
-
 2
2
-
 3
3
-
 4
4
-
 5
5
-
 6
6
-
 7
7
-
 8
8
-
 9
9
-
 10
10
-
 11
11
-
 12
12
-
 13
13
-
 14
14
-
 15
15
-
 16
16
-
 17
17
-
 18
18
-
 19
19
-
 20
20
-
 21
21
-
 22
22
-
 23
23
-
 24
24
-
 25
25
-
 26
26
-
 27
27
-
 28
28
-
 29
29
-
 30
30
-
 31
31
-
 32
32
-
 33
33
-
 34
34
-
 35
35
-
 36
36


Germanica GEAF5L3LD User manual
- Category
- Deep fryers
- Type
- User manual
Germanica GEAF5L3LD is a kitchen appliance with innovative features such as two separate cooking zones and the ability to air fry. With its 1700 watts of power, this model is likely very efficient. It also comes with a number of preset cooking programs, making it easy to cook a variety of foods. Some of the possible use cases for this device include:
-
Air frying: The Germanica GEAF5L3LD can be used to air fry a variety of foods, including French fries, chicken nuggets, and onion rings. Air frying is a healthier alternative to traditional frying, as it uses little to no oil.
-
Dual cooking zones: This model features two separate cooking zones, which allows you to cook two different foods at the same time. This can be helpful for preparing a meal for a family or for cooking side dishes.
Ask a question and I''ll find the answer in the document
Finding information in a document is now easier with AI
Related papers


Other documents
-
 Brooklyn BAF5L3LDW User manual
-
HAEGER AF-D42.007A User manual
-
Tower T17099 Vortx Dual Basket 8.5L Air Fryer User manual
-
INNOTECK DS-5015 User manual
-
Vytronix 45QCF User manual
-
Healthy Choice AF301 User manual
-
Midea MF-CN35C2 User manual
-
Turbotronic TT-AF4 User manual
-
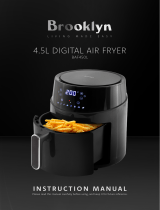 Brooklyn BAF450L User manual
-
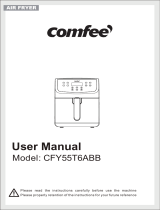 Comfee’ CFY55T6ABB User manual


