Page is loading ...

IS276-17I J&D Manufacturing • 6200 Hwy 12 • Eau Claire, WI 54701 • 1-800-998-2398 • www.jdmfg.com Page 1/3
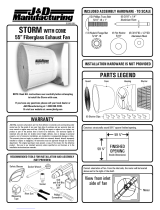
WALL MASTER EXHAUST FAN
J&D Mfg. warrants all products are free from defects in materials and workmanship under
normal use for the period of one year from date of purchase and our warranty does not cover
normal or regular wear and tear. J&D Mfg can repair or replace at our option, any product or
part of the product that is found to be defective. Our warranty applies to materials only and
does not include return freight, delivery, loss or damage to personal property, cost of removal
or installation, any incidental or consequential damages or labor. This warranty does not apply
to products which are misused, abused, altered, improperly installed or subject to negligence.
All warranties must be approved through our warranty department. The original purchaser
must present a copy of the invoice for the defective product. One year is our standard
warranty unless specified on our literature or in the installation instructions/user manuals.
INSTALLATION HARDWARE IS NOT PROVIDED
Please read over all instructions carefully before you
begin. If you have any questions please call your local
dealer, or contact J&D Manufacturing at 1-800-998-2398.
Safety Glasses
RECOMMENDED TOOLS FOR ASSEMBLY (NOT PROVIDED)
ADDITIONAL TOOLS (NOT PROVIDED) DEPENDENT ON BUILDING MATERIAL
AND CHOSEN HARDWARE WILL BE NEEDED FOR INSTALLATION
WARRANTY
INSTALLATION
For 36” models construct structurally sound 41” square rough opening.
For 50“ models construct structurally sound 54¾” square rough opening.
1
41”
41”
ROUGH
OPENING
(Inside Dimensions)
36”
Wall Master
Models
54¾”
54¾”
ROUGH
OPENING
(Inside Dimensions)
50”
Wall Master
Models
The top of each wall master is indicated by the location of the J&D label on
the sides of the fan. Do not mount unit in any position but upright as shown
below.
NOTE: Depth of fans is indicated only for clearance purposes and does not
indicate depth of rough opening.
2
14¼”
Depth of 36” Direct Drive
Wall Master Models
23¾”
Depth of 36” & 50” Belt Drive
Wall Master Models
#2 Square Drive Bit & Drill
Location of J&D
label indicates
the top of the fan
Location of J&D
label indicates
the top of the fan

The wall master fan can be mounted flush to interior as shown in Step 4a,
flush with exterior as shown in Step 4b, or any location in-between as
shown split in Step 4c.
NOTE: It is recommended that the exterior exposed top of the unit as
shown in Step 4a and 4c be protected from collecting rain water and
especially snow and ice. Damage to the unit due to inadequate protection is
not covered by warranty.
Interior
of
structure
Exterior
of
structure
Interior
of
structure
Exterior
of
structure
Interior
of
structure
Exterior
of
structure
4c
4a
4b
Using a #2 square drive bit remove and set aside rear guard and clips.
Flush to Interior
Flush to Exterior
Split - Not Flush
3
IS276-17I J&D Manufacturing • 6200 Hwy 12 • Eau Claire, WI 54701 • 1-800-998-2398 • www.jdmfg.com Page 2/3
If installing optional weather hood (not included), wall
master must be mounted flush to the exterior as shown
in Step 4b.

Maintenance Instructions
• Disconnect power before cleaning or maintaining your fan in order
to prevent serious injury or death.
• Service and repair of fan should only be completed by a qualified
technician.
• For maximum efficiency and fan life, keep the following free from
dirt and dust: blades, motor and guard.
• The totally enclosed air over motor has sealed ball bearings and
does not require additional oil/lubrication.
DISCONNECT POWER
BEFORE INSTALLING OR SERVICING.
ALL ELECTRICAL WORK SHOULD BE COMPLETED BY
QUALIFIED PERSONNEL AND MEET NATIONAL (NEC),
REGIONAL AND LOCAL ELECTRIC CODES.
! !
Connecting Power To The Unit
• Install manual disconnect switch inside
building adjacent to fan.
• Use either rubber covered or flexible water-
tight conduit and stranded wire.
• Route wire to motor with drip loop and
secure. Drip loop will drain accumulated
moisture away from the motor.
• Configure internal wires to match supply
voltage and wire according to motor
nameplate. Test to verify correct rotation.
• Shut off manual disconnect for remainder
of install. Only permit power to unit when
shutter and guard are fully installed to
prevent injury.
6
Using a #2 square drive bit reinstall the rear guard and clips that were
removed in Step 3.
7
Using a minimum of 12 fasteners suitable to your structure secure the unit
in the opening as shown below, 3 fasteners per side.
5
IS276-17I J&D Manufacturing • 6200 Hwy 12 • Eau Claire, WI 54701 • 1-800-998-2398 • www.jdmfg.com Page 3/3
/