3-862-757-11 (1)
Instructions
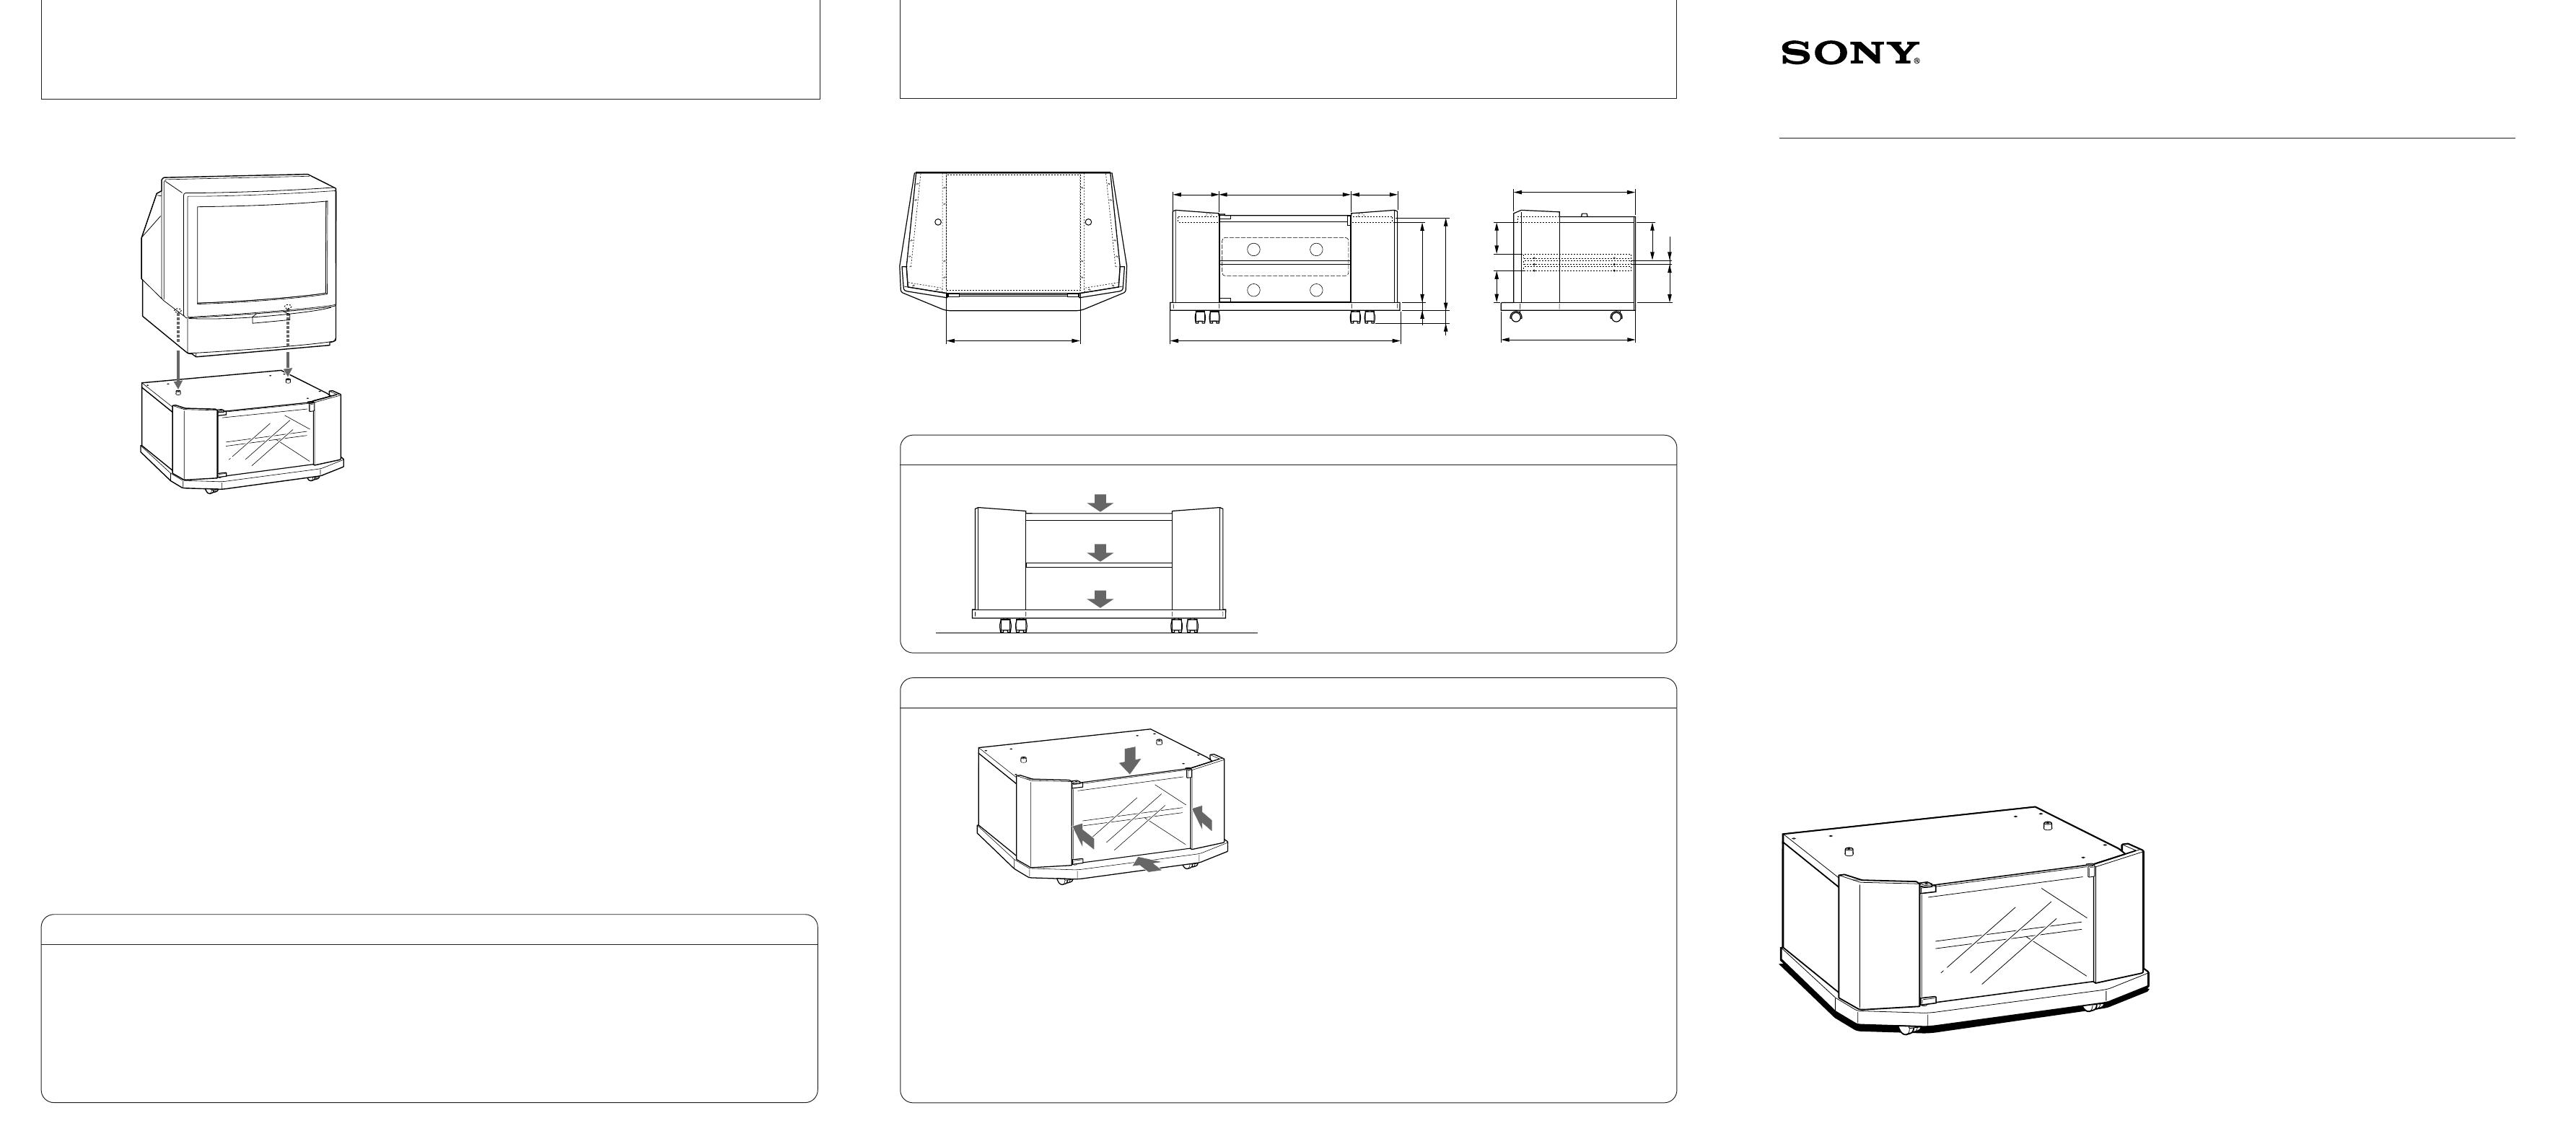
This AV rack is designed for use with Sony Projection
TV KP-EF41. It is designed to hold a VCR or other
equipment inside.
########
### ### ### ### ### ### ### ### ### ### ### ### ###
### ### ### ### ### ### ### ### ### ### ### ### ###
### ### ### ### ### ### ### ### ### ### ### ### ###
########
### ### ### ### ### ### ### ### ### ### ### ### ###
### ### ### ### ### ### ### ### ### ### ### ### ###
### ### ### ### ### ### ### ### ### ### ### ### ###
AV Rack
SU-EF41
1998 by Sony Corporation
Note on the tempered glass/#####################/###############
Under normal conditions, this “tempered glass” is more
shock resistant and able to bear more weight than ordinary
glass. However, this glass may break if it receives a sharp
blow or is severely scratched.
### ### ### ### ### ### ### ### ### ### ### ### ### ### ###
### ### ### ### ### ### ### ### ### ### ### ### ### ### ###
### ### ### ### ### ### ### ### ### ### ### ### ### ### ###
### ### ### ### ### ### ### ### ### ### ### ### ### ### ###
### ### ### ### ### ### ### ### ### ### ### ### ### ### ###
### ### ### ### ### ### ### ### ### ### ### ### ### ### ###
Notes on use/##################/######
• ### ### ### ### ### ### ### ### ### ### ### ### ### ### ###
### ### ### ### ### ### ### ### ### ### ### ### ### ### ###
• ### ### ### ### ### ### ### ### ### ### ### ### ### ### ###
### ### ### ### ### ### ### ### ### ### ### ### ### ### ###
### ### ### ### ### ### ### ### ### ### ### ### ### ### ###
### ### ### ### ### ### ### ### ### ### ### ### ### ### ###
#######
### ### ### ### ### ### ### ### ### ### ### ### ### ### ###
### ### ### ### ### ### ### ### ### ### ### ### ### ### ###
• ### ### ### ### ### ### ### ### ### ### ### ### ### ### ###
### ### ### ### ### ### ### ### ### ### ### ### ### ### ###
• ### ### ### ### ### ### ### ### ### ### ### ### ### ### ###
### ### ### ### ### ### ### ### ### ### ### ### ### ### ###
### ### ### ### ### ### ### ### ### ### ### ### ### ### ###
### ### ### ### ### ### ### ### ### ### ### ### ### ### ###
#######
### ### ### ### ### ### ### ### ### ### ### ### ### ### ###
### ### ### ### ### ### ### ### ### ### ### ### ### ### ###
• Do not place the rack in a location near a heat source, such
as a radiator, or in a place subject to direct sunlight.
• Clean the rack periodically with a soft cloth. If fingerprints,
food and beverage stains, etc., are difficult to remove, use a
cloth moistened with a mild detergent solution. Do not use
scouring powder, an abrasive pad, or a solvent.
Warning
When opening or closing the door, take care not to pinch your
fingers in the door (indicated by arrows in the illustration)
and be especially mindful whenever children are nearby.
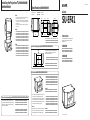
Note on carrying capacity/##################/########
Do not place any equipment which exceeds the maximum
weight for each shelf as indicated in the illustration.
Otherwise, the shelf may break.
### ### ### ### ### ### ### ### ### ### ### ### ### ### ###
### ### ### ### ### ### ### ### ### ### ### ### ### ### ###
### ### ### ### ### ### ### ### ### ### ### ### ### ### ###
### ### ### ### ### ### ### ### ### ### ### ### ### ### ###.
50kg
20 kg
20 kg
Notes
• To install the TV, make sure the pilot holes on the bottom of the TV
are fitted onto the posts on the top of the AV Rack.
• Do not put the TV power cord between the top board and the bottom
of the TV. If you do so, the cord may be damaged and it may cause an
electric shock or fire.
• Be careful not to hit the glass door with the TV when placing the TV
on the AV Rack.
#####
• ### ### ### ### ### ### ### ### ### ### ### ### ### ### ### ### ### ###
### ### ### ### ### ### ### ### ### ### ### ### ### ### ### ### ### ###
• ### ### ### ### ### ### ### ### ### ### ### ### ### ### ### ### ### ###
### ### ### ### ### ### ### ### ### ### ### ### ### ### ### ### ### ###
### ### ### ### ### ### ### ### ### ### ### ### ### ### ### ### ### ###
• ### ### ### ### ### ### ### ### ### ### ### ### ### ### ### ### ### ###
### ### ### ### ### ### ### ### ### ### ### ### ### ### ### ### ### ###
Dimensions Unit: mm
Weight: 28 kg
### ### ### ###
####: #### ###
### : mm
### : 28 kg
Specifications/#######/###
Installing the Projection TV/###########/
############
Design and specifications are subject to change without notice.
### ### ### ### ### ### ### ### ### ### ### ### ### ### ### ###
### ### ### ### ### ### ### ### ### ### ### ### ### ### ### ###
117.5
133.5
366
316
31
908
180
142
158
542.5
490.3
526
16
50
526
180


 1
1
 2
2


Hoshizaki SR48A-8 User manual
 KraftMaid VC4821L6S7.RBE.7118PN Installation guide
Panasonic SCHTR210 Owner's manual
SMART Technologies 4000i User manual
Eaton Paramount Enclosure Installation guide
Hoshizaki CPT93-D6 User manual
Gladiator GARF19XXYK01 Owner's manual
LG GC-P217LCLJ User manual
Hoshizaki PR46A-D2 User manual
