Belkin BELKIN MINISCROLLER #F8E841QEABLK User manual
- Category
- Mice
- Type
- User manual

En
Fr
De
Nl
Es
It
P74279ea Belkin Series:
F8E841eaBLK and F8E882eaOPT
User Manual
Manuel de l'utilisateur
Benutzerhandbuch
Handleiding
Manuale utente
Manual de usuario
P74279ea-F8E841eaBLK 24-03-2003 14:11 Page 1

P74279ea-F8E841eaBLK 24-03-2003 14:11 Page 2

En
Fr
De
Nl
Es
It
Table of Contents
English . . . . . . . . . . . . . . . . . . . . . . . . . . . 4
Français (Europe) . . . . . . . . . . . . . . . . . . 18
Deutsch . . . . . . . . . . . . . . . . . . . . . . . . . . 30
Nederlands . . . . . . . . . . . . . . . . . . . . . . . 42
Español . . . . . . . . . . . . . . . . . . . . . . . . . . 54
Italiano . . . . . . . . . . . . . . . . . . . . . . . . . . . 66
P74279ea-F8E841eaBLK 24-03-2003 14:11 Page 3

4
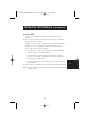
Important Information
The USB connector is compatible with Windows
®
98,
Windows
®
2000, Windows
®
ME, Windows
®
XP
The PS/2 connector is compatible with Windows
®
98, NT,
and 2000.
USB Connector
PS/2 Connector
P74279ea-F8E841eaBLK 24-03-2003 14:11 Page 4

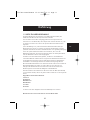
Introduction
5
En
1.1 An Introduction to your new Belkin Mouse
Congratulations on your purchase of the Belkin MiniScroller Mouse, a revolutionary
mouse designed for today’s sophisticated computer user. You will find this mouse
not only resoundingly easy to use but also incredibly versatile.
Mouse features include a scroll wheel, which eliminates the need for a scroll bar as
you move fluidly through websites and documents. Using the MiniScroller Mouse
scroll wheel also reduces movement, for less strain on your wrist and easier
navigation through computer programs. Four-directional scrolling increases viewing
options. Scroll horizontally or vertically with one click of the wheel. You can even
browse at multiple speeds. Browse quickly or slowly—you decide!
One-Touch Zoom Control gives you control of the zoom feature provided by your
Windows system. Now you can instantly enlarge or reduce your viewing screen.
Once the software has been loaded onto your computer, the center button of your
mouse (the scroll wheel) can be programmed to perform the same tasks as:
"Left Button Double-Click"
"F1" through "F12"
"Enter" Key
"Page Up" Key
"Page Down" Key
"Home" Key
"End" Key
These can be used in place of your scrolling options.
P74279ea-F8E841eaBLK 24-03-2003 14:11 Page 5

6
Miniscroller Optical Mouse
Try it on the floor, try it on a lampshade, try it on your leg…try it just about
anywhere. You’ll be amazed by the precision of the MiniScroller Optical Mouse,
moving more smoothly than other mice on conventional mouse pads. No longer will
you need a mouse pad to get optimal performance—which is perfect for computer
users who don’t have a lot of space.
And without a rubber ball that picks up dirt and debris from everyday use, you
won’t have to continuously clean your MiniScroller Optical Mouse. This no-
maintenance-required device stays smooth and precise.
So enjoy—and thank you for choosing Belkin!
Introduction
P74279ea-F8E841eaBLK 24-03-2003 14:11 Page 6

7
En
Hardware Installation
2.1 Hardware Installation
Your mouse connects to either a PS/2 mouse port or a Universal Serial Bus
(USB) port . To check, look at the back of your computer for the port that is
designated for your mouse. Some PCs will have the word MOUSE marked next to
the PS/2 connector. If you are still unsure, please refer to your hardware manual. For
USB mouse port installation, simply remove the PS/2-USB adapter from the end of
the connector before plugging the mouse into the computer.
PS/2 Installation
a. Make sure that the computer is turned off.
b. Locate the PS/2 mouse port on the back of your computer.
c. Plug your mouse into the appropriate port suggested above. Check the box in
which your mouse was shipped to verify the ports supported.
d. Turn your computer on. At this point, your mouse will work with the built-in
Microsoft
®
Operating System.
Note: To use the extra features of your middle button, you must install the included
software.
P74279ea-F8E841eaBLK 24-03-2003 14:11 Page 7

8
Hardware Installation (continued)
USB Installation
a. Locate the Universal Serial Bus (USB) port on the back of your computer.
b. Plug your mouse into the port. Check the box in which your mouse was shipped to
verify the ports supported.
c. Sometimes, when connecting the mouse into a USB port, Windows will detect
the mouse and start the Add New Hardware Wizard. If it does not, then go to
d, below. If the Wizard does come up, follow the on-screen instructions.
1. You may be prompted to insert the Windows
®
software disk.
2. Insert the disk into the diskette driver.
3. The drive and CD will come up automatically. Confirm that it is the current
drive (for example: A:\).
4. Then click “OK”.
5. The file needed to support the USB mouse will be copied to your computer.
d. At this point, your mouse will work with the built-in Microsoft
®
Operating System.
Note: To use the extra features of your middle button, you must install the included
software.
P74279ea-F8E841eaBLK 24-03-2003 14:11 Page 8

9
Software Installation
A step-by-step guide to getting your mouse set up.
Important: Before installing the MiniScroller
™
software, it is strongly recommended that you
remove all other third party mouse drivers. DO NOT REMOVE THE WINDOWS
®
DEFAULT
MOUSE DRIVERS.
WARNING: To avoid damage, turn your computer off before plugging or unplugging any
pointing devices.
Windows
®
95, Windows
®
98 and Windows NT
®
Installation
a. Insert the MiniScroller
™
diskette in the A: or B: drive
b. Click "Start" in the lower left corner of your screen
c. Then click "Run"
d. Type "A\:setup" (or "B\:setup") and then click "OK"
e. Follow the on-screen instructions to complete the installation of the MiniScroller
™
f. To make the process run smoothly:
1. Click "Next" two times
2. Type in your name and the company's name,
then click "Next"
3. Click "Next" two more times
4. Specify if you are using a USB or PS/2 connection
(refer to section 2.1) then click "OK"
5. Select "Yes, I want to restart my computer now" then click "Finish"
En
P74279ea-F8E841eaBLK 24-03-2003 14:11 Page 9

10
Troubleshooting
Problem #1:
Q: I can get into Windows
®
or into "Safe Mode"
but I cannot use the mouse.
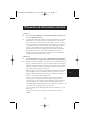
A: If you have more than one driver, this could be causing your computer to boot
in safe mode or not allow your mouse to work at all. To solve this problem, you
must remove the excess drivers. If you are using a PS/2 mouse, then the driver
must state that it is using a PS/2 driver. If you are using a USB mouse, then
the driver must state that it is using a USB driver. Go to "Mouse Properties"
(Start, Settings, Control Panel, Mouse) and look under the “General” tab. This
will show you which driver is currently recognized by Windows. If this is not the
same as the mouse you currently have plugged in, then you must remove this
driver and install the correct one.
Problem #2:
Q: If I have more than one mouse driver how do I remove the driver without
the mouse control? How do I boot into normal Windows
®
mode?
A: Use your "Windows
®
"Key at the bottom left hand corner of your keyboard.
Then use your [Up Arrow] to select "Settings", then use your [Right Arrow] to
select "Control Panel", and then press [Enter]. These steps have taken you to
the "Control Panel" where you can gain access to your "Device Manager". The
"Device Manager" shows your driver status and information and it will allow
you to modify their settings.
After entering the "Control Panel" use your [Up and Down Arrows] to select
"System" and then press [Enter]. After entering "System Properties" use your
[Right Arrow] to select "Device Manager". Then press [Tab] until you have
selected "Computer" and then use the [Down Arrow] until your "Mouse" is
highlighted. Then use your [Right Arrow] to expand and select your mouse
driver or drivers.
After you have chosen your mouse driver you can now modify it by removing
the driver or changing the driver.
To remove the driver you have selected, use your [Tab] key until the "Remove"
tab is selected. Then press [Enter]. This will remove the driver. Use your [Arrow
Keys] to select any other drivers and repeat the process until all but one driver
remains. Even if it is the wrong driver you can use it and change it to the
mouse driver you want.
P74279ea-F8E841eaBLK 24-03-2003 14:11 Page 10

11
En
Troubleshooting (continued)
After removing or changing the mouse driver, use your [Tab] key until "Close"
is selected and then press [Enter]. Then you will have to reboot your
computer. Use your [Windows
®
] Key at the bottom left hand corner of your
keyboard if you have one; if not, press {[Alt] + [S]}. Then use the [Up Arrow] to
select "Shut Down" and use your [Enter] key. Use your [Arrow Key] to select
"Restart" and press [Enter]".
Problem #3:
Q: After installing the mouse driver and rebooting, my mouse will not work.
How do I change the mouse driver without mouse control?
A: see Problem #2
Problem #4:
Q: Why does my external mouse not work with my laptop computer?
A: You may have to disable the onboard mouse in order to use an external
mouse. Try looking in your CMOS or BIOS in order to disable the onboard
mouse. If you do not have this option or do not know how to get into your
BIOS or CMOS, please follow the instructions in your computer manual or call
the computer dealer/ technical support for your computer.
P74279ea-F8E841eaBLK 24-03-2003 14:11 Page 11

12
How To Use Your Mouse
Care for Your Mouse
Maintenance of your Belkin (ball-style) Mouse is important. It is designed to provide
years of trouble-free service. A self-cleaning ball cage helps prevent dust and lint from
building up around the ball. However, if the pointer should skip or move abnormally
on-screen, we recommend you clean your mouse manually.
a. First, turn the retainer ring counter clockwise to remove the ball
b. Wipe the ball with a clean lint-free cloth
c. Blow into the ball cage to dislodge any dust and lint. If there is build-up on the
rubber rollers inside the ball cage, clean them using a cotton swab, lightly soaked
with isopropyl alcohol to remove any debris.
d. User maintenance is not required on optical model mice.
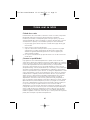
Get to know your options!
Programming your scroll wheel couldn't get any easier. On the bottom right-hand
corner of your screen, you will find a yellow box with an orange triangle in it. Click on
it, then click "Open".
Starting with the Universal Scroll section, you will be allowed to choose and restrict
the direction your mouse can scroll. "X-Scroll" and "Y-Scroll" are already selected for
you. This allows you to scroll left/right and up/down, respectively. Clicking off the
"X-Scroll" restricts scrolling to up and down only, while clicking off the "Y-Scroll" sets
scrolling for left and right only. Clicking off both disables the scrolling features of the
wheel.
The "Direction Reverse" field will reverse your scroll direction. Clicking it, depressing
the wheel, and moving your mouse to the left lets you scroll to the right (and vice
versa).
Your MiniScroller Optical Mouse will let you scroll by lines or by pages. Choosing to
scroll by page is recommended for larger documents that you need to browse
quickly. Clicking the scroll wheel once starts the "Auto Browse" mode, in which the
appearance of the arrow changes to a dot with four arrows directed away from it.
Moving the mouse in the direction that you wish to browse scrolls the page in that
direction. Scrolling speed is also adjustable in this mode: the further the pointer gets
from your original point, the faster the scrolling occurs.
P74279ea-F8E841eaBLK 24-03-2003 14:11 Page 12

13
En
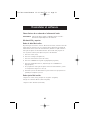
Software Uninstall
Removing the mouse software from your computer.
WARNING: To avoid damage, turn your computer off before plugging or
unplugging any pointing devices.
Windows
®
98 and higher
Miniscroller Optical Mouse:
a. Click on “Start”, then click on “Programs”
b. Click on “Browser Mouse”
c. Click on “Uninstall”
Miniscroller Ball Mouse:
First, it will be necessary to close the "Mouse Control Panel". Click the “X” button in
the upper right hand corner of the "Mouse Control Panel" window. When asked if
you are sure if you want to quit the "Mouse Control", click "Yes". Now you are ready
to begin the uninstall process.
a. Select "Start".
b. Select "Settings".
c. Select "Control Panel".
d. Select "Add/Remove Programs".
e. Select "Belkin Mouse Driver", then click "Add/Remove".
f. You will be asked if you are sure if you want to remove "Browser Mouse" and all
of its components. Click "Yes".
g. The uninstall process will begin. Follow the on-screen instructions to complete
the process.
P74279ea-F8E841eaBLK 24-03-2003 14:11 Page 13

Information
14
FCC Statement
DECLARATION OF CONFORMITY WITH FCC RULES FOR
ELECTROMAGNETIC COMPATIBILITY
We, Belkin Components, of 501 West Walnut Street, Compton CA 90220,
declare under our sole responsibility that the product series:
F8E841-BLK and F8E882-OPT
to which this declaration relates:
Complies with Part 15 of the FCC Rules. Operation is subject to the following
two conditions: (1) this device may not cause harmful interference, and (2) this
device must accept any interference received, including interference that may
cause undesired operation.
CE Declaration of Conformity
We, Belkin Components, declare under our sole responsibility that the F8E812, F8E841-BLK
and F8E882-OPT
, to which this declaration relates, is in conformity with Generic Emissions
Standard EN50081-1 and with Generic Immunity Standard EN50082-1 1992.
Belkin Components Limited Lifetime Product Warranty
Belkin Components warrants this product against defects in materials and workmanship for
its lifetime. If a defect is discovered, Belkin will, at its option, repair or replace the product at
no charge provided it is returned during the warranty period, with transportation charges
prepaid, to the authorized Belkin dealer from whom you purchased the product. Proof of
purchase may be required.
This warranty does not apply if the product has been damaged by accident, abuse, misuse,
or misapplication; if the product has been modified without the written permission of Belkin;
or if any Belkin serial number has been removed or defaced.
THE WARRANTY AND REMEDIES SET FORTH ABOVE ARE EXCLUSIVE IN LIEU OF ALL OTHERS,
WHETHER ORAL OR WRITTEN, EXPRESSED OR IMPLIED. BELKIN SPECIFICALLY DISCLAIMS
ANY AND ALL IMPLIED WARRANTIES, INCLUDING, WITHOUT LIMITATION, WARRANTIES OF
MERCHANTABILITY AND FITNESS FOR A PARTICULAR PURPOSE.
No Belkin dealer, agent, or employee is authorized to make any modification, extension, or
addition to this warranty.
BELKIN IS NOT RESPONSIBLE FOR SPECIAL, INCIDENTAL, OR CONSEQUENTIAL
DAMAGES RESULTING FROM ANY BREACH OF WARRANTY, OR UNDER ANY OTHER
LEGAL THEORY, INCLUDING BUT NOT LIMITED TO LOST PROFITS, DOWNTIME,
GOODWILL, DAMAGE TO OR REPROGRAMMING, OR REPRODUCING ANY PROGRAM
OR DATA STORED IN OR USED WITH BELKIN PRODUCTS.
Some states do not allow the exclusion or limitation of incidental or consequential damages
or exclusions of implied warranties, so the above limitations of exclusions may not apply to
you. This warranty gives you specific legal rights, and you may also have other rights that
vary from state to state.
P74279ea-F8E841eaBLK 24-03-2003 14:11 Page 14

En
P74279ea-F8E841eaBLK 24-03-2003 14:11 Page 15

Belkin Corporation
501 West Walnut Street • Compton • CA •
90220-5221 • USA
Tel +1 310 898 1100
Fax +1 310 898 1111
Belkin Components, Ltd.
Express Business Park •
Shipton Way • Rushden •
NN10 6GL • United Kingdom
Tel +44 (0) 1933 35 2000
Fax +44 (0) 1933 31 2000
Belkin Components B.V.
Starparc Building • Boeing Avenue 333 •
1119 PH Schiphol-Rijk • The Netherlands
Tel +31 (0) 20 654 7300
Fax +31 (0) 20 654 7349
Belkin GmbH
Hanebergstrasse 2
80637 München, Germany
Tel +49 (0) 89 / 1434 05-0
Fax +49 (0) 89 / 143405-100
Belkin Components, Ltd.
7 Bowen Cresent •
West Gosford • NSW 2250 • Australia
Tel +61 (2) 4372 8600
Fax +61 (2) 4325 4277
Free Technical support
Tel: 00800 22355460
e-mail: [email protected]
© 2003 Belkin Components. All rights reserved.
All trade names are registered trademarks of respective manufacturers listed.
P74279ea-F8E841eaBLK 24-03-2003 14:11 Page 16

En
P74279ea-F8E841eaBLK 24-03-2003 14:11 Page 17

18
Information Importante
Le connecteur USB est compatible
avec Windows
®
98, Windows
®
2000, Windows
®
ME e
Windows
®
XP
Le connecteur PS/2 est compatible
avec Windows
®
98, NT et 2000.
Connecteur USB
Connecteur PS/2
P74279ea-F8E841eaBLK 24-03-2003 14:11 Page 18
Page is loading ...
Page is loading ...
Page is loading ...
Page is loading ...
Page is loading ...
Page is loading ...
Page is loading ...
Page is loading ...
Page is loading ...

Belkin Corporation
501 West Walnut Street • Compton • CA •
90220-5221 • Etats-Unis
Tel +1 310 898 1100
Fax +1 310 898 1111
Belkin Components, Ltd.
Express Business Park •
Shipton Way • Rushden •
NN10 6GL • • Royaume-Uni
Tel +44 (0) 1933 35 2000
Fax +44 (0) 1933 31 2000
Belkin Components B.V.
Starparc Building • Boeing Avenue 333 •
1119 PH Schiphol-Rijk • Pays-Bas
Tel +31 (0) 20 654 7300
Fax +31 (0) 20 654 7349
Belkin GmbH
Hanebergstrasse 2
80637 München, Allemagne
Tel +49 (0) 89 / 1434 05-0
Fax +49 (0) 89 / 143405-100
Belkin Components, Ltd.
7 Bowen Cresent •
West Gosford • NSW 2250 • Australie
Tel +61 (2) 4372 8600
Fax +61 (2) 4325 4277
Free Technical support
Tel: 00800 22355460
e-mail: [email protected]
© 2003 Belkin Components. Tous droits réservés.
Toutes les raisons commerciales sont des marques déposées de leurs fabricants respectifs. P73429ea
P74279ea-F8E841eaBLK 24-03-2003 14:11 Page 28

Fr
P74279ea-F8E841eaBLK 24-03-2003 14:11 Page 29
Page is loading ...
Page is loading ...
Page is loading ...
Page is loading ...
Page is loading ...
Page is loading ...
Page is loading ...
Page is loading ...
Page is loading ...
Page is loading ...
Page is loading ...
Page is loading ...
Page is loading ...
Page is loading ...
Page is loading ...
Page is loading ...
Page is loading ...
Page is loading ...
Page is loading ...
Page is loading ...
Page is loading ...
Page is loading ...
Page is loading ...
Page is loading ...
Page is loading ...
Page is loading ...
Page is loading ...
Page is loading ...
Page is loading ...
Page is loading ...
Page is loading ...
Page is loading ...
Page is loading ...
Page is loading ...
Page is loading ...
Page is loading ...
Page is loading ...
Page is loading ...
Page is loading ...
Page is loading ...
Page is loading ...
Page is loading ...
Page is loading ...
Page is loading ...
Page is loading ...
Page is loading ...
Page is loading ...
-
 1
1
-
 2
2
-
 3
3
-
 4
4
-
 5
5
-
 6
6
-
 7
7
-
 8
8
-
 9
9
-
 10
10
-
 11
11
-
 12
12
-
 13
13
-
 14
14
-
 15
15
-
 16
16
-
 17
17
-
 18
18
-
 19
19
-
 20
20
-
 21
21
-
 22
22
-
 23
23
-
 24
24
-
 25
25
-
 26
26
-
 27
27
-
 28
28
-
 29
29
-
 30
30
-
 31
31
-
 32
32
-
 33
33
-
 34
34
-
 35
35
-
 36
36
-
 37
37
-
 38
38
-
 39
39
-
 40
40
-
 41
41
-
 42
42
-
 43
43
-
 44
44
-
 45
45
-
 46
46
-
 47
47
-
 48
48
-
 49
49
-
 50
50
-
 51
51
-
 52
52
-
 53
53
-
 54
54
-
 55
55
-
 56
56
-
 57
57
-
 58
58
-
 59
59
-
 60
60
-
 61
61
-
 62
62
-
 63
63
-
 64
64
-
 65
65
-
 66
66
-
 67
67
-
 68
68
-
 69
69
-
 70
70
-
 71
71
-
 72
72
-
 73
73
-
 74
74
-
 75
75
-
 76
76


Belkin BELKIN MINISCROLLER #F8E841QEABLK User manual
- Category
- Mice
- Type
- User manual
Ask a question and I''ll find the answer in the document
Finding information in a document is now easier with AI
in other languages
- italiano: Belkin BELKIN MINISCROLLER #F8E841QEABLK Manuale utente
- français: Belkin BELKIN MINISCROLLER #F8E841QEABLK Manuel utilisateur
- español: Belkin BELKIN MINISCROLLER #F8E841QEABLK Manual de usuario
- Deutsch: Belkin BELKIN MINISCROLLER #F8E841QEABLK Benutzerhandbuch
- Nederlands: Belkin BELKIN MINISCROLLER #F8E841QEABLK Handleiding
Related papers
-
Belkin F5L033NGGRY-AD Datasheet
-
-
-
-
Belkin SWITCH POUR PÉRIPHÉRIQUES USB 4X1 #F1U401EA Owner's manual
-
-
-
-
-
Other documents
-
Impecca WM300W User guide
-
SPEEDLINK SL-6179-SRD User guide
-
Sony PCGA-UMS5 Operating instructions
-
-
Hama 00057269 Owner's manual
-
-
-
-
 R-Go Tools R-Go Tools RGOHBRSWLBL R-Go HE Break Mouse User manual
-
Ebode IPV38WE User manual
