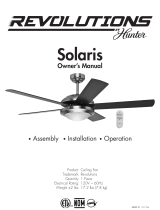
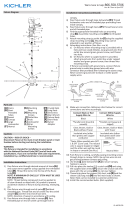
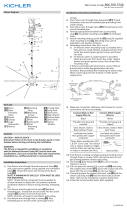
Hunter Fan 21688 Owner's manual

Type
Owner's manual

This manual is also suitable for

Hunter Fan 21688 is a 52-inch indoor ceiling fan with a 200W motor and a 120V, 60Hz electrical rating. It comes with three fan blades and a light kit. The fan can be installed with or without the downrod, depending on the height of your ceiling. It also has a three-speed wall control that allows you to adjust the fan speed to your liking. The fan is designed to provide many years of comfort and satisfaction.

Hunter Fan 21688 is a 52-inch indoor ceiling fan with a 200W motor and a 120V, 60Hz electrical rating. It comes with three fan blades and a light kit. The fan can be installed with or without the downrod, depending on the height of your ceiling. It also has a three-speed wall control that allows you to adjust the fan speed to your liking. The fan is designed to provide many years of comfort and satisfaction.

Solaris Ceiling Fan
Owner’s Manual
Product:
Trademark:
Quantity:
Electrical Rating:
Ceiling Fan
Revolutions
1 Piece
120 V ~ 60 Hz 140 W
44276-01 r021813
200
Models 21685 21687 21688 21689
44276-01 02/18/2013
2
You have chosen the best. Your new Revolutions ceiling fan will provide you with
many years of comfort and satisfaction.
44276-01 02/18/2013
3
u
.
44276-01 02/18/2013
4
Flat Head
44276-01 02/18/2013
5
.
.
METHOD A
Attach mounting bracket to outlet box using screws provided with the outlet box (Fig. 5a) Install rubber washers in
between the ceiling and mounting bracket to reduce vibration.
44276-01 02/18/2013
6
Slide the canopy onto the downrod (Fig. 6). Thread the power leads from the fan through the
canopy and downrod. Take care not to pull excessively on power wires. Damage and loose
connections could result from any abnormal pressure on these wires. Set downrod into yoke.
Rotate until the holes match. Be careful not to damage wiring. Insert connector pin through the
holes (Fig. 6A and 6B). Secure the pin by inserting the stop pin through the connector pin.
1.
44276-01 02/18/2013
7
2.
3.
4.
5.
6.
2.
1.
3.
4.
5.
6.
Fasten the canopy directly to the top of the fan motor housing with the three screws provided. (The downrod and
ball are not used for this installation). (Fig. 9A) If a metal ring washer with three holes is provided, use it to install
the canopy.
Hang the canopy (with the fan motor housing attached) from the tab on the hanger bracket (Fig. 9B). This will
allow you to make the electrical connections without having to hold the fan up.
Make the wire connections (refer to section titled “Electrical Connections”).
Put two screws in the hanger bracket, leaving them partially out (Fig. 9C).
Place the canopy up on the hanger bracket by inserting the slotted opening of the canopy on the screws (Fig. 9D).
Insert the remaining screws through the remaining canopy holes and tighten all four screws.
WARNING: Failure to completely tighten the screws in step 1 could result in fan loosening and possibly falling.
44276-01 02/18/2013
8
44276-01 02/18/2013
9
Attach the blue wire plug from the fan to the black wire plug from the light kit. Attach the white wire
plug from the fan to the white wire plug from the light kit. Attach the light kit to the switch housing using
three small screws provided (Fig. 12).
Install light bulbs (not included). Slide fan pull chain through hole in glass bowl and metal cap (Fig. 12B).
44276-01 02/18/2013
10
44276-01 02/18/2013
11
1.Use of standard light rheostat or continuously variable fan speed wall control will always cause
h
armonic distortions, or a humming noise. Many fan motors do not work quietly with solid state
v
ariable controls. If a quiet wall control is desired,use only 3-speed NOM approved wall controls.
2.Always allow a few daysbreak intime for any new fan at medium or high speed. Try todiagnose
t
he exact location of the noise by listening carefully from several sides (Blades, Motor,Light
F
an noise can come from a light kit.
3.Make sure all screws in the fan assembly and light kit are tight and properly threaded.If not, back
o
ut and retighten. Tighten these screws at least once a year because they may loosen slowly
o
ver time and cause a clicking noise.
4.Make sure the light kit is securely fastened to the fan and all glass screws are finger tightened
o
nly. Do not tighten with pliers or a screw driver.
5.Make sure mounting bracket is installed snugly to junction box.
6.Make sure wire nuts in switch housing or canopy are not rattling against each other or against
w
all of housing. Wrap with electrical tape if necessary.
7.Make sure the canopy is not touching the ceiling.
8.Assure that the screws fastening blade Arm to motor are tight and the lock washers provided for
t
hat purpose have been used.
Kit, etc ...).
.
n
44276-01 02/18/2013
12
Revolutions 52” Solaris Indoor Ceiling Fan
  • Page 1 1
  • Page 2 2
  • Page 3 3
  • Page 4 4
  • Page 5 5
  • Page 6 6
  • Page 7 7
  • Page 8 8
  • Page 9 9
  • Page 10 10
  • Page 11 11
  • Page 12 12

Hunter Fan 21688 Owner's manual

Type
Owner's manual
This manual is also suitable for

Hunter Fan 21688 is a 52-inch indoor ceiling fan with a 200W motor and a 120V, 60Hz electrical rating. It comes with three fan blades and a light kit. The fan can be installed with or without the downrod, depending on the height of your ceiling. It also has a three-speed wall control that allows you to adjust the fan speed to your liking. The fan is designed to provide many years of comfort and satisfaction.

Ask a question and I''ll find the answer in the document

Finding information in a document is now easier with AI