Page is loading ...

PROSCAN *
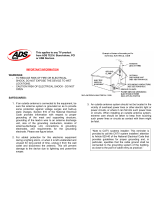
2.lCH SUBWOOFER SPEAKER SYSTEM
PSS2115! )

CAUTION
L Eil/lim ilii
CAUTION" TO REDUCE THE RISK OF ELECTRIC SHOCK,
DO NOT REMOVE COVER (OR BACK). NO USER-
SERVICEABLE PARTS INSIDE. REFER SERVICING TO
QUALIFIED SERVICE PERSONNEL.
®
DANGEROUS VOLTAGE:
The lightning flash with arrowhead symbol within an
equilateral triangle is intended to alert the user to the
presence of uninsulated dangerous voltage within the
product's enclosure that may be of sufficient magnitude to
constitute a risk of electric shock to persons.
ATTENTION:
The exclamation point within an equilateral triangle is
intended to alert the user to the presence of important
operating and maintenance (servicing)instructions in the
literature accompanying the appliance.
FCC WARNING:
This equipment may generate or use radio frequency energy. Changes or
modifications to this equipment may cause harmful interference unless
the modifications are expressly approved in the instruction manual. The
user could lose the authority to operate this equipment if an unauthorized
change or modification is made.
iPod is a trademark of Apple Computer, Inc., registered in the U.S. and
other countries.

INFORMATION:
This equipment complies with Class B digital device regulations.
This equipment generates, uses and can radiate radio frequency
energy and, if not installed and used in accordance with the
instructions, may cause harmful interference to radio
communications. However, there is no guarantee that interference
will not occur in a particular installation. If this equipment does
cause harmful interference to radio or television reception, which
can be determined by turning the equipment off and on, the user is
encouraged to try to correct the interference by one or more of the
following measures:
• Reorient or relocate the receiving antenna.
• Increase the separation between the equipment and receiver.
• Connect the equipment into an outlet on a circuit different from
that to which the receiver is connected.
• Consult the dealer or an experienced radio/TV technician for help.
WARNING: TO PREVENT FIRE OR SHOCK
HAZARD, DO NOT EXPOSE THIS UNIT TO RAIN
OR MOISTURE.
SURGE PROTECTORS:
It is recommended to use a surge protector for AC connection.
Lightning and power surges ARE NOT covered under warranty
for this product.
This Class B digital apparatus complies with Canadian
ICES=003.
2

Before using the unit, be sure to read all operating instructions carefully. Please
note that these are general precautions and may not pertain to your unit. For
example, this unit may not have the capability to be connected to an outdoor
antenna.
1. READ INSTRUCTIONS
All the safety and operating instructions should be read before the product is
operated.
2. RETAIN INSTRUCTIONS
The safety and operating instructions should be retained for future reference.
3. HEED WARNINGS
All warnings on the product and in the operating instructions should be adhered to.
4. FOLLOW INSTRUCTIONS
All operating and use instructions should be followed.
5. CLEANING
Unplug this product from the wall outlet before cleaning. Do not use liquid cleaners
or aerosol cleaners. Use a dry cloth for cleaning.
6. ATTACHMENTS
Do not use attachments not recommended by the product's manufacturer as they may
cause hazards.
7. WATER AND MOISTURE
Do not use this product near water-for example: near a bathtub, washbowl, kitchen
sink or laundry tub; in a wet basement; or near a swimming poot.
8. ACCESSORIES
Do not place this product on an unstable cart, stand, tripod, bracket or table. The
product may fall, causing serious injury and serious damage to the
product. Use only with a cart, stand, tripod, bracket or table
recommended by the manufacturer or sold with the product. Any
mounting of the product should follow the manufacturer's instructions,
and should use a mounting accessory recommended by the
manufacturer.
An appliance and cart combination should be moved with care.
Quick stops, excessive force and uneven surfaces may cause the
appliance and cart combination to overturn.
9. VENTILATION
Slots and openings in the cabinet and in the back or bottom are provided for
ventilation, to ensure reliable operation of the product and to protect it from
overheating. These openings must not be blocked or covered. The openings should
never be blocked by placing the product on a bed, sofa, rug or other similar surface.
This product should never be placed near or over a radiator or heat source. This
product should not be placed in a built-in installation such as a bookcase or rack
unless proper ventilation is provided or the manufacturer's instructions have been
adhered to.
10. POWER SOURCES
This product should be operated only from the type of power source indicated on
the marking label. If you are not sure of the type of power supply to your home,
consult your appliance dealer or local power company. For products intended to
PORTABLE CART WARNING
(symbol provided by RETAC)

operate from battery power, or other sources, refer to the operating instructions.
11. GROUNDING OR POLARIZATION
This product is equipped with a polarized alternating-current line plug (a plug having
one blade wider than the other). This plug wilt fit into the power outlet only one way.
This is a safety feature. If you are unable to insert the plug fully into the outlet, try
reversing the plug. If the plug should still fail to fit, contact your electrician to replace
your obsolete outlet. Do not defeat the safety purpose of the polarized plug.
12, POWER-CORD PROTECTION
Power-supply cords should be routed so that they are not likely to be walked on or
pinched by items placed upon or against them, paying particular attention to cords
at plugs, convenience receptacles, and the point where they exit from the appliance.
13. LIGHTNING
To protect your product from a lightning storm, or when it is left unattended and
unused for tong periods of time, unplug it from the walt outlet and disconnect the
antenna or cable system. This will prevent damage to the product due to lightning
and power-line surges.
14. POWER LINES
An outside antenna system should not be located in the vicinity of overhead power
lines or other electric light or power circuits, or where it can fall into such power lines
or circuits. When installing an outside antenna system, extreme care should be
taken to keep from touching such power lines or circuits as contact with them might
be fatal.
15. OVERLOADING
Do not overload wall outlets and extension cords as this can result in a risk of fire or
electric shock.
16. OBJECT AND LIQUID ENTRY
Never push objects of any kind into this product through openings as they may touch
dangerous voltage points or short out parts that could result in fire or electric shock.
17.
Never spill or spray any type
of liquid on the product.
OUTDOOR ANTENNA
GROUNDING
If an outside antenna is
connected to the product,
be sure the antenna
system is grounded so as
to provide some protection
against voltage surges and
built-up static charges.
Section 810 of the National
Electric Code, ANSI/NFPA
70, provides information
with respect to proper
grounding of the mast and
supporting structure,
grounding of the lead-in
ANTENNA
LEAD IN
WIRE
DISCHARGE UNIT
(NED SECTION 810-20)
SERVICE
(NEC SECTION 810-21)
ELECTRODE SYSTEM
NEC - NATIONAL ELECTRICAL CODE (NEC ART 250, PART H)
$2898A
EXAMPLE OF ANTENNA GROUNDING AS PER
NATIONAL ELECTRICAL CODE
4

wire to an antenna discharge product, size of grounding conductors, location of
antenna discharge product, connection to grounding electrodes and requirements
for grounding electrodes.
18. SERVICING
Do not attempt to service this product yourself as opening or removing covers may
expose you to dangerous voltage or other hazards. Refer all servicing to qualified
service personnel.
19. REPLACEMENT PARTS
When replacement parts are required, be sure the service technician uses
replacement parts specified by the manufacturer or those that have the same
characteristics as the original part. Unauthorized substitutions may result in fire,
electric shock or other hazards.
20. SAFETY CHECK
Upon completion of any service or repairs to this product, ask the service technician
to perform safety checks to determine that the product is in proper operating
condition.
21. WALL OR CEILING MOUNTING
The product should be mounted to a wall or ceiling only as recommended by the
manufacturer.
22. DAMAGE REQUIRING SERVICE
Unplug the product from the wall outlet and refer servicing to qualified service
personnel under the following conditions:
a. When the power-supply cord or plug is damaged.
b. If liquid has been spilled or objects have fallen into the product.
c. Ifthe product has been exposed to rain or water.
d. If the product does not operate normally by following the operating
instructions. Adjust only those controls that are covered by the
operating instructions, as an adjustment of other controls may result
in damage and will often require extensive work by a qualified
technician to restore the product to its normal operation.
e. If the product has been dropped or the cabinet has been damaged.
f. When the product exhibits a distinct change in performance-this
indicates a need for service.
23. HEAT
The product should be situated away from heat sources such as radiators, heat
registers, stoves or other products (including amplifiers) that produce heat.
24. NOTE TO CATV SYSTEM INSTALLER
This reminder is provided to call the CATV system instalter's attention to Article 820-
40 of the NEC that provides guidelines for proper grounding and, in particular,
specifies that the cable ground shall be connected to the grounding system of the
building, as close to the point of cable entry as practical.
25. The MAINS plug or an appliance coupler is used as the disconnect device, the
disconnect device shall remain readily operable.
5

1. Standby Indicator
2. Display
3. Remote Sensor
2 3
4. STANDBY/ON (_b)
Button
5. INPUT Button
sRs(o) ®
9 6. PLAY/PAUSE (_,11)
4 S 6 7 8 Button (iPod)
_ _ _ (_ (_ 7. V©LUME-Button
8. VOLUME + Button
9. iPod Dock
(_ INPUT MI - VOLUME +

REAR
I
2
1234
1. DVD Audio Left and Right Audio In Jacks
2. TVAudio Left and Right Audio In Jacks
3. S-Video OUT Jack
4. Video Out Jack
3 4
5. AC Cord
6. Fuse
7. POWER ON/OFF Switch
5
ACINPUT
O[_]]AC~120V/60Hz
FUSE
T2L250V
6 7
7

REMOTE
1
2
8
10
12
14
7
9
11
13
15
1. STANDBY/ON (¢)
button
2. MUTE button
3. INPUT button
4. SOUND button
5. PLAY/PAUSE (IHI)
Button (iPod)
6. Skip/Search 144
Button (iPod)
7. Skip/Search i_I,I
Button (iPod)
8. MENU button
(iPod)
9. Navigation UP
Button (iPod)
10. SELECT button
(iPod)
11. Navigation DOWN
Button (iPod)
12. BASS - button
13. BASS + Button
14. VOLUME - button
15. VOLUME + Button

Insert the AC plug (with the 2 blades) into a conveniently located
AC outlet having 120V, 60Hz.
NOTE: The AC plug supplied with
the unit is polarized to help minimize
the possibility of electric shock. If
the AC plug does not fit into a
nonpolarized AC outlet, do not file or
cut the wide blade. It is the user's
responsibility to have an electrician
replace the obsolete outlet.
\ AC Plug
AC Outlet
REMOTE BATTERY INSTALLATION
1.
.
.
Open the Battery Compartment
cover by sliding it off.
Install two (2)"AAA" batteries (not
included), paying attention to the
polarity diagram in the battery
compartment.
Replace the Battery Compartment
cover.
BATTERY PRECAUTIONS
Follow these precautions when using batteries in this device:
1. Use only the size and type of batteries specified.
2. Be sure to follow the correct polarity when installing the batteries as indicated
in the battery compartment. Reversed batteries may cause damage to the
device.
3. Do not mix different types of batteries together (e.g. Alkaline, Rechargeable
and Carbon-zinc) or old batteries with fresh ones.
4. If the device is not to be used for a long period of time, remove the batteries to
prevent damage or injury from possible battery leakage.
5. Do not try to recharge batteries not intended to be recharged; they can
overheat and rupture. (Follow battery manufacturer's directions.)
9

..... i .... i
Hole
/
/
Plastic Na_
If hanging below a hung TV,
make sure to leave at least 40ram
between the TV and this unit.
Measure for the holes in the wall as
shown, and then drill holes using an
8mm drill bit. Use a hammer and
gently nail in the eight anchors, if a
stud is not directly behind the hole.
=========================
ScPew(M4_161_l_)_2pcs
Attach the Wall Mount Bracket to
the wall using the eight ST4x40mm
screws and washers, making sure it
is very secure.
//
/
Place the main unit onto the Wall
Moun Bracket and screw in using
the two M4x16mm screws.
Please note that the wall mount kit is
included and find in the accessory bag.
10

If you are using an iPod that has photo/video capability, and your TV has a standard
video or an S-Video input, you can connect the unit to the external TV with the Video
cable or an S-Video cable (not included). You will then be able to view the photos/videos
from the iPod on your external TV.
TV
S-VIDEO VIDEO
NOTES:
, Set the TV's TV/VtDEO button or switch to the VIDEO setting.
, When connecting the unit, refer to the owner's manual of the TV, as
well as this manual.
, When connecting the unit, make sure the power is off and both units
are unplugged before making any connections.
, Make sure to go into the Settings menu of your iPod and set the TV
Out setting to ON; otherwise, you may not be able to view the
videos/photos on your external TV.
11

Connect a DVD to the DVD Audio in jacks and a TV to the TV Audio in jacks to output
the sound through this speaker.
DVD
ii i_i i
DVDAUDIO OUT I_ l
DVD VIDEO OUT
TV AUDIO OUT
TV
TV VIDEO IN
DVD: To listen to the DVD player connected to the DVD tn jacks, press the
INPUT button until DVD appears in the display.
TV: To listen to the TV connected to the TV In jacks, repeatedly press the
INPUT buton until TV appears in the display.
NOTES:
. When connecting the unit, refer to the owner's manual of the TV, as
well as this manual.
. When connecting the unit, make sure the power is off and both units
are unplugged before making any connections.
. Instead of the TV's or DVD's audio output, you can use an external
audio equipment, such as a non-iPod MP3 audio player, with a audio
left and right out jacks.
. tf your TV only has one audio input, the use of a "Y" connector may
be necessary. Visit your local electronics supply store.
12

VOLUME EQ
Press the VOLUME - button O to
decrease or the VOLUME +
buttonO to increase the volume.
The volume level will be indicator
briefly in the display.
n
Repeatedly press the SOUND
button to cycle through the
EQ/Bass settings (BYPASS, SRS-
WOW, TSXT and TSXT-DC) to
pick the desired sound preference.
BASS
il
Press the BASS - button _ to
decrease or the BASS + button
to increase the bass. The bass
level will be indicator briefly in the
display.
13

Rotate the iPod compartment as
shown. Insert the Universal Dock
included with your iPod (A) into
the iPod compartment (B) (as
shown), making sure the tabs are
facing front, and slip the tabs into
place. Press the rear side of the
Universal Dock until it is
positioned inside the iPod
compartment.
NOTE: You cannot use the
iPhone or iShuffle with this unit.
Slide the iPod into the Universal
Dock (as shown). Gently push
down so the connector on the
iPod slides onto the connector on
this unit.
Insert the iPod onto the holder. Gently push down so the connector on the
iPod slides onto the connector on the unit. If the unit is turned off, once you
connect the iPod, "iPod" will briefly appear in the display and then enter
Standby mode. Press the STANDBY/ON button to turn the unit ON.
Press the INPUT button to select the iPod mode.
NOTES:
• CHARGING: When the iPod is inserted into the dock, the iPod's battery will
charge until it is full.
• When the iPod is connected to this unit, it will be in the Pause mode.
• To remove the Universal Dock, insert your finger (or other object) into the gap
in the Universal Dock, then gently pull the Universal Dock out to remove it.
14

USING AN iPod WiTH THIS UNiT
With an iPod connected (see
previous page), if this unit is not
already on, turn this unit on by
pressing the POWER ON/OFF
switch on the main unit to the ON
position. If in the Standby mode,
simply press the STANDBY/ON
button on the remote; the Standby
indicator will go out.
Repeatedly press the INPUT
button to select iPod mode;
"iPod" will appear in the display.
You can operate the iPod using its
own controls, as per its owner's
manual, or you can use the
controls on this unit to operate the
iPod.
To play/pause the iPod:
Press the PLAY/PAUSE ( l_ll )
button to start playback on your
iPod. Press again to pause
playback and press yet again to
resume playback.
To skip forward or backward on
the iPod: Press the Tune/
Skip/Search 144O or)_,lO button to
skip to the beginning of the current
track/previous or next track.
To search forward or backward
on the iPod: Press and hold the
Tune/Skip/Search 144O or _')10
button to search within the
currently-playing track.
CONTINUED ON THE NEXT PAGE
15

To navigate your iPod menus:
At any time, press the MENU
button to go back to the previous
screen/menu. Repeatedly press
the MENU button to return to the
Main menu.
To navigate your iPod menus
(continued):
Use the Navigation UP O or
DOWN O button to browse
through the menus. Then, press
the SELECT button O to make
your selection.
Adjust the volume using the
VOLUME -_/+ _ buttons. Set
the EQ/BASS using the SOUND
buttonO, and the BASS using the
BASS-O/+ _ buttons. See page
13 for details.
To turn the power off, press the
STANDBY/ON button; the
Standby indicator will light.
16

tf you experience a problem with this unit, check the chart below before
calling for service.
SYMPTOM CAUSE SOLUTION
No sound from iPod.
No image/video on
your external TV.
iPod not charging.
Volume is
set to minimum.
Incorrectly connected.
iPod has incorrect
settings selected.
Incorrectly connected.
Unit is not connected
with the AC cord
and/or not turned on.
Increase volume using
VOL + / - buttons.
Check the connection
(see page 12).
In the Settings menu of
your iPod, set the TV
Out setting to ON.
Check the connection
(see page 11).
The iPod can charge only
when the unit is
connected with the AC
cord and turned on.
17

Model.....................................................................................PSS21151:
Connectioninterface:
Input ................................................................1x iPod dockingstation
1x TV Audio input
1x DVD Audio input
Output........................................................................1x S-Video
1x Video (CVBS)
Weight ........................................................................................9.78kg
Dimensions.............................150mm(H)X 1030mm(W)X 128mm(D)
Power source ...............................................................AC 120V/60Hz
Subwoofer impedance: ..............................................................8 Ohm
Surround impedance: ................................................................6 Ohm
S/N: ..............................................................................................60dB
Subwoofer power output: ..............................................................36W
Left and Right speakers power output: .....................................12Wx2
THD (1KHz, 1W): .........................................................................0.5%
Frequencyresponse (Subwoofer): ...........................40Hz~200Hz 5dB
Frequencyresponse (Left and Right channels): ....200Hz~20KHz 5dB
L/Rseparation (1KHz): ................................................................55dB
L/R Balance: ..................................................................................2dB
Accessory contents....................RCAAudio Cable, RCAVideo Cable,
Wall Mount Kit, RegistrationCard,
Warranty Card, Remote Control,
Quick Start Guide, User Manual.
Specifications are subject to change without notice.
This product has been designed specifically to work with iPod and has
been certified by the developer to meetApple performance standards.
Serivice & Support: 1-888-977-6722 (888-9PROSCAN)
www.proscanus.com
18
/