Page is loading ...

http://www.ome
g
a.com
e-mail: info
@
ome
g
a.com
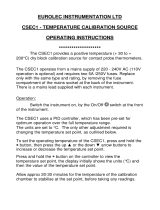
CL552
Portable Tem
p
erature Calibrato
r

OMEGAnet
SM
On-Line Service
http://www.omega.com
Internet e-mail
info@omega.com
Servicing North America:
USA:
ISO 9001 Certified
One Omega Drive, Box 4047
Stamford, CT 06907-0047
Tel: (203) 359-1660
e-mail: info@omega.com
FAX: (203) 359-7700
Canada:
976 Bergar
Laval (Quebec) H7L 5A1
Tel: (514) 856-6928
e-mail: info@omega.ca
FAX: (514) 856-6886
For immediate technical or application assistance:
Usa and Canada:
Sales Service: 1-800-826-6342 / 1-800-TC-OMEGA
SM
Customer Service: 1-800-622-2378 / 1-800-622-BEST
SM
Engineering Service: 1-800-872-9436 / 1-800-USA-WHEN
SM
TELEX: 996404 EASYLINK: 62968934 CABLE: OMEGA
Mexico and
Latin America:
Tel: (95) 800-826-6342
En Español: (95) 203-359-7803
e-mail: espanol@omega.com
FAX: (95) 203-359-7807
Servicing Europe:
Benelux:
Postbus 8034, 1180 LA Amstelveen, The Netherlands
Tel: (31) 20 6418405
Toll Free in Benelux: 0800 0993344
e-mail: nl@omega.com
FAX: (31) 20 6434643
Czech Republic:
ul. Rude armady 1868, 733 01 Karvina-Hranice, Czech Republic
Tel: 420 (69) 6311899
Toll free: 0800-1-66342
e-mail: [email protected]m
FAX: 420 (69) 6311114
France:
9, rue Denis Papin, 78190 Trappes
Tel: (33) 130-621-400
Toll Free in France: 0800-4-06342
e-mail: france@omega.com
FAX: (33) 130-699-120
Germany/Austria:
Daimlerstrasse 26, D-75392 Deckenpfronn, Germany
Tel: 49 (07056) 3017
Toll Free in Germany: 0130 11 21 66
e-mail: info@omega.de
FAX: 49 (07056) 8540
United Kingdom:
ISO 9002 Certified
One Omega Drive , River Bend Technology Centre
Northbank, Irlam, Manchester
M44 5EX, England
Tel: 44 (161) 777-6611
Toll Free in United Kingdom: 0800-488-488
e-mail: info@omega.co.uk
FAX: 44 (161) 777-6622
It is the policy of OMEGA to comply with all worldwide safety and EMC/EMI regulations that apply. OMEGA is constantly
pursuing certification of its products to the European New Approach Directives. OMEGA will add the CE mark to every
appropriate device upon certification.
The information contained in this document is believed to be corrected but OMEGA Engineering Inc. accepts no liability for any errors it
contains, and reserves the right to alter specifications without notice.
WARNING: These products are not designed for use in, and should not be used for, patient connected applications.
2

INTRODUCTORY NOTE
A
TTENTION: THIS MANUAL MUST BE REFERRED TO INSTRUMENTS WITH SERIAL N. 015298 ONWARDS.
This publication contains operating instructions, as well as a description of the principles of operation, of the
CL552 portable temperature calibrator. The information covers all models of the instrument, including the
basic equipment and its options and accessories.
The instructions reported in this manual, for the above mentioned equipment, are those relevant to:
• Start-up preparation
• Operation description
• Start-up instructions
• Shut-down instructions
• Typical faults and their remedies
OMEGA has used the best care and efforts in preparing this book and believes the information in this
publication are accurate. The OMEGA Products are subjected to continuous improvement, in order to pursue
the technological leadership; these improvements could require changes to the information of this book.
OMEGA reserves the right to change such information without notice.
OMEGA makes no warranty of any kind, expressed or implied, with regard to the documentation contained in
this book. OMEGA shall not be liable in any event - technical and publishing error or omissions - for any
incidental and consequential damages, in connection with, or arising out of the use of this book.
The instrument uses sophisticated analog and digital technologies. Repair and service require highly
qualified personnel. OMEGA Engineering, inc will supply, on request, all pertinent instructions and
procedures for service and calibration. OMEGA Engineering, inc specialists will be glad to give any
technical support you may require.
No part of this document may be stored in a retrieval system, or transmitted in any form, electronic or
mechanical, without prior written permission of OMEGA.
WARNING
THE CALIBRATOR CONTAINS CERAMIC FIBRE. AVOID COMING INTO CONTACT WITH THIS MATERIAL AND, IN ANY CASE, TAKE THE
NECESSARY PRECAUTIONS WHEN HANDLING THE CALIBRATOR.
WARNING
HAZARDOUS VOLTAGE IS PRESENT IN THIS ELECTRICAL EQUIPMENT DURING OPERATION.
NON-OBSERVANCE OF THE SAFETY INSTRUCTION CAN RESULT IN SEVERE PERSONAL INJURY OR PROPERTY DAMAGE.
ONLY QUALIFIED PERSONNEL SHOULD WORK ON OR AROUND THIS EQUIPMENT AFTER BECOMING FAMILIAR WITH ALL WARNINGS,
SAFETY NOTICES, AND MAINTENANCE PROCEDURES CONTAINED HEREIN.
ONLY QUALIFIED PERSONNEL OR OUR PERSONNEL SHOULD WORK ON THIS EQUIPMENT FOR MAINTENANCE OPERATION.
THE SUCCESSFUL AND SAFE OPERATION OF THIS EQUIPMENT IS DEPENDANT ON PROPER HANDLING, OPERATION AND MAINTENANCE
3

TABLE OF CONTENTS
1 GENERAL PERFORMANCE............................................................................................................... 5
1.1 Specifications................................................................................................................................................... 6
2 GENERAL FEATURES........................................................................................................................ 7
2.1 Main switch ...................................................................................................................................................... 7
2.2 Thermal characteristics .................................................................................................................................... 7
2.3 Temperature sensors ....................................................................................................................................... 7
2.4 Temperature protection.................................................................................................................................... 7
2.5 Ventilation holes............................................................................................................................................... 7
2.6 External digital indicator ................................................................................................................................... 7
2.7 Serial communication....................................................................................................................................... 7
2.8 Carrying handle................................................................................................................................................ 7
3 PHYSICAL DESCRIPTION.................................................................................................................. 8
4 FUNCTIONAL DESCRIPTION............................................................................................................. 9
2.4 Heating resistance ........................................................................................................................................... 9
2.5 Equalizing block ............................................................................................................................................... 9
4.1 Temperature controller..................................................................................................................................... 9
4.2 Temperature sensors ..................................................................................................................................... 10
4.3 Keyboard........................................................................................................................................................ 10
4.4 Display ........................................................................................................................................................... 10
5 PRE-OPERATIONAL CHECK ........................................................................................................... 11
5.1 Unpacking ...................................................................................................................................................... 11
5.2 Supply ............................................................................................................................................................ 11
5.3 Thermocouple wires....................................................................................................................................... 11
6 OPERATION & APPLICATION ......................................................................................................... 13
6.1 Recommendations ......................................................................................................................................... 13
6.2 Start-up .......................................................................................................................................................... 13
6.2.1 Preparation for the start-up........................................................................................................................ 13
6.2.2 How to fit the equalizing block ................................................................................................................... 14
6.2.3 Start-up instructions .................................................................................................................................. 14
6.3 Cooling........................................................................................................................................................... 16
7 SERIAL INTERFACE......................................................................................................................... 17
8 MAINTENANCE ................................................................................................................................. 18
8.1 Typical faults .................................................................................................................................................. 18
8.2 Safety recommendations ............................................................................................................................... 18
8.3 Protections ..................................................................................................................................................... 19
8.4 Calibration...................................................................................................................................................... 19
8.5 Storage .......................................................................................................................................................... 19
4

1 GENERAL PERFORMANCE
An highly accurate and powerful system to test and calibrate temperature sensors built into a transportable and compact
instrument.
The temperature parameter represents the most important factor to fulfil quality, operational safety and reliability of
industrial processes.
Thermocouples, resistance thermometers and any other temperature sensor, when installed in an industrial process,
should be inspected as they undergo mechanical, thermal and chemical stresses which accelerate their aging.
Therefore, it is a recommended procedure to inspect, check and calibrate each sensor during the commissioning phase
and at regular-programmed time intervals.
The temperature calibrator series CL552 is a transportable unit designed to obtain a controlled temperature with high
stability, high uniformity in a range from +200 °C to +1100 °C.
The internal metal block, designed with a self-lock feature to avoid dangerous undesired block drop , is interchangeable
and standard equipped with a multiple hole block with an immersion depth of 155 mm.
The portable temperature calibrator CL552 is a multifunction instrument designed to meet the needs of instrumentation
engineers, both in laboratory and in fieldwork.
Accurate, compact, rugged, easy to use; the ideal solution to test and calibrate:
• thermocouples
• resistance thermometers
• thermostats
• gas filled thermometers
• mercury thermometers
• material thermal test
CL552 has been designed using the most advanced thermal and electronic technologies to provide high stability and
accuracy with easy operation combined with a powerful operating flexibility.
5

1.1 Specifications
• Range:
from +200 to +1100 °C
• Stability:
±0.3 °C at 1100°C. Data recorded with ambient temperature of 20°C
±
3°C, power supply of 230 Vac
±
10% and
thermocouples type N and type K inserted inside the block.
• Reading accuracy:
± (0.2% + 1 digit) at 1000°C
• Radial Uniformity:
± 0.2 °C at 800°C
• Axial Uniformity:
± 0.3 °C at 100mm depth
• Heating rate:
17 °C/min (from +250 °C to + 1000 °C). Data recorded with ambient temperature of 20°C
±
3°C, power supply of 230
Vac
±
10% and thermocouples type N and type K inserted inside the block.
• Cooling rate
6 °C/min (from +1000 to +300 °C). Data recorded with ambient temperature of 20°C
±
3°C, power supply of 230 Vac
±
10% and thermocouples type N and type K inserted inside the block.
• Stabilising time:
approximately 20 min.
• Internal metal block:
standard INCONEL600 ø44x175mm depth with n. 6 holes ø 6.5 / 9.5 / 4.75 / 19 / 3.25 / 8.0 mm x 155mm depth
• Dimensions:
Oven: ø44 mm x 200 mm
Metal Block: ø44 mm x 175 mm
• Display:
LED display 2 lines of 4 digits
• Display resolution:
1 °C
• Regulating System:
PID microprocessor
• Tc Reference:
Type N connected to the PID regulator
• Thermal protection.
Thermostat with type K thermocouple
• Digital interface:
RS 232
• Power:
1200 VA
• EMC:
EN50081-I / EN50082-2
• Chassis:
separate shell for thermal and electronic sections with a carrying handle
• Size and Weights:
200 x 330 x 420 mm
Net 12 kg Gross 17 kg
6

2 GENERAL FEATURES
2.1 Main switch
The main switch can be found on the rear of the instrument; it is fitted with a socket for the voltage cable, a main switch
and two fuses of 6A for 230V mod. & 8A for 115V models.
N
OTE: USE ONLY FUSES F. 6,3X32 MM
All the electrical part can be found below the main switch; we recommend allowing calibrator cooling before switching it
off.
2.2 Thermal characteristics
The Inconel 600 block is inserted in to a resistor heated quartz tube ; the special alloy block insert , provides uniform
temperature all over it. The fan fitted inside the regulating block, expels the hot air from the rear of the equipment ; in this
way the head connection of the probe is always at ambient temperature. The internal microcontroller system handles,
through the keyboard, man-machine communications, the internal logic and grants the stability of the internal thermal
equalizing metal block of ±0.3 °C. The temperature control uses a sophisticated PID algorithm with memory stored
optimized tuning constants.
2.3 Temperature sensors
The temperature sensor used to adjust the instrument is an N thermocouple; the sensor used for protection is a K
thermocouple. Both are inserted directly into the equalizing block in order to supply a temperature value close to the real
value in the block. However, there could be some differences due to the tolerance of the sensors themselves.
2.4 Temperature protection
A light has been fitted on the rear part of the calibrator in order to warn that the safety device has been triggered by
reaching maximum temperature. When the temperature inside the calibrator is over 1150°C the lamp is on while the
heating has been switched off; the safety device is automatically reset at a temperature of about 1100°C. If the light is
on only temporarily and this situation is not going to repeat, there are no problems; if, however, this situation should be
repeated, the technical assistance service should be contacted in order to detect a possible fault.
2.5 Ventilation holes
Holes have been made on the base and on the rear of the calibrator so that air may circulate inside the calibrator; do not
obstruct these ventilation holes.
2.6 External digital indicator
When high accuracy is required, the portable temperature calibrator CL552 can be used in combination with high
accuracy and with an external high accuracy calibrated resistance thermometer (ask OMEGA for the pertinent literature).
2.7 Serial communication
CL552 is standard equipped with a full bi-directional RS232 digital interface for communication with a Personal
Computer. The transportable temperature calibrator can be part of an automatic calibration system with a programmable
cycle and the acquisition of all data can be required to generate a full calibration report. OMEGA engineers are ready to
support you with components, accessories and software that can fulfil your application requirements.
2.8 Carrying handle
The calibrator is fitted with a multi-position carrying handle which makes it easy to use as the handle can be placed so as
not to get in the way of the user. Never leave the handle lifted with the calibrator switch on at high temperatures
7

3 PHYSICAL DESCRIPTION
CL552 portable temperature calibrator consists of two modules mechanically and electrically interconnected.
The module on the left incorporates the heater, the thermal equalizing metal block, the thermocouple sensors and an air
blower.
The calibrator uses a microprocessor controller and a reference thermocouple type N ; the controller is equipped with an
RS232 serial interface. The controller displays the set point value and the actual temperature value inside the block.
8

4 FUNCTIONAL DESCRIPTION
The CL552 portable temperature calibrator functional block diagram is shown below.
POWER DRIVER
Cooling fan
A/D COVERTER
POWER SUPPLY
Mains supply 230 Vac
MICROCONTROLLER
KEYBOARD
RS232 INTERFACE
DISPLAY
N Thermocouple
Temperature controller
K Thermocouple
EQUALIZING BLOCK
INSERT BLOCK
The instrument functional blocks are the following ones:
• power supply
• power driver
• temperature controller
• keyboard
• digital interface
• display
2.4 Heating resistance
The resistance is made in ceramic fiber with a flooded heating element. The power of the resistance is 1100VA and it
can reach temperatures approaching 1150°C. Bear in mind, however, that a continuous use of the calibrator at extreme
temperatures reduces the life of the resistance itself. Limit the number of hours in which the resistance is used at
maximum temperatures to the time required by the calibrator in order to prolong the resistance life.
2.5 Equalizing block
The equalizing block is in INCONEL 600; it has a 45mm diameter and 200mm depth hole to make it possible to fit
various types of insert blocks. The function of these blocks is to find the mean temperature and make it uniform
throughout all the block depth.
Two slots have been made in the block into which the regulating and safety probes are inserted. A standard 6 hole insert
block is supplied with the calibrator to make it possible to fit various types of sensors. It should be inserted into the
equalizing block.
In addition to the holes for the test probes, a threaded hole has been made to screw the extractor. If you want to fit the
calibrator with an insert block having different hole diameters, we recommend to contact OMEGA technical support
department that will check if it is possible. This will avoid any unfortunate problems which might arise by using the wrong
tolerances are used
4.1 Temperature controller
A temperature controller is a PID microprocessor which can be set from 0 to 1110°C. The upper display shows the
measured value while the lower one displays the input set point value (this state is defined as "normal display mode").
9

4.2 Temperature sensors
The temperature sensor used to control the temperature, is a type N thermocouple; the sensor used to protect the
system is a thermocouple type K. Both are inserted directly into the equalizing block measure the temperature value
close to the real value in the block.
4.3 Keyboard
The operative mode set-up is made simple and easy with a sequence of menu pages that only requires 4 keys :
<F> (Function)= allows to enter in configuration mode. Allows to confirm the program changes.
<
> (Auto/Manual)= This function is always disabled.
<▲> = to increase the value of the displayed parameter.
<▼> = to decrease the value of the displayed parameter.
4.4 Display
The internal digital indicator is a double 4 digit LED display: the upper display shows the measured values while the
lower display shows the programmed set point value (we define the above condition as "normal display mode").
10

5 PRE-OPERATIONAL CHECK
5.1 Unpacking
The insert block is packed separately to avoid breaking the quartz tube during transport. The block must be fitted into the
calibrator when it is ready to be used.
Remove the instrument from its packing case and remove any shipping ties, clamps, or packing materials.
Carefully follow any instruction given on any attached tag.
Inspect the instrument from scratches, dents, damages to case corners etc. which may have occurred during shipment.
If any mechanical damage is noted, report the damage to the shipping carrier and then notify OMEGA Engineering, inc
directly or its nearest agent, and retain the damaged packaging for inspection.
A label, on the back of the instrument case, indicates the serial number of the instrument.
Refer to this number for any inquiry for service, spare parts supply or application and technical support requirements.
OMEGA Engineering, inc keeps an updated data base with all information regarding your instrument.
WARNING
THE INSERT BLOCK IS PACKED SEPARATELY TO AVOID BREAKING THE QUARTZ TUBE DURING TRANSPORT. THE BLOCK SHOULD BE
FITTED INTO THE CALIBRATOR WHEN IT IS READY TO BE USED AND SHOULD BE REMOVED WHEN THE CALIBRATOR HAS TO BE MOVED.
5.2 Supply
The calibrator runs on a voltage of 115 Vac, single-phase, 50/60Hz. A 2.5 meter cable is supplied with the calibrator
fitted with two conductors plus ground (2.5 mm
2
). Make sure that the plant is connected to ground correctly before
switching the instrument on.
5.3 Thermocouple wires
When making measurements where additional wires have to be connected to the thermocouple leads, care must be
exercised in selecting these wire types, not only when they are claimed to be of the same composition as the
thermocouple involved, but, also, of the same "quality".
Performance results, where high precision is required and in circumstances where some types of thermocouple wire
leads are added to the original installation, should be reviewed carefully for the impact of the choice of the additional wire
leads.
The quality of the thermocouple wire is established by the limit of error to be expected with its use.
There are three recognized levels of quality:
− Special or Premium grade
− Standard grade
− Extension wire grade
The error limits determining the grade quality differ from thermocouple type to thermocouple type, reflecting the degree of
difficulty in maintaining the precise levels of purity of the metal used.
11

Table A
Colour code & polarity for extension wires (ANSI)
Thermocouple Wires Color
code
E
Chromel ( + ) Chromel Purple
Constantan ( - ) Constantan Red
J
Iron ( + ) Iron White
Constantan ( - ) Constantan Red
K
Chromel ( + ) Chromel Yellow
Alumel ( - ) Alumel Red
R
Pt 13% Rh ( + ) Copper Black
Platinum ( - ) Alloy 11 Red
S
Pt 10% Rh ( + ) Copper Black
Platinum ( - ) Alloy 11 Red
T
Copper ( + ) Copper Blue
Constantan ( - ) Constantan Red
B
Pt 6% Rh ( + ) Copper
Pt 30% Rh ( - ) Copper
N
Nicrosil ( + ) Nicrosil Orange
Nisil ( - ) Nisil Red
The table below summarizes the error limits for Premium and Standard grades, while the Extension grade wire is
characterized by limits of error exceeding those in the table.
Errors up to ±4°C may be experienced when using the Extension grade thermocouple wire for J and K thermocouples.
Thermocouples limits of Error
The following ranges state the temperature limit for the indicated errors. Cold junction at 0 °C
Tc Class 1 Class 2 Class 3
type T 0.5°C (-40 to +125°C) 1°C (-40 to 133°C) 1°C (-67 to 40°C)
0.004 . T (T >125°C) 0.0075 . T (T >133 °C) 0.015. T (T <-67°C)
T range -40 to +350°C -40 to +350°C -200 to 40°C
type E 1.5°C (-40 to 375°C) 2.5°C (-40 to 333 °C) 2.5°C (-167 to +40°C)
0.004.T (T >375°C) 0.0075.T (T >333°C) 0.015.T (T <-167°C)
T range -40 to 800°C -40 to 900°C -200°C to 40°C
type J 1.5°C (-40 to 375°C) 2.5°C (-40 to 333 °C) 2.5°C (-167 to +40°C)
0.004.T (T >375°C) 0.0075.T (T >333°C) 0.015.T (T <-167°C)
T range -40 to 750°C -40 to 750°C -----
type K & N 1.5°C (-40 to 375°C) 2.5°C (-40 to 333 °C) 2.5°C (-167 to +40°C)
0.004.T (T >375°C) 0.0075.T (T >333°C) 0.015.T (T <-167°C)
T range -40 to 1000°C -40 to 1200°C -200°C to 40°C
type R & S 1°C (0 to 1100°C) 1.5°C (-40 to 600 °C) 4°C (600 to +800°C)
1 + 0.003 (T-100) 0.0075.T (T >600°C) 0.005.T (T>800°C)
(T >1100°C)
T range 0 to 1600°C 0 to 1600°C ----
type B 1°C (0 to 1100°C) 1.5°C (-40 to 600 °C) 4°C (600 to +800°C)
1 + 0.003 (T-100) 0.0075.T (T >600°C) 0.005.T (T>800°C)
(T >1100°C)
T range ----- 600 to 1700°C 600 to 1700°C
Note
: Specially selected "premium grade" wires are available on request
12

6 OPERATION & APPLICATION
6.1 Recommendations
ATTENTION
THE MICROPROCESSOR REGULATOR HAS BEEN CONFIGURED IN FACTORY WITH THE PARAMETERS SUITED TO WORK WITH REGARD TO
TECHNICAL SPECIFICATIONS.
DON’T CHANGE THESE PARAMETERS TO AVOID MISFUNCTION OR BREAKING OF THE CALIBRATOR WITH RISKS OF SERIOUS PERSONAL
INJURY.
Probe positioning:
To obtain the best result, follow these pieces of advice:
• Measure the diameter of the probe being checked.
• Check that the diameter of the hole in the calibration block is at least 0.3mm bigger than the diameter of the probe. If
this is not the case, use the block with the above-mentioned tolerances (fig.a).
• Avoid using holes which are too accurate and do not force the probes into the block.
• Insert the probe up to the bottom of the block: the sensitive element is in the optimal calibration zone (fig. b).
• When calibrating using probes shorter than the length of the hole in the block, position the sample reference sensor
at the same height as the sensor which is to be checked
• Calibration with a reference: take care to position the two probes, the standard one and the calibration one, at the
same depth and as close together as possible (fig. c).
• Always verify the range of the probes to be calibrated before using; the maximum temperature of the probes should
be higher than the temperature of the liquid otherwise the probe could break.
60
REFERENCE
PROBE
CALIBRATION
ZONE
Fig. a
Fig. b
NO
Y
ES
Fig. c
WARNING
THE TEMPERATURE DIFFERENCE IS PROPORTIONAL TO THE DIFFERENCE BETWEEN THE DIAMETER OF THE PROBE AND THE DIAMETER
OF THE HOLE.
DO NOT INSERT THE PROBE WHEN THE INSTRUMENT HAS ALREADY REACHED THE SET TEMPERATURE; THERMAL SHOCK CAUSES
INSTABILITY AND BREAKAGE OF THE SENSITIVE ELEMENT.
FOR THE CALIBRATION OF TEMPERATURE TRANSDUCER WITH SPECIAL EXECUTION, CALL OUR TECHNICAL OFFICE AND ASK FOR
EQUALISER BLOCK WITH SPECIAL DRILLINGS.
6.2 Start-up
6.2.1 Preparation for the start-up
Remove the calibrator from the carrying case and place it on a flat surface. Position the calibrator in a safe clean place;
leave enough space around the calibrator to allow the air to circulate well. Fit the equalizing block into the calibrator.
Connect the instrument to a mains supply with the nominal voltage specified on the back label. Remember that the
instrument requires a power of approximately 1200 VA. For safe operations the equipment must be correctly connected
to the ground.
13

WARNING
TO AVOID ANY SMELL IN THE ROOM IT IS BETTER TO SWITCH ON THE CALIBRATOR OUTSIDE THE ROOM FOR THE FIRST TIME
WHENEVER THE CALIBRATOR HAS TO BE MOVED, REMOVE THE BLOCK FROM THE QUARTZ TUBE IN ORDER TO PREVENT ANY
BREAKAGE OF THE TUBE.
IT IS A GOOD IDEA IF THESE OPERATIONS ARE CARRIED OUT WITH THE CALIBRATOR AS CLOSE TO AMBIENT TEMPERATURE AS
POSSIBLE.
6.2.2 How to fit the equalizing block
Generally after installing the furnace, the equalizer block and the ceramic fiber insulation may be inserted. Carefully
insert the block and the ceramic fiber insulation into the tube (see the following drawing).
Care should be taken to prevent dirt, insulation, or other foreign materials from getting between the block and the quartz
tube it might also break during heat up due to thermal expansion differences. The fit between the block and the tube is
typically loose in order to accommodate this expansion.
A handle is provided to insert the block. It consists of a stainless steel rod with a M8x15 threaded end which is screwed
into the top of the block. The block is then lowered down over the control and the sensor is cut-out using the handle
allowed to rest on the ceramic fiber insulation on the bottom of the well. There are grooves on either sides of the block for
the sensor to slide into. The grooves have a tapered opening at the bottom to make the entry of the sensor easier.
Insert the ceramic fiber insulation on the top of the block, using the handle. Make the holes of the ceramic fiber match
with the holes of the equalization block.
6.2.3 Start-up instructions
ATTENTION
THE CALIBRATOR CAN ONLY BE USED CORRECTLY IF THE USER HAS A GOOD KNOWLEDGE OF ITS BASIC FEATURES.
BEFORE STARTING THE CALIBRATION FOLLOW THE INSTRUCTIONS FOR THE POSITIONING OF THE EQUALISING BLOCK
ATTENTION
DO NOT INSERT THE SENSOR UNDER TEST INTO THE THERMAL EQUALISING BLOCK WHEN THE OVEN IS AT A HIGH TEMPERATURE. A
THERMAL SHOCK COULD DAMAGE THE SENSING ELEMENT OF THE PROBE.
AT THE END OF THE TEST DO NOT REMOVE IMMEDIATELY THE PROBE/S FROM THE THERMAL EQUALISING BLOCK.
WAIT FIRST FOR THE TEMPERATURE CALIBRATOR COOLING.
AT THE END OF THE OPERATION : WAIT FOR THE THERMAL EQUALISING BLOCK TO BE COMPLETELY COOLED BEFORE PLACING THE
CALIBRATOR INTO THE CARRYING CASE.
There are two ways to calibrate the probe: calibration with internal indicator, or calibration with external reference.
Calibration with internal indicator:
Make reference to the temperature value of the display (fig. 4).
It is advisable to refer the value to the test report to compensate for the error of the display.
14

fig. 4
Calibration with external reference:
Make reference to the temperature value of the external standard instrument (fig. 5).
Put the sensitive elements of the probes near and at the same depth.
Fig. 5
Before undertaking any calibration follow these pieces of advice:
Start the calibration only at ambient temperature: any thermal shock can break the sensitive element of the probe and
injure the operator.
Fit the equalizer block inside the oven.
Put the probe to check into the equalizer block:.
Push on the main switch and wait for the end of the autotest procedure.
Set the required temperature value on the set point:
Press the <5> key to increase the set point value.
Press the <6> key to decrease the set point value.
The input value is confirmed automatically.
Wait for the stabilization of the oven before starting any calibration.
When working at different temperatures set the set point on the new value and wait for the stabilization.
When the set point has been changed, the temperature read on the display and the measured one in the block may not
proceed at the same speed; this is because there are differences between the sensors used and the position of the
same inside the block. Temperature stability inside the block will have to be checked on the external reader and not on
the temperature controller display because the probe connected to it is very close to the heating resistance.
15

The temperature indicated by the display must not be considered as a reference temperature but only as a general
indication of the temperature inside the block.
We suggest to insert a primary standard with SIT certificate into the block; compare the probe indications with the values
indicated by the standard.
Never use the primary standard: it's possible to calibrate the instrument in more significant points, comparing the
displayed temperature to the temperature of standard one.
ATTENTION
AT THE END OF THE CALIBRATION DO NOT REMOVE THE PROBE IF IT IS STILL AT A HIGH TEMPERATURE. ALWAYS ALLOW THE
CALIBRATOR TO COOL OFF WITH THE PROBE STILL INSERTED IN ORDER TO AVOID THERMAL SHOCKS TO THE PROBE ITSELF AND ANY
HARM TO PEOPLE OR THINGS.
BEFORE SWITCHING THE CALIBRATOR OFF MAKE SURE THAT THE BLOCK TEMPERATURE IS ALMOST THE SAME AS THE AMBIENT
TEMPERATURE.
6.3 Cooling
To reduce the oven temperature, change the set point and wait for the cooling.
If necessary, the CL552 with the standard insert block, can be completed with a cooling device. It is important to use this
system only with temperature below 650°C.
How to use:
Insert into the block the cooling device only with the temperature below 650°C
Supply with forced air at 6bar.
Set the air flow with the pin valve.
The diagram reported below shows the cooling times with and without the cooling device.
16

7 SERIAL INTERFACE
On the rear part of CL552 there is a 9 pole socket connected to the temperature controller which enables the calibrator to
be completely controlled by a computer. The serial link protocol is a full bi-directional RS232 digital interface. The
Portable Temperature Calibrator can be part of an automatic calibration system with a programmable cycle and the
acquisition of all data can be required to generate a full calibration report.
1
Tx GNDRx
17

8 MAINTENANCE
CL552 portable temperature calibrator has been factory tested and calibrated before shipment.
The calibration should be verified and re-adjusted if the instrument shows an error exceeding the declared specifications
or when a critical active or passive component is replaced (either at component level or at board level)
OMEGA Engineering, inc will supply, on request, a technical reference manual, with all instructions and
recommendations for service and calibration.
OMEGA Engineering, inc engineers will give prompt support for any assistance request.
The calibrator does not require any special type of maintenance. Clean the equalizer block periodically to remove any
waste. Keep the calibrator in a clean dry place and avoid moving it with the equalizer block inserted.
8.1 Typical faults
Before carrying out these operations the instrument must be disconnected from the power supply; the equalizer block
must be at ambient temperature
N°
FAULT DESCRIPTION
FAULTY COMPONENT OR
FUNCTION
METHOD FOR REMOVAL
1
The calibrator does not
work when the power cable
is connected and the main
switch is turned on.
- The fuse is cut off.
- The power cable is cut off.
- The main switch is faulty.
- Replace the fuses.
- Replace the power cable
with a similar one.
- Replace the cup socket
2
The fuses are triggered
when the power cable is
connected and the main
switch is turned on.
- The main switch is faulty
- There is a short circuit in the
heating element.
- Replace the cup socket.
- Contact our technical
office
3
The control panel is working
properly but the
temperature does not
increase.
- The static relay is faulty.
- The heating element is cut off.
- The safety thermostat has
been triggered.
- The temperature controller is
not generating a signal.
- Replace the static relay.
- Contact our technical
office
- Replace the temperature
controller
4
The display indicates a
different temperature from
the one measured in the
block.
- The thermocouple N is faulty.
- The temperature controller is
faulty.
- Replace the thermal element
- Replace the temperature
controller
5
The temperature does not
stop at the value which has
been set.
The static relay is faulty.
Replace the static relay.
6
The temperature does not
decrease to the set value as
quickly as it should.
- The temperature controller is
faulty.
- The cooling fan is faulty.
- Replace the temperature
controller
- Contact our technical
office
7
The display indicates ' -Sbr ‘ The thermal control element is
cut off or is in short circuit.
Replace the probe.
8
The temperature is different
from ±40°C compared to the
set point.
The safety thermostat is
working.
Contact our technical office.
8.2 Safety recommendations
1. Due to the fact that CL552 is a portable instrument to be used on the field, it is very important to ensure that the
socket has been grounded correctly when connecting it to the power supply.
2. Carry out the maintenance and repair operation only with the equipment at ambient temperature and disconnected
from the electric power.
3. During the use of the calibrator, the upper protection grid may overheat.
4. Never leave the handle lifted with the calibrator switch on at high temperatures.
5. Don’t touch the probe to calibrate when it’s in the block.
6. Don’t switch the calibrator off when it is working at high temperature because the protection grid and the carpentry
may overheat.
7. When the calibrator has to be moved, remove the block from the quartz tube in order to prevent any breakage of the
tube. It is a good idea if these operations are carried out with the calibrator as close to ambient temperature as
possible.
18

8. Never put any type of liquid inside the block.
ATTENTION:
THE EQUIPMENT HAS BEEN DESIGNED TO PROTECT THE OPERATOR FROM ELECTRICAL AND HIGH TEMPERATURE HAZARDS. HOWEVER,
THE FOLLOWING CAUTIONS SHOULD BE TAKEN: WEAR PROTECTIVE GLOVES.
DO NOT PLACE ANY COMPONENT ON THE TOP OF THE OVEN.
DO NOT OPERATE THE UNIT CLOSE TO FLAMMABLE COMPOUNDS.
8.3 Protections
The equipment is based on the following devices to protect any operation from hazard:
• When there is a breakage in the temperature sensor this is recognised by the temperature controller which switches
off the heat output.
• If the temperature exceeds 1110°C the temperature controller switches on a safety device which, in turn, switches off
the static heating relay
• Max. temperature safety thermostat, with a K thermocouple, to disconnect the heating resistance each time the
temperature exceeds 1500°C.
• Protection grid to avoid any contact with the internal oven.
• Protection fuses
• Ground conductor.
8.4 Calibration
Efficiency and accuracy of CL552 can be grant with a periodical calibration. Frequency of calibration is not a fix period
but depends by the use if the instrument; our suggestion is to calibrate the instrument every year.
8.5 Storage
Store the instrument in the original package, at a temperature from -30°C to +60°C, with R.H. less than 90%.
19

WARRANTY/DISCLAIMER
OMEGA ENGINEERING, INC. warrants this unit to be free of defects in materials and workmanship for a period of 13
months from date of purchase. OMEGA Warranty adds an additional one (1) month grace period to the normal one (1)
year product warranty to cover handling and shipping time. This ensures that OMEGA’s customers receive maximum
coverage on each product.
If the unit should malfunction, it must be returned to the factory for evaluation. OMEGA’s Customer Service Department
will issue an Authorized Return (AR) number immediately upon phone or written request. Upon examination by OMEGA,
if the unit is found to be defective it will be repaired or replaced at no charge. OMEGA’s WARRANTY does not apply to
defects resulting from any action of the purchaser, including but not limited to mishandling, improper interfacing,
operation outside of design limits, improper repair, or unauthorized modification. This WARRANTY is VOID if the unit
shows evidence of having been tampered with or shows evidence of being damaged as a result of excessive corrosion;
or current, heat, moisture or vibration; improper specification; misapplication; misuse or other operating conditions
outside of OMEGA’s control. Components which wear are not warranted, including but not limited to contact points,
fuses, and triacs.
OMEGA is pleased to offer suggestions on the use of its various products However, OMEGA neither assumes
responsibility for any omissions or errors nor assumes liability for any damages that result from the use of its
products in accordance with information provided by OMEGA, either verbal or written. OMEGA warrants only
that the parts manufactured by it will be as specified and free of defects. OMEGA MAKES NO OTHER WAR-
RANTIES OR REPRESENTATIONS OF ANY KIND WHATSOEVER, EXPRESSEO OR IMPUED, EXCEPT THAT OF
TITLE, AND ALL IMPLIED WARRANTlES INCLUDING ANY WARRANTY OF MERCHANTABIUTY AND RTNESS
FOR A PARTlCULAR PURPOSE ARE HEREBY DISCLAIMED. LIMITATlON OF LIABILITY: The remedies of
purchaser set forth herein ate exclusive and the total liability of OMEGA with respect to this order, whether
based on contract, warranty, negligence. Indemnification, strict liability or otherwise, shall not exceed the
purchase price of the component upon which liability is based. In no event shall OMEGA be liable for
consequential, incidental or special damages.
CONDITIONS: Equipment sold by OMEGA is not intended to be used, nor shall it be used: (1) as a ”Basic Component”
under 10 CFR 21 (NRC), used in or with any nuclear installation or activity; or (2) in medical applications or used on
humans. Should any Product(s) be used in or with any nuclear installation or activity, medical application, used on
humans, or misused in any way, OMEGA assumes no responsibility as set forth in our basic WARRANTY/DISCLAIMER
language, and additionally, purchaser will indemnify OMEGA and hold OMEGA harmless from any liability or damage
whatsoever arising out of the use of the Product(s) in such a manner.
RETURN REQUESTS / INQUIRIES
Direct all warranty and repair requests/inquiries to the OMEGA Customer Service Department. BEFORE RETURNING
ANY PRODUCT(S) TO OMEGA, PURCHASER MUST OBTAIN AN AUTHORIZED RETURN (AR) NUMBER FROM
OMEGA’S CUSTOMER SERVICE DEPARTMENT (IN ORDER TO AVOID PROCESSING DELAYS). The assigned AR
number should then be marked on the outside of the return package and on any correspondence.
The purchaser is responsible for shipping charges, freight, insurance and proper packaging to prevent breakage in
transit.
FOR WARRANTY
RETURNS, please has the
following information available BEFORE contacting
OMEGA:
1. P.O. number under which the product was
PURCHASED,
2. Model and serial number of the product under
warranty, and
3. Repair instructions and/or specific problems
relative to the product.
FOR NON-WARRANTY
REPAIRS, consult OMEGA for
current repair charges. Have the following information
available BEFORE contacting OMEGA:
1. P.O. number to cover the COST of the repair,
2. Model and serial number of product, and
3. Repair instructions and/or specific problems relative to
the product.
OMEGA’s policy is to make running changes, not model changes, whenever an improvement is possible. This affords our customers the
latest in technology and engineering.
OMEGA is a registered trademark of OMEGA ENGINEERING, INC.
(C) Copyright 1999 OMEGA ENGINEERING, INC. All rights reserved. This document may not be copied, photocopied, reproduced,
translated, or reduced to any electronic medium or machine-readable form, in whole or in part, without prior written consent of OMEGA
ENGINEERING, INC.
20
/