Page is loading ...

iOptron Corp. | 6E Gill Street | Woburn, MA 01801 USA | www.iOptron.com
Page 1
SmartStar
®
CubePro™ GOTO AltAz Mount with GPS
#8200
FEATURES
• Alt‐Azimuth Mount– The Cube™‐‐ The only mount of its kind for ultimate rotation
• Includes the GoToNova
®
Controller. The most intuitive controller on the market.
• 130,000 object database with 256 user‐defined objects
• The largest LCD screen on the market with 8 lines and 21‐character Hand Control with backlit LED buttons.
• USB Port for PC Laptop control and firmware upgrades (ASCOM protocol)
• Drive motor with 9‐speed setting for precise tracking
• Dual‐axis Servomotor with optical encoder
• 1‐inch stainless steel tripod
• Built‐in 32‐Channel GPS
• Operates on 8 AA batteries (not included)
• Included AC adaptor (Optional DC adaptor available)
• 8 lb. payload
PACKAGE CONTENTS
• The Cube
TM
telescope mount (with built‐in GPS)
• Go2Nova
®
#8401 hand controller
• Controller cable
• 1” stainless steel tripod with tripod tray
• 1.5 kg Counterweight and CW shaft
• AC adaptor with cord
ONLINE CONTENTS (click under “Support” menu) www.iOptron.com
• Manuals (you will need to refer to the manual for details on set‐up and operation).
• Tips for set up
• Hand controller firmware upgrades (check online for latest version)
• Reviews and feedback from other customers
ASSEMBLY TERMS
1. Telescope tube
2. Dovetail lock
3. Hand held controller
4. Altitude lock
5. Mount
6. Tripod
7. Inner support /Tripod bolt.
8. Tray
9. Tray lock
10. CW and CW shaft (not shown)

iOptron Corp. | 6E Gill Street | Woburn, MA 01801 USA | www.iOptron.com
Page 2
Quick Set‐up
Note: This is a brief outline for getting started. Please refer to the full manual at ww.iOptron.com for details.
Step 1. Installing Tripod
Extend tripod legs to full extension.
Attach mount to tripod using the long bolt
(#7). Slide tray on bottom of shaft. Then
screw on round black knob (#9).
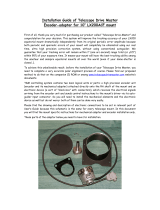
Step 2. Installing Batteries
Pull the batteries compartment cover (shown) open.
Gently pull the batteries holder out of the compartment to avoid breaking
the attached wires.
Step 2a.
Insert 8 AA batteries (not included) according to the diagrams on the
holder.*
Replace the holder back into the batteries compartment and replace the
cover.
Note: fit the batteries holder back into the compartment with the attached
wires at the bottom right corner (see arrow in the photo).
* Use only fresh batteries; do not mix fresh and old batteries;
insufficient battery power may cause error messages.
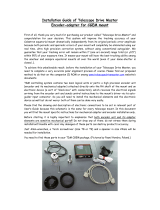
Step 3. Attaching Telescope
Attach telescope to mount using the dovetail lock knob (#2).
Step 4. Connecting Hand Controller
Plug hand controller into any one of the HBX (handbox) ports on the
mount. Plug in power plug if a AC adaptor is used.
Turn on power. Now you are ready to observe. Use the 4 Arrow keys
(▲▼◄►) to rotate the scope Up, Down, Left, and Right. Use the
Number key to change the slew speed from the slowest (1 - 1X) to the
fastest (9 - MAX).
The other HBX is reserved for accessories, such as electronic focuser,
laser pointer and autoguider adapter. DO NOT plug non-iOptron
accessories into the unit to avoid damaging the mount or
accessories
Dovetail
lock (#2)

iOptron Corp. | 6E Gill Street | Woburn, MA 01801 USA | www.iOptron.com
Page 3
Step 5. Installing counterweight Shaft
This step allows you to attach the counterweight to the mount. (note: if
you have a scope less than 7 lbs., attaching a counterweight is optional).
Unlock and remove the altitude lock (#4). Screw on the counterweight
shaft and tighten it.
Step 6. Installing CW
Slide the counterweight onto the
counterbalance shaft. Next, insert the brass
pin into the hole on the counterweight.
Secure the counterweight by tightening the
lock knob.
Counter weight is heavy. Please
handle with care to avoid injury!
Step 7. Power on the mount
Turn on the mount and wait for controller to display “GPS-OK” in top
right corner —not “GPS-ON”. GPS provides Latitude, Longitude, and
current universal time (UT) time only.
Step 8. Setting up controller
Press the MENU key once.
Scroll (with the ▲/▼ keys) to “Set Up Controller”
Press ENTER.
Then go to Set Up Local Time and Site in the next screen.
Select and then press ENTER.
Step 9. Set Up Local Time
Enter date and day-light savings (Y-yes. N-no).
(Note: use arrow keys to scroll through screen and use numbered keypad to
change numbers)

iOptron Corp. | 6E Gill Street | Woburn, MA 01801 USA | www.iOptron.com
Page 4
Step 10. Set Up Site
GPS will provide the longitude and latitude information. If GPS signal is
not available, these values can be manually entered here.
The last line of this screen is for setting time zone information.
Examples: minutes “behind” UT or “ahead of” UT
• New York: 300 Min. “behind” UT
• Los Angeles: 480 Min. “behind” UT
• Rome: 60 Min. “ahead of” UT
• Sydney: 600 Min. “ahead of” UT
Press ENTER when finished.
Step 11. Select and Slew to an object
The mount is now ready to find (GOTO) and track objects.
Press Menu button.
Scroll to “Select and Slew”
Press ENTER.
Step 12.
Select a category (ex. “Planets, Sun, Moon”) by scrolling with the arrow
keys.
Press ENTER.
Then select an object (ex. “Moon”) by scrolling with the arrow keys.
Press ENTER.
The telescope will automatically slew to the object and lock on. It will
automatically begin to track once it locks on to the object.
Step 13. Sync to Target (Use this to center and synchronize the
object selected in Step 12).
Press MENU. Scroll to “Sync. To Target”. Press ENTER.
Next use the arrow keys (▲▼◄►) to center the object in the eyepiece.
Then press ENTER again to synchronize the object with the memory.
To slew to other objects simply repeat steps 11 and 12. You do not
need to repeat step 13 except for adjustments as needed.
(Refer to the full online manual for 1-star and 2-star alignments. Sync to
Target is similar to 1-star Alignment except that you choose the object
to align to.)
/