Page is loading ...

Quadratec®
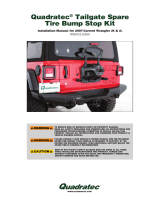
Tube Doors for Wrangler
Installation Manual: for ’07 - Current JK & JL Vehicles #11147.10XX
READ ALL SAFETY MESSAGES AND UNDERSTAND ALL
INSTRUCTIONS BEFORE ATTEMPTING TO INSTALL THIS
PRODUCT. ALWAYS WEAR SAFETY GLASSES DURING INSTALL.
PARTS LIST:
Front or Rear Doors QTY 2
Door Check Straps QTY 2
Mirror Mounting Hardware (Front Doors Only)
1/4” Countersunk Screws QTY 6
Hex Nuts QTY 6
Split Washers QTY 6
Washers QTY 6
REQUIRED TOOLS:
Safety Glasses
5mm Hex Key For Door
5/32” Hex Key For Mirrors
13mm Wrench For Doors
3/8” Wrench For Mirrors
T50 Torx Socket For Door Nuts
T40 Torx Socket For Hinge Bolts
10 mm Wrench For Door Stops
JK
Version JL
Version
Front
Front
Rear Rear

2
READ ALL SAFETY MESSAGES AND ALWAYS WEAR
SAFETY GLASSES WHEN WORKING WITH TOOLS.
A HAZARDOUS SITUATION WHICH, IF NOT AVOIDED, COULD RESULT IN DEATH OR
SERIOUS INJURY. YOU CAN BE KILLED OR SERIOUSLY HURT IF YOU DON’T FOLLOW
INSTRUCTIONS.
A HAZARDOUS SITUATION WHICH, IF NOT AVOIDED, COULD RESULT IN MINOR
OR MODERATE INJURY. YOU CAN BE MODERATELY HURT AND ALSO MAY SUFFER
PROPERTY DAMAGE IF YOU DON’T FOLLOW INSTRUCTIONS.
CAREFUL ATTENTION IS REQUIRED TO THIS INSTRUCTION OR OPERATION BUT
DOES GENERALLY NOT RELATE TO PERSONAL INJURY. DAMAGE TO YOUR PRODUCT
OR OTHER PROPERTY MAY RESULT IF YOU DON’T FOLLOW INSTRUCTIONS.
A Few Words About Product Safety:
Your Quadratec® Tube Doors enhance
the look, visibility, and performance of
your off-road capable vehicle. Before
installation, please review the following
safety information and installation
recommendations.
Throughout these instructions import-
ant safety information is generally
preceded by one of three signal words
indicating the relative risk of injury,
property damage or adverse conse-
quence. The signal words mean:
Before You Begin Installation:
Congratulations on your purchase.
When unpacking, check to make sure
all parts are included and not damaged
due to shipping. If any part is missing or
broken, please call Customer Service
at 800-745-6037 as soon as possible.
Thank you again for your purchase
and let’s start the installation process.
THESE DOORS ARE NOT INTENDED TO PROTECT OR CONTAIN THE
VEHICLE OCCUPANTS OR PREVENT INJURY OR DEATH IN THE EVENT
OF AN ACCIDENT.
WEAR SEAT BELTS AT ALL TIMES.
ALWAYS READ ALL INSTRUCTIONS COMPLETELY AND FOLLOW
ALL VEHICLE MANUFACTURER WARNINGS AND GUIDELINES.
PERIODICALLY CHECK AND ADJUST ALL LATCHES AND FASTENERS,
FAILURE TO DO SO COULD RESULT IN THE DOORS NOT LATCHING
SECURELY.
Installation Instructions:
Put on safety glasses. Start by removing
your vehicle’s factory doors. Refer to
your vehicles owner manual or visit
the video section of our website:
www.quadratec.com
Retain the factory door retaining nuts
for use with your tube doors. Please
note, the installation is the same for
both versions regardless of which
generation vehicle is shown.

3
Loosely install the factory door reten-
tion nuts with a T50 Torx but do not
fully tighten at this time. You may need
to wiggle the door in order to align the
hinge pins in hinges. (FIG3)
With a 10 mm wrench loosen the jam
nuts on the door stop and thread the
door stop in as far as it will go. (FIG4)
Start by locating the hinge fasteners.
Loosen the fasteners on the upper and
lower hinges slightly with a 5mm Hex
key and a 13mm wrench or socket. (FIG1)
Align the hinge pins with the factory
door hinges of your vehicle and gently
lower the doors onto the hinges. (FIG2)
FIG 1 FIG 2
Installation Instructions:
FIG 3 FIG 4
PLEASE NOTE THE DOOR STOP IS ONLY USED ON 4 DOOR VEHICLES.
THE DOOR STOP IS NOT USED ON 2 DOOR MODELS. PLEASE REMOVE
THE STOP AND DISREGARD REFERENCES TO THIS FEATURE IF YOU
ARE INSTALLING THESE DOORS ON A 2 DOOR VEHICLE.

4
Installation Instructions:
While the doors are still closed and
the latch is engaged, tighten the hinge
fasteners with a 5mm hex key and
13mm wrench. (FIG7)
For 4 Door Vehicles Only: Adjust the
door stop out until the rubber end firmly
makes contact with the body of the vehicle
(FIG8). Tighten both the jam nuts with
a 10mm wrench. Depending on your ad-
justment the jam nuts may be on opposite
sides of the bracket as shown (FIG8) or
both nuts may be installed on the inside of
the bracket to provide proper clearance.
Next, gently close the door and align the
latch on the vehicle striker pin. Push the
door onto the striker until the latch fully
engages with two clicks. The Quadratec
tube doors are equipped with two stage
latches; please make sure that both
stages are engaging before proceeding.
(FIG5)
If the latch is not engaging properly
you may need to loosen the latch with
a 13mm wrench and a T40 torx bit
(13mm wrench only on JK rear doors).
Adjust the position of the latch as
needed. (FIG6) Tighten all fasteners
after the adjustment is complete.
FIG 5 FIG 6
FIG 7 FIG 8
FIG 9
For 4-Door
Vehicles only
For 4-Door
Vehicles only

5
Installation Instructions:
Open the door by lifting up on the latch
knob on the inside of the door. Gently
swing the door open and loop the door
check strap over the hook on the inside
of the door. Attach the other end of the
door check to the factory hook on the
inside of the vehicle.
The check the straps have multiple
positions to allow for adjustment.
Adjust the position of the straps so that
he door will not open too far and come
in contact with the body of the vehicle.
This could cause damage to the door of
the vehicle. (FIG10)
FIG 10
IF DOORS SWING OPEN TOO FAR YOU CAN DAMAGE THE BODY OF
THE VEHICLE. PLEASE USE CAUTION.
Repeat all steps on all remaining doors,
front and/or rear.
See next page for Mirror Installation.
Enjoy the fun and freedom of your
Tube Doors! There’s nothing quite like it!

6
Installation Instructions: Mirrors
Optional mirror installation for front
doors: Align the optional mirrors with
the holes in the mounting bosses on
the doors. (FIG11)
Pass the ¼” counter sunk screws threw
the holes in the mirror and secure them
with a washer, split washer and hex
nut on the inside of the door. Tighten
the screws with a ⁄” hex key and ⅜”
wrench or socket. (FIG12)
FIG11 FIG12

7
Installation Results:
JK
Version
JL
Version

8
Quadratec® Exclusive
Three Year Limited Warranty
Your Quadratec® branded accessories are
covered by the following Limited Warranty
provided exclusively by Quadratec, Inc., 1028
Saunders Lane, West Chester PA 19380.
This Limited Warranty is the only warranty
made in connection with your purchase. Quad-
ratec neither assumes nor authorizes any ven-
dor, retailer or other person or entity to assume
for it any other obligation or liability in connec-
tion with this product or Limited Warranty.
This Limited Warranty does not apply and is
not cumulative to any accessory or part distrib-
uted by Quadratec for which the Manufacturer
provides a separate written warranty.
What is Covered: Subject to the terms, exclu-
sions and limitations herein and with respect
only to Quadratec branded accessories first sold
in the United States, Quadratec warrants to the
initial retail purchaser only that your Quadratec
accessory shall be free of defects in material
and workmanship: for a period of three (3)
years from date of retail purchase.
This Limited Warranty is not assignable and
shall terminate upon sale of the vehicle upon
which the Quadratec accessory is installed or
other transfer third persons.
All other warranties are hereby disclaimed,
except to the extent prohibited by applicable
law in which case any implied warranty of mer-
chantability or fitness for a particular purpose
on this product is limited to 3 year from date of
initial retail sale. Quadratec reserves the rights
to: (a.) require invoice or other proof your acces-
sory is within the terms of this Limited
Warranty as a condition of warranty service
and, (b.) make future revisions to this product
and Limited Warranty without prior notice or
obligation to upgrade your product.
What is Not Covered:
Your Quadratec Limited Warranty does not
cover products or parts Quadratec determines
to have been damaged by or subjected to:
(a.) installation damage, alteration, modifica-
tion, combination with other parts, failure to
maintain or improper repair or service, (b.) nor-
mal wear & tear, cosmetic damage or damage
from moisture or water immersion, (c.) Acts of
God, accidents, misuse, negligence, inadequate
mounting or impact with vehicle(s), obstacles
or other aspects of the environment, (d.) theft,
vandalism or other intentional damage.
Remedy Limited to Repair/Replacement:
The exclusive remedy provided hereun-
der shall, upon Quadratec inspection and
at Quadratec’s option, be either repair or
replacement of product or parts (new or
refurbished) covered under this Limited
Warranty. Customers requesting warranty
consideration should first contact Quadratec to
obtain a RGA number (610-701-3336). All labor,
removal, shipping and installation costs are
customer’s responsibility.
Other Limitations - Exclusion of Damages -
Your Rights Under State Law:
In consideration of the purchase price paid,
neither Quadratec nor any independent Quad-
ratec distributor/licensee are responsible for
any time loss, rental costs, or for any incidental,
consequential, punitive or other damages you
may have or incur in connection with any part
or product purchased. Your exclusive remedy
hereunder for covered parts is repair/replace-
ment as described above.
This Limited Warranty gives you specific
rights. You may also have other rights that vary
from state to state. For example, some states
do not allow limitations of how long an implied
warranty lasts and /or do not allow the exclu-
sion or limitation of incidental or consequential
damages, so the limitations and exclusions
herein may not apply to you.
©Quadratec, Inc. 2020. All Rights Reserved.
7.2.20 LTR Version
Part #12999.3165
/