Innovative 7000-1-8537H-104 Owner's manual
- Category
- Flat panel desk mounts
- Type
- Owner's manual
This manual is also suitable for

27"
MAX
11-28lbs
RATED
© 2022 Human Active Technology, LLC P516502 REV B
7000-1-8537H
Installation Instructions
Human Active Technology
800 524 2744
customerservice@team-hat.com
team-hat.com
PAGE 1 OF 12

A Top Down Mount 1x
8524
B Forearm Cap 1x
115864
C M6-1 x 12mm Phillips Pan Head Screw 1x
716386
D Flat Washer 1x
715866
E Bushing 1x
114548
F Quick Connect VESA Plate 2x
114808
G M4 x 12mm Phillips Pan Head Screw 8x
701153
H Monitor Tilter 2x
8500 Tilter
I Dog Washer 2x
105189
J 10-32 x 3/8" FPhMS w/Lock Patch 2x
705198
K Cable Cap 1x
114810
L 3mm Allen Wrench 1x
701313
M 1/8" Allen Wrench 1x
701312
N 3/32" Allen Wrench 1x
700146
O 7/32" Allen Wrench 1x
701127
P* M8 x 95mm SCHS 1x
716061
Q* Spacer 1x
701544
R* Lock Nut 1x
710015
* Included with optional thru-desk kit only, 8524-TM-CK (sold separately).
PARTS LIST
PAGE 2 OF 12

O
A
OR
Desk thickness
up to 1.5" (3.8 cm)
Desk thickness
up to 1.5" (3.8 cm)
iIf the monitor arm or pole does not easily fit into the
mount, remove the bushing from the mount and place
it on the monitor arm or pole and press firmly back
into the mount.
OR
1 2
2a 2b 2c
7/32"
DESK CLAMP CONFIGURATION
PAGE 3 OF 12

3 4
OPTIONAL THRU-DESK CONFIGURATION
7/32"
O
P
Q
R
7/32"
Desk thickness
up to 1.5" (3.8 cm)
PAGE 4 OF 12

5
N
3/32"
PAGE 5 OF 12

6
E
PAGE 6 OF 12

7
i
Use handle to level beam.
LEVEL ADJUSTMENT
i
To adjust handle position, loosen the two set screws,
adjust handle then retighten screws.
HANDLE ADJUSTMENT
3mm
C
B
C
D
L
PAGE 7 OF 12

8
J
J
I
H
PAGE 8 OF 12

G
G
F
9
2x
PAGE 9 OF 12

10
2x
iTILTER FRICTION ADJUSTMENT
M
1/8"
PAGE 10 OF 12

11
In some instances, an additional
counterbalance adjustment may be
needed to allow the arm’s instant height
adjustment function to work properly.
If your arm is not staying in position after
performing step 11, tighten the adjustment
screw as shown.
1/8"
M
iOPTIONAL ADJUSTMENT
7/32"
IMPORTANT!
• Monitor must be on arm
• Arm must be in mount
O
Press the arm down to
approximately parallel
with the desk prior to
turning the strength
adjustment screw.
Depending on the weight of your monitor, you may have to make 15-20 turns.
If the arm drifts downward,
turn the adjustment screw
counter-clockwise.
If the arm drifts upward,
turn the adjustment screw
clockwise.
PAGE 11 OF 12

12
K
PAGE 12 OF 12
-
 1
1
-
 2
2
-
 3
3
-
 4
4
-
 5
5
-
 6
6
-
 7
7
-
 8
8
-
 9
9
-
 10
10
-
 11
11
-
 12
12
Innovative 7000-1-8537H-104 Owner's manual
- Category
- Flat panel desk mounts
- Type
- Owner's manual
- This manual is also suitable for
Ask a question and I''ll find the answer in the document
Finding information in a document is now easier with AI
Related papers
-
Innovative STX-01S-124 Owner's manual
-
Innovative 3500-800-NM-104 User manual
-
Innovative 7000-1000-NM-124 Owner's manual
-
Innovative STX-2-800-SLD-8510 Owner's manual
-
Innovative 7516-1000-248 Installation guide
-
Innovative 7509-1000HY-NM-124 Owner's manual
-
Innovative STX-1000-8510 Staxx Articulating Monitor Plus Laptop Mount User manual
-
Innovative 7000 User manual
-
Innovative E2 Monitor Arm Installation guide
-
Innovative 7000-500-8408-248 Owner's manual
Other documents
-
HAT COLLECTIVE 7000 User manual
-
ERGODIRECT STX-02S User manual
-
 Innovative Design Works STX-3S-SLD-XXX User manual
-
HAT COLLECTIVE FLEXMOUNT 8111 User manual
-
 Innovative Office Products 7516 Installation guide
-
 ERGOMART SAA179 Installation guide
-
 Innovative Office Products 7500-WING Installation guide
-
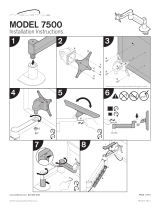 Innovative Office Products 7500 Installation guide
-
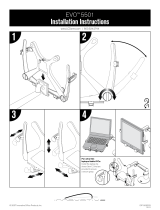 Innovative Office Products 7000-T Installation guide
-
Spectrum Industries 95533B User manual


