8
Press the TIMER button first, the default “3.0H” delay time will flash in LCD display window,
then press the SELECT button to select your desired delay time. Each press SELECT button
one time, the flashing delay time will increase 0.5 hour, and if you always press the SELECT
button for mor than 3 seconds, the delay time will chang very quickly. Then after 5 seconds
flashing, the delay time digit will change from flashing to always displaying, means the timer
program has been set.
How to cancel the timer
When the unit has been set with the timer or during the timer setting process, press the
TIMER button, then the delay time digit will disappear, mean the timer set has been cancelled.
When the symbol flashs, means the unit need to be cleaned. And if you have cleaned the
unit, always press the TIMER button for more than 5 seconds, this symbol will disappear from
the LCD display window. And the cleaning timer will reset to Zero and reaccount again.
PROBLEM POSSIBLE CAUSE SOLUTION
Symbol“ ” flashs.
Lack of Water.
Stop the ice maker, fill water, and
press “ON/OFF” button again to
restart the unit.
Symbol“ ” display in
LCD display window.
There is too much ice. Remove ice from ice basket.
Ice cubes stick together.
The ice cycle is too long.
Stop the ice maker, and restart it
when the ice blocks melt. Select
the small size ice cube selection.
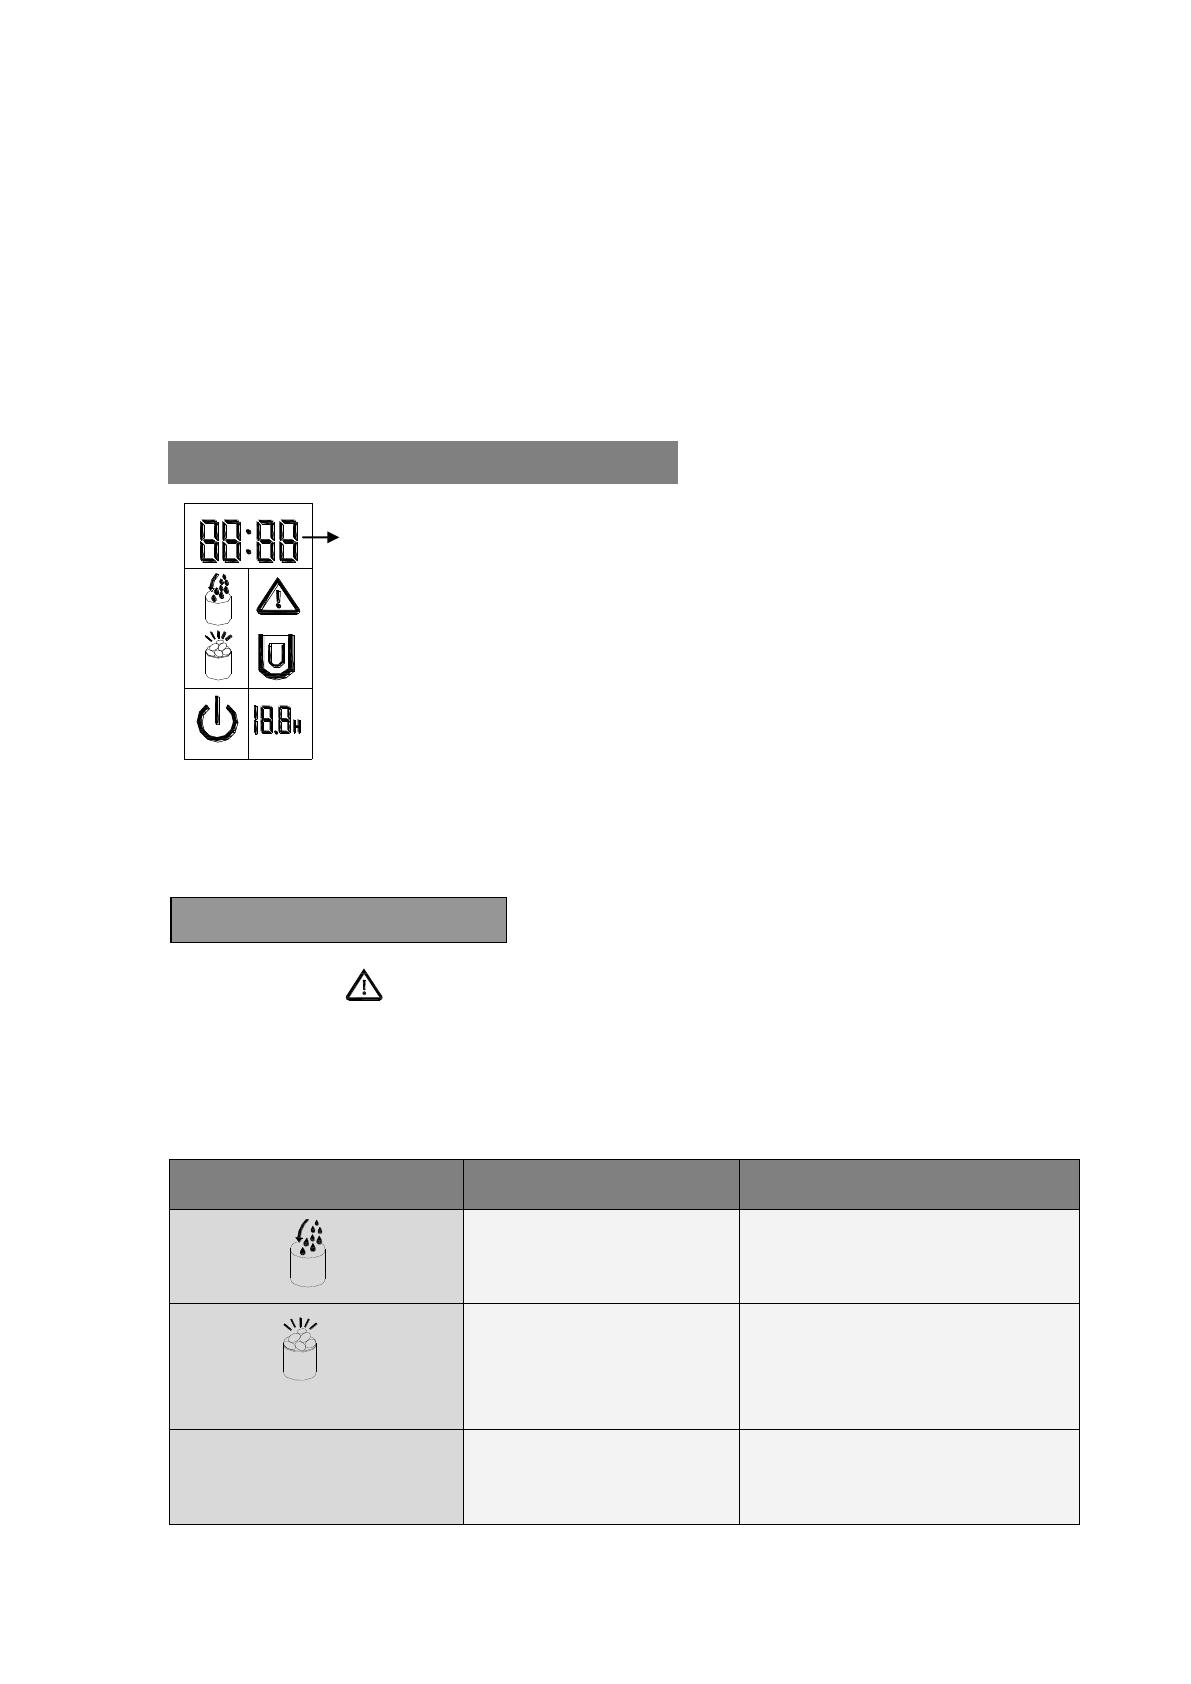
CLOCK DISPLAY & THE CORRECT TIME
This unit is supplied with CLOCK dipalying function.
If the displayed time is not correct, you can adjust it to the
correct digit through the CLOCK and SELECT button.
First press the CLOCK button once, the digit meaning hour will
start to flash first, then you can press SELECT button to change
it, each press will increase 1 hour. Press the CLOCK button
again, the digit meaning minute then will start to flash, and also
press the SELECT to change it. Then press the CLOCK the third
time to confirm it, and now it display the new correct clock. And
during adjusting process, after 5 seconds flashing, the digit will
automaticall change to always displaing, also means the new
clock has been set.
Clock
Time
CLEANING REMINDING