Page is loading ...

Installation
We suggest that our products be
installed by professionals that are
locally licensed by the authority
having jurisdiction in gas piping.
Service
We suggest that our products
be serviced by a professional
certified in the US by the
National Fireplace Institute
(NFI) as NFI Gas Specialists.
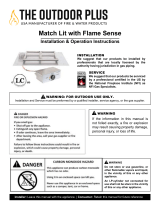
Match Lit Fire Pit Insert Manual
Installation & Operation Instructions
WARNING: FOR OUTDOOR USE ONLY
WARNING
•Improper installation, adjustment, alteration, service, or maintenance can cause injury or property
damage. Read the installation, operating, and maintenance instructions thoroughly before installing or
servicing this equipment.
WARNING
•Do not store or use gasoline or other flammable vapors and liquids in vicinity of this or any other
appliance.
•An LP-cylinder not connected for use shall not be stored in the vicinity of this or any other appliance.
DANGER
If you smell gas:
1) Shut off gas to appliance.
2) Extinguish any open flame.
3) If odor continues, keep away from appliance and immediately call gas supplier or fire
department.
INSTALLER: Leave this manual with the appliance.
CONSUMER: Retain this manual for future reference.

Index:
1) General Information
2) Selecting the Location
3) Construction of Enclosure
4) Installation of Fire Pit
5) Media
Product Specific Information
6) Parts List
7) Assembly
8) Fire Pit Operation
9) Maintenance
10) Troubleshooting
11) Warranty
1) General Information
Please carefully follow the instructions in this manual to prevent personal injury or property loss. Instructions are
updated as needed. It is the installer’s responsibility to periodically review instruction for applicable updates.
The steps listed as:
WARNINGS: Contains information critical to the safe installation and operation of the fire-pit.
WARRANTY REQUIREMENT: Must be strictly followed to qualify for product warranty.
Warranty will be void if not followed.
IMPORTANT: Are notes and insights to help ensure product satisfaction and serviceability.
-------------------------------------------------------------------------------------------------------------------------------------------------
WARNING: It is the installer’s responsibility to ensure a safe installation and to educate the end user as to proper
operation. Leave this manual with the end user.
WARNING: Never alter product or configuration in any way.
WARNING: We suggest that our products be installed by professionals that are locally licensed by the authority having
jurisdiction in gas piping. We suggest that our products be serviced annually by a professional certified in the US by the
National Fireplace Institute (NFI) as NFI Gas Specialists or in Canada by WETT (Wood Energy Technical Training).
Installer must follow all instructions carefully to ensure proper performance and safety. Manufacturer is not responsible
for your actions.
WARNING: Product is not intended to be a starter for wood or any other combustibles.
WARNING: It is the responsibility of the installer to follow ALL LOCAL CODES concerning the installation and
operation of the fire pit. In the absence of local codes, please follow:
● Fixed piping system: The National Fuel Gas Code, ANSI Z223.1/NFPA 54 or International Fuel Gas
Code.
● Electrical ground: The National Electrical Code, ANSI/NFPA 70.
WARNING: Only use gas/fuel type specified for this fire pit. Verify correct gas/fuel type and pressure. Never use an
alternative fuel to include bio-fuel, ethanol, lighter fluid or any other fuel.
Gas pressure and type should be checked prior to use and installation.
● Natural Gas Fire Pit:
Supply Pressure: Minimum: 3.5” W.C.; Maximum: 7.0” W.C.
● LP Gas:
Supply Pressure: Minimum: 8.0” W.C.; Maximum: 11.0” W.C.

2) Selecting the Location
WARNING: All fire pits, match lit kits, spark ignition, safety pilot and electronic ignition systems are designed and intended for
outdoor use only.
WARNING: All fire pits must have a gas shutoff on the outside of the exterior of the fire pit to allow for emergency shut off and
maintenance.
WARNING: Select a location where the fire pit can be attended during operation. Never leave an operating fire pit unattended or
by someone not familiar with its operation or emergency shut off locations.
WARNING: Both children and adults should be alerted to the hazards of high surface temperatures and should stay away to avoid
burns and clothing ignition.
WARNING: Young children should be carefully supervised when they are in the area of fire pit.
WARNING: Clothing or other flammable materials should not be placed on or near fire pit.
WARNING: Fire pits create very high temperatures - Combustibles must be located far enough away that there is no risk of
ignition.
IMPORTANT: Unless previously tested, it is recommended that material such as granite, marble or other dense stone be kept
away from heat and especially flame due to risk of cracking. Manufacturer is not responsible for damage.
Fire Pit Clearances –
Sides Surrounding Fire Pit 48” From Structure or Combustibles
Overhead Clearance Nothing Over Head
Select a location with good drainage.
Choose a location that allows easy access for installation and maintenance of the fire pit.
Pick a location that allows sufficient horizontal room to enjoy the fire pit while allowing a safe distance from the heat
and flame.
3) Construction of the Enclosure
WARNING: All fire pits must have a gas shutoff on the outside of the exterior of the fire pit to allow for emergency shut off and
maintenance.
WARNING: Always use proper materials and construction for gas supply.
WARNING: The interior void space of the enclosure cannot be filled with any material (gravel, crushed rock, concrete, etc.)- It is a
requirement to have a minimum of 2” under the valve box for proper ventilation drainage.
WARRANTY REQUIREMENT: The enclosure must be constructed on a stable surface. The weight of the fire pit burner must be
supported by the pan and not by any control/valve box. For electronic ignition models the control/valve box must be above grade
with adequate drainage to prevent water damage to the controls inside the box. We cannot guarantee the steel tray will be perfectly
flat and will not warp due to heat
IMPORTANT: Follow the enclosed instructions for the installation of the fire pit enclosure.
Installation
We suggest that our products be installed by professionals
that are locally licensed by the authority having
jurisdiction in gas piping.

4) Installation of Fire Pit Burner Assembly
WARNING: We suggest that our products be installed by professionals that are locally licensed by the authority having jurisdiction
in gas piping.
WARNING: We suggest that our products be serviced annually by a professional certified in the US by the National Fireplace
Institute (NFI) as NFI Gas Specialists.
WARNING: Confirm this appliance is built for gas used – natural gas or LP. Do not use natural gas appliance with LP or LP
appliance with natural gas. Refer to the label on the appliance.
WARNING: To prevent damage, unhook fire pit from gas supply for pressure leak tests.
WARNING: Fuel line sizing is the responsibility of the installer and must be able to supply the stated maximum Btu for the
product.
WARNING: Burn Testing- It is the responsibility of the qualified installer to test for gas leaks at all connections.
WARNING: When filling the pan with lava rock and/or decorative glass, the instructions in Section 5 must be followed.
WARNING: Gas Plumbing Connections: Use only joint compound or tape that is resistant to all gases. Apply joint compound to
all male pipe fittings only- DO NOT use on FLARED fittings. Be sure to tighten every joint securely.
WARNING: For systems with an extended or detached valve box the area in which the valve box is installed must conform to all
installation requirements to include but not limited to location, construction, venting and local codes. Failure to do so may result in
personal injury property damage or explosion.
Purge gas lines of air.
Perform all leak tests with leak detector or leak reactant.
Verify correct gas type and pressure.
Perform leak test on main gas supply. Repair leaks as necessary.
Shut Off Gas Supply and Power to fire-pit.
Connect fire-pit to main gas supply. If using flex line avoid sharp bends with flex line to prevent whistling.
Turn on gas supply and perform leak test on all inlet connections. Repair as needed.
Position fire pit safely with access to all gas connections for testing.
Once fire pit is lit perform leak test on all gas connections. Repair as needed.
Turn off fire pit and allow cooling.
Apply media as described in (Section 5).
Turn on fire pit again and perform leak test with media correctly installed. If gas leak is detected verify correct media
application and repair as needed.
Set fire pit in properly constructed enclosure (Section 3).
Verify correct operation and lighting.
Review safety manual with end user and instruct not to change/ modify fire pit or media.
Leave manual with end user.
5) Media
WARNING: FOR GLASS MEDIA USAGE WITH LP GAS- WHEN USING APPROVED DECORATIVE GLASS TO
COVER BURNER APPLY ONLY ENOUGH TO HIDE BURNER. APPLYING OVER 1/2” MAY CREATE BACK
PRESSURE AND GAS LEAKAGE FROM AIR MIXER RESULTING IN LP POOLING UNDER FIRE PIT.
WARNING: FOR GLASS MEDIA USAGE WITH LP GAS- THE UNIT MUST BE TESTED WITH MEDIA OVER
BURNER FOR CONFIRMATION OF NO BACK PRESSURE CREATING GAS TO LEAK OUT OF AIR MIXER
VENTURI HOLES. THIS MAY HAVE TO BE DONE PRIOR TO PLACING IN ENCLOSURE IF NO ACCESS DOOR.
WARNING: The fire pit is designed to use approved media correctly installed over the burner to achieve proper combustion.
WARRANTY REQUIREMENT: Never install a mesh or screen under the media.
IMPORTANT: Media affects flame pattern greatly. It is possible to create an unusual flame pattern that could damage your
enclosure. Enclosure damage from an open flame fire feature is not covered under any warranty.

Lava Rock & Glass Application
Please follow the instructions below to add the finishing touch to your fire pit. Remember the deeper your lava rock or
glass the more risk of reducing if not smothering the flame. Particular attention needs to be on the pilot assembly area.
Incorrect media installation will cause the pilot flame to suffocate and turn off pit or delay main burner ignition.
Lava Rock Only Application
1) Install your fire pit per instructions.
2) Apply lava rock ONLY deep enough to cover ring and pan-
less than 2” above fire ring.
For Electronic Ignition
3) Blow Out Box: Do not cover vents with lava rock- leave
open. Do not allow any rock to block flame opening.
4) Blowout Box: Do not cover blowout box vents or
opening with lava rock or glass. Incorrect media
installation will cause the pilot flame to suffocate and
turn off pit or delay main burner ignition.
Decorative Glass Application
1) Install your fire pit per instructions.
2) Fill Pan with glass. Cover Burner with 1/8” to ¼” of
glass. Do not over fill with glass. All LP installations
must be checked for back pressure with media installed.
Failure to do so may result in personal injury or
property damage.
For Electronic Ignition
3) Blowout Box: Do not cover blowout box vents or
opening with lava rock or glass. Incorrect media
installation will cause the pilot flame to suffocate
and turn off pit or delay main burner ignition.
DO NOT COVER VENTS! DO NOT COVER PILOT
OPENING!

Installation
We suggest that our products be installed by professionals
that are locally licensed by the authority having
jurisdiction in gas piping.
6) Parts List
1) Burner (1)
2) Pan (1)
3) Key Valve (1)
4) Properly Sized Orifice for Natural Gas or LP (1)
5) Coupler- (2)
6) Close Nipple (1)
7) Flex Line (2)
8) Flare Fittings (4)
9) Elbow (1)
10) Lava Rock (1)
11) Instructions (1)
7) Fire Pit Burner Assembly
1) Ensure gas to the fire pit location is shut off.
2) Remove parts from packaging material.
3) Read Instructions thoroughly.
4) Call distributor for clarification as needed.
5) Inspect the Burner for any signs of damage or corrosion.
6) Apply pipe dope or gas rated tape to all threads.
7) Connect flex line from valve to burner- see Steps 8 & 9.
LP Gas Burner Assembly
8) LP burner assembly sequence.
Note: Must use the LP Orifice
Burner >Pan > Close Nipple > Coupler > Air-Mixer >
Coupler > Fitting > Flex Line
Air Mixer
Natural Gas & LP Gas Configuration
WARNING: Confirm “Gas In” is towards control valve or shutoff valve. Installing backwards will result in severe gas leak and
risk of explosion. If your air-mixer has an adjustment nut adjust to desired flame condition.
WARNING: A pan must be used on LP systems and configured in way to minimize fuel settling below the pan. Failure to do so
may result in personal injury or explosion.
Natural Gas Burner Assembly
9) Natural Gas burner assembly sequence.
Burner > Pan > Close Nipple > Coupler > Orifice > Coupler > Fitting > Flex Line

10) For key valve assembly sequence is the same for either Natural Gas or LP.
Flex Line > Fitting > Valve > Elbow > Gas Supply Flex Line
11) Connect fuel supply line to Key Valve.
12) Perform leak test as described in this manual. Perform leak test on all fittings
and back pressure checks for LP with media installed.
13) Install unit in enclosure.
To reduce whistling ensure any flex line does not have sharp bends.
Key Valve Configuration
8) Fire Pit Operation
WARNING: Before use, be sure to test all gas connections for leaks. Do not use fire pit if there is any evidence of leaking gas. If
leaking gas suspected, turn off the main gas supply and repair immediately.
WARNING: Wind and gusty conditions will affect the flame in an unpredictable manner. If conditions exist that are not safe for
patrons turn the fire pit off.
WARNING: Do not use fire pit if any part has been submerged under water. Immediately call a qualified service technician to
inspect the fire pit.
WARNING: Never use any material that is non-porous and holds moisture such as gravel, pebbles, river rock, etc. This material,
when heated will cause the trapped moisture to boil and fracture unexpectedly. This material is not sufficiently porous to allow
heated steam to readily escape which can break and cause personal injury or damage.
WARNING: Solid fuels shall not be burned in the fire pit. Leaves, sticks, wood, paper, clothing, food material, should be kept
away from the fire pit. Make sure that there is no vegetation or other objects over the top or sides of the fire pit that could interfere
with safe operation. See clearances in Section 2 Selecting the Location.
WARNING: If lava rock is wet, allow fire pit to burn for 45 minutes prior to coming within 15 feet of the fire pit.
WARNING: When fire pit is not in operation turn off gas valve.
WARRANTY REQUIREMENT: When not in use the fire pit must be covered at all times.
IMPORTANT: Initial Start-up: It may be necessary to purge air in gas lines after system installation.
START UP
1. STOP! Read the safety information on “What to do if you smell gas” (Pg. 1).
2. Confirm fire pit is clear of debris and that all covers are removed.
3. Place long handled lighter or match while burning on top of the fire pit.
4. Slowly turn “ON” gas valve.
5. After burner lights remove lighter or match.
6. Adjust flame to desired height.
7. If burner does not light turn valve off and allow gas to clear then repeat steps 3~7.
8. Never alter the design of the fire pit.
9. Never leave fire pit unattended- should be supervised by an adult familiar with emergency shut off.
10. Flammable materials should not be placed on or near the fire pit.
11. Children should be supervised when they are in vicinity of the fire pit.

Service
We suggest that our products
be serviced by a professional
certified in the US by the
National Fireplace Institute
(NFI) as NFI Gas Specialists.
9) Maintenance
WARNING: Any guard or protective device removed for servicing must be replaced prior to
operating the fire pit.
WARNING: Installation and repair should be done by a qualified service person. Fire pits
should be inspected prior to use and at least annually by a qualified service person.
WARNING: Ensure gas and power (if applicable) are shut off and fire pit is cool before servicing.
Keep fire pit covered at all times when not in use.
Keep any debris out of fire pit- clean as needed.
In some areas of the country spiders or insects have been known to build nest and or
lay eggs in the venture holes of the air-mixer for LP units. This can cause fuel to fill
the fire feature cavity and result in personal injury or property damage. Periodical
inspection by a qualified service technician of the air-intake is required to ensure your
fire feature performs properly.
Ring Cleaning: (1 x YR) If flames exhibit any abnormal shapes or behavior, or if
burner fails to ignite properly, then the burner holes may require cleaning. The
appliance can be cleaned by carefully removing the logs and media to allow access to burner. Use a brush to carefully
remove dust, spider webs, and loose particles from base, logs, and fire ring itself. If evidence of damage, fire ring must
be replaced with fire ring specified by manufacturer.
10) Troubleshooting
Below are some potential causes and countermeasures to the symptoms indicated in bold. Please contact your retailer or
certified technician for service & repair.
Below are some potential causes and countermeasures to the symptoms indicated in bold. If still unable to resolve issue, please
contact your retailer or certified technician.
Will Not Light
1. Air in gas line. If new install, may take several attempts to purge air
2. Debris in gas line. Confirm gas line is clear (insulation, dirt, plastic, excessive pipe sealer etc..)
3. Gas Pressure Improper Confirm proper gas pressure found (Section 1)
Will Not Stay Lit
1. Gas Pressure Improper Confirm proper gas pressure found (Section 1)
2. Improperly applied media Review Media in (Section 5)
Noise
1. Whistling Sound Change Flex line routing.
11) Warranty
Limited Warranty
The manufacturer warranties fire pits against manufacturing defects that prevent
safe and correct function as follows:
●Electronics, Gas Valve, & Pilot Assembly: Commercial-1yr.; Residential- 3 yrs.
●Stainless Steel Pan, Fire Ring, & Valve Box: Commercial-1yr.; Residential 5yrs.
This commences from the date of original sale / shipment from manufacturer.
This warranty is for parts and in-house labor. The defective product must be
sent back to manufacturer with a Return Merchandise Authorization (RMA) issued by
manufacturer for that specific product and any other additional information for the nature of the
defect or warranty claim.
The warranty does not cover items that have been damaged by overheating,
modification, abuse, or improper storage. Also any labor involving installation or
maintenance with the unit is not covered.
This warranty excludes claims for consequential, indirect-collateral expenses
arising from product defects or warranty recovery.
/