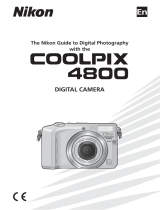
Nikon Coolpix 880 Owner's manual

Category
Bridge cameras
Type
Owner's manual
En
DIGITAL CAMERA
The Guide to Digital Photography
with the
i
Product Documentation
The documentation for this product includes the manuals listed below. Please be sure to read all
instructions thoroughly to get the most from your camera.
Fast Track Guide/For Your Safety
In addition to taking first-time users step-by-step through the process of setting up and using the
camera, the Fast Track Guide provides a quick overview of camera settings. For Your Safety, printed on
the reverse of the Fast Track Guide, lists warnings and cautions that should be observed when using
and storing your camera, together with legal information. Please keep this document where all
those who use the product will read it.
Menu Guide
This reference is your guide to camera menus. Keep it handy when you use the camera.
Guide to Digital Photography (this manual)
This manual provides complete operating instructions for your camera.
ii
Contents
Overview: About This Manual ............................... 1
Tutorial 3
Getting to Know the COOLPIX 880: The Parts
of the Camera and Their Functions ............. 4
Using the Camera Menus ......................................... 12
First Steps:
Getting Ready to Use Your Camera .......... 15
Inserting the Battery .................................................... 15
Inserting the Memory Card ..................................... 18
Choosing a Language................................................... 20
Setting the Time and Date ........................................ 21
Taking Photographs: The Basics .......................... 23
Getting the Camera Ready for Use (AUTO
Mode) ............................................................................. 23
Framing Photographs ................................................... 26
Focus and Shoot ............................................................ 28
Assisted Creative Photography: Scene Mode . 32
Review and Deletion: Quick Review ................... 39
Putting the Camera Away ......................................... 44
Where Do I Go from Here? 45
Getting the Most from Digital Images: Your
Camera and Your Computer............................... 46
Viewing Photos on TV ................................................. 48
Ordering Prints: Digital Print Order Format
(DPOF) .......................................................................... 48
Taking Photographs for E-Mail and the Web ... 49
Taking Photographs for Printing ............................. 50
Reference 51
Beyond Point and Shoot:
Shooting Controls for All Modes ............... 52
Framing Photographs:
Optical and Digital Zoom ..................................... 52
Throwing Light on Your Subject:
The Flash Button ....................................................... 55
Focusing Near and Far:
The Focus-Mode Button ....................................... 58
Delaying Shutter Release: Self-Timer Mode ..... 62
Bright, Dark, and High-Contrast Subjects:
Exposure Compensation ...................................... 64
Choosing a Focus Area:
Manual Focus-Area Selection.............................. 66
iii
Advanced Photography: P, A, M, and CSM ......... 68
Choosing a Mode: P, A, M, or CSM? ...................... 69
Adjusting Exposure: A and M Modes .................. 70
Reacting Faster to Light: Sensitivity (ISO
Equivalency) ................................................................. 74
Focusing at a Preset Distance: Manual Focus .. 76
The Shooting Menu...................................................... 78
Keeping Colors True:
The White-Balance Menu ................................. 81
Measuring Light: The Metering Menu .............. 85
Making Movies and Taking Photographs in a
Sequence: The Continuous Menu ................ 88
Getting Sharper Photographs:
The BSS Menu........................................................ 92
Contrast, Brightness, and Image Type:
The Image Adjustment Menu ......................... 94
Making Edges More Distinct:
The Image Sharpening Menu .......................... 96
Modifying Sensitivity from a Menu:
The ISO Menu ....................................................... 98
Exposure Options..................................................... 98
Focus Options ......................................................... 103
Settings for Optional Lens Converters ....... 106
Restoring Default Shooting Settings:
The Reset Menus ............................................... 109
Playing Images Back: Playback Mode ................ 111
Basic Playback ............................................................... 112
Single-Image Playback........................................... 113
Viewing Multiple Images:
Thumbnail Playback .......................................... 118
Deleting Individual Photographs ..................... 119
The Playback Menu ................................................... 120
Deleting Photographs: The Delete Menu... 122
Selecting a Folder for Playback:
The Folders Menu ............................................. 126
Automated Playback:
The Slide-Show Menu ..................................... 127
Safeguarding Valuable Images:
The Protect Menu ............................................. 130
Hiding Images During Playback:
The Hide-Image Menu .................................... 131
Preparing Photographs for Printing:
The Print-Set Menu .......................................... 132
iv
Camera Setup: The Setup Menu ....................... 134
Controlling the (File) Size of Photographs:
Image Quality and Size ........................................ 137
Organizing Your Photographs:
The Folders Menu ................................................. 142
Monitor Options ......................................................... 149
The Auto Off Menu .................................................. 151
File Numbering: The Seq. Numbers Menu .... 153
Formatting Memory Cards:
CF Card Format ..................................................... 154
Storing Camera Settings:
The Controls Menu .............................................. 155
Shutter Release Confirmation and Photo
Information ................................................................ 156
The Date Menu ........................................................... 158
The Video Mode Menu ........................................... 158
The Language Menu.................................................. 159
The Distance Units Menu ...................................... 159
Restoring Default Settings:
The Reset All Menu .............................................. 160
Connections: Connecting Your Camera to a
Computer, TV, or VCR ................................ 162
Connecting to a Television or VCR .................... 162
Connecting to a Computer................................... 164
Using Nikon View Software .............................. 164
Connecting Your Camera to a Computer . 166
Reading Photographs from Memory
Cards ........................................................................ 168
Technical Notes .................................................. 170
Caring for Your Camera .......................................... 170
Optional Accessories ................................................ 172
Troubleshooting........................................................... 174
Specifications ................................................................. 181
1
Overview
About This Manual
Thank you for your purchase of a COOLPIX 880 digital camera. This manual has been written to help
you enjoy taking digital photographs with your COOLPIX 880. As you read through it, you will find
explanations not only of how the camera works but also of why certain features have been included,
and how they may be used to take photographs in many different situations.
The “Tutorial” section gives you enough information for simple “point-and-shoot” photography when
you first start using your camera. This section may be all you need to read if you want to take advantage
of the simplicity and immediacy of digital photography.
Once you have taken a few photographs, “Where Do I Go from Here” outlines how to view them on
a computer or television set and order prints using digital “print orders” that you create with the
camera. It also provides some tips on how to take photographs for electronic distribution and for
printing on a personal color printer.
Finally, the “Reference” section provides a comprehensive guide to all aspects of digital photography
with the COOLPIX 880, including manual control of exposure, tone, sharpness, taking movies, caring for
your camera, and troubleshooting, together with a list of optional accessories.
2
This icon marks cautions, information that
you should read before use to prevent dam-
age to your camera.
This icon marks notes, information that you
should read before using your camera.
This icon marks tips, additional information
you may find helpful when using your
camera.
This icon indicates that more information is
available elsewhere in this manual or in other
documentation.
This icon marks cross-references to the
Guide to Digital Photography (this manual).
The number next to the icon gives the page
on which more information may be found.
This icon marks cross-references to the Fast
Track Guide.
This icon marks cross-references to For Your
Safety.
This icon marks cross-references to the
Menu Guide.
As part of Nikon’s “Life-Long Learning” commitment to ongoing product support and education, con-
tinually-updated information is available on-line at www.nikon-euro.com. Visit this site to keep up-to-
date with the latest product information, tips, answers to frequently-asked questions (FAQs), and gen-
eral advice on digital imaging and photography.
Life-Long Learning
To make it easier to find the information you need, the following symbols and conventions are used:
3
Introduces you to the parts of the COOLPIX 880 and the camera menus
Takes you step-by-step through the process of setting up your camera
Outlines the steps involved in taking photographs and playing them back
Tutorial
Using the Menus
Parts of the COOLPIX 880
This section:
First Steps/Taking Photographs
4
Getting to Know the COOLPIX 880
The Parts of the Camera and Their Functions
Take a few moments to familiarize yourself with camera controls, displays, and menus.
1 Viewfinder window
2 Lens
3 Tripod socket
4 Battery-chamber cover
5 Battery-chamber latch
6 DC-IN connector
7 USB/serial connector
8 Eyelet for camera strap
9 Flash
10 Red-eye reduction lamp
* Refer to the page numbers in parentheses for more information.
11 Flash-ready lamp
12 Autofocus lamp
13 Memory-card slot
14 VIDEO OUT connector
14 (162)
5 (15)
3
12 (11)
2 (181)
11 (11)
13 (18)
1 (26)
10 (56)
9 (55)
8 (
)
4 (15)
7 (166)
6
A B
C
D
E
F
G
H
I
K
J
L
M
N
5
B The Shutter-Release
Button
The COOLPIX 880 has a two-
stage shutter-release button.
Press the shutter-release button
halfway to focus. Focus will re-
main fixed while the button is
held in this position (focus lock).
Press the shutter-release button all
the way down to take a picture.
A The Power Switch
The power switch is used to
turn the camera on and off.
C The Zoom Buttons
Use the zoom buttons to frame
photographs. The button
zooms the camera out, increas-
ing the area visible in the final
photograph. The button
zooms the camera in, enlarging
small or distant objects to fill the
frame.
When an image is played back
full screen, the
( ) button is
used to zoom in on the image
displayed in the monitor. Press
the button to cancel zoom.
23–24
28–30
52–54, 116
6
Mode
D The Mode Dial
Use the mode dial to select the
operating mode.
68–71
23–31
32–38
The camera sets the shutter
speed while you control aperture
and other settings
Description
An automatic mode for simple,
“point-and-shoot” photography
This mode offers a choice of set-
tings for specific scenes, such as
sunsets and portraits
68–73
Puts you in complete control of
all settings, including exposure
mode
68–73
You control all camera settings, in-
cluding shutter speed and aper-
ture
68–69
This mode puts the camera in
charge of exposure, while leaving
you in control of all other settings
Auto
Scene
CSM
Custom
A
Aperture-
priority auto
M
Manual
P
Programmed
auto
Playback
111
–133
Use this mode to play back and
delete photographs
7
E The / Button
F The / Button
The
/ button controls
the functions shown at right.
The functions controlled by the
/ button depend on the
operating mode and on the
combination of buttons used.
Function Mode Operation
Function
Focus mode
Mode
AUTO, SCENE,
P, A, M, CSM
Operation
Press 58–61
Manual focus
distance
P, A, M, CSM
+
76–77
Photo-information
display Press 114
Exposure
compensation
AUTO, SCENE,
P, A, CSM (expo-
sure mode P, A)
+
64–65
Shutter speed/
aperture
A, M, CSM (expo-
sure mode A, M)
+
71–72
Sensitivity
(ISO equivalency)
P, A, M, CSM
+
74–75
Single-image
deletion Press 119
8
I The MENU Button
Press the MENU button to dis-
play or hide the menu for the
current operating mode, or to
display the second page of a
two-page menu.
H The / Button J The Multi Selector
Use the multi selector to select
items from the camera menus,
or to scroll through the images
in memory in quick-review or
playback modes.
39–43, 117
12 13–14
G The / Button The / button controls:
Function
Flash mode
Thumbnail display
Mode
AUTO, SCENE,
P, A, M, CSM
Operation
Press
Press
55–57
118
The / button is used
to review photographs while
shooting. In playback mode, its
function is to start and stop
movie playback.
9
L The Control PanelK The MONITOR Button
The MONITOR button controls
the monitor in AUTO, P, A, M,
CSM, and modes.
1 Flash mode
2 Battery indicator
3 Exposure-count display (shows
numbers of exposures remain-
ing)
4 Exposure-compensation in-
dicator
5 Sensitivity (ISO equivalency)
indicator
6 Metering method
7 Image quality
8 Self-timer indicator
9 Focus mode
10 Continuous setting
* Refer to the page numbers in parentheses for more information.
10 (91)
9 (58)
8 (62)
7 (139)
6 (85)
5 (74)
4 (64)
3 (24)
2 (16)
1 (55)
Monitor on,
information icons
displayed
Monitor on,
information icons
hidden
Monitor
off
Press
Press
Press
The monitor can not be turned
off in SCENE and SETUP modes.
10
M The Monitor
5
ISO
NIKON
NIKON
AE-
AE-
L
1.25
0.66ft
VGA
VGA
WB
WB
- L
+
0.7
+
2.0
P
1/60
F
2.8
NORMAL
NORMAL
[
10
]
23
25
21
16
12
10
2 3 4
6
5
7
8
9
11
13
14
151718
19
20
22
24
26
1
29
30
28
27
1 Scene indicator (33)
2 Zoom indicator (53)
3 Digital-zoom factor (53)
4 Focus mode/manual focus
distance (58)
5 “Date not set” icon (22)
6 Flash mode (55)
7 Battery indicator (16)
8 Sharpening (97)
9 White balance (84)
10 Sensitivity (ISO equivalency)
(74)
11 Image adjustment (95)
12 Image size (141)
13 Image quality (139)
14 Number of exposures remain-
ing at current settings (24)
15 Exposure compensation (64)
16 Aperture (f number) (71)
17 Shutter speed (72)
18 Exposure mode (71)
19 Metering method (86)
20 Continuous setting (91)
21 Exposure-bracketing indica-
tor (100)
22 Auto-exposure lock (99)
23 White-balance lock (99)
24 Best-shot selection (93)
25 Lens-converter setting (108)
26 Current folder (148)
27 Self-timer indicator (62)
28 Auto-exposure target (spot
metering) (87)
29 Focus areas (66)
30 Exposure display (manual-
exposure mode) (72)
* Refer to the page numbers in parentheses for more information.
11
N The Viewfinder
Focus target (Auto/Scene)
Center focus area for manual or
automatic AF-area selection
(P•A•M/CSM)
Use this area to frame photo-
graphs at ranges of less than
90 cm (1 yd)
The flash lamp (red) and
autofocus (AF) lamp (green)
next to the viewfinder provide a
visual guide to camera status.
Lamp Meaning
AF Lamp (Green)
Glows steadily
Flash Lamp
(Red)
Flash will fire when photograph is taken
Blinks Flash charging ( 55)
Off
Flash not required or flash set to “off
Subject in focusGlows steadily
Flashes rapidly
Camera unable to focus using autofo-
cus. Use focus lock ( 29) or manual
focus ( 76).
Blinks
Camera recording image(s) to memo-
ry card. Do not eject card or remove
or disconnect power source while lamp
is blinking.
Blinks slowly
Digital zoom ( 52) in effect; frame
photographs in monitor
12
Viewing the menus
When the camera is on, the
menu for the current operat-
ing mode can be displayed by
pressing the MENU button.
If MENU PAGE2 is displayed in
the lower left corner of the
menu screen, pressing the
MENU button a second time
will display the second page of
the menu. Pressing the MENU
button when MENU OFF is dis-
played clears the menu from the
monitor.
PAGE2
1
2
MENU
SELECT SET
A
A
A
WHITE BALANCE
Press
Menu for current
mode displayed
P•A•M
CSM
SHOOTING
Using the Camera Menus
Changes to some settings can be made with the help of menus that
appear in the monitor. Separate menus are available for scene,
P•A•M, CSM, playback, and setup modes (no menu is available in
AUTO mode).
Mode Menu
SETUP SET-UP
Advanced shooting options (e.g., white
balance, metering). Two menus are
available, one for P, A, and M modes,
the other for CSM mode. Changes to
settings in one menu do not affect the
other.
Function
Basic camera setup (e.g., formatting
memory cards, setting the time and
date); image quality and size settings
for AUTO and SCENE modes
SCENE SCENE Scene selection
PLAY BACK Playback options
13
1
2
MENU
SELECT SET
A
A
A
PAGE2
METERING
Making a selection
Use the multi selector to make a selection.
1
Highlight menu
item
1
2
MENU
SELECT SET
Matrix
Spot
Center-Weighted
Spot AF Area
A
A
A
OFF
METERING
2
Display options
1
2
MENU
SELECT SET
Matrix
Spot
Center-Weighted
Spot AF Area
A
A
A
METERING
OFF
3
Highlight option
1
2
MENU
SELECT SET
A
A
A
PAGE2
METERING
4
Make selection
Camera menus
Pg. For more information on:
To go back one step, press the
multi selector to the left.
The selection for some
menu options is made from
a sub-menu. Repeat steps 3
and 4 to select the desired
setting from the sub-menu.
Changes to settings apply as
soon as the selection is
made.
In SCENE, P•A•M, and CSM
modes, the view through the
lens is visible behind the
menu. To take a photograph
while the menu is displayed,
press the shutter-release
button.
14
OFF
1
2
MENU
SHOOTING MENU2
SELECT SET
C
QUAL.
PAGE2
1
2
MENU
SELECT SET
A
A
A
WHITE BALANCE
Multi-page menus
To move between pages of a multi-page menu.
1
Position cursor in main menu
PAGE2
1
2
MENU
SHOOTING MENU1
SELECT SET
A
A
A
2
Highlight page tab
3
Highlight page
number
IMAGE SIZE & QUALITY
4
Display selected
page
You can also go from the first to the second page of a multi-page menu by pressing the MENU
button once.
15
2
Open the battery-chamber cover
Pressing the battery-chamber latch (1), slide the battery-cham-
ber cover out (2) and flip it open (3).
Inserting the Battery
1
Turn the camera off
If the camera is on a tripod, remove the tripod before proceeding to the next step.
First Steps
Getting Ready to Use Your Camera
Before using your camera for the first time, you will need to:
Check the contents of the package (see the packing list included in the “Open Me First” envelope)
Attach the camera strap and lens-cap string as described in For Your Safety (
)
Put the battery in the camera
Insert the memory card
Choose a language for the camera menus and messages
Set the time and date
  • Page 1 1
  • Page 2 2
  • Page 3 3
  • Page 4 4
  • Page 5 5
  • Page 6 6
  • Page 7 7
  • Page 8 8
  • Page 9 9
  • Page 10 10
  • Page 11 11
  • Page 12 12
  • Page 13 13
  • Page 14 14
  • Page 15 15
  • Page 16 16
  • Page 17 17
  • Page 18 18
  • Page 19 19
  • Page 20 20
  • Page 21 21
  • Page 22 22
  • Page 23 23
  • Page 24 24
  • Page 25 25
  • Page 26 26
  • Page 27 27
  • Page 28 28
  • Page 29 29
  • Page 30 30
  • Page 31 31
  • Page 32 32
  • Page 33 33
  • Page 34 34
  • Page 35 35
  • Page 36 36
  • Page 37 37
  • Page 38 38
  • Page 39 39
  • Page 40 40
  • Page 41 41
  • Page 42 42
  • Page 43 43
  • Page 44 44
  • Page 45 45
  • Page 46 46
  • Page 47 47
  • Page 48 48
  • Page 49 49
  • Page 50 50
  • Page 51 51
  • Page 52 52
  • Page 53 53
  • Page 54 54
  • Page 55 55
  • Page 56 56
  • Page 57 57
  • Page 58 58
  • Page 59 59
  • Page 60 60
  • Page 61 61
  • Page 62 62
  • Page 63 63
  • Page 64 64
  • Page 65 65
  • Page 66 66
  • Page 67 67
  • Page 68 68
  • Page 69 69
  • Page 70 70
  • Page 71 71
  • Page 72 72
  • Page 73 73
  • Page 74 74
  • Page 75 75
  • Page 76 76
  • Page 77 77
  • Page 78 78
  • Page 79 79
  • Page 80 80
  • Page 81 81
  • Page 82 82
  • Page 83 83
  • Page 84 84
  • Page 85 85
  • Page 86 86
  • Page 87 87
  • Page 88 88
  • Page 89 89
  • Page 90 90
  • Page 91 91
  • Page 92 92
  • Page 93 93
  • Page 94 94
  • Page 95 95
  • Page 96 96
  • Page 97 97
  • Page 98 98
  • Page 99 99
  • Page 100 100
  • Page 101 101
  • Page 102 102
  • Page 103 103
  • Page 104 104
  • Page 105 105
  • Page 106 106
  • Page 107 107
  • Page 108 108
  • Page 109 109
  • Page 110 110
  • Page 111 111
  • Page 112 112
  • Page 113 113
  • Page 114 114
  • Page 115 115
  • Page 116 116
  • Page 117 117
  • Page 118 118
  • Page 119 119
  • Page 120 120
  • Page 121 121
  • Page 122 122
  • Page 123 123
  • Page 124 124
  • Page 125 125
  • Page 126 126
  • Page 127 127
  • Page 128 128
  • Page 129 129
  • Page 130 130
  • Page 131 131
  • Page 132 132
  • Page 133 133
  • Page 134 134
  • Page 135 135
  • Page 136 136
  • Page 137 137
  • Page 138 138
  • Page 139 139
  • Page 140 140
  • Page 141 141
  • Page 142 142
  • Page 143 143
  • Page 144 144
  • Page 145 145
  • Page 146 146
  • Page 147 147
  • Page 148 148
  • Page 149 149
  • Page 150 150
  • Page 151 151
  • Page 152 152
  • Page 153 153
  • Page 154 154
  • Page 155 155
  • Page 156 156
  • Page 157 157
  • Page 158 158
  • Page 159 159
  • Page 160 160
  • Page 161 161
  • Page 162 162
  • Page 163 163
  • Page 164 164
  • Page 165 165
  • Page 166 166
  • Page 167 167
  • Page 168 168
  • Page 169 169
  • Page 170 170
  • Page 171 171
  • Page 172 172
  • Page 173 173
  • Page 174 174
  • Page 175 175
  • Page 176 176
  • Page 177 177
  • Page 178 178
  • Page 179 179
  • Page 180 180
  • Page 181 181
  • Page 182 182
  • Page 183 183
  • Page 184 184
  • Page 185 185
  • Page 186 186
  • Page 187 187
  • Page 188 188
  • Page 189 189
  • Page 190 190
  • Page 191 191
  • Page 192 192
  • Page 193 193

Nikon Coolpix 880 Owner's manual

Category
Bridge cameras
Type
Owner's manual

Ask a question and I''ll find the answer in the document

Finding information in a document is now easier with AI