简 介简 介
14
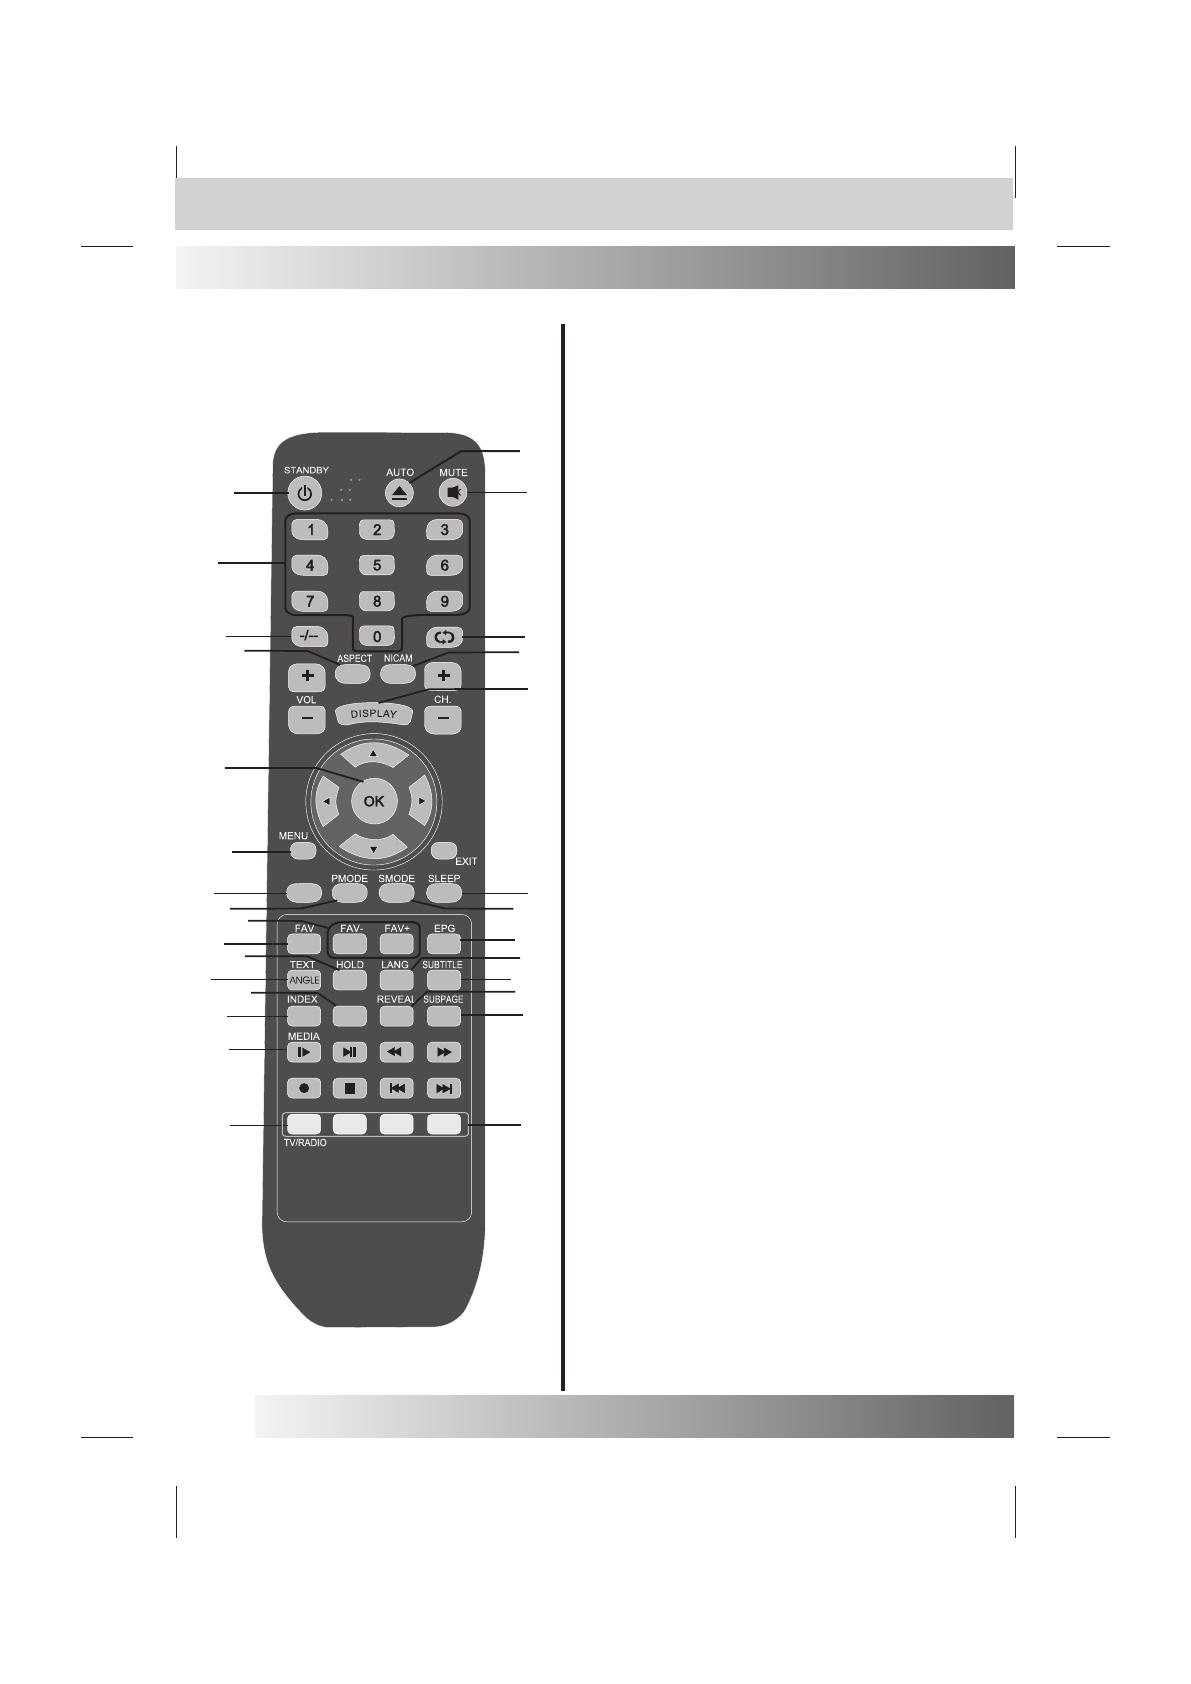
Operation-Remote Control
1.STANDBY:
Turn the unit on or off
2.AUTO Button
Press this button to auto adjust in PC
3.MUTE:
Press this button to mute or restore sound
4.0-9 number buttons
Use these number button to select channel or input password
5.-/--:
This TV allows you to select channels from 1t0 200.
Press this button to select one-digit,two digit or three
-digital channels input options.
To select a one-digit channel(e.g.Channel 8),press
this“-/--” botton to change channel selection to “-”
on screen display and press the “8” button only.
To select a two-digit channel(e.g.Channel 28). Press
This “ -/--” button to change channel selection to “--”
on screen display and press “2” and “8” buttons.
To select a three-digit channel(e.g. Channel 128).
press this “-/--“ on screen display and press “1”, “2” and
“8” buttons.
6.RETURN:
Press this button,can back to last channel
7.ASPECT:
To choose a proper screen aspect ratio
8.NICAM:
To change stereo sound mode in ATV channels
9.DISPLAY:
To access the program information(or DVB info)
10.LCD MENU:
To access the Menu main page
11.OK:
To confirm or alter the settings of the selected menu item
12.SOURCE:
To select the signal input source
13.PMODE:
Use to change the desired picture mode
14.SMODE:
To change the desired sound mode
15.SLEEP:
To set the time of television to automatically turn off
16.FAV:
To display a desired favorite channel list
17.FAV-,FAV+:
Press FAV-/FAV+ Button to choose the channel in favorite list .
18.EPG:
Turn on/off the EPG in DVBT mode.
19.TEXT:
Press to enter or exit the teletext mode.
20.HOLD:
To stop the automatic page change from Teletext
21.LANG:
change the audio language of current service if available.
22.SUBTITLE:
Turn on/off the subtitle
23.INDEX:
To go to the index page in the teletext mode
24.SIZE:
Press repeatedly to change the screen display mide in the
teletext mode.
25.REVEAL:
To reveal answers the hidden information for some teletext page(e.g
answers to puzzles or riddles).Press again to hide
the information.
26.SUBPAGE:
To enter or exit the subpaage in the teletext mode
27.MEDIA:
To enter the Media mode
28.COLOUR Buttons(RED/YELLOW/GREEN/BLUE):
Press this button to access directly to the corresponding
pages,displayed at the lower part of the teletext screen
ZOOM AUDIO
GOTO
TITLE
D.MENU
D.DISP
PROG
REPEAT A-B
SIZE
SOURCE
DVD
SETUP
1
2
3
4
5
6
7
12
9
10
11
13
15
14
16
17
18
19
20
21
22
23
24
26
25
27
29
8
29.TV/Radio Button
Switches to TV and Radio in DVBT mode.
28
D.MEDIA
ENGLISH
DVBX 2716CI


