Page is loading ...

TAL 1403 (L) Rev. 11 © MSA 2014 Prnt. Spec. 10000005389(B) Mat. 10073772
Doc. 10073772
CRANBERRY TWP.,PENNSYLVANIA,U.S.A.16066
For More Information, call 1-800-MSA-2222 or VisitOurWebsiteatwww.MSAsafety.com
The warranties made by MSA with respect to the product are voided if the product is not installed, used and ser-
viced in accordance with the instructions in this manual. Please protect yourself and your employees by follow-
ing the instructions. Please read and observe the WARNINGS and CAUTIONS inside. For any additional informa-
tion relative to use or repair call 1-800-MSA-2222 during regular working hours.
See separate insert for NIOSH Approval Information: P/N 10084702
This manual must be carefully read and followed by all persons who have, or will have, the responsibility for using
or servicing the Advantage 4000 Air-Purifying Respirator. The Advantage 4000 Air-Purifying Respirator will per-
form as designed only if used and serviced according to these instructions; otherwise, the respirator could fail to
perform as designed, and persons who rely on the Advantage 4000 Air-Purifying Respirator could sustain serious
personal injury or death.
AIR-PURIFYING RESPIRATOR
Model 4100 SINGLE-PORT Full Facepiece Respirator
P100 Respirator
GME - P100 Respirator
RESPIRATOR APPLICATION
P100 Respirator
GME-P100 Respirator
INDUSTRIAL APPLICATION
Chin-Type Canister
Model 4200 TWIN-PORT Full Facepiece Respirator
P100 Respirator
GME - P100 Respirator
RESPIRATOR APPLICATION
P100 Respirator
GME-P100 Respirator
INDUSTRIAL APPLICATION
Advantage 4200 Respirator
OPERATION AND INSTRUCTIONS
ADV ANTAGE
4000
Series APR

INTRODUCTION
CAUTIONS AND LIMITATIONS
Advantage 4000 Industrial and Gas Mask Applications
Note: All cautions and limitations do not apply to all appli-
cations. Refer to the NIOSH approval insert to verify the
applicable cautions and limitations.
A- Not for use in atmospheres containing less than 19.5
percent oxygen.
B- Not for use in atmospheres immediately dangerous to
life or health.
C- Do not exceed maximum use concentrations estab-
lished by regulatory standards.
H- Follow established cartridge and canister change out
schedules or observe ESLI to ensure that cartridges
and canisters are replaced before breakthrough
occurs.
I- Contains electrical parts that may cause an ignition in
flammable or explosive atmospheres.
J- Failure to properly use and maintain this product
could result in injury or death.
L- Follow the manufacturer's User's Instructions for
changing canisters.
M- All approved respirators shall be selected, fitted,
used, and maintained in accordance with MSHA,
OSHA and other applicable regulations.
N- Never substitute, modify, add, or omit parts. Use only
exact replacement parts in the configuration as speci-
fied by the manufacturer.
O- Refer to User's Instructions, and/or maintenance
manuals for information on use and maintenance of
these respirators.
P- NIOSH does not evaluate respirators for use as surgi-
cal masks.
S- Special or critical User’s Instructions and/or specific
use limitations apply. Refer to User’s Instructions
before donning.
BB- Not for use for entry into atmospheres immediately
dangerous to life and health.
CC-For entry, do not exceed maximum use concentra-
tions established by regulatory standards.
FF- Respirators are to be fit tested prior to use with the
heaviest cartridges, canisters, filters and/or acces-
sories intended to be used. Fit testing should also be
conducted while wearing all personal protective
equipment intended to be used. See User’s
Instructions for fit test requirements.
S- SPECIAL OR CRITICAL USER’S INSTRUCTIONS
Mersorb-P100 cartridges can be used against a mixture
of chlorine and mercury that are both present simultane-
ously, but cannot be used if alternating between mercury
contaminated atmospheres and chlorine-contaminated
atmospheres.
Mersorb-P100 respirators utilize an end-of-service-life
indicator for use against metallic mercury vapor. The band
around the side of each Mersorb-P100 cartridge consists
of chemically-treated paper. In use, as the paper is
exposed to metallic mercury vapor it changes from
orange to brown. When the indicator color changes to
brown, the cartridge is beginning to lose its effectiveness
against metallic mercury vapor and must be replaced.
Thus, the wearer has a constant, positive check on the
condition of the cartridge.
Do not enter any atmospheres with this respirator unless
you know that you are not colorblind and can distinguish
between the beginning and ending colors of the end-of-
service-life indicator (when using Mersorb-P100/Mersorb
respirators only).
Special Instructions for P100 with Splash Guard:
1. Test for Tightness – Support the cartridge from behind
using your fingers and depress the button with your
thumb. Gently inhale so that the facepiece collapses
slightly and hold breath for ten seconds. The face-
piece will remain collapsed while the breath is held,
unless there is a leak in the seal.
NOTE: If a leak is detected, adjust the straps or reposition
the facepiece, ensure the push button is completely
depressed, and repeat test until no leakage is detected.
2
TAL 1403 (L) Rev. 11 - 10073772 - DRAFT 3-20-14
TABLE OF CONTENTS
Instructions for Use and Care............................................3
General Description ...........................................................5
Size Selection.....................................................................9
Respirator Fit Test..............................................................9
Preparing the Respirator for Use .....................................11
Donning............................................................................13
Negative Pressure Seal Test ............................................14
Maintaining the Respirator...............................................15
Removing the Respirator .................................................21
Decontamination ..............................................................21
Cleaning and Disinfecting ................................................23
Storage.............................................................................25
Advantage Facepiece Assemblies...................................28

INSTRUCTIONS FOR USE AND CARE
1. An adequate respiratory protection program must
include knowledge of hazards, hazard assessment,
selection of proper respiratory protective equip-
ment, instruction and training in the use of equip-
ment, inspection and maintenance of equipment,
and medical surveillance.
2. This respirator will perform as designed only if
used and maintained according to the manufactur-
er's instructions. The Program Administrator and
the users must read and understand these instruc-
tions before using or servicing this product.
3. If the respirator does not perform as specified in
this manual, it must not be used until it has been
checked by authorized personnel.
4. Do not alter, modify, or substitute any components.
5. Inspect the respirator regularly and maintain it
according to the instructions. Repairs must only be
made by properly trained personnel.
6. This respiratory protective device does not supply
oxygen. Use only in adequately ventilated areas
which conform to the appropriate standard.
7. This respirator must be used in conjunction with
the proper chemical or particulate canis-
ter/cartridge(s) for protection against specific con-
taminants. If you cannot determine that the filter
canister/ cartridge(s) used with this device is
designed for the contaminant, or if you do not
know the identity of the contaminant, do not use
this device.
8. Do not use when concentrations of contaminants
are unknown.
9. Do not use when appropriate exposure limit (PEL,
REL, TLV, etc.) is not known.
10. Leave the contaminated area immediately if:
a. Breathing becomes difficult
b. Dizziness or other distress occurs
c. You taste or smell the contaminant
d. You experience nose or throat irritation
e. Instructed by responsible individuals
11. Use strictly according to the instructions, labels,
and limitations pertaining to this device. Follow an
established canister/cartridge(s) change-out
schedule.
12. This respirator may not provide a satisfactory seal
with certain facial characteristics, such as beards
or large sideburns, that prevents direct contact
between the skin and the sealing surface of the
facepiece. Do not use this facepiece if such condi-
tions exist.
13. Do not wear eyeglasses under the facepiece. The
temples or sidebars on eyeglasses will prevent an
air-tight seal. If you must wear glasses, install the
spectacle kit.
14. The user must perform a respirator fit test
(Quantitative Test or Qualitative Test) and follow all
warnings and limitations specified.
15. Wear impermeable protective clothing to prevent
exposure to gases and vapors which can poison by
skin absorption.
16. Do not use this full facepiece with self-contained
breathing apparatus (SCBA) unless equipped with
a push-to-connect inlet.
17. Do not use this respiratory protective device in
explosive atmospheres.
18. Do not use for urethane paints or other paints con-
taining isocyanates unless an appropriate cartridge
change-out schedule is developed. Due to their
poor warning properties, overexposure can occur
without user awareness and result in severe per-
manent damage to the respiratory system. If
unable to develop an appropriate change-out
schedule, use an air-supplied respirator or SCBA.
Failure to follow all warnings, instructions, and estab-
lished protective measures can result in serious per-
sonal injury or death.
• This respirator/filter provides LIMITED protection.
It may help reduce exposure to airborne biological
agents, including H1N1 (swine) flu virus, avian
(bird) flu virus, other types of influenza, SARS, or
other bacterial or viral biological agents and help
reduce the risk for influenza infection during a pan-
demic, but will NOT eliminate the risk of exposure,
infection, illness, or death.
• This respirator/filter is certified by NIOSH to com-
ply with the requirements specified for the desig-
nated filter efficiency level; however, appropriate
authorities have NOT established a safe level of
exposure to biological agents. Therefore, the respi-
rator may NOT prevent transmission of influenza
virus.
• Refer to the Centers for Disease Control and
Prevention (CDC) at www.cdc.gov for guidance on
the use of respirators to help decrease exposure to
H1N1 virus or other airborne biological agents in
community, home, and occupational settings. The
CDC recommends fit testing, medical evaluations,
and training for optimal effectiveness when a res-
pirator is used in a non-occupational setting.
Neglecting these preparatory measures may cause
an unsafe condition. Respirators used in an occu-
pational setting MUST be used in accordance with
a complete respiratory protection program as
required by OSHA, which includes proper selec-
tion, training, fit-testing, and fit-checking. Detailed
information on a respiratory protection program is
available by contacting OSHA or visiting
www.osha.gov.
• Do NOT remove respirator in contaminated areas.
The outer surface of the respirator MUST be treat-
ed as if it is contaminated at all times. Tight-fitting
3
TAL 1403 (L) Rev. 11 - 10073772 - DRAFT 3-20-14

INSTRUCTIONS FOR USE AND CARE
safety goggles, or a full-facepiece respirator, may
further help prevent transmission of influenza
virus.
• The CDC recommends frequent hand washing and
wearing gloves to help prevent transmission of dis-
ease due to exposure to surfaces where contami-
nants may be present, and also immediately fol-
lowing removal of the respirator.
• Do NOT reuse or share maintenance-free respira-
tors. ALWAYS clean cartridge-style respirators
before reuse in accordance with the instructions
provided.
• This respirator/filter is NOT for use by (a) children,
or (b) people with a medical condition that may be
adversely affected by using it.
Failure to follow all warnings and instructions can
result in serious personal injury or death.
When using filters in an application that produces
sparks, ensure that they are protected by a shield.
ontact with sparks can damage filters and reduce pro-
tection.
• DO NOT use a gas mask chin canister in an area
where spark is present.
• DO NOT use an OptiFilter
®
XL in an area where
spark is present.
Failure to follow this warning can result in serious per-
sonal injury or death.
4
TAL 1403 (L) Rev. 11 - 10073772 - DRAFT 3-20-14

GENERAL DESCRIPTION
The Advantage 4000 APR is an air purifying respirator
intended for use in atmospheres which are not immediate-
ly dangerous to life or health (non-IDLH). This respirator is
intended for applications which may require the user to
enter or exit a hazardous area, or work within the area for
a limited time. Advantage 4000 series APRs are not
approved for use in atmospheres containing CBRN conta-
minants.
The Advantage 4000 Model 4100 consist of a faceblank
mask and head-harness with push-to-connect inlet
assembly, twin-cartridge inlet assembly, or RD40 inlet
assembly.
The Advantage 4000 APR Model 4200 consist of a full-
facepiece mask with twin-port or plugged inlet assembly.
Use of nosecup assemblies provided with Advantage
4000 series APRs is not optional. Properly installed nose-
cup assemblies must be present during use.
Primary faceblanks and head-harnesses are Hycar™ and
cloth, respectively.
METHOD OF OPERATION
Inhaled air is drawn through the canister/cartridge(s)
which contain(s) adsorbents and a filter that removes or
neutralizes specific contaminants. Exhaled air leaves the
facepiece through the exhalation valve.
It is important that the user become familiar with the
application and operation of the Advantage 4000 series
APR Respirator and ensures that it fits properly before
use.
When properly fitted to the user, the Advantage 4000 full
facepiece with nosecup, head harness, and inlet assembly
combined with the appropriate canister/cartridge(s),
becomes a complete respiratory protective device.
The respirator consists of the following subassemblies:
• full facepiece (with required nosecup assembly)
• head harness
• inlet assembly
• filter canister/cartridge(s)
Facepiece size is identified on the front of the facepiece
on the lower left head harness tab.
Nosecup size is identified on the front of the nosecup on
the lower left (user’s left) side of the baffle.
Note: Facepiece and nosecup size should match.
Advantage 4000 series APRs are not approved for use
in atmospheres containing CBRN contaminants.
Contact MSA at 1-800- MSA-2222 for information
regarding CBRN approved facepieces. Failure to fol-
low this warning can result in serious personal injury
or death.
FILTER(S) / CARTRIDGE(S)
See separate insert for NIOSH Approval Information (P/N
10084702).
ATTACHING FILTER CARTRIDGE
Model 4200 Twin-Port Respirator or Model 4100
Faceblank with Twin-Cartridge Inlet Assembly
1. Carefully attach filter cartridges to facepiece connec-
tors (bayonets).
a. Align the small lug on the connector with the
match-mark on the cartridge body to mate the car-
tridge cutouts with the bayonet lugs.
b. Turn the cartridge
clockwise until tight.
c. (see Replacing Cartridges).
Model 4100 Single-Port Faceblank with RD40 Inlet
Assembly.
1. Thread the cartridge into receptacle.
2. Hand tighten slowly until snug to ensure a good seal
and prevent damage to threads.
Attaching Snap-On Filters
1. Place a filter in each filter
cover. Never load filters
into receptacles.
5
TAL 1403 (L) Rev. 11 - 10073772 - DRAFT 3-20-14

GENERAL DESCRIPTION
2. Snap filter cover onto
both cartridges taking
care not to damage the
filter.
Note: If using the Comfo/Advantage Adapter, follow the
instructions supplied in the Comfo/Advantage kit.
RESPIRATOR USE LIMITATIONS
The wearer must comply with the following MSA respira-
tor use limitations:
A. MAXIMUM USE CONCENTRATION – Do not exceed
any of the following:
1. Routine Use –
a. 50 times the exposure limit for the contaminants
present if using a quantitative fit test method.
Using a qualitative fit test may reduce the
maximum use concentration. See the Respirator
Fit Test section.
b. Immediately Dangerous to Life or Health (IDLH)
concentration for any contaminant present.
2. Escape (for Gas Mask only) –
B. The limitations outlined in the applicable NIOSH
approval
C. Any applicable limitation contained in a standard
established by regulatory agency (such as OSHA) with
jurisdiction over the wearer.
An appropriate cartridge change-out schedule must be
developed by a qualified professional unless the car-
tridge/canister uses an end-of-service-life indicator. The
change-out schedule must take into account all factors
that may influence respiratory protection including spe-
cific work practices and other conditions unique to the
workers’ environment. If using against substances hav-
ing poor warning properties there is no secondary
means of knowing when to replace the cartridge/ canis-
ter. In such cases, take appropriate additional precau-
tions such as a more conservative change-out schedule
or use of an air-supplied respirator or SCBA to prevent
overexposure. Failure to follow this warning can result in
serious personal injury or death.
The following is a partial list of substances with poor
warning properties:
6
TAL 1403 (L) Rev. 11 - 10073772 - DRAFT 3-20-14
Canister for Chin-Type Gas Masks (Model 4100 Single Port)
Maximum Escape
Part No.
MSA Canister Purifying Conditions
Identification Protection Code
Approval Gas/Vapors
% Volume PPM
10059903 Phosphine/ PH/AM/CL TC TC-14G-0274 0.50% 1500 Ammonia/Chlorine
Ammonia/Chlorine/ 0.15% Phosphine
P100
10067469 Organic Vapor/ OV TC-14F-0279 0.50% 5000 Organic Vapors
P100
10067491 Hydrogen HF TC-14G-0280 0.10% 1000 Hydrogen Fluoride
Fluoride/P100
10067470 Formaldehyde Acid FM/AG/CD/HS TC-14G-0282 0.05% 500 Formaldehyde
Gas/Chlorine 0.50% 5000 Acid Gases and
Dioxide/Escape Hydrogen Sulfide
from Hydrogen 0.10% 1000 Chlorine Dioxide
Sulfide/P100
Acrolein
Carbon monoxide
Hydrogen selenide
Aniline
Diisocyanates
Methanol
Arsine
Dimethyl sulfate
Methyl bromide
Bromine
Hydrogen cyanide
Methyl chloride
Methylene chloride
Nickel carbonyl
Nitric Acid
Ozone
Phosgene
Phosphine
Phosphorous trichloride
Stibine
Sulfur chloride
Urethane or other
diisocyanate containing
paints
Vinyl chloride
Nitro compounds:
Nitrogen oxides
Nitroglycerin
Nitromethane

GENERAL DESCRIPTION
D. MIXTURES OF CONTAMINANTS – This gas mask can
be used for protection against a mixture of contami-
nants that are present simultaneously or alternately
against one contaminant then another (using the same
canister) if the mixture meets the following conditions:
1. The canister must be approved for all contaminants
present.
2. NIOSH permits mixing of the following contami-
nants: organic vapors, chlorine, chloride dioxide,
hydrogen sulfide, acid gases, ammonia, and carbon
monoxide.
3. Particulates can be mixed with any other particulate
or any gas or vapor for which the canister is
approved.
4. Contaminants present simultaneously must be
below IDLH levels for the specific contaminants. If
any one contaminant in the mixture exceeds the
IDLH concentration, then the entire mixture must be
treated as IDLH and the respirator cannot be used
(except for escape when using respirator in a gas
mask configuration).
5. Mersorb-P100 cartridges can be used against a
mixture of chlorine and mercury that are both pre-
sent simultaneously, but cannot be used if alternat-
ing between mercury-contaminated atmospheres
and chlorine-contaminated atmospheres.
E. TIME USE LIMITATION
1. Canisters and cartridges with an N95 or R95filter
shall be limited to 8 hours of use (continuous or
intermittent) against particulates. (Service time can
be extended by performing an evaluation in the
specific workplace setting that demonstrates (a)
that the extended use will not degrade the filter effi-
ciency below 95%, or that the total mass loading of
the filter is less than 200mg for a single canister
application or less than 100 mg each for a dual car-
tridge application).
2. GMHF-C-P100 and Hydrogen Fluoride/P100:
Canister must be replaced after each use against
hydrogen fluoride (not to exceed 8 hours) to ensure
the integrity of the P100 filter.
F. MULTI-USE LIMITATIONS (OptiFilter XL only)
1. Approved as a high efficiency particulate air filter on
approved Powered Air Purifying Respirators. Also,
approved as a P100 filter, but ONLY when used with
an approved negative pressure respirator. Do not
exceed maximum use concentrations established
by regulatory standards.
EXPOSURE LIMITS
A listing of applicable exposure limits from the following
sources is provided in MSA’s Response
®
Respirator
Selector: available online at www.MSAnet.com.
• American Conference of Governmental Industrial
Hygienists (ACGIH)
• Occupational Safety and Health Administration
(OSHA)
• National Institute for Occupational Safety and Health
(NIOSH)
• American Industrial Hygiene Association (AIHA)
Contact MSA at 1-800-MSA-2222 for information.
EXPOSURE LIMITS FOR MIXTURES
The American Conference of Governmental Industrial
Hygienists (ACGIH) publishes the following information to
determine the TLV of a mixture.
First, determine the total concentration of the chemical
mixture (C
Mixture
) from the individual contaminant con-
centrations (C
1
, C
2
, C
3
...) using the following formula:
The TLV of the mixture is found by using the following for-
mula where T
1
, T
2
, T
3
, ... are the individual contaminant
TLVs and C
1
, C
2
, C
3
... are the individual contaminant
concentrations:
Only use these equations if the contaminants present are
actually mixed. Some substances do not mix and may be
present separately, for example, in pockets or at different
levels. In that case, the lowest TLV of the substances pre-
sent must be used to determine the appropriate respirator
category for protection against all contaminants present.
See MSA’s Response
®
Respirator Selector for additional
information.
7
TAL 1403 (L) Rev. 11 - 10073772 - DRAFT 3-20-14
C
mixture
T
mixture
C
1
T
1
+
C
2
T
2
+
C
3
T
3

NOTES
8
TAL 1403 (L) Rev. 11 - 10073772 - DRAFT 3-20-14

SIZE SELECTION
Regardless of facial dimensions and respirator sizing
charts, an actual respirator fit test, either qualitative or
quantitative must be performed to ensure selection of the
correct respirator size.
Fit test the respirator size relative to your facial features
and dimensions. The Safety Administrator or Program
Manager might assist in selecting the initial size to try.
Carefully don the respirator and conduct a Negative
Pressure Seal test. See donning instructions for proce-
dure.
If the respirator does not pass the Negative Pressure Seal
Test or feels uncomfortable, try the next size. If other than
facial seal leakage is detected, the condition must be
investigated and corrected before another test is made.
Passing the Negative Pressure Seal Test does not verify
that the size is correct. Size selection must be verified by
successfully passing either a qualitative or quantitative
Respirator Fit Test. If the respirator passes a Negative
Pressure Seal Test but DOES NOT pass a Respirator Fit
Test, try the next size.
Once the correct size is selected, the respirator must pass
a Negative Pressure Seal Test every time the mask is
donned to ensure proper fit before using the respirator.
The respirator must also pass the tightness test before the
user attempts to enter a toxic atmosphere.
The respirator will not furnish protection unless all inhaled
air is drawn through a suitable canister/cartridge(s).
RESPIRATOR FIT TEST
The user must perform a respirator fit test
(Quantitative Test or Qualitative Test) and follow all
warnings and limitations specified. Failure to do so
can result in serious personal injury or death.
A qualitative or quantitative respirator fit test must be rou-
tinely carried out for each wearer of this respirator to
determine or confirm the amount of protection that the
respirator provides. The fit test method chosen may
impact the maximum use concentration.
Respirator fit tests are explained fully in the American
National Standard Practices for Respiratory Protection,
ANSI Z88.2-1992 which is published by the American
National Standards Institute, 11 West 42nd Street, New
York, New York, 10036 and Occupational Safety and
Health Standards, OSHA 1910.134, which is published by
the Occupational Safety and Health Administration, 200
Constitution Avenue, NW, Washington DC, 20210.
9
TAL 1403 (L) Rev. 11 - 10073772 - DRAFT 3-20-14

NOTES
10
TAL 1403 (L) Rev. 11 - 10073772 - DRAFT 3-20-14

PREPARING THE RESPIRATOR FOR USE
CHECKPOINTS BEFORE USE
1. Check that all parts of the respirator are complete and
undamaged. See the Inspection section for
Inspections Procedures.
2. Check that the filter canister/cartridge(s) approval is
appropriate and effective against the contaminant in
the environment.
When using the Advantage 4000 twin cartridge inlet
assembly, ensure that the inhalation valve disc is lay-
ing flat against the adapter orifice. Failure to follow
this warning can result in serious personal injury or
death.
INSTALLING/REPLACING THE CANISTER/
CARTRIDGE(S)
Verify the contaminant(s) in the environment before
entering. Always check that the filter canis-
ter/cartridge(s) is appropriate for use in the environ-
ment. A filter canister/cartridge(s) which is not
designed for the contaminant present may not provide
protection.
Failure to follow this warning can result in serious per-
sonal injury or death.
After verifying that the canister/cartridge(s) type is appro-
priate for use in the environment
1. Verify shelf life expiration date on carton, bag, and
canister/cartridge(s) label has not been exceeded.
• DO NOT use an expired canister/cartridge.
• DO NOT use the canister/cartridge(s) if the bag is
opened, damaged, or missing. Canisters/ car-
tridges must be in their original packaging prior to
use in a contaminated environment. Do not reuse
the canister/cartridge(s).
Failure to follow this warning can result in serious per-
sonal injury or death.
2. Remove canister/cartridge(s) from its packaging.
3. Inspect the canister/cartridge(s) to be sure that it is
not damaged.
4. Thread the filter canister/cartridge(s) into the facepiece
port and hand-tighten.
If applicable, place a new filter in each filter cover. Never
load filters into the receptacles.
Use the canister/cartridge(s) immediately upon opening
the bag.
Note: For gas mask canister, refer to the shelf life section
for storing the canister outside the packaging. Discard
canister/cartridge(s) after each use.
Replace the canister/cartridge(s) before each use. Follow
the established canister/cartridge(s) change-out sched-
ules to ensure that canister/cartridge(s) are replaced
before breakthrough occurs. When used at defined occu-
pational exposure limits, the rated service time cannot be
exceeded.
Replacement of the Mersorb P100 cartridge must occur
when the end-of-service-life indicator turns brown.
After using the respirator in a gas mask application for
escape, the canister must be replaced before reusing the
respirator.
DO NOT replace canister/cartridge(s) in a contaminat-
ed area. Be sure to follow applicable decontamination
procedures. Failure to follow this warning can cause
inhalation of contaminated air, resulting in serious res-
piratory injury or death.
When the mask is adjusted properly, the wearer should
not taste or smell the contaminant, or experience eye,
nose, or throat irritation. The wearer's inhalation resis-
tance should be as experienced during training.
• If the respirator does not perform as specified, it
must not be used until it has been checked by
authorized personnel.
• Return to a non-contaminated area immediately if
you experience nausea, dizziness, eye irritation,
unusual odor or taste, excessive fatigue, or diffi-
culty breathing.
• When using canisters in an application that pro-
duces sparks, ensure that they are protected by a
shield. Contact with sparks can damage filters and
reduce protection.
11
TAL 1403 (L) Rev. 11 - 10073772 - DRAFT 3-20-14

NOTES
12
TAL 1403 (L) Rev. 11 - 10073772 - DRAFT 3-20-14

DONNING
When Using the Advantage 4000, ensure the inhalation
valve disc is laying flat against the adapter orifice.
Failure to follow this warning can result in serious per-
sonal injury or death.
DONNING THE FACEPIECE WITH THE CLOTH HEAD
HARNESS
1. Loosen the harness straps until the end tabs are at
the buckle.
2. Grasp the harness straps.
3. Insert chin into the chin
cup.
4. Pull the harness over
the head so that the
netting lies flat and is
centered behind your
head.
5. Hold the facepiece by
the inlet housing while
tighten the lower
straps. Pull them
straight back, not out.
6. Tighten the upper
straps.
7. Adjust the straps as
necessary until the
facepiece fits snugly
against the face.
8. Ensure that straps are
adjusted to same
lengths from left to
right sides of the face-
piece.
9. Perform a negative
pressure seal test.
13
TAL 1403 (L) Rev. 11 - 10073772 - DRAFT 3-20-14

DONNING
DONNING THE FACEPIECE WITH RUBBER HARNESS
1. Loosen the harness straps until the end tabs are at
the buckle. Grasp the harness straps.
2. Insert chin into the chin
cup.
3. Pull the harness back over head.
4. Pull the back of harness downward toward the neck
until it’s centered at the back of your head.
5. If necessary, hold the center of the facepiece inlet
assembly with one hand and position the harness with
the other hand, until obtaining a firm and comfortable
fit against the face at all points.
DO NOT carry or support the Advantage 4000 APR by
cartridges or filters. They are not intended to be load
bearing components.
6. Tighten the neckstraps so that the mask fits snugly
against the face.
Note: Make sure the back
of the harness is centered
on the back of the head.
7. The top two harness straps must be flat against the
top of head.
Note: Both top straps should be adjusted with button in
the same position so straps are equal in length.
8. If the mask does not feel snug, loosen the bottom
straps and reposition the back of the harness. Make
sure that the back of the harness is positioned on the
back of the head. If the mask does not become snug
against the face, remove the mask and adjust the
length of the top two straps.
Adjusting the Top Straps
1. Remove the strap from the button by pulling the loose
end of the strap away from the button.
2. Move the slide away
from the lens ring to
allow the strap to slide
through the lens ring
connection. Adjust the
length of the strap.
Secure the strap in
position by pulling the
strap onto the button.
3. Smooth the straps so that they are flat. Move the slide
so that it is located at the lens ring connection.
NEGATIVE PRESSURE SEAL TEST
The Negative Pressure Seal Test must be performed each
time the facepiece is donned. A good face-to-facepiece
seal must be verified before entering a hazardous area.
Perform the test as follows:
1. Ensure respirator is assembled properly.
2. Block off canister/cartridge(s) inlet using the palm(s) of
the hand(s).
3. Inhale gently and hold breath for 10 seconds. If the
seal is good, the facepiece will collapse and remain
collapsed against face. Remove hands and breathe
normally.
4. If the facepiece did not remain collapsed during the
test, or any leakage is noticed, readjust straps and
perform Negative Pressure Seal Test again.
5. If this does not correct the leak, the mask will not pro-
vide protection. If the leakage is from the face seal, a
different size mask may provide a good seal. If other
than face seal leakage is detected, the condition must
be corrected before performing another test.
P100 with Splash Guard Method - Support the car-
tridgee from behind using your fingers and depress the
button with your thumb. Gently inhale so that the face-
piece collapses slightly and hold breath for ten seconds.
The facepiece will remain collapsed while the breath is
held, unless there is a leak in the seal.
14
TAL 1403 (L) Rev. 11 - 10073772 - DRAFT 3-20-14

INSPECTION
NOTE: If a leak is detected, adjust the straps or reposition
the facepiece, ensure the push button is completely
depressed, and repeat test until no leakage is detected.
This device may not seal properly with your face if you
have a beard, gross sideburns, or similar physical
characteristics (see ANSI Z88.2). An improper facial
seal may allow contaminants to leak into the face-
piece, reducing or eliminating respiratory protection.
Do not use this device if such conditions exist. The
negative pressure seal test must be conducted and
passed before each use. Never remove the facepiece
except in a safe, non-hazardous, non-toxic atmos-
phere. Failure to follow this warning can result in seri-
ous personal injury or death.
REMOVING THE RESPIRATOR WITH RUBBER
HARNESS
To remove the facepiece:
1. Push the bottom buckles forward to loosen and fully
extend the bottom straps.
2. Grasp the inlet assembly and pull the mask up and
away from face.
REMOVING THE RESPIRATOR WITH CLOTH
HARNESS
To remove the facepiece:
1. Push the bottom buck-
les forward to loosen
and fully extend the
bottom straps.
2. Push the upper buckles forward to loosen the upper
straps.
3. Grasp the inlet assembly and pull the mask up and
away from face.
MAINTENANCE
This respirator must be kept in good condition to function
properly. When any respirator shows evidence of exces-
sive wear or damage, it must be replaced immediately.
This respirator, when not in use, should be stored in a
clean dry location, such as its storage bag. Do not distort
the facepiece during storage. When disposing of the res-
pirator or its components, do so in accordance with local,
state and federal regulations.
REPAIR
Note: All repair procedures assume that the respirator is
clean and free of contaminant and that the fil-
ter(s)/cartridge(s) are removed.
Removing the Inlet Assembly
1. Press the Inlet assem-
bly release button.
2. Rotate the adapter
clockwise a quarter
turn until the notch and
part number are at 9:00
o’clock.
3. Firmly pull the inlet assembly from the facepiece
assembly by grasping the inlet assembly and base of
the facepiece.
Inlet Assembly Instructions
DO NOT use a sharp object to remove the o-ring. A
damaged o-ring will not form an adequate seal with
the facepiece.
Disassembling the Twin-Cartridge Inlet Assembly
1. Carefully roll the o-ring out of its groove and discard.
2. Carefully pry open the exhalation cover.
3. Depress Inlet assembly release button. Rotate the
handwheel 135 degrees (3/8-turn) clockwise. Pull the
adapter off the inlet assembly and rotate it another 45
15
TAL 1403 (L) Rev. 11 - 10073772 - DRAFT 3-20-14
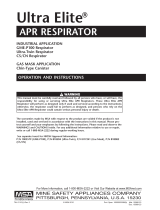
Plugged Inlet Assembly
RD40 Inlet Assembly

INSPECTION
degrees (1/8-turn).
4. Carefully remove the button, allowing the springs to
fall out.
5. Pull the adapter and the twin-cartridge manifold apart,
taking care not to drop the O-ring between them.
6. Discard the O-ring.
7. Remove the gaskets from the bayonet fittings.
8. Gently pull the inhalation valve disc from the stem.
9. Inspect the valve for any damage and replace if nec-
essary.
10. Fold the exhalation valve in half and gently pull out of
the component housing.
11. Inspect the valve seat for any damage and replace if
necessary.
Disassembling the Plugged Inlet Assembly
1. Carefully roll the o-ring out of its groove and discard.
2. Carefully pry open the exhalation cover..
3. Depress the button on the inlet housing. Facing the
front of the inlet assembly, rotate the adapter 135
degrees (3/8-turn) clockwise. Pull the adapter off the
inlet assembly.
4. Carefully remove the button, allowing the springs to
fall out.
5. Gently pull the inhalation valve disc from the stem.
6. Inspect the valve disc and seat for damage and
replace if necessary.
Disassembling the RD40 Inlet Assembly
1. Carefully roll the o-ring out of its groove and discard.
2. Carefully pry open the exhalation cover.
3. Depress Inlet assembly release buttonFacing the front
of the inlet assembly, rotate the adapter 135 degrees
(3/8-turn) clockwise. Pull the adapter off the inlet
assembly.
4. Carefully remove the button, allowing the springs to
fall out.
5. Grasp the tab on the spider gasket and gently pull it
out.
6. Gently pull the inhalation valve disc from the stem.
7. Inspect valve for any damage. Replace if necessary.
8. Gently pull the exhalation valve disc from the stem.
7. Inspect the valve disc and seat for damage and
replace if necessary.
Disassembling the PTC Inlet Assembly
1. Carefully roll the o-ring out of its groove and discard.
2. Carefully pry open the exhalation cover.
3. Depress the button on the inlet housing. Facing the
front of the inlet assembly, rotate the adapter 45
degrees (3/8-turn) clockwise. Pull the adapter off the
inlet assembly and place it on your working surface
with the valve side up if applicable.
4. Gently pull the inhalation valve disc from the stem.
5. Inspect valve disc and stem for damage. Replace if
necessary.
6. Carefully release the button over your working surface,
allowing the springs to fall out.
7. Carefully remove the clip. Do not damage the spring
or valve.
8. Place clip, spring, valve, and valve stem assembly
(contained within rubber valve) on your working sur-
face.
9. Remove rubber valve from valve stem assembly.
The inlet assembly is now completely disassembled. It
may be cleaned using a non-sudsing cleaning solution
such as Confidence Plus
®
Cleaning Solution (P/N
10009971)
Inspect all parts for damage before reassembly.
Reassembling the Twin-Cartridge Inlet Assembly
1. Lightly lubricate exhalation valve stem with Christo-
Lube (PN 604070) or similar fluorinated lubricant.
2. Carefully press the valve stem into the orifice by push-
ing in the center of the valve face.
3. Locate the button and place a small spring in each
hole.
4. Put the button into mating cavity and locate the
adapter
5. Place a new o-ring on twin-cartridge manifold seat
and insert it into the serrated adapter with wider rib to
the left and serrated adapter inverted.
6. Rotate the notched adapter 180 degrees so that
model number is visible and upright. Larger of the two
ribs should be to the left.
7. Pull the components apart gently to ensure that they
are fully engaged.
8. Rotate serrated adapter 3/8-turn clock-wise.
9. Insert adapter into grooved channels by locating
recessed button cavity.
10. Press adapter into place and rotate adapter 3/8-turn
counter-clockwise until it locks.
11. Roll a new o-ring into position on the groove/interface
between the serrated adapter and the component
housing.
12. Place the hinge tabs into the slots.
13. Snap the cover into place.
14. Carefully stretch the valve disc over the stem in the
center of the adapter.
15. Replace the bayonet gaskets on the fittings of the
manifold.
The Twin-Cartridge Inlet Assembly is now ready for use
with the Advantage 4000 facepiece.
Reassembling the Plugged Inlet Assembly
1. Lightly lubricate exhalation valve stem with Christo-
Lube (PN 604070) or similar fluorinated lubricant.
2. Carefully press the valve stem into orifice by pushing
in the center of the valve face
3. Locate the button and place a small spring in each
hole.
4. Put the button into mating cavity and locate the
adapter.
5. Insert the adapter into the grooved channels by locat-
16
TAL 1403 (L) Rev. 11 - 10073772 - DRAFT 3-20-14

INSPECTION
ing recessed button cavity.
6. Press the adapter into place and rotate the adapter
3/8-turn counter-clockwise until it locks.
7. Roll a new o-ring into position on the groove between
the plugged adapter and the component housing.
Locate the exhalation cover.
8. Place the lower tabs of the cover into the inlet assem-
bly.
9. Snap the top half of the cover into place.
The plugged Inlet Assembly is now ready for use with the
Advantage 4000 Facepiece.
Reassembling the RD40 Inlet Assembly
1. Lightly lubricate exhalation valve stem with Christo-
Lube
®
(PN 604070) or similar fluorinated lubricant.
2. Carefully press the valve stem into orifice by pushing
in the center of the valve face
3. Locate the button and place a small spring in each
hole.
4. Put the button into mating cavity and locate the
adapter.
5. Insert adapter into grooved channels by locating
recessed button cavity.
6. Press adapter into place and rotate adapter 3/8-turn
counter-clockwise. A click will be heard when the but-
ton engages
7. Roll a new o-ring into position on the groove/interface
between the RD40 adapter and the component hous-
ing. Locate the exhalation cover.
8. Place the hinge tabs into the slots. Snap the cover
into place and locate the inhalation valve disc.
9. Carefully stretch the valve disc over the stem in the
center of the spider gasket.
10. Replace the spider gasket valve in the seating groove
inside of the RD40 Adapter.
The RD40 Inlet Assembly is now ready for use with the
Advantage 4000 facepiece.
Reassembling the PTC Inlet Assembly
1. Lightly lubricate exhalation valve orifice.
2. Carefully insert disc portion of valve stem into orifice
and stretch around until stem and valve are fully
engaged and properly oriented.
3. Insert valve stem shaft into exhalation port of compo-
nent housing.
4. Place exhalation pressure demand spring on spring
retaining clip and, while holding spring on clip, set
opposite end of spring in valve crown portion of exha-
lation valve.
5. Firmly press spring retaining clip sides into matching
holes on component housing until engaged
6. Locate the button and place a small spring in each
hole.
7. Put the button into mating cavity and locate adapter
8. Insert adapter into grooved channels by locating
recessed button cavity.
9. Press adapter into place and rotate adapter 3/8-turn
counter-clockwise until it locks into place.
10. Roll a new O-ring into position on the groove/interface
between the PTC adapter and the component hous-
ing. Locate the exhalation cover.
11. Place the lower tabs of the cover into the mating
grooves above the adapter.
12. Snap the cover into place and locate the inhalation
valve disc
13. Carefully stretch the valve disc over the post in the
center of the adapter
The PTC Inlet Assembly is now ready for use with the
Advantage 4000 facepiece.
Disassembling the Facepiece: Model 4100 and 4200
1. Remove the U-clip from the inlet housing front by
spreading away from the inlet assembly and sliding it
down. Set the U-clip aside.
2. Push the inlet housing through the facepiece lens by
applying inward force at bottom of inlet housing
3. Remove the nosecup by grasping to close to the inlet
housing flange.
4. Remove and discard the small internal o-ring.
5. Remove the larger external o-ring and replace.
6. Set the inlet housing aside.
7. Holding the nosecup, gently push the inlet check
valves from inside and through the nose-cup.
8. Inspect the silicone valves for any damage. Replace if
damaged.
Disassembling the Facepiece: Model 4200 only
1. To replace the inhalation valves on the lens bayonet
connectors, line the holes up in the valves with the
posts on the back of the lens bayonet connectors and
gently stretch the valve openings to slip over the posts
2. Remove the bayonet connector gaskets by stretching
the gaskets slightly and lifting them over the bayonet
connectors.
Removing the Lens from the Facepiece Blank
1. Remove the head harness. See the Removing the
Head Harness section.
2. Using a Phillips screwdriver, unthread and remove the
two screws securing the lens rings.
3. Separate the lens rings by inserting a flat head screw-
driver into the rear notch of each side until it is seated
firmly.
4. Carefully rock the screwdriver up and down until either
half can be pulled from the facepiece blank by hand.
5. Fold back the facepiece blank and remove the lens.
Set all components aside. Do not discard.
DO NOT allow the screwdriver blade to contact any
portion of the facepiece blank.
Reassembling the Facepiece
1. To reassemble facepiece, reverse the preceding direc-
17
TAL 1403 (L) Rev. 11 - 10073772 - DRAFT 3-20-14

INSPECTION
tions with the exception of the lens which is reassem-
bled as per the following instructions.
Before use, perform negative pressure test to insure
proper reassembly of Advantage 4000 Respirator. If
any portion of facepiece does not seal, remove from
service and inspect/service immediately.
Before installing a new lens, check the blank groove
for dirt or other debris, which may interfere with a seal
between the lens and blank.
Reassembling the Lens
1. Insert the top of the lens into the top of the facepiece
blank.
2. Mold the blank around
the lens, checking to
be sure that the lens is
centered in the face-
piece blank.
3. Stretch the blank enough to insert the bottom of the
lens into the blank.
4. Guide the lens into the blank groove all the way
around the lens. Ensure the lens is fully captured in
the blank groove.
5. Guide the top lens ring over the outside of the face-
piece blank lens groove, ensuring that the harness
straps are at the back of the facepiece.
6. Guide the bottom lens ring over the outside of the
bottom facepiece blank lens groove.
7. Work the lens rings
down on to the face-
piece blank to line-up
the threaded ends as
close as possible with-
out bending the lens.
8. Install one Phillips
screw in the top lens
ring-mounting flange
and thread it about
halfway into the oppo-
site lens ring flange.
9. Install the remaining Phillips screw in the other lens
ring-mounting flange and thread it about half way into
the opposite lens ring flange.
10. Alternate tightening the screws until the lens is secure.
11. Reinstall the Component Housing parts as described
above.
12. Don the facepiece and perform the Negative Pressure
Seal Test
RUBBER HARNESS STRAPS DISASSEMBLY
Top Straps
Unbutton the top straps
and slide the straps back
through retainer. Pull the
top straps through slot in
lens rings.
Bottom Straps
Unthread both bottom straps through the buckles.
Buckles
The bottom buckles are
detachable. Grasp the
buckle and the facepiece
tab and push them togeth-
er until the button is free.
18
TAL 1403 (L) Rev. 11 - 10073772 - DRAFT 3-20-14

INSPECTION
RUBBER HARNESS STRAPS REASSEMBLY
1. Place the new harness on a flat surface with the MSA
logo facing "right-side up." In this position, the straps
above the logo are the top straps.
2. Grasp one top strap and fold the end-tab in half.
3. From the "face" side of the facepiece, insert the end
tab under the slot in lens ring.
4. Thread the end-tabs up through the lens ring slots and
pull strap through several inches.
Attach the bottom straps to the bottom, detachable
buckles:
1. Place the buckle’s button-hole over the button.
2. Grasp a facepiece tab and buckle in each hand and
pull them apart until the button snaps into the button-
hole.
3. Ensure the strap is not twisted and that the boss on
end-tabs side is facing up (away from the inside of the
facepiece).
4. Thread the end tabs with the boss facing up, through
the bottom slot of buckles, then over center bar, down
through top slot of buckles.
5. Pull straps through buckles.
6. Don the facepiece and perform the Negative Pressure
Seal Test.
CLOTH HEAD HARNESS DISASSEMBLY
Removing the Cloth Head Harness
1. Removing the upper strap.
• At the top of the lens ring, fold the mask rubber
down against the lens.
• Push the straps and netting down against the lens,
pivoting the upper buckle on the adapter clip
• Pull upper buckle down, pulling them out of the
adapter clip.
Replacing the Cloth Head Harness
1. Removing the bottom strap
• Grasp the metal buckle and the facepiece tab. Push
them together until the button is free from the buck-
le.
Removing the Adapter Clip
1. Slide the blade of a flathead screwdriver between the
top of the lens ring and each black clip.
2. Pivot the screwdriver until the clip disengages.
Replacing the Cloth Head Harness
Note: Adapter clips are identified with an “R” or “L” indi-
cating right and left sides.
1. Reassemble the adapter clips by pressing them into
lens rings until fully engaged..
2. Installing the top straps.
• Place the new harness on a flat surface so the
straps behind the MSA logo are the top straps.
• Ensure the black adapter clips are engaged.
• Fold the mask rubber down against the lens.
• Slide the slotted part of the black upper buckle up
into its respective side’s black adapter clip.
• Pivot the upper buckle up and pull the strap, ensur-
ing proper assembly.
3. Install the bottom strap
• Place the metal buckles bottom-hole over the but-
ton then grasp a mask tab and buckle in each hand
and pull them apart until the button shaft snaps into
the button hole.
• Thread the strap ends through the forward slot of
the buckles, then over center bar, down through the
rear slot of the buckles. Pull strap through the buck-
les.
• Ensure no straps have become twisted. All straps
should lay flat against the head when the facepiece
is donned.
• Perform a Negative Pressure Seal Test to insure that
a seal has been achieved.
Note: All procedures are from the “face” side of mask.
1. Fold the mask rubber against lens.
2. Slide the slotted part of top strap under the Adapter
Clip, push the slotted part into Adapter Clip. Pull on
strap to ensure it is secure in Adapter Clip.
3. Make sure the strap is not twisted and ensure the
strap moves freely.
Bottom Straps
Attach the bottom straps to the bottom, detachable buck-
les:
1. Place the buckle’s button-hole over the button then
grasp a mask tab and buckle in each hand and pull
them apart until the button snaps into the button hole.
2. Make sure the strap is not twisted, and that the boss
on end-tabs side is facing up (away from the inside of
the mask).
3. Don the mask and perform the Negative Pressure Seal
Test.
Adapter Clips Reassembly
Note: All procedures are from “face” side of mask.
1. The adapter clips are identified with an “R” or “L”. “R”
is for right side. “L” is for self side of lens ring.
2. With the “R” or “L” must face into the center of the
mask and to the back of lens ring.
3. Push the new adapter clip over the boss of the lens
ring.
4. Ensure the adapter clips are tight on lens ring.
19
TAL 1403 (L) Rev. 11 - 10073772 - DRAFT 3-20-14

NOTES
20
TAL 1403 (L) Rev. 11 - 10073772 - DRAFT 3-20-14
/