Attero Tech by QSC Synapse D32o
User Manual
QSC, LLC 2020 614-00049
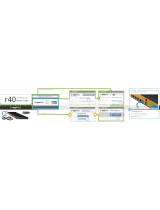
2.2.3 – DB25 Pin-Out Configuration
For devices using DB25 connectors, the TASCAM standard is
used for the pin-out configuration as shown below.
2.3 – Power Supply
Use the provided AC power cable to connect a standard AC outlet
to the power supply input connector. There is no “on” switch so
the unit will power up as soon as the power connection is made.
*Note: It is recommended to attach the optional power supply to
the D32o first, then connect the power cord to the power supply
to supply power to it.
Once powered, the screen on the front of the unit should turn on
and show the Attero Tech logo, the status LED should be red and
the mute LED should be flashing red rapidly. Initialization can up
to 20 seconds depending on how the device is setup. Once
initialized, the status LED will turn green, the mute LED will go
out, and the screen will change to show the first of the metering
screens.
There may also be some activity on the Dante™ RJ45 Ethernet
connector LEDs. If a cable is connected and no network is
detected, both LEDs will remain off. If an active connection is
made the green LED will come on and the yellow LED will flash.
2.4 – Network Connections
*Note: All Attero Tech products are tested using UTP cabling and
it is recommended that UTP cabling be used when installing them.
STP cabling can be used for installation though care must be
taken not to introduce grounding issues into the system by doing
so.
Network connection is made using the RJ45 ports and SFP ports.
To use an SFP port, a suitable SFP module(s) will be required to
be installed. These are not included with the D32o and must be
purchased separately. In general, any 1Gbit SFP compatible
module may be used.
*Note: If there is no network connection, the front panel will show
“No Network” in the center of all the metering screens. The
network screen will also indicate that there are no active
interfaces.
Dante™ networks can be configured in two different ways:
standalone or redundant. The Synapse D32o can be used in either
configuration. By default the D32o is set to “Redundant” mode
but this can easily be changed using Dante™ Controller.
2.4.1 – AES67 Audio Network Note
For successful deployment of Attero Tech’s AES67 enabled
products, it is necessary to insure the AES67 audio network is
properly configured. A Quick Start Guide for AES67 Audio
Networking is available from the Attero Tech Customer Portal at
https://portal.atterotech.com/home/?v=files/560321a2b075c
.
As setup needs may vary by product, it may also be necessary to
check with the AES67-enabled product manufacturer as well.
2.4.2 – Using on a Redundant Network
The D32o is setup for use in a redundant network out of the box.
In this mode the D32o effectively has two separate network
connections, each with its own unique IP address. Both IP
addresses also need to be on completely different subnets.
By default, both ports of the D32o in redundant mode will get
their own IP from a DHCP server if one is available. If not, the
interfaces will fall back to a local link address. For the primary
port, that will be in the range 169.254.x.x. For the secondary
port, that will be in the range 172.31.x.x. Static addresses may
be assigned to one or both interfaces using Dante™ Controller.
Figure 4 –"Redundant” mode, no daisy chain
Connecting both the primary and secondary connections of any
Dante™ device to a network setup for redundancy *WILL* cause
network problems if the device not configured in “Redundant”
mode. As only the primary interface is required for initial setup,
if there is any doubt as to what configuration *ANY* device on the
network has, it is recommended only the primary ports of all
devices be connected to the primary network and all secondary
port connections are left disconnected. Once all devices that
support redundancy are confirmed as being configured in
“Redundant” mode, the secondary ports of all the Dante devices
can then be attached to the secondary network.
For the D32o, when connecting the primary Dante™ network,
either the primary SFP port or the primary RJ45 port can be used.
Similarly, when connecting the secondary Dante™ network, either
the secondary SFP port or the secondary RJ45 port can be used.
*Note: The connections to the primary and secondary Dante™
networks don’t have to use the same type of port on the D32o.
They may be mixed so using a primary SFP connection and an
RJ45 secondary connection or vice versa are both perfectly
acceptable.