Page is loading ...

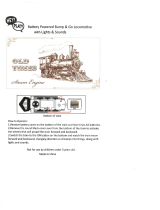
Genesis Passenger Set
Thank you for purchasing this RailKing product.
PLEASE READ BEFORE USE AND SAVE
Operation Manual
Operation Manual
(3V PS2)

Table of Contents
Set Up Checklist................................................3
Getting Started.................................................4
Assembling RealTrax.....................................4
Connecting the Transformer................................4
Lubricating the Engine....................................5
Coupling the Engine and Cars ..............................5
Checking the Battery......................................5
Basic Operation ................................................6
Operation Buttons........................................6
Manual Volume Control...................................6
Proto-Sound 2.0 Operation .......................................7
Activating Proto-Sound 2.0 Conventional Mode Features. . . . . . . . . 7
Passenger station announcements (PSA) . . . . . . . . . . . . . . . . . . . . . . 7
Tips on Using PSA.......................................8
®
Proto-Coupler Operation..................................8
Speed Control...........................................9
Lock into a Direction .....................................9
Reset to Factory Defaults..................................9
Automatic Sounds.......................................10
Maintenance..................................................10
Lubrication and Greasing Instructions . . . . . . . . . . . . . . . . . . . . . . . 10
Cleaning the Wheels, Tires and Track. . . . . . . . . . . . . . . . . . . . . . . . 11
L
teractive CD ROM ..................................14
Troubleshooting................................................15
C o m p a t i b i l i t y..................................................1 7
Transformer Compatibility Chart.................................17
Additional Features with DCS Remote Control System. . . . . . . . . . . . . . . 18
Service and Warranty Information
Getting Started
ocomotive Traction Tire Replacement . . . . . . . . . . . . . . . . . . . . . . 11
Locomotive Light Bulb Replacement. . . . . . . . . . . . . . . . . . . . . . . . 12
Passenger Car Light Bulb Replacement . . . . . . . . . . . . . . . . . . . . . . 12
Self-Charging Battery Back-Up............................13
RailWare In
CAUTION: ELECTRICALLY OPERATED PRODUCT:
Not recommended for children under 10 years of age. M.T.H. recommends adult supervision with children ages 10 - 16. As with all
electric products, precautions should be observed during handling and use to reduce the risk of electric shock.
WARNING: When using electrical products, basic safety precautions should be observed, including the following:
Read this manual thoroughly before using this device.
l M.T.H. recommends that all users and persons supervising use examine the hobby transformer and other electronic equipment periodically for
conditions that may result in the risk of fire, electric shock, or injury to persons, such as damage to the primary cord, plug blades, housing,
output jacks or other parts. In the event such conditions exist, the train set should not be used until properly repaired.
l Do not operate your layout unattended. Obstructed accessories or stalled trains may overheat, resulting in damage to your layout.
l This train set is intended for indoor use. Do not use if water is present. Serious injury or fatality may result.
l Do not operate the hobby transformer with damaged cord, plug, switches, buttons or case.
l The transformer was designed to operate on regular US household current (120 volt, 50-60 Hertz). Do not connect to any other source of
power.
l To avoid the risk of electrical shock, do not disassemble the transformer unit. There are no user-serviceable parts inside. If the unit is damaged
contact M.T.H. Service for instructions.
l The transformer is equipped with an internal circuit protector. If the circuit protector trips, unplug the power cord from the electrical wall
outlet, check your layout for any short circuits. The circuit breaker will reset automatically when the short is removed from the circuit.
l Unplug the transformer from the electrical wall outlet when not in use.
l Do not use this transformer for other than its intended purpose.
Transformer Ratings:
Input: 120 VAC, 60 Hz Only, Outpu
This product may be protected by one or more of the following patents: 6,019,289; 6,280,278; 6,281,606; 6,291,263; 6,457,681; 6,491,263; 6,604,641;
6,619,594; 6,624,537; 6,655,640.
©2004, M.T.H. Electric Trains, Columbia, MD 21046
t: 14VAC 80 W or 18VAC 100W
2
RailKing Genesis Passenger Set with Proto-Sound® 2.0

Tools Needed
Cotton Swab or Rag
Scissors
Pliers
Philips Screwdriver
RailKing Maintenance Kit or
Light Household Oil and Bearing Grease
Set Up Checklist
®
r Assemble RealTrax
r Connect the transformer
r Lubricate the engine
r Place the engine and cars on the track and couple them together
r Position remote lock-on lens
r Check to see whether the battery needs to be charged for full sound effects
r Apply power to run as described in the Basic Operation section of these
instructions.
3
Battery Charger (Optional)
You can obtain replacement parts and replacement instructions from the M.T.H.
Parts Department
e-mail: [email protected]
phone: 410-381-2580
mail: 7020 Columbia Gateway Drive, Columbia MD 21046-1532
Set Includes
8-Pieces
O-31 Curve RealTrax
Diesel Engine with Proto-Sound® 2.0
Lighted Lock-On
DVD/CD-Rom
3 Passenger Cars
4-Pieces
10” Straight RealTrax
RailKing Genesis Passenger Set with Proto-Sound® 2.0
Z-1000 Transformer and Controller

®
Assembling RealTrax
The quick connectors and built-in roadbed allow you to set up RealTrax anywhere,
including carpeted surfaces.
The transformer included with this set provides an easy-to-use, safe power source for AC-
powered trains and accessories.
To complete the connection between the track and the transformer, simply plug in the
color-coded wire harness that was included in your set and plug the transformer into your
wall outlet.
! Plug the wire from the transformer into the Z-Controller’s center port.
! Connect the Wires from the Z-Controller to the Lighted Lock-On, being sure that the
wires are connected from red-to-red and black-to-black.
! Unplug when not in use
Connecting the Transformer
4
Gently push together RealTrax
Insert lock-on into
knock-out tab
(Lock-on is the interface between
the track and transformer)
Make sure the metal
contacts line up.
Align Quick
Connect Plugs
Knock-out must be removed
before remote lock-on can
be installed
Remove knock-out from
outer edge of track by
holding and twisting up
with a pair of pliers
REMOVE TAB
FROM OUTER EDGE
STEP
11
STEP
22
STEP
33
STEP
44
STEP
55
STEP
66
RailKing Genesis Passenger Set with Proto-Sound® 2.0
-
7
5
0
DI
R
E
C
T
I
ON
B
E
L
L
H
O
R
N
W
H
I
S
T
L
E
P
OW
E
R
A
I
L
I
N
G
R
K
B
y
M
T
H
E
l
e
c
t
r
i
c
T
r
a
i
n
s
®
TR
A
N
S
F
OR
M
ER
C
O
N
T
R
OL
L
E
R
OF
F
F
U
L
L
PO
W
E
R
Also functions as a binding post.
Red Harness
Wire/Plug
Red Harness
Wire/Plug
Black Harness
Wire/Plug
Black Harness
Wire/Plug

Lubricating and Greasing the Engine
Lubricate all exposed moving parts before operating using a multi-purpose,
plastic-compatible oil and grease (available with M.T.H.'s Maintenance
Kit, sold separately). Follow the lubrication points.
Coupling the Engine and Car
Checking the Battery
You may find, if your set was built several months before you set it up, that the
rechargeable battery has run down and needs to be charged before operating. If you
notice that the sounds are garbled, test and charge the engine as described in “Self-
Charging Battery Back-Up" on page 13.
DO NOT
OVER OIL
DO NOT
OVER OIL
DO NOT
OVER OIL
Lubricate Axles
Lubricate Pick-Up Rollers
(Do Not Lube the Flat Part of Pick-Up Rollers)
5
Position
armiture
for proper
operation
Incorrect
Position
Place the engine and cars
on the track.
Grease Gears
STEP
11
STEP
22
RailKing Genesis Passenger Set with Proto-Sound® 2.0
STEP
33
Push cars together

Basic Operation
The Throttle knob controls how fast your train will travel.
! Turn the throttle knob up ½-way, until the engine and caboose lights shine bright.
! Put the engine into motion by pressing the Direction button on your transformer
once. (hold it for approximately 1 second)
If the engine does not begin to move as soon as you firmly press the Direction button,
you may not have sent enough voltage to the track to make the train move. Turn the
throttle up a bit higher until the train begins to move.
Operation Buttons
Throttle To increase or decrease track
voltage, and therefore train speed, turn the
throttle control knob. Turning it clockwise
will increase voltage and speed, while
turning it counterclockwise will decrease
voltage and speed. The engine will maintain
the speed you set after you release the
throttle until you turn it again to change the
voltage and speed.
Horn/Whistle - To sound the whistle,
firmly press the Horn/Whistle button. The
horn will sound for as long as you continue
to depress the button. It will stop when you
release the button.
Direction Your train is programmed to start in neutral.
The train will always cycle neutral-forward-neutral-
reverse with each press and release of the direction
button. The engine is programmed to restart in neutral
each time the track voltage is turned off for 25 seconds
or more.
Manual Volume Control
To adjust the volume of all sounds made by this engine, turn the master volume control
knob located under the engine clockwise to increase the volume and counter-clockwise to
decrease the volume.
Cycle Phases
Neutral
Neutral
ForwardReverse
6
RailKing Genesis Passenger Set with Proto-Sound® 2.0
increase

Proto-Sound 2.0 Operating Instructions
This manual contains the operating instructions for Proto-Sound 2.0 in conventional
mode only. Instructions for accessing DCS command mode features accompany the
DCS Remote Control System equipment (sold separately).
Activating Proto-Sound 2.0 Conventional Mode Features:
Proto-Sound 2.0 features are activated by sequences of Bell and Horn button pushes
described below. Please read the full descriptions of each feature before using it. To use
these buttons to activate features rather than to blow the horn or ring the bell, you should
tap the buttons very quickly with a ½-second pause between button presses. You may
need to practice your timing to make this work smoothly.
Passenger station announcements (PSA):
Your engine is equipped with a sound package of passenger station announcements that
you can play when you pull into a station. Each sequence described below will play as
long as it is left on, randomly generating sounds, but be sure to allow approximately
30 seconds between the button pushes described below to allow the PSA sufficient
time to run through each sequence.
! To cue the sound system to play the PSA, quickly but firmly tap the Bell button once
followed by 2 quick taps of the Horn button while the engine is moving. Tap the
buttons quickly but allow approximately ½ second between each press.
! Press the Direction button once to stop the engine. This will trigger the first
sequence of PSA. The reverse unit is temporarily disabled so that the train will not
move as you use the Direction button to trigger the sounds, and Proto-Sound 2.0 has
disabled operator control over the Horn and Bell buttons until the full PSA sequence
is complete.
! After waiting about 30 seconds for that sequence to run, press the Direction button
again to trigger the second sequence of PSA.
! After about 30 seconds, press the Direction button again to trigger the third PSA
sequence.
! Again, after allowing about 30 seconds for that sequence to run, press the Direction
button one more time to trigger the fourth and final PSA sequence. The PSA will
continue, and within a few seconds, the engine and bell will start and move out on
its own at the current throttle setting, in the same direction it was traveling when you
began the sequence. Once the bell turns off, the operator regains control of the
transformer's bell and Horn buttons and can ring the bell or blow the Horn as usual.
7
RailKing Genesis Passenger Set with Proto-Sound® 2.0
Feature to Be Activated
Button Code:
Passenger Station Announcements
Fire the Rear Coupler
Fire the Front Coupler
Speed Control On/Off
Lock into a Direction
Reset to Factory Defaults
1 Bell, 2 Horns
1 Bell, 3 Horns
1 Bell, 4 Horns
1 Horn, 2 Bells (from Neutral only)
1 Horn, 3 Bells
1 Horn, 5 Bells (from Neutral only)
Timing Chart
Total Time Lapse: 1 Seconds½
Press
Horn
Short &
Firm
½ Sec.
Pause
½ Sec.
Pause
Press
Bell
Short &
Firm
Press
Bell
Short &
Firm

Tips on Using PSA
! You can terminate PSA at any time by turning off power to the track for 15
seconds.
! You do not have to be in Forward to use PSA. At the conclusion of the full
sequence, the train will pull away from the station in whatever direction you
were going when you activated the feature.
! You can use PSA even if you are double-heading with another engine. If the
second engine is not equipped with Proto-Sound 2.0, you must remember not
to leave the throttle at a high voltage level once you have stopped the engine to
run the PSA. Otherwise, the engine without PSA will begin vibrating on the
track as its motors strain to move the train, since they cannot be automatically
disabled during the PSA cycle (or if an original Proto-Sound engine, PSA are
triggered differently and that engine's motor-disable feature will not be active
when you run PSA in Proto-Sound 2.0).
! PSA can be triggered from Neutral. It will operate the same as if triggered
while in motion except that, at the conclusion of the PSA, the engine will
depart in the next direction of travel, as opposed to the direction it was
traveling before entering Neutral.
®
Proto-Coupler Operation
This locomotive is equipped with one or more coil-wound Proto-Couplers for remote
uncoupling action. Because Proto-Couplers are controlled through the Proto-Sound 2.0
microprocessor, they do not require an uncoupling track section or modification to your
layout to function. You can fire a coupler from neutral or while in motion. Use the code
shown below (and in the chart on p. 7) to fire the coupler(s).
Rear Coupler:
To fire the rear coupler, quickly tap the Bell button once followed by three quick taps of
the Horn button, allowing approximately ½ second to lapse between each quick button
press. The sound of the liftbar and air line depletion will play, and the knuckle will be
released.
Front Coupler:
To fire the front coupler (if your engine has one), quickly tap the Bell button once
followed by four quick taps of the Horn button, allowing approximately ½ second to
lapse between each quick button press. The sound of the liftbar and air line depletion will
play, and the knuckle will be released.
8
RailKing Genesis Passenger Set with Proto-Sound® 2.0
+
Sound System Cued
to Play Passenger
Station Announcements (PSA)
Horn Horn
Bell
Direction
1st
Sequence
PSA
+
Direction
2nd
Sequence
PSA
+
Direction
3rd
Sequence
PSA
+
Direction
4th
Sequence
PSA
=
Operator
Controls
When Bell
Turns Off
Horn Horn
Fire
Rear
Coupler
=
Horn
Bell
Horn Horn
Fire
Front
Coupler
=
Horn Horn
Bell

Speed Control:
M.T.H. engines equipped with Proto-Sound 2.0 have speed control capabilities that allow
the engine to maintain a constant speed up and down grades and around curves, much like
an automobile cruise control. You can add or drop cars on the run, and the engine will
maintain the speed you set.
While the engine is programmed to start with the speed control feature activated, you can
opt to turn it off. This means the engine's speed will fall as it labors up a hill and increase
as it travels downward. It is also affected by the addition or releasing of cars while on the
run. Because the engine will run more slowly at a given throttle voltage when speed
control is on than when it is off, you should adjust the throttle to a lower power level for
operation with speed control off to avoid high-speed derailments. When speed control is
off, the volume will drop to allow for better low voltage operation.
To turn speed control on and off, put the engine in neutral, then quickly tap the
transformer's Horn button one time then quickly tap the Bell button two times, allowing
approximately ½ second to lapse between each quick button press. Two horn blasts will
indicate that the engine has made the change. Repeat the 1 horn, 2 bells code to return it
to the other condition. You will want to do this during the initial neutral upon start-up if
you ever couple this engine to another engine that is not equipped with speed control to
avoid damaging the motors in either engine. Each time you shut down the engine
completely, it will automatically turn speed control on.
Lock into a Direction:
You can lock your engine into a direction (forward, neutral, or reverse) so that it will not
change directions. To do this, put the engine into the direction you want (or into neutral
to lock it into neutral), run it at a very slow crawl (as slowly as it will move without
halting), and quickly but firmly tap the Horn button once followed by three quick taps of
the Bell button, allowing approximately ½ second to lapse between each quick button
press. Two horn blasts will indicate that the engine has made the change. The engine will
not change direction (including going into neutral) until you repeat the 1 horn, 3 bells
code to return the engine to its normal condition, even if the engine is kept without power
for extended periods of time.
Reset to Factory Defaults:
To override the settings you currently have assigned to the engine and reset it to its
factory defaults, while in Neutral tap the Horn button quickly once, followed by five
quick taps of the Bell button, allowing approximately ½ second to lapse between each
quick button press. Two horn blasts will indicate that the engine has made the change.
9
RailKing Genesis Passenger Set with Proto-Sound® 2.0
Horn
Place
Engine into
Neutral
Bell Bell
=
Speed Control
Two Horn Blasts
(indicates change is made)
Repeat to Return
to Normal Condition
Horn
Place
Engine into
Desired
Direction
Horn
Bell Bell Bell
=
Direction Lock
Two Horn Blasts
(indicates change is made)
Repeat to Return
to Normal Condition
Reset
Two Horn Blasts
(indicates change is made)
Repeat to Return
to Normal Condition
Horn
Place
Engine in
Neutral
=
BellBellBellBellBell

Automatic Sounds
Certain Proto-Sound 2.0 sound effects automatically play in programmed conventional
mode conditions:
! Squealing Brakes play any time the engine's speed decreases rapidly.
! Cab Chatter plays at random intervals when the engine idles in neutral.
! Engine Start-up and Shut-down sounds play when the engine is initially powered
on or is powered off for five seconds or more.
Maintenance
Lubricating and Greasing Instructions
The engine should be oiled and greased in order to run properly.
Regularly lubricate all axles and linkage components and pickup rollers to prevent
squeaking. Use light household oil, such as that found in M.T.H.'s maintenance kit. Do
not over oil. Use only a drop or two on each pivot point.
The locomotive's internal gearing was greased at the factory. Grease engine every 50
hours of use or one year. Use a lithium based grease and follow the greasing instructions.
10
RailKing Genesis Passenger Set with Proto-Sound® 2.0
DO NOT
OVER OIL
DO NOT
OVER OIL
DO NOT
OVER OIL
Lubricate Axles
Lubricate Pick-Up Rollers
(Do Not Lube the Flat Part of Pick-Up Rollers)
Grease Gears
Remove the six Phillips screws from the chassis then lift the body away from the chassis.
STEP
11
STEP
22
Motor
Mount
Screw
Motor
Mount
Screw
Remove the truck blocks from the chassis by unscrewing the large Phillips motor mount screw
on the bottom of each truck block.

Cleaning the Wheels, Tires and Track
Periodically check the locomotive wheels and pickups for dirt
and buildup, which can cause poor electrical contact and
traction and prematurely wear out the neoprene traction tires.
Wheels and tires can be cleaned using denatured (not rubbing)
alcohol applied with a cotton swab.
To clean the track, use a clean rag and RailKing Track Cleaning Fluid or denatured (not
rubbing) alcohol. Unplug the transformer and wipe the rails of the track, turning the rag
frequently to ensure that you are using clean cloth on the rails. Because the
manufacturing process leaves a coating on RealTrax center rail, you should clean the rails
after the first 30 minutes of use (you may notice an electrical smell during initial use as
the coating wears off; this is normal). Thereafter, keep an eye on the track and clean it
when it gets dirty to ensure good electrical contact and to lengthen the life of the tires.
Traction Tire Replacement Instructions
Your locomotive is equipped with four neoprene rubber traction tires on the flanged drive
wheels. While these tires are extremely durable, occasional replacement may be
necessary.
11
RailKing Genesis Passenger Set with Proto-Sound® 2.0
! Once the motor mount screw has been removed, pull the
motor away from the truck block and lightly coat the motor
worm gear and bronze drive gear (in the truck block) with
grease.
! Reassemble the truck and motor, being careful not to pinch
the pickup and ground wires between the truck block and
motor mount.
! Repeat the procedure if engine has more than one motor.
! Reassemble the chassis and body, being careful that the
wires are not caught between the body and chassis, as
this can lead to a short that may damage the electronics
beyond repair.
Worm
Gear
Bronze
Drive
Gear
STEP
33
! Remove two screws from below truck side.
! Remove the truck sides from the truck block.
! Make sure the old tire has been completely
removed from the groove in the drive wheel,
using a razor blade or small flathead screwdriver
to pry away any remains.
! Clean the groove using a cotton swab and
denatured alcohol.
STEP
11
! Slip the new tire onto the wheel. You may find it useful to
use two small flathead screwdrivers to stretch the tire over
the wheel.
! If you twist the tire while stretching it over the wheel, you
will need to remove and reinstall the tire. Otherwise your
engine will wobble while operating.
! Make sure the tire is fully seated inside the groove. Use a
razor blade to trim away any excess tire that doesn't seat
itself inside the groove properly.
! Reassemble the truck sides to the truck blocks.
STEP
22

Locomotive Light Bulb Replacement
Follow the cab removal instructions found in the Greasing
Instructions section of this booklet (page 10).
! Rotate the headlight bulb counter-clockwise to remove.
You can obtain replacement bulbs directly from the M.T.H.
Parts Department.
Passenger Car Light Bulb Replacement
To replace the interior light bulbs follow these instructions and see the diagrams below:
1. Turn the car over and remove the two mounting screws holding the roof on.
2. Turn the car back over and gently lift the car roof away from the body and chassis. You
may need to twist the car a little to make to roof come loose from the body.
3. Gently pull the bulb away from its housing and push the replacement bulb into the
housing (like a Christmas tree light).
4. Reassemble in reverse order.
12
RailKing Genesis Passenger Set with Proto-Sound® 2.0

Self-Charging Battery Back-Up
The special NiCad 2.4v self-charging battery recharges continuously during train
operation and should last for up to five years. The battery is a dry battery that should not
leak or cause any damage to your engine. Depending upon when your engine was
built, it may need to be charged right out of the box. If engine sounds seem distorted
or garbled at low voltages or become silent when power from the transformer is turned
off, test the battery to determine whether it should be recharged or replaced.
Test: Put the engine in neutral and leave the track voltage at 10-12 volts (high enough for
the lights to shine brightly) for 15 minutes.
Recharge: If the sounds are improved at the end of the 15-minute test charge, the battery
charge has run down and can be recharged. There are a number of ways you can do this:
! Leave the engine in neutral with track voltage at 10-12 volts for 6-7 hours so
the battery can fully recharge (if your engine has a smoke unit, be sure it is
turned off).
! Use M.T.H.'s battery recharger (sold separately) that plugs into a wall outlet and
a special port under the engine to recharge the battery overnight without leaving
it on the track.
Replace: If the sounds are not improved at the end of the 15-minute test charge, it is time
to replace the batt ery. Available through M.T.H. Parts.
13
RailKing Genesis Passenger Set with Proto-Sound® 2.0
Battery Charger
Item No. 50-1019

14
RailKing Genesis Passenger Set with Proto-Sound® 2.0
Quick-Start DVD
The included DVD Quick-Start video demonstrates the start-up and basic operation of
this set as well as other information about model railroading. You may find it helpful to
view the DVD before operating this set.
RailWare Interactive CD ROM
M.T.H. provides a free RailWare CD ROM in each Ready-To-Run set. It is full of helpful
information on M.T.H. product history, track planning software, a dealer finder, and
information and video clips on Loco-Sound and Proto-Sound 2.0. Follow the directions
below to use the CD ROM.
Minimum System Requirements: Pentium 100, 16MB RAM, Windows 95 or later, CD
ROM drive, Sound Card, display properties set to greater than 256 colors. The CD will
®
not work on a Mac OS unless you run VirtualPC .
Running RR-Track Software
You may run the RR-Track software directly off of the CD ROM or you may install the
software to your hard drive.
1. On the Desktop, click on the icon that says My Computer.
2. Find your CD ROM drive.
3. With the M.T.H. CD ROM in the drive, double click on the icon for the CD ROM
drive.
4. Find the folder on the CD ROM entitled INSTALLATION.
5. Choose the folder inside entitled RRTRAXSETUP.
6. Run the file in that folder called SETUP.EXE and follow the directions it provides.
The program may ask you for a registration code. If it does type in "M.T.H." and it will
run.
Additional track libraries can be obtained directly from RR-Track. See their website for
more information www.rrtrack.com.
Installing Adobe Acrobat Software
To read some of the electronic documents included on the CD ROM, you will need to
®
install the Adobe Acrobat Reader if it is not already on your computer. To install the
software:
1. On the Desktop, click on the icon that says My Computer.
2. Find your CD ROM drive.
3. With the MTH CD ROM in the drive, double click on the icon for the CD ROM
drive.
4. Find the folder on the CD ROM entitled INSTALLATION.
5. Choose the folder inside entitled ACROBAT READER.
*If you are running Windows 95, 98 or NT choose the folder 32 BIT. Run the file
AR32E301.EXE and follow the directions it provides.
If you have problems you cannot resolve by using these directions, contact
[email protected] or call 410-381-2580 for further help.

15
RailKing Genesis Passenger Set with Proto-Sound® 2.0
®
Troubleshooting Proto-Sound 2.0 Problems
Although Proto-Sound 2.0 has been designed and engineered for ease of use, you may
have some questions during initial operation. The following table should answer most
questions. If your problem cannot be resolved with this table, contact M.T.H. for
assistance (e-mail: [email protected]; telephone: 410-381-2580; fax: 410-
423-0009; mail: 7020 Columbia Gateway Drive, Columbia MD 21046-1532).
Starting Up
Horn
Bell
Remedy
Remedy
Remedy
When I first turn the power on, the engine
will not begin to run.
The engine will not start after I press the
Direction button.
My engine sounds are distorted and garbled.
I can't get the horn to blow when I press the
Horn button.
I can't get the bell to ring when I press the
bell button.
You may be pressing the button too quickly. Try
pressing the Horn button more slowly, taking
approximately one full second to fully depress the
button.
You may be pressing the button too quickly. Try
pressing the bell button more slowly, taking
approximately one full second to fully depress the
button.
This is normal behavior. To prevent accidental
high-speed start-ups, Proto-Sound 2.0 is
programmed to start up in neutral anytime track
power has been turned off for several seconds. See
the "Basic Operation" section for more details.
You may not be sending enough power to the track
to power the engine. Rotate throttle clockwise to
increase track power.
The battery may have run down, especially if the
engine has been in storage for some time. See the
"Self-Charging Battery Back-Up" section of these
instructions for how to test, recharge, and (if
necessary) replace the battery.
Coupler Remedy
When I try to fire the coupler, FYS starts.
The Proto-Coupler won't let the engine
uncouple on the fly.
The coupler does not fire or stay coupled.
The rear coupler does not fire, but coupler
sounds play.
You are waiting too long between Horn button
presses. See the timing instructions located at the
beginning of the "Proto-Sound 2.0 Operating
Instructions" section.
Try lubricating the coupler knuckle and rivet with
a dry graphite lubricant.
The coupler needs to be cleaned. Wipe with
denatured alcohol (not rubbing alcohol) and let
dry.
Check position of Auxiliary Proto-Coupler
Control Switch. Switch Should be in the “OFF”
position for the rear coupler to fire.
Cab Chatter Remedy
Sometimes the Cab Chatter sounds don't
play.
Cab Chatter plays only in neutral at random
intervals.

16
RailKing Genesis Passenger Set with Proto-Sound® 2.0
Volume Remedy
The sounds seem distorted, especially when
the Horn or bell is activated.
No Sound
Proto-Sound 2.0 volume is set too high. Turn the
volume control knob on the bottom of the chassis
counter-clockwise to reduce the volume.
Volume is set too low, adjust volume control knob
on the bottom of the chassis clockwise to increase
the volume or check connector to speaker.
Battery Remedy
The engine will not leave the initial neutral
setting.
I get no sounds when the engine shifts
between directions.
After I turn off my transformer, my engine
continues to make sounds before quitting.
Check to be sure the battery is installed and fully
charged. See the "Self-Charging Battery Back-
Up" section.
The battery may be dead or need to be charged.
See the "Self-Charging Battery Back-Up" section.
Proto-Sound 2.0 is designed to continue to sound
for a few seconds after power to the track has
been shut off to allow for a more realistic shut-
down.
Lock-out Remedy
I can't get the engine to run after I power up
the transformer. It sits still with the diesel
and compressor sounds running.
The engine won't lock into forward, neutral,
or reverse.
The engine maybe locked into the neutral
position. Follow the procedure in the "Lock into a
Direction" section to unlock the engine's direction.
Engine speed must be below 10 scale mph
(approx. 10 volts or less in conventional mode).
PSA Remedy
Once in PSA, the engine doesn’t go into
reverse.
When the PSA enters its last sequence the
bell automatically comes on
When PSA is enabled, pressing the whistle
and bell has no effect
I push the direction button but the next
sound clip in the sequence does not play or
the engine does not come out of PSA after
fourth press of the direction button.
So that PSA effects can be as realistic as
possible, Proto-Sound 2.0 disables the
reversing unit whenever PSA is enabled.
This way the engine remains still at its stop
as the operator cycles through the PSA
sequences.
PSA is programmed to start ringing the bell
at that point. After approximately 12
seconds, it will automatically turn off.
Because PSA must control various effects in
each sequence, Proto-Sound 2.0 takes
control of these sound effects until you exit
PSA
Each PSA clip must play for aprox. 30
seconds before PSA will advance to the next
step in the PSA cycle. Wait at least 30
seconds in each PSA sound clip before
pressing the direction button.

17
RailKing Genesis Passenger Set with Proto-Sound® 2.0
Compatibility
While this Ready-To-Run set is equipped with everything you need to operate it, the
design allows flexibility. The train will operate on any traditional O-31 or larger O Gauge
®
track system, including the RealTrax included with this set or traditional tubular track. It
is also compatible with most standard AC transformers, including the hobby transformer
packaged with your set.
Transformer Compatibility and Wiring Chart
Note that many of the operational commands described in these instructions require a bell
button, so if you are using a transformer other than the one included in this set and your
transformer does not have its own bell button, you should consider adding one to get the
full benefit of the system.
Transformer
Model
Center Rail Outside Rail
Min/Max.
Voltage
Power
Rating
Transformer
Type
Lionel 1032 U A 5-16v 90-Watt Standard
Lionel 1032M U A 5-16v 90-Watt Standard
Lionel 1033 U A 5-16v 90-Watt Standard
Lionel 1043 U A 5-16v 90-Watt Standard
Lionel 1043M U A 5-16v 90-Watt Standard
Lionel 1044 U A 5-16v 90-Watt Standard
Lionel 1053 U A 8-17v 60-Watt Standard
Lionel 1063 U A 8-17v 60-Watt Standard
All-Trol Left Terminal Right Terminal 0-24v 300-Watt Electronic
Dallee Hostler Left Terminal Right Terminal Electronic
Lionel LW A U 8-18v 75-Watt Standard
Lionel KW A or B U 6-20v 190-Watt Standard
Lionel MW
Outside Track
Terminal
Inside Track
Terminal
5-16v 50V.A. Electronic
Lionel RS-1 Red Terminal Black Terminal 0-18v 50V.A. Electronic
Electronic
Lionel RW U A 9-19v 110-Watt Standard
Lionel SW U A Unknown 130-Watt Standard
Lionel TW
U A 8-18v 175-Watt Standard
Lionel ZW
Lionel Post-War
Celebration
Series ZW
A,B,C or D
A,B,C or D
U
Common
8-20v
0-20v
275-Watt
135/190 Watt
Standard
MTH Z-500 Red Terminal Black Terminal 0-18v 50-Watt Electronic
MTH Z-750 Red Terminal Black Terminal 0-21v 75-Watt Electronic
MTH Z-4000 Red Terminal Black Terminal
0-22v 390-Watt Electronic
MTH Z-1000
Red Terminal
Black Terminal
0-14v
0-18v
80-Watt
100-Watt
Electronic

18
RailKing Genesis Passenger Set with Proto-Sound® 2.0
Additional Features Accessible with the
DCS Remote Control System: (additional equipment required)
While conventional mode operation of a Proto-Sound 2.0 engine yields wonderfully
realistic sound and several train control features, command mode operation allows the
user to access a world of command functions never before accessible to O Gauge
railroaders. With the addition of the DCS Remote Control System (including a DCS
remote handheld and Track Interface Unit) users gain many advanced features, including:
! DCS Proto-Speed Control - Establishes desired locomotive speed in scale miles per
hour increments via a thumbwheel control and allows operator to set maximum speed
and acceleration/deceleration rates
®
! ProtoSmoke Variable Output Control - Controls how much smoke each engine
outputs and matches smoke to locomotive speed
! Locomotive Lighting Control - Controls locomotive headlights, marker and interior
lights, beacon lights, ditch lights, and MARS lights
! Emergency Stop-Single button push stops all Proto-Sound 2.0 trains but does not turn
off the power
! One Touch Global Mute/UnMute-Single button mutes or unmutes all DCS-controlled
locomotives' user-defined actions, including sound, lights, and smoke
! Proto-Dispatch Operation-Public Address-like feature allows users to speak through
locomotive speaker during operation
! Proto-Cast-Allows users to play audio recordings through locomotive speaker during
operation
! Proto-Doppler Sound Effects Set Up-Users can configure locomotive for Doppler
Operation, including setting distance points for Doppler start, repeat, and stop modes
! Independent Volume Control of Engine Sounds, Bell, Horn & Whistle for each
Locomotive
! Control up to 50 different DCS-Equipped Locomotives at one time with multiple
TIUs
! Proto-Effects™ Set Up-User can select individual Proto-Effects™ operations to be
active or inactive, including cab chatter, train wreck sounds, coupler sounds, and
wheel clickety-clack sounds
! Direction Control Set Up-User can set initial individual start-up direction (start in
forward or reverse) for double-heading operations
! Locomotive Consist Set-up-User can determine locomotive values for consist make-
ups, allowing multiple locomotives belonging to a consist to operate together
! Query Locomotive Information-User can query locomotive programming to learn
locomotive address and engine data information, including scale miles traveled
! User Can Query, Set and Operate Track and Accessory Interface Units for
Programming Digital Command Operations for up to 250 Accessories and 250
Individual Switches
! User Can Script, Record and Playback Train Routes
Operating instructions for all DCS Command features will accompany the DCS remote
control equipment.

Service & Warranty Information
How to Get Service Under the Terms of the Limited One-Year Warranty
When you suspect an item is defective, please check the operator's manual for standard
operation and trouble-shooting techniques that may correct the problem. Additional
information may be found on the M.T.H. Website. Should you still require service, follow
the instructions below to obtain warranty service.
First, e-mail, write, call or fax a M.T.H. Authorized Service Center (ASC) in your area to obtain Repair
Authorization. You can find the list of ASCs on the M.T.H. Website, www.mth-railking.com. Authorized Service
Centers are required to make warranty repairs on items sold only from that store; all other repairs may-- or may not
be done at the store's own discretion. If you did not purchase the item directly from the ASC, you will need to
select a National Authorized Service Center (NASC). These centers are compensated by M.T.H. to perform
warranty service for any customer whose repair qualifies for warranty service. A list of NASC retailers can be
located on the M.T.H. Website or by calling 1-888-640-3700. Should the warranty no longer apply, you may
choose either an ASC or NASC retailer to service your M.T.H. Product. A reasonable service fee will be charged.
CAUTION: Make sure the product is packed in its original factory packaging including its foam and plastic
wrapping material to prevent damage to the merchandise. There is no need to return the entire set if only one of
the components is in need of repair unless otherwise instructed by the Service Center. The shipment must be
prepaid and we recommend that it be insured. A cover letter including your name, address, daytime phone
number, e-mail address (if available), Return Authorization number (if required by the service center, a copy of
your sales receipt and a full description of the problem must be included to facilitate the repairs. Please include
the description regardless of whether you discussed the problem with a service technician when contacting the
Service Center for your Return Authorization.
Please make sure you have followed the instructions carefully before returning any merchandise for service.
Authorized M.T.H. Service Centers are independently owned and operated and are not agents or representatives of
M.T.H. Electric Trains. M.T.H. assumes no responsibility, financial or otherwise, for material left in their
possession, or work done, by privately owned M.T.H. Authorized Service Centers.
If you need assistance at any time email MTH Service at , or call 410 381-2580.
Limited One-Year Warranty
All M.T.H. products purchased from an Authorized M.T.H. Train Merchant are covered by this warranty.
See our website at or call 1-888-640-3700 to identify an Authorized M.T.H. Train Merchant near you.
M.T.H. products are warrantied for one year from the date of purchase against defects in material or workmanship, excluding wear
items such as light bulbs, pick-up rollers, batteries, smoke unit wicks, and traction tires. We will repair or replace (at our option)
the defective part without charge for the parts or labor, if the item is returned to the M.T.H. Authorized Service Center (ASC)
where it was purchased or a M.T.H. National Authorized Service Center (NASC) within one year of the original date of purchase.
This warranty does not cover damages caused by improper care, handling, or use. Transportation costs incurred by the customer
are not covered under this warranty.
Items sent for repair must be accompanied by a return authorization number, a description of the problem, and a copy of the
original sales receipt from an Authorized M.T.H. Train Merchant, which gives the date of purchase. If you are sending this
product to an Authorized Service Center, contact that Center for their return authorization.
This warranty gives you specific legal rights, and you may have other rights that vary from state to state. Specific questions
regarding the warranty may be forwarded to M.T.H. directly.
Service Department
M.T.H. Electric Trains
7020 Columbia Gateway Drive
.Columbia MD 21046-1532
www.mth-railking.com

ALABAMA COLORADO ILLINOIS
SOUTHERLAND STATION CUSTOM RAILWAY SUPPLY BERWYN'S TOY TRAINS &
HUNTSVILLE COLORADO SPRINGS MODELS
256-533-4720 719-634-4616 BERWYN
708-484-4384
CABOOSE HOBBIES, INC.
ARIZONA
DENVER CHICAGOLAND HOBBY
ARIZONA TRAIN DEPOT
303-777-6766 CHICAGO
MESA
773-775-4848
480-833-9486
MIZELL TRAINS
WESTMINSTER BILL’S ENGLEWOOD STATION
CALIFORNIA
303-429-4811 ORLAND PARK
CENTRAL COAST TRAINS
708-460-4906
ATASCEDERO
CONNECTICUT
805-466-1391
BIKE & CHOO CHOO
TIME MACHINE HOBBY, L L C
CONNECTION
MANCHESTER
TRAIN SHACK
SCHAUMBURG
860-646-0610
BURBANK
847-882-7728
818-842-3330
FLORIDA
INDIANA
REED’S HOBBY SHOP AMHERST DEPOT
Y. O. R. K. TRAINS
LA MESA ENGLEWOOD
MUNSTER
619-464-1672 941-475-2020
219-838-9999
ROUNDHOUSE DEPOT HOBBY SHOP
SAMUELSON'S TRAIN SHOP
NORTH HOLLYWOOD lANTANA
VALPARAISO
818-769-0403 561-585-1982
219-462-2708
DOLLHOUSES, TRAINS & HOLLYWOOD STATION
MORE MIAMI
IOWA
NOVATO 954-921-2700 CABOOSE STOP HOBBIES
415-883-0388 CEDAR FALLS
READY TO ROLL 800-642-7012
TIN PLATE JUNCTION MIAMI
OAKLAND 305-688-8868
KANSAS
510-444-4780
HOBBY HAVEN
COLONIAL PHOTO & HOBBY
OVERLAND PARK
RON'S WORLD ORLANDO
913-381-3111
SAN CLEMENTE 407-841-1485
949-361-5596
KENTUCKY
WARRICK CUSTOM HOBBIES
L& N TRAINS & THINGS
BLACK NIGHT TRAINS & PLANTATION
LOUISVILLE
HOBBIES 954-370-0708
502-897-9005
SANTA ROSA
707-523-3522 ROUNDHOUSE SOUTH
PORT ORANGE
386-304-7002
PARTICIPATING A.S.C.
RETAILER LIST
AUTHORIZED SERVICE CENTER
www.mth-railking.com
AUTHORIZED SERVICE CENTERAUTHORIZED SERVICE CENTER
7020 Columbia Gateway Dr. - Columbia, MD 21046
Information: 410-381-2580 Fax: 410-381-6122
/