Page is loading ...

H1S272
Please Read These Instructions Carefully Before Use!
Instructions Manual
KOOL
COMPACT
FRIDGE
91L / 3.2 cu.ft.
KBC88-W
Warranty
This product is warranted to the retail customer for 90 days from date of retail purchase, against
defects in material and workmanship.
WHAT IS COVERED
• Replacement parts and labour.
• Transportation charges to customer for the repaired product.
WHAT IS NOT COVERED
• Damage caused by abuse, accident, misuse, or neglect.
• Transportation of the unit or component from the customer to Koolatron.
IMPLIED WARRANTIES
Any implied warranties, including the implied warranty of merchantability are also limited
to the duration of 90 days from the date of retail purchase.
WARRANTY AND SERVICE PROCEDURE
Keep the original, dated, sales receipt with this manual.
If you have a problem with your unit, or require replacement parts, please telephone the following
numbers for assistance:
North America 1-800-265-8456
Koolatron has Master Service Centres at these locations:
U.S.A. - 4330 Commerce Dr., Batavia, NY 14020-4102
Canada - 139 Copernicus Blvd., Brantford, ON N3P1N4
A Koolatron Master Service Centre must perform all warranty work.
www.koolatron.com
©2018 Koolatron, Inc. All rights reserved.
All specification are subject to change without notice.
09/2018 - v1

2
SPECIFICATIONS
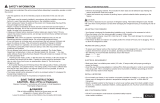
IMPORTANT SAFETY INSTRUCTIONS
IMPORTANT SAFETY INSTRUCTIONS (cont.)
3
REFRIGERANT GAS WARNINGS
DANGER - RISK OF FIRE OR EXPLOSION. FLAMMABLE REFRIGERANT USED.
- DO NOT use mechanical devices to defrost refrigerator.
- DO NOT puncture refrigerant tubing.
- Consult repair manual/owner’s guide before attempting to service this product. All safety precautions must
be followed.
- Dispose of property in accordance with federal or local regulations.
GROUNDING INSTRUCTIONS
ELECTRICAL REQUIREMENTS
The electrical requirements are a 115V 60 Hz, AC only, 15A. It is recommended that a separate circuit serving
only the product be provided. The product is equipped with a 3-wire cord having a 3-prong grounding plug.
It must be plugged into a wall receptacle that is properly installed and grounded.
This appliance must be grounded. In the event of an electrical short circuit, grounding reduces risk of electric
shock by providing an escape wire for the electric current. The cord provided with this appliance is equipped
with a grounding wire and a grounding plug. The plug must be plugged into an outlet that is properly installed
and grounded.
Avoid the use of three prong adapters or cutting off the third grounding prong in order to accommodate a
two prong outlet. This is a dangerous practice since it provides no effective grounding for the refrigerator and
may result in shock hazard.
WARNING - Improper use of the grounding plug can result in a risk of electric shock.
Consult a qualified electrician or serviceman if:
1) The grounding instructions are not completely understood.
2) You are unsure that the appliance is properly grounded.
3) You have any questions about the grounding or electrical instructions.
POWER SUPPLY CORD
1. Avoid the use of an extension cord because of potential safety hazards under certain conditions. Have a
qualified electrician or serviceman to install an outlet near the appliance.
2. If it is absolutely necessary to use longer cord sets or an extension cord, extreme care must be exercised.
a) Use only a grounding type 3-wire extension cord that has a 3-blade grounding plug and a 3-slot receptacle
that will accept the plug on the appliance.
b) The marked electrical rating of the cord set or extension cord must equal to or greater than the electrical
rating of the appliance. The longer cord should be arranged so that it will not drape over the counter top or
table top where it can be pulled on by children or tripped over unintentionally.
NOTE - Neither Koolatron nor the dealer can accept any liability for damage to the product or personal injury
resulting from failure to observe the electrical connection procedures.
WARNING - When using electrical appliances, basic safety precautions should always be followed to reduce
the risk of fire, electric shock and personal injury: READ ALL INSTRUCTIONS BEFORE USING THE PRODUCT.
NOTE - If the refrigerator/freezer has been placed in a horizontal or tilted position for any period of time,
wait 24 hours before plugging the unit in.
1. Use this appliance only for its intended purpose as described in this use and care guide.
2. This refrigerator must be properly installed in accordance with the installation instructions before it is
used. See grounding instructions in the INSTALLATION section.
3. Never unplug your refrigerator by pulling on the power cord. Always grasp the plug firmly and pull straight
out from the outlet.
4. Do not operate any appliance with a damaged cord or plug. Return appliance to the nearest authorized
service facility for examination, repair or adjustment.
5. Unplug your refrigerator before cleaning or before making any repairs. NOTE - If for any reason this
product requires service, we strongly recommend that a certified technician performs the service. Compo-
nent parts shall be replaced with like components and servicing shall be done by factory authorized service
personell, so as to minimize the risk of possible ignition due to incorrect parts or improper service.
6. Do not use any electrical device or any sharp instrument in defrosting your refrigerator.
7. DANGER – Risk of child entrapment. Before you throw away your old refrigerator or freezer, take off the
doors and leave the shelves in place to that children may not easily climb inside.
8. After your refrigerator is in operation, do not touch the cold surfaces in the freezer compartment, particu-
larly when hands are damp or wet. Skin may adhere to these extremely cold surfaces.
9. Do not refreeze foods that have been thawed completely. The United States Department of Agriculture in
Home and Garden Bulletin No. 69 reads: “…You may safely refreeze frozen foods that have thawed if they
still contain ice crystals or if they are still cold-below 40˚F. “…Thawed ground meats, poultry, or fish that
have any off-odor or off-color should not be refrozen and should not be eaten. Thawed ice cream should be
discarded. If the odor or color of any food is poor or questionable, discard it. The food may be dangerous to
eat … Even partial thawing and re-freezing reduce the eating quality of foods, particularly fruits, vegetables,
and prepared foods. The eating quality of red meats is affected less than that of many other foods. Use
refrozen foods as soon as possible, to save as much of its eating quality as you can.”
10. This refrigerator should not be recessed or built-in in an enclosed cabinet. It is designed for freestanding
installation only.
11. Do not operate your refrigerator in the presence of explosive fumes.
Power Requirements:
Capacity:
Setting (7):
Setting (1):
Weight:
AC 115V 60Hz 60W
91L / 3.2 cu.ft.
-2°C (28°F) at 25°C (77°F) ambient air temp.
10°C (50°F) at 25°C (77°F) ambient air temp.
23 kg (50.71 lbs)

4 5
INSTALLATION
1. Unpack your refrigerator by removing all packaging materials like carton, base, foams, adhesive tape, etc.
2. Remove all accessories, internal packaging material used to hold shelves, ice tray, etc. in place.
3. Clean the remains of all adhesive tap used and remove all printed material supplied.
4. Install the refrigerator in a convenient location away from extreme heat and cold. Allow sufficient clearance
between the refrigerator and side wall so the door(s) will open without obstruction. Refrigerator is not
designed for recessed installation.
5. The floor on which the refrigerator should be placed must be flat, hard, solid, and even. The refrigerator
should not be placed on any soft material such as foam, plastic, etc.
6. To level your refrigerator, use the two leveling legs located on the bottom front of your refrigerator. Adjust
by turning the legs counter clockwise to raise or clockwise to lower your refrigerator. The door will close
easier if the leveling legs are extended.
7. The following are recommended minimum clearances around the refrigerator for proper air circulation:
- Sides: 3/4” (19mm)
- Top: 2” (50mm)
- Back: 2” (50mm)
PROPER AIR CIRCULATION WILL HELP YOUR REFRIGERATOR WORK AT MAXIMUM EFFICIENCY.
NOTE - The appliance must be correctly connected to the power supply.
CAUTION - Care should be taken during the handling moving and use of the freezer to avoid damaging the
refrigerant tubing or increasing the risk of a leak.
WARNING - It is important to keep the power cord away from the compressor at the back of the refrig-erator
as during operation, the compressor can reach a high temperature and could cause serious damage to the
power cord.
PROTECTION FROM HEAT AND MOISTURE
• Do not install your refrigerator in any location where heavy moisture is present or if the location is not
properly insulated. This refrigerator is not designed to operate in temperature setting below 55°F.
• Location for the refrigerator should be on a hard surface and away from direct sunlight and heat source,
e.g., radiators, baseboard heaters, cooking appliances, etc.
DOOR ALIGNMENT
1. Remove the top hinge cover.
2. Loosen the top hinge screws using a Phillips head screwdriver.
3. Adjust the door or put a spacer in between and then tighten the screws.
STARTING YOUR NEW REFRIGERATOR
After cleaning your refrigerator thoroughly. Wipe the outside with a soft
dry cloth, the interior with a clean moist cloth.
1. Insert the power supply cord into the socket.
2. Turn the thermostat dial to an initial setting of “7” for 15-20 minutes.
NOTE - As the door gets pressed in during shipping, the gasket may have to be reset. This is done to prevent
the cool refrigerated air from escaping. If there is a gap between the door gasket and the cabinet, set the
gasket by gently pulling it out of the seal gap.
INSTALLATION (cont.)
REVERSING THE DOOR HINGE
1. Remove the top hinge cover.
2. Using Phillips Head Screwdriver, loosen and remove the screws holding the top hinge in place.
3. Remove top hinge and carefully lift off the door.
4. Remove the screw hole plugs from the opposite side and insert the plugs in the screw hole openings of
the just removed screws.
5. Remove any loose items in the refrigerator and carefully turn refrigerator on its back and place in a secure
area.
6. Loosen the screws holding the lower hinge bracket to the refrigerator and remove screws and bracket.
7. Remove the screws from the other side and insert in the previously removed screw holes.
8. Remove door pin by turning counter clockwise and reinsert to the underside of the bracket and tighten.
9. Align bracket and insert (2) remaining screws into the holes provided .
10. Align hole in the door with the door pin and washer and gently push down until firm.
11. Align upper hinge bracket with screw holes insert screws and partially secure, check that door and
cabinet are properly aligned and then secure tightly.
12. Replace hinge cap.
Door Hinge Cap

6 7
PARTS & FEATURES
OPERATING INSTRUCTIONS
NOTE - If the refrigerator has been placed in a horizontal or tilted position for any period of time wait 24
hours before plugging the unit in.
• The settings of the temperature control are "0, 1, 2, 3, 4, 5, 6, 7." Adjust the temperature control to the
setting that best suits your needs. The setting of "4" should be appropriate for home or office use.
• Turning the temperature to “0” position will shut off the cooling cycle, but does not turn off the electrical
power to the unit.
NOTE
- Wait 3-5 minutes before restarting if you unplug the refrigerator. The unit may fail to operate properly if
restarted too quickly.
- If the ambient temperature is too high, the refrigerator may not reach the desired target temperature.
- Large amounts of foods will lower the cooling efficiency of the appliance.
- Do not place the foods on the air outlet and leave spaces for airflow.
- If you choose to change the thermostat setting, adjust thermostat control one increment at a time. Allow
several hours for temperature to stabilize between adjustments.
REFRIGERATOR INTERIOR SHELF
1. Carefully tilt the shelf up and slide forward until the shelf has been completely removed.
2. Slide the shelf back to replace.
FREEZER COMPARTMENT
Follow the suggestions below for safe storage:
• Foods frozen in this compartment must be consumed within 5 days after storage. This compartment is
not cold enough for long term storage.
• To release frozen ice cube tray from the bottom of the compartment, pour warm water around it. Boiling
water should not be used as it can damaged the interior cabinet. Metal objects, such as, screwdrivers or
sharp knives can damage and puncture the cooling system tubing. Do not wash the ice cube tray in a
dishwasher; only wash in lukewarm water.
CARE AND CLEANING
CLEANING AND MAINTAINING
The refrigerator should be cleaned and maintained once a month. Before doing so, YOU MUST UNPLUG THE
REFRIGERATOR.
• Prepare a cleaning solution of 3-4 tablespoons of baking soda mixed with warm water. Use sponge or soft
cloth, dampened with the cleaning solution to wipe down your refrigerator.
• Rinse with clean warm water and dry with a soft cloth,
• Do not use harsh chemicals, abrasives, ammonia, chlorine bleach, concentrated detergents, solvents or
metal scouring pads. Some of these chemicals may dissolve, damage and/or discolor your refrigerator.
DOOR GASKET
Clean door gaskets every three months according to general instructions. Gasket must be kept clean and
pliable to assure a proper seal.
- Petroleum jelly applied lightly on the hinge sides of gaskets will keep the gasket pliable and ensure a
good seal.
CAUTION
To avoid personal injury or product damage always read and follow manufacturer’s instruc-tions and
warnings before using any cleaning products.
WARNING
Always unplug your refrigerator before cleaning to avoid electric shock. Ignoring this warning may result in
death or injury.
VACATIONS
• SHORT VACATIONS: Leave the appliance operating during vacations of less than 3 - 4 weeks.
• LONG VACATIONS: If the appliance will not be used for over one month, remove all items and unplug the
power cord. Clean and dry the interior thoroughly. To prevent odor and mold growth, leave the door open
slightly: blocking it open if necessary.
MOVING YOUR FRIDGE
1. Remove all contents and store properly.
2. Securely tape down all loose items inside your appliance.
3. Turn the leveling screws up to the base to avoid damage.
4. Tape the door shut.
5. Be sure the unit stays in the upright position during transportation. Protect the outside with a blanket or
similar item.
POWER INTERRUPTION
In case of a power interruption/outage, unplug the power cord from the wall outlet. Replug the power cord
to the wall outlet once the power has been restored. For long period of power outage, inspect and discard the
spoiled or thawed foods from the refrigerator and freezer compartments. Clean the refrigerator thoroughly
before using again.
DEFROSTING THE FREEZER COMPARTMENT
• Defrost the freezer compartment when the frost accumulated is about 1/8” thick.
• Set the temperature control dial to “0” before defrosting. Remove all contents from the freezer com-part-
ment and leave the door open until ice and frost dissolve thoroughly. Make sure the drip tray is in place and
unplug the unit. After defrosting, empty water from drip tray and wipe the compartment dry with a soft cloth
and then adjust the temperature control dial to the desired position.
Temperature Control Hinge Cover
Door Shelf
Tall Bottle Storage
Can Dispenser
Freezer Compartment
Drip Tray
Glass Shelves
Adjustable Leveling Legs

8 9
NOTE
- In case you want to speed up the defrosting, you may put a bowl of warm water (about 122°F / 50°C) into
the refrigerator.
- Do not heat the evaporator directly with hot water or hair dryer while defrosting. Doing so will damage the
freezer compartment.
- Never use a sharp or metallic instrument to remove frost as it may damage the refrigerator and puncture
the cooling coils. It will also void the warranty. We recommend using a plastic scraper.
ENERGY SAVING TIPS
• The refrigerator should be located in the coolest area of the room, away from heat-producing appliances or
heating ducts, and out of direct sunlight.
• Let hot foods cool to room temperature before placing in the refrigerator. Overloading the refrigerator
forces the compressor to run longer and thus increase energy consumption. Foods that refrigerate too slowly
may lose quality or spoil.
• Be sure to wrap foods properly, and wipe containers dry before placing in the refrigerator.
• The shelves should not be lined with aluminium foil, wax paper, or paper towels. This will interfere with cold
air circulation, making the refrigerator less efficient.
• Organize food to reduce door openings and extended searches. Remove as many items as needed at one
time, and close the door as soon as possible.
CARE AND CLEANING (cont.) TROUBLESHOOTING GUIDE
You can solve many common appliance problems easily, saving you the cost of a possible service call. Try
the suggestions below to see if you can solve the problem before calling the servicer.
Refrigerator does not work
A. Refrigerator is not switched on. Turn on the temperature control dial. It may be in the OFF, “0” position
B. Unit is not plugged in or plug is loose. Plug in the refrigerator.
C. Fuse has blown or is defective. Check fuse, replace if necessary.
D. Wall power socket is defective. To be corrected by a qualified electrician.
The food is too cold
Temperature is not properly adjusted. Set the temperature control dial to a warmer setting.
The food is too warm
A. Temperature is not properly adjusted. Set the temperature control dial to a cooler setting
B. Door was open for an extended period. Open the door only as long as necessary. Check door gasket for
proper seal.
C. A large quantity of warm food was placed in the refrigerator within the last 24 hours. Set the temperature
control dial to a colder setting temporarily.
D. The refrigerator is near a heat source. Please look in the “Protection From Heat and Moisture” section.
Heavy build-up of frost, possibly also on the door seal
NOTE This is normal during high humidity periods. Frequent door openings will also cause heavy frost
buildup.
Door seal is not .air-tight (possibly after reversing the door). Carefully warm the leaking sections of the door
gasket with a hair dryer (on a cool setting). At the same time, shape the warmed door seal by hand such that
it sits correctly.
Popping or cracking sounds
When compressor comes on. This is a normal sound of coolant flowing through condenser coils.
Refrigerator door does not shut properly
The refrigerator door is not properly aligned. Re-align the refrigerator door. Refer to the “Door Alignment”
section. Ensure nothing is blocking the door.
Refrigerator has an odor
A. Foods not properly sealed. Remove any contaminated foods.
B. Interior needs cleaning. Please refer to “Cleaning and Care” section.
/