Page is loading ...

PROFLO.COM
Distributed Exclusively by Ferguson and Wolseley Canada
© 2015 Ferguson Enterprises, Inc. 1015 49294
1
3)8:+
3)8%6
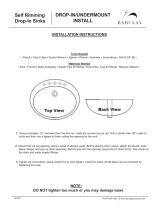
UNDERCOUNTER LAVATORIES/SINKS
LAVABOS/ÉVIERS ENCASTRÉS/ LAVAMANOS/FREGADEROS EMPOTRADOS (EN MOSTRADOR)
Installation Instructions
Instructions pour l’installation / Instrucciones de instalación
IMPORTANT INSTRUCTIONS
Read before you begin
• Observe all local plumbing and building codes.
• Prior to installation, unpack the new lavatory and
inspect for damage. Return the lavatory to its
protective carton until you are ready to install it.
• Inspect the existing drain and supply tubing.
Replace if necessary.
• Use the template supplied with the lavatory.
• Refer to the roughing in information to ensure
proper installation for ADA applications.
• Failure to follow these precautions may result in a
poor installation.
• 4HEWALLSANDmOORMUSTBESQUARE, plumb, and
level.
CARE & CLEANING INSTRUCTIONS
• To keep your lavatory looking new, make sure you
rinse it out thoroughly after each use.
• Stubborn stains, paint, or tar can be removed with
turpentine or paint thinner.
INSTRUCTIONS IMPORTANTES
À lire avant de commencer l’installation
• Respectez tous les codes de plomberie et du bâtiment
locaux.
• Avant de procéder à l’installation, déballez votre
nouveau lavabo et examinez-le aln de vérilEr s’il a
été endommagé. Replacez le lavabo dans la boîte de
carton protectriceJUSQUau moment de l’installation.
• Examinez le drain et les conduits d’alimentation
actuels. Remplacez-les au besoin.
• Servez-vous du gabarit fourni avec le lavabo.
• Pour les installations faites dans le cadre de l’ADA,
reportez-vous aux mesures relatives aux points de
raccordement pourQUe l’installation respecte les
règlements de cet organisme.
NETTOYAGE
• Pour préserver l’apparence de votre lavabo, veuillez le
rincer en profondeur après chaQUe utilisation.
• Les tâches tenaces, la peinture ou le goudron
peuvent être éliminés à l’aide d’essence de
térébenthine ou de diluant à peinture.
INSTRUCCIONES IMPORTANTES
Leer antes de comenzar
• Siga todos los códigos/normas locales de
plomeríayconstrucción.
• Antes de la instalación,DESEMPAQUEel nuevo
lavamanos/fregaderoyexamínelo, para determinar si
hay algún daño. Vuelva a colocar el lavamanos en su
caja protectora hastaQUe esté listo para instalarlo.
• Examine el desagüeylas tuberías de suministro
existentes. ReemplacECUALQUIera de estas piezas, si
es necesario.
• Use la plantilla suministrada con el lavamanos.
• Para asegurarse de realizar una instalación
adecuadaycompatible con las normas de la ADA,
consulte las dimensiones de instalación.
CUIDADO Y LIMPIEZA
• Para mantener su lavamanos con un aspecto
nuevo, asegúrese de enjuagarlo bien después de
usarlo.
• Para eliminar manchas difíciles, pintura o
ALQUITRĐN,USEAGUARRĐSODISOLVENTE
WARNING
Risk of personal injury or product damage. Handle
with care. Product can break, chip or cause injury
if handled carelessly. Get help lifting the lavatory.
AVERTISSEMENT
Risque de blessures ou de dommages matériels.
Manipulez avec soin. Le produit peut se briser,
s’écailler ou causer des blessures s’il n’est pas
manipulé avec précaution. Demandez l’assistance
d’une autre personne pour soulever le lavabo.
ADVERTENCIA
Riesgo de lesiones personales o daños al producto.
Frágil. El producto puede romperse, astillarseo causar
lesiones si no se manipula con cuidado. Cuando
levante el lavamanos, solicite ayudaaotra persona.
ADVERTENCIA
Riesgo de daños al producto. NO use limpiadores
abrasivos fuertes, ya que podrían rasguñarydeslucir
la supeTƂcie.
WARNING
Risk of product damage. DO NOT use strong abrasive
cleaners, as they will scratch and dull the surface.
AVERTISSEMENT
Risques d’endommager le lavabo. N’UTILISEZ PAS
de nettoyants abrasifs forts, car ils égratigneront
la surface et la rendront terne.

PROFLO.COM
Distributed Exclusively by Ferguson and Wolseley Canada
© 2015 Ferguson Enterprises, Inc. 1015 49294
2
PREPARATION
• Install the water supplies and drain piping according to
the roughing-in information.
Note: You may require different, more specialized
tools to install this lavatory to countertop materials
other than wood or wood composites.
NOTE: Install so future removal from underneath the
countertop is possible to avoid countertop damage.
• Check the desired lavatory location for clearance
between the backsplash, faucet and lavatory.
• Verify cabinet clearance beneath the countertop.
• Cut out the template where indicated for countertop
opening. Cut along the inside of the cutting line.
• Position and trace around the template on the
countertop with a pencil.
• Mark the faucet hole centerline on the countertop.
UNDERCOUNTER INSTALLATION
Cut out the opening by carefully following the pencil line
traced from the template.
Note: The screws and anchors provided should be
used on countertops with a maximum 1” (2.5 cm)
thickness. For thinner countertops, use appropriate
anch
ors and fasteners (not provided).
PRÉPARATION
• Installez les conduits d’alimentation en eau et la
tuyauterie du drain en fonction des mesures relatives
aux points de raccordement.
REMARQUE : Il se peut que vous ayez besoin
d’outils plus spécialisés pour installer ce lavabo si le
comptoir est fabriqué avec un autre matériau que le
bois ou le composite de bois.
REMARQUE : Installez le lavabo de manière à ce
que vous puissiez l’enlever à partir du dessous du
comptoir pour éviter d’endommager ce dernier.
• Vérilez l’espace de dégagement entre le dosseret, le
robinet et le lavaboàl’endroit prévu pour l’installation.
• Vérilez également l’espace requis pour le meuble sous
le comptoir.
• Découpez l’ouverture du comptoir dans le gabarit en
suivant la ligne de découpe intérieure.
• Placez le gabarit sur le comptoir et tr
acez-le à l’aide
d’un crayon.
• Tracez la ligne centrale de l’orIlce du robinet sur le
comptoir.
INSTALLATION SOUS LE COMPTOIR
Découpez l’ouverture en suivant soigneusement la ligne
tracée au crayon à l’aide du gabarit.
REMARQUE : Les vis et les douilles d’ancrage
fournies ne doivent être utilisées qu’avec des
comptoirs d’une épaisseur maximale de 2,5 cm (1
po). Pour les comptoirs d’une épaisseur inférieure,
utilisez des douilles d’ancrage et des pièces de n
appropriées (non fournies).
PRÉPARATION
• Instale las tuberías de suministro de agua y de
desagüe de acuerdoalos datos de las dimensiones de
la instalación.
NOTA: es posible que requiera herramientas
diferentesomás especializadas para instalar el
lavamanos bajo un mostrador hecho de un material
distintoa la maderao de compuestos de madera.
NOTA: realic
e la instalación de manera que sea
posible desinstalar el lavamanos de debajo del
mostrador sin causar daños al mostrador.
• Examine la ubicación deseada para el lavamanos, para
determinar el espacio libre entre el protector trasero, el
grifoyel lavamanos.
• VeRIlQUe el espacio libre que queda debajo del
mostrador.
• Recorte la plantilla donde se indica el sitio donde irá
empotrado el lavamanos. Recorte a lo largo de la parte
interior de la línea de corte.
• Coloque la plantilla en el mostrador y trace en él una
línea a lápiz siguiendo la forma de la plantilla.
• Trace en el mostrador la línea de centro del hueco del grifo.
INSTALACIÓN EMPOTRA DA EN
MOSTRADOR (GENERAL)
Corte el hueco para el lavamanos siguiendo atentamente
la línea trazada a lápiz mediante la plantilla.
NOTA: los tornillosylos ancla
jes deben usarse en
mostradores con un grosor máximo de 1” (2,5
cm). En el caso de mostradores más delgados, use
anclajesysujetadores apropiados (no suministrados).
Apply Sealant
Foam Padding
Anchor
Setting Tool
Marble
Clamp
Anchor
Screw
Wood
Screw
SEALAN T
TOOLS AND MATERIALS
Tape Measure Drill Sealant Pencil Scissors Claw Hammer Jigsaw Safety Glasses

PROFLO.COM
Distributed Exclusively by Ferguson and Wolseley Canada
© 2015 Ferguson Enterprises, Inc. 1015 49294
3
FOR WOOD COUNTERTOPS
• Mark and pre-drill the wood screw holes at the locations
shown on the template.
• Waterproof any exposed areas of wood.
FOR MARBLE/STONE COUNTERTOPS
• Position the countertop upside down on foam padding to
protect the surface. Mark and drill 3/8” holes 5/8” (1.6
cm) deep at the locations shown on the template.
• Use a setting tool and hammer to secure the anchors.
FOR ALL UNDERCOUNTER INSTALLATION
• If the countertop has not been installed, install it at this
time.
• Drill the faucet holes according to the faucet installation
instructions.
• Install the faucet to the countertop according to the
faucet manufacturer’s instructions.
• Install the drain to the lavatory according to the drain
manufacturer’s instructions.
Not
e: Do not use adhesives or adhesive sealants.
• Apply a continuous bead of quality sealant to the top
surface of the lavatory rim where it will contact the
countertop.
• For marble countertops, install the lavatory to the
countertop with the clamps and screws provided. For
other countertop materials, refer to the countertop
manufacturer’s instructions for recommended fasteners.
• Position the lavatory squarely under the cutout before
tightening the clamps. Draw the lavatory rim up against
the countertop until it is snug. Do not overtighten.
• Immediately wipe away any excess sealant and lll any
voids as needed.
• Allow the sealant to set for 30 minutes before
proceeding.
• Connect and tighten the trap to the drain, and complete
the water supply connections to the faucet according to
the instructio
ns packed with the faucet.
• Run water into the lavatory and check for leaks.
• Clean up with a non-abrasive cleaner.
UNDERCOUNTER ADA INSTALLATION
• For ADA installation, please follow recommended rough-
in dimension below.
COMPTOIRS EN BOIS
• Tracez et percez des avant-trous pour les vis à bois aux
endroits indiqués sur le gabarit.
• Imperméabilisez toutes les zones en bois à découvert.
COMPTOIRS EN MARBRE/PIERRE
• Placez le comptoir à l’envers sur une surface coussinée
pour en protéger la surface. Marquez l’emplacement,
puis percez des trous d’un diamètre de 1 cm (3/8 po)
et d’une profondeur de 1,6 cm (5/8 po) aux endroits
indiqués sur le gabarit.
• Fixez les douilles d’ancrage à l’aide d’un outil de pose et
d’un marteau.
POUR TOUTES LES INSTALLATIONS
ENCASTRÉES
• Si le comptoir n’est pas installé, installez le maintenant.
• Percez les trous du robinet conformément aux
instructions d’installation fournies avec le robinet.
• Installez le robinet sur le comptoir conformément aux
instructions du fabricant du robinet.
• Installez le drain sur le lavabo conformément aux
instructions du fabricant du drain.
REMARQUE : N’utilisez pas d’adhésif ou d’adhésif
mastic.
• Appliquez un boudin continu d’un matériau d’étanchéité
de bonne qualité autour du rebord supérieur du lavabo à
l’endroit où ce dernier touche au comptoir.
• Pour les comptoirs en marbre, z le lavabo au comptoir
à l’aide des serre-joints et des vis fournis. Pour les
comptoirs faits d’un autre matériau, reportez-vous aux
instructions du fabricant du comptoir pour connaître les
pièces de n recommandées
.
• Placez le lavabo directement au centre de l’ouverture
et de niveau avant d’installer les serre-joints. Alignez le
rebord du lavabo avec le comptoir jusqu’à ce qu’il soit
bien ajusté. Évitez de trop serrer.
• Essuyez immédiatement tout excédent de matériau
d’étanchéité et appliquez-en aux endroits où il en
manque au besoin.
• Laissez le matériau d’étanchéité durcir pendant 30
minutes avant de poursuivre l’installation.
• Raccordez et serrez le siphon à l’orilce d’évacuation,
puis effectuez les raccordements entre l’alimentation en
eau et le robinet en suivant les instructions fournies avec
le robinet
• Faites couler l’eau dans le lavabo et vérilez s’il y a des
fuites.
PARA MOSTRADORES DE MADERA
• Marque y taladre previamente los agujeros para los
tornillos para made
ra en las ubicaciones indicadas en
la plantilla.
• Impermeabilice cualquier área de madera que quede
expuesta.
PARA MOSTRADORES DE MÁRMOL/PIEDRA
• Coloque el mostrador hacia abajo sobre el relleno de
espuma,a ln de proteger la superlcie. Marqueytaladre
agujeros de 3/8” (0,9 cm) de diámetroy5/8” (1,6 cm) de
profundidad en las ubicaciones indicadas en la plantilla.
• Use una herramienta de instalaciónyun martillo para
asegurar los anclajes.
PARA LA INSTALACIÓN EMPOTRADA EN
TODO TIPO DE MOSTRADOR
• Si el mostrador no ha sido instalado aún, instálelo en
este momento.
• Taladre los agujeros del grifo de acuerdo a las
instrucciones de instalación del grifo.
• Instale el grifo en el mostrador de acuerdo a las
instrucciones del fabricante del gr
ifo.
• Instale el desagüe en el lavamanos de acuerdoalas
instrucciones del fabricante del desagüe.
NOTA: no use adhesivososelladores adhesivos.
• Aplique una línea continua de sellador de calidad en la
superlcie superior del borde del lavamanos que quede
en contacto con el mostrador.
• En el caso de mostradores de mármol, instale el
lavamanos en el mostrador con los sujetadoresytornillos
suministrados. En el caso de mostradores de otro tipo
de material, consulte las instrucciones del fabricante
del mostrador para determinar los sujetadores
recomendados.
• Sitúe el lavamanosaescuadra bajo el hueco donde irá
empotrado antes de apretar los sujetadores. Ajuste el
borde del lavamanos contra el mostrador hasta que
quede apretado. No aprie
te demasiado.
• Quite con un paño cualquier exceso de selladoryrellene
con sellador cualquier espacio no cubierto.
• Deje secar el sellador al menos 30 minutos antes de
continuar con el resto del procedimiento.
• Conecte y apriete el sifón al desagüe, y termine de
realizar todas las conexiones de suministro de agua con
el grifo, de acuerdo a las instrucciones incluidas en el
empaque del grifo.
• Deje correr el agua sobre el lavamanos y observe si hay
alguna fuga de agua.
1”
(25mm)
Max
21-7/8”~24”
(555~610mm)
5-1/8”
(130mm)
Min
Overflow passage
Finished wall
3-4/3”
(97mm)
Min

PROFLO.COM
Distributed Exclusively by Ferguson and Wolseley Canada
© 2015 Ferguson Enterprises, Inc. 1015 49294
4
WARRANTY
WHAT IS COVERED?
WOLSELEY NORTH AMERICA “WOLSELEY” OR THE
“COMPANY” WARRANTS ITS PRODUCTS TO BE FREE
FROM DEFECTS IN MATERIAL AND WORKMANSHIP
UNDER NORMAL USE AND SERVICE FOR A PERIOD OF
ONE (1) YEAR FRO M THE DATE O F INSTALLATION.
WHAT IS NOT COVERED?
The warranty set forth in paragraph 1 does not cover
installation or any other labor charges and does not apply
to products which have been damaged as a result of any
accident, abuse, improper installation or maintenance,
warranty of such products is limited to the warranty
extended to Wolseley by the product manufacturer.
Finally, WOLSELEY NO RTH AMERICA SHALL NOT BE
RESPONSIBLE OR LIABLE FOR ANY FAILURE OR DAMAGE
TO THIS PRODUCT OR ANY COMPONENT THEREOF
CAUSED BY THE USE OF ABRASIVE CLEANERS.
HOW TO OBTAIN WARRANTY SERVICE
The purchaser should contact their local Wolseley
location, installing contractor or builder from whom
the product was purchased or upon written request
addressed to Wolseley North America, 12500 Jefferson
Avenue, Newport News, VA 23602, Attention Consumer
Affairs. Any shipping charges, associated with warranty
service, must be prepared by the consumer. In all
cases, proof of purchase will be required.
LIMITATIONS OF IMPLIED WARRANTY AND DISCLAIMER
OF CONSEQUENTIAL OR INCIDENTAL DAMAGES
WOLSELEY NORTH AMERICA DISCLAIMS ANY LIABILITY
FOR CONSEQUENTIAL OR INCIDENTAL DAMAGES AND
DISCLAIMS ALL EXPRESS OR IMPLIED WARRANTIES,
INCLUDING THOSE OF MERCHANTABILITY AND FITNESS
FOR A PARTICULAR PURPOSE, AS SET FORTH ABOVE.
IMPLIED WARRANTIES OF THE PRODUCTS AND
PRODUCT COMPONENTS SET F RTH IN PARAGRAPH
1 ABOVE ARE LIMITED TO THE DURATIONS OF THE
RESPECTIVE WARRANTY. Some states do not allow the
exclusion or limitation of incidental or consequential
damages or limitations on how long an implied
warranty lasts, so the above limitations may not apply
you may also have other rights, which vary from state
to state.
If you encounter any installation of performance
problems, please done hesitate to contact us at
800-221-3379. Thanks again for choosing PROFLO
GARANTIE
ÉLÉMENTS COUVERTS PAR LA GARANTIE
WOLSELEY NORTH AMERICA (APPELÉ CI-APRÈS «
WOLSELEY» OU « L’ENTREPRISE ») GARANTIT SES
PRODUITS CONTRE LES DÉFAUTS DE MATÉRIAUX ET
LES VICES DE FABRICATION DANS DES CONDITIONS
D’UTILISATION ET D’ENTRETIEN NORMALES POUR UNE
DURÉE D’UN (1) ANÀPARTIR DE LA DATE D’INSTALLATION.
ÉLÉMENTS NON COUVERTS PAR LA GARANTIE
LA GARANTIE DÉCRITE AU PARAGRAPHE1NE COUVRE PAS
LES FRAIS D’INSTALLATION OU DE MAIN-D’OEUVRE ET
NE S’APPLIQUE PAS AUX PRODUITS ENDOMMAGÉSÀLA
SUITE D’UN ACCIDENT, D’UNE UTILISATION ABUSIVE,
D’UNE INSTALLATION OU D’UN ENTRETIEN INAPPROPRIÉ
OU D’UNE MODIFICATION DU PRODUIT DE PLOMBERIE
ORIGINAL. LA GARANTIE DE CE PRODUIT SE LIMITE À LA
GARANTIE OFFERTE À WOLSELEY PAR LE FABRICANT DU
PRODUIT. ENFIN, WOLSELEY NORTH AMERICA NE PEUT
ÊTRE TENU RESPONSABLE DES BRIS OU DES DOMMAGES
DE CE PRODUIT OU DE
TOUTES PIÈCES DE CE PRODUIT CAUSÉS PAR
L’UTILISATION DE NETTOYANTS ABRASIFS.
COMMENT SE PRÉVALOIR DE LA GARANTIE
L’ACHETEUR DOIT COMMUNIQUER AVEC LE DÉTAILLANT
WOLSELEY DE SA RÉGION, L’ENTREPRENEUR QUI A
EFFECTUÉ L’INSTALLATION OU LE CONSTRUCTEUR QUI
A VENDU LE PRODUIT OU ENCORE, FAIRE PARVENIR UNE
DEMANDE ÉCRITEÀWOLSELEY NORTH AMERICA, 12500,
JEFFERSON AVENUE, NEWPORT NEWS, VA 23602, ÉTATS-
UNIS,À L’ATTENTION DE : CONSUMER AFFAIRS. TOUS
LES FRAIS D’EXPÉDITION LIÉS AU SERVICE DE GARANTIE
DOIVENT ÊTRE ASSUMÉS PAR LE CONSOMMATEUR.
TOUTE DEMANDE AU TITRE DE LA GARANTIE DOIT ÊTRE
ACCOMPAGNÉE D’UNE PREUVE D’ACHAT.
RESTRICTIONS DE LA GARANTIE IMPLICITE
ET EXONÉRATION DE RESPONSABILITÉ QUANT AUX
DOMMAGES INDIRECTS OU ACCESSOIRES. WOLSELEY
NORTH AMERICA DÉCLINE TOUTE RESPONSABILITÉ POUR
LES DOMMAGES INDIRECTS OU ACCESSOIRES
ET ANNULE TOUTE GARANTIE EXPRESSE OU
IMPLICITE,YCOMPRIS TOUTE GARANTIE DE QUALITÉ
MARCHANDE OU D’ADAPTATION À UN USAGE
PARTICULIER, TEL QU’ÉNONCÉ PRÉCÉDEMMENT. LES
GARANTIES IMPLICITES POUR LE PRODUIT ET LES
PIÈCES DU PRODUIT ÉNONCÉES DANS LE PARAGRAPHE
1 SE LIMITENT À LA DURÉE DE VIE DE LA PRÉSENTE
GARANTIE. CERTAINS ÉTATS ET CERTAINES PROVINCES
NE PERMETTENT PAS LES CLAUSES SUR L’EXCLUSION
OU LA RESTRICTION DES DOMMAGES INDIRECTS OU
ACCESSOIRES OU DES RESTRICTIONS CONCERNANT LA
DURÉE D’UNE GARANTIE IMPLICITE. PAR CONSÉQUENT,
LES RESTRICTIONS SUSMENTIONNÉES PEUVENT NE
PAS S’APPLIQUER. CETTE GARANTIE VOUS CONFÈRE
CERTAINS DROITS RECONNUS PAR LA LOI ET IL EST
POSSIBLE QUE VOUS AYEZ D’AUTRES DROITS QUI
VARIENT D’UN ÉTAT OU D’UN PROVINCEÀL’AUTRE.
GARANTÍA
¿QUÉ CUBRE LA GARANTÍA?
WOLSELEY NORTH AMERICA “WOLSELEY” O “LA
COMPAÑÍA” GARANTIZA QUE SUS PRODUCTOS ESTÁN
LIBRES DE DEFECTOS DE MATERIALES Y MANUFACTURA
EN CONDICIONES NORMALES DE USO Y SERVICIO, POR
UN PERÍODO DE UN (1) AÑO A PARTIR DE LA FECHA DE LA
INSTALACIÓN.
¿QUÉ EXCLUYE LA GARANTÍA?
La garantía estipulada en el párrafo 1 no cubre la
instalación ni cualquier otro gasto de mano de obrayno
es válida para productos que hayan resultado dañados
debido a accidente, abuso, instalaciónomantenimiento
de plomería. La garantía de tales productos está
limitadaala garantía que haya otorgado el fabricante
del producto a Wolseley. Por último, WOLSELEY NORTH
AMERICA NO SE HACE RESPONSABLE DE NINGUNA
FALLAO DAÑO AL PRODUCTO
OA CUALQUIERA DE LOS COMPONENTES DEBIDO AL USO
DE LIMPIADORES ABRASIVOS.
CÓMO OBTENER EL SERVICIO TÉCNICO
CUBIERTO POR LA GARANTÍA
El comprador debe ponerse en contacto con su
proveedor local de Wolseley, el contratista de la
instalaciónoel constructor encargado de la compra
del producto, o bien de forma escritaaWolseley North
America, 12500
Jefferson Avenue, Newport News, VA 23602, EE.UU.
Attention: Consumer Affairs. Cualquier gasto de
transporte/envío del producto asociado al servicio
técnico cubierto por la garantía deberá ser pagado
previamente por el consumidor. En cualquier caso de
solicitud de servicio técnico se requiere una prueba de
compra.
LÍMITACIONES DE LA GARANTÍA IMPLÍCITA Y EXENCIÓN
DE RESPONSABILIDAD DE
DAÑOS CONSECUENCIALES O
INCIDENTALES WOLSELEY NORTH AMERICA ESTÁ
EXENTA DE CUALQUIER RESPONSABILIDAD POR DAÑOS
CONSECUENCIALESOINCIDENTALES, ASÍ COMO DE
CUALQUIER GARANTÍA EXPRESA O IMPLÍCITA, INCLUIDAS
AQUELLAS RELACIONADAS CON LA
COMERCIALIZACIÓN E IDONEIDAD DEL PRODUCTO
PARA UN FIN DETERMINADO, COMO SE ESTIPULA
EN LOS PÁRRAFOS PREVIOS. LAS GARANTÍAS
IMPLÍCITAS DE LOS PRODUCTOS Y COMPONENTES
DEL PRODUCTO ESTIPULADAS EN EL PÁRRAFO
1 ANTERIOR SE LIMITANALA DURACIÓN DE LA
GARANTÍA CORRESPONDIENTE. ALGUNOS ESTADOS
NO PERMITEN LA EXCLUSIÓN O LIMITACIÓN DE DAÑOS
INCIDENTALESODERIVADOS, O BIEN DE LIMITACIONES
SOBRE LA DURACIÓN DE UNA GARANTÍA IMPLÍCITA. POR
TANTO, PUEDE QUE LAS LIMITACIONES PREVIAMENTE
DESCRITAS NO SEAN VÁLIDAS EN ESE CASO. ESTA
GARANTÍA OTORGA AL COMPRADOR DEL PRODUCTO
DERECHOS LEGALES ESPECÍFICOS Y ES POSIBLE QUE
DICHO COMPRADOR TENGA OTROS DERECHOS QUE
VARÍAN DE UN ESTADO A OTRO.
/