Page is loading ...

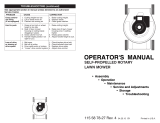
Owner's Manual
®
24 VOLT DO
20" Cordness Rechargeable
REAR DISCHARGE
MULCHING MOWER
Model No.
917.386411
° Safety
• Assembly
Operation
o Maintenance
o EspaSol
o Repair Parts
.,AUTION.
_ead and follow all
;afety Rules and Instructions
_efore operating this equipment
;ears, Roebuck and Co., Hoffman Estates, IL 60179

Safety Rules 2 Maintenance Schedule 9
Product Specifications 10 Service and Adjustments 11
Maintenance 7 Storage 12
Warranty 2 Troubleshooting 13-14
Assembly 5 lUustrated Parts List 28-30
Operation 6 Parts Ordering Back Cover
LIMITED TWO YEAR WARRANTY ON CRAFTSMAN POWER MOWER
For two years from date of purchase, when this Craftsman Lawn Mower is maintained,
lubricated, and tuned up according to the operating and maintenance instructions in the
owner's manual, Sears will repair free of charge any defect in material or workmanship.
If this Craftsman Lawn Mower is used for commercial or rental purposes, this warranty
applies for only 90 days from the date of purchase.
This Warranty does not cover:
o Expendable items which become worn during normal use, such as rotary mower
blades, blade adapters, and belts_
o Repairs necessary because of operator abuse or negligence, including bent crank-
shafts and the failure to maintain the equipment according to the instructions con-
tained in the owner's manual.
WARRANTY SERVICE IS AVAILABLE by returning the Craftsman power mower to the
nearest Sears Service Center/Department in the United States. This warranty applies
only while this product is in use in the United States.
This Warranty gives you specific legal rights, and you may also have other rights which
vary from state to state.
Sears, Roebuck and Co.,D/817 WA, Hoffman Estates, IL 60179 USA
CAUTION: Do not attempt to operate this mower until you have read thoroughly and
understand completely all instructions, safety rules, etc. contained in this manual,
Failure to comply can result in accidants involving fire, electric shock, or serious
personal injury, Save Owner's Manual and review frequently for continuing safe opera-
tion and instructing others who may use this mulching mower.
Safety standards require anOperator
Presence Control Bar to minimize the risk of
injury. Yourunitis equipped with such a
Control Bar, Donot attempt to defeat its
function under any circumstances°
TRAINING:
o Read this operator's manual carefully.
Become familiar with the controls and
know how to operate your mower properly,
Learn how toquicl'Jystop mower.
o Do not allow children to useyour mower.
Never allow adults to use mower without
proper instructions.
o Keep the area of operation clear of all
persons, especially small children and pets.
• Use mower only as the manufacturer
intended and as described in this manual.
• Do not operate mower if it has been
dropped or damaged in any manner,
Always have damage repaired before Qsing
your mower.
o Do not use accessory attachments that are
not recommended by the manufacturer.
Use of such attachments may be hazard-
ous.
. 2

Thebladetumswhenthemotorisrunning.
Avoidaccidentalstarting_Donotplaywith
theswitchbuttonandOperatorPresence
ControlBarwhennotinuse.
_REPARATION:
Alwaysthoroughlychecktheareatobe
mowedandclearitofallstones,sticks,
wires,bones,andotherforeignobjects.
Theseobjectswillbethrownbytheblade
andcancausesevereinjury.
Alwayswearsafetyglassesoreyeshields
whenstartingandwhileusingyourmower.
Dressproperly.Donotoperatemower
whenbarefootorwearingopensandals.
Wearonlysolidshoeswithgoodtraction
whenmowing.
Alwaysmakewheelheightadjustments
beforestartingyourmower.Neverattempt
todothiswhilethemowerisrunning°
Mowonlyindaylightorgoodartificiallight,
DoNotinsertfuseintomoweruntilitis
readytobeusedorcharged_
Protectyourlung&Wearafaceordust
maskifmowingOperationisdusty°
Removeadjustingwrenches.Formhabitof
checkingtoseethatadjustingwrenchesare
removedfrommowerbeforeturningiton,
)PERATION:
Keepyoureyesandmindonyourmower
andtheareabeingcut.Donotletother
interestsdistractyou,
Donotmowwetorslipperygrass.Never
runwhileoperatingyourmower.Alwaysbe
sureofyourfooting- keepafirmholdon
thehandlesandwalk.
Donotputhandsorfeetnearorunder
rotatingparts.Keepclearofthedischarge
openingatalltimes.
Alwaysstopthemotorwheneveryouleave
orarenotusingyourmower,orbefore
crossingdriveways,walks,roads,andany
gravel-coveredareas.
Neverdirectdischargeofmaterialtoward
bystandersnorallowanyonenearthe
mowerwhileyouare
operatingit.
Beforecleaning,inspecting,orre-
pairingyourmower,stopthemotor
andmakeabsolutelysuretheblade
andallmovingpartshavestopped.Then
removethefusetopreventaccidental
starting.
Donotcontinuetorunyourmower
ifyouhitaforeignobject.Follow
theprocedureoutlinedabove,thenrepair
anydamagebeforerestartingandoperating
yourmower_
o Donotoperateyourmowerifitvibrates
abnormally.Excessivevibrationisan
indicationofdamage;stopthemotorand
safelycheckforthecauseofvibration.
Repairasrequired°
o Donotrunthemotorindoors.
. Nevercutgrassbypullingthemower
towardsyou.Mowacrossthefaceofslopes,
neverupanddownoryoumightloseyour
footing.Denotmowexcessivelysteep
slopes.Usecautionwhenoperatingthe
moweronuneventerrainorwhenchanging
directions- maintaingoodfooting.
• Neveroperateyourmowerwithoutproper
guards,plates,grasscatcherorothersafety
devicesinplace.
• Don'tforcethemower.Itwiltdothejob
betterandsaferattherateofwhichitis
designed.Whenmowingonroughsurfaces
orinhighgrass,selectahighercutting
position_
o Don'toverreach.Keepproperfootingand
balanceatalltime.
o Stayalert.Watchwhatyouaredoingand
usecommonsense.Donotoperatemower
whenyouaretired.Donotrunorrushwhen
mowing.
o Drugs,alcohol,medication_Donotoperate
mowerwhileundertheinfluenceofdrugs,
alcohol,oranymedication.
° Danger.Keepawayfrombladearea.Be
awareoftheriskofinjury°Keephandsand
feetawayfromtheblade°DONOTattempt
toremovecutmaterialorunclogdebrisfrom
undermowerdeckwhilebladeismoving.
o Ifmowerstalls,releaseoperatorpresence
controlbarandwaitforbladetostop
rotating.Removefusebeforeattemptingto
removeanythingfrom undermower
deck.Thoroughlyinspectandhaveany
damagerepairedbeforerestartingand
operatingmower.
MAINTENANCEAND STORAGE:
° Check the blade and the motor mounting
bolts often to be sure they are tightened
properly.
o Check all bolts, nuts and screws at frequent
intervals for proper tightness to be sure
mower is in safe working cond_on.
o Keep all safety devices in place and
working.
° To reduce fire hazard, keep the motor free
of grass, leaves or excessive grease and oil.
o Check grass catcher bag often for deteriora-
tion and wear. Replace worn bags. Use only
replacement bags that are recommended

_yandcomplywithspecificationsofthe
r}anufacturerofyourmower:
_lwayskeepthebladeon yourmower
_harp.
\llowmotortocoolbeforestoringinany
._nclosure.
(eepmowerdryandclean.Alwaysusea
-leandampclothwhencleaning.Neveruse
_rakefluids,gasoline,petroleum-based
_roducts,solvents,orwatertocleanmower.
3onotmowifswitchdoesnotturnitonand
)ff.Havedefectiveswitchreplacedbya
lUalifiedservicetechnicianatanauthorized
;ervicecenter/department
3heck damaged parts. Before further use of
he mower, a guard or other part that is
lamaged should be carefully checked to
letermine that it will operate properly and
_erform its intended function. Check for
llignrnent of moving parts, binding of
noving parts, breakage of parts, mounting,
ind any other conditions that may affect its
9eration. A guard or other part that is
lanlaged shouldbe properly repaired or
_=placedby a qualified service technician at
_nauthorized service center/department.
Vhen servicing use only identical Crafts-
nan replacement parts. Servicing of this
nower should be performed only by a
tualified service technician. For repair
ervice we suggest you return mower to
our nearest authorized service center/
'epartment for repair.
Vhen replacing blade, use manufacturers
ecommended parts only. Use of any other
)lade may result in serious personal injury
,rdamage to your mower.
;tore mower inside. When not in use,
nower should be stored indoors in a
larage, basement, etc. Storage area should
)e a dry, locked-up place - out of reach of
:hildreno
¢lalntain mower with care. Keep blade
_harp and clean for best and safest
)efformance. Follow instructions for
ubricating and changing accessories.
CHARGER SAFELY INSTRUCTIONS:
o DOUBLE INSULATION. The charger for
your mower is double insulated. This means
you are separated from the electrical system
of the charger by two complete sets of
electrical insulation, This extra layer of
insulation is inteeded to protect the user from
electrical shock due to a break in the wiring
insulation. All exposed metal parts are
isolated from live internal metal components
with protecting insulation. Double insulated
chargers do not need to be grounded,
Servicing of a charger with double insulatian
requires extreme care and knowledge of the
system and should be performed only by a
qualified service technician.
• Before charging battery, read all instructions
and cautionary ma_ngs in this manual and
on your mower.
o Do not expose mower to rain or snow.
o To reduce risk of damage to charger plug,
pull cord by the cord plug rather than cord
when disconnecting from charger port or AC
outlet.
° Make sure cord is located so that itwill not be
stepped on, tripped over, or otherwise
subjected to damage or stress.
• Do not operate mower if charger has
received a sharp blow, been dropped, or
otherwise damaged in any way; take it to a
qualified serviceman.
o Do not disassemble mower; take it to a
qualified serviceman when service or repair
is required° Incorrect reassembly may result
in a risk of electric shock or fire.
• To reduce risk of electric shock, remove fuse
before attempting any maintenance cleaning_
, Turning off control will not reduce this risk.
WARNING: Always remove fuse to prevent
accidental starting when setting up, transport-
ing, adjusting or making repairs_
4

These accessories were available when also order repair parts for you, when you
this lawn mower was produced. They are provide the model number of your lawn
also available at most Sears retail outlets mower.
and service centers,, Most Sears stores can
LAWNMOWER PERFORMANCE
GRASS CATCHERS
FOR
REAR DISCHARGE
LAWN MOWERS
LAWN MOWER MAINTENANCE
Blades Blade adapters
9
Wheels
rO REMOVE LAWN MOWER FROM
CARTON
Remove loose parts included with
mower
Cut down two end corners of carton and
lay end panel down flat.
Remove all packing materials except
padding between upper and lower
handle and padding holding operator
presence control bar to upper handle.
Roll lawn mower out of carton and check
carton thoroughly for additional loose
parts.
DQ NOT insert fuse at this time.
"tOW TO SET UP YOUR LAWN
VtOWER
ro UNFOLD HANDLE
MPORTANT: Unfold handle carefully so as
_ot to pinch or damage control cables.
• Raise handles until lower handle section
locks into place in mowing position.
• Raise upper handle section into place
on lower handle, remove protective
padding and tighten both handle knobs.
Remove handle padding holding
operator presence control bar to upper
handle.
Your lawn mower handle can be
adjusted for your mowing comfort. Refer
to "Adjust Handle" in the Service and
Adjustment section of this manual.
Operator Presence
Control Bar
Upper Handle
Lift Up
Mowing
Position
Lower Handle
• DO NOT insert fuse at this time.
= Plug switch box cord connector
into motor connector. Plug is
located on right side of motor.
Motor Connector
Switch Box Cor,
Connector
5

KNOW YOUR LAWN MOWER
READ THIS OWNER'S MANUAL AND SAFETY RULES BEFORE OPERATING YOUR
LAWN MOWER. Compare the illustrations with your lawn mower to familiarize yourself
with the location of various controls and adjustments, Save this manual for future
reference.
These symbols may appear on your lawn mower or in literature supplied with the
product. Learn and understand their meaning.
CAUTION OR _ E
WARNING
Operator Presence (
Start Switch Button
Loadlndicator
Light
Handle
Knob
Ba_eryStatus
Light
Mulcher Plug
Fuse 40 amp
Automotive
Type
Wheel adjuster
Charger (on each wheel)
Housing
MEETS CPSC SAFETY REQUIREMENTS
Sears rotarywalk-behind power lawn mowers conform to the safety standards of the
American National Standards Institute and the U.S. Consumer Product Safety Commis-
sion, The blade turns when the motor is running,
Operator Presence Control Bar - must be held down to the handle to start and run the
motor, Release to stop the motor.
Battery Status Light - alerts operator when battery capacity is approaching 80%
discharge (approximately 10 to 15 minutes left-- depending on grass conditions).
Load Indicator Light - informsthe operator that the mower is experiencing a heavy
load.
Mulcher Plug - allows conversion to discharge or bagging operation.
Fuse - must be plugged in to operate and recharge mower.
6

;HARGING
hebatteryhasbeenchargedatthefactory.
Iowever,itwiltbenecessarytorecharge
arteryandmakesureithasafullcharge
eforeinitialuse,,
Alwayschargemowerindoorsinagarage,
carport,etc.whereitisdryandprotected
fromtheweather.DONOTexposetorain
orsnow.
Donotchargemowerinextremehotorcold
temperatures.
OTE:Extremeheatismoreharmfulthan
]ld,especiallywhenstoringmower.Charge
_owerinalocationwherethetemperatureis
lore than 50°F (10°C) but less than 100°F
17°O).
Keep mower away from water, heaters,
stoves, radiators, flames, chemicals,
corrosives, etc.
0 CHARGE
Mower is disabled while charging. Plugging
the charger into the mower interrupts the
switching circuit.
The fuse must be plugged in while
charging battery.
Open charging port door to expose
charging port°
Plug charger lead into charging port.
Connect charger power cord to power
supply,
Door Charger Lead
Charging
OTE: Always plug charger into mower
RST,, Then into wall receptacle. Reversing
is procedure will result in the battery not
._ingfully charged,,
Make sure power supply is normal house
voltage, 120 volts, 60 Hz, AC only.
The red LED light on the charger will turn
on, indicating "on charge" status of mower.
OTE: If mower does not charge, see
)ubleshooting cha&
Make sure fuse is plugged in.
When the battery becomes fully charged,
the red light will turn off and the green light
will tum on_
It takes 16 hours to fully recharge a
completely discharged battery° Your mower
may be used with a partially charged battery
if you need to finish a job.
,' Your mower has been designed so that it
is safe to continuously leave it on charge
for extended periods of time. You can even
leave it on charge during the off season if
desired°
The operation of any lawn mower
can result in foreign objects thrown
into the eyes, which can result in
severe eye damage. Always wear safety
glasses or eye shields while operating your
lawn mower or performing any adjust-
ments or repairs. We recommend a wise
vision safety mask over the spectacles or
standard safety glasses.
MOTOR ZONE CONTROL
CAUTION; Federal regulations re-
quire a motor control to be installed on
this lawn mower in order to minimize the
risk of blade contact injury. DO NOT
under any circumstances attempt to
defeat the function of the operator
control. The blade turns when the motor
is running.
o Your lawn mower is equipped with
• an operator presence control barwhich
requires the operator to be positioned
behind the lawn mower handle to start and
operate the lawn mower.
TO ADJUST CUTTING HEIGHT
o Raise wheels for low cut and lower wheels
for high cut,
• Adjust cutting height to suit your require-
ments, Medium position is best for most
lawn&
= To change cutting height, squeeze adjuster
lever toward wheel Move wheel up or
down to suit your requirements, Be sure all
wheels are in the same setting.
NOTE; Adjuster is properly positioned when
plate tab inserts into hole in lever. Also, 9-
position adjusters (if so equipped) allow lever
to be positioned between the plate tab&
Plate Tab
Lower Wheels for High Cut
Raise Wheels for Low Cut

ATTACH GRASS CATCHER
;lose the flip lid. Flip lid must be closed
#hile operating lawn mower°
ift the rear door on the mower housing
,nd place the grass catcher frame onto
ne formed tabs on the rear door hinge
_rackeL
_he grass catcher is secured to the lawn
nower housing when the rear door is
owered onto the grass catcher frame.
..-__ _ Rear
_r'f _ door Grass
/ _ catcher
F_\ /flame
,ingeJ
brack
Formed
tabs
EMPTY GRASS CATCHER
-o remove grass catcher, release
_perator presence control bar to stop
;ngine.
_ift up rear door and remove the grass
:atcher by the handleo
)o not drag the bag when emptying; it
viii cause unnecessary wear.
TO INSTALL ATTACHMENTS
Your lawn mower was shipped ready to be
used as a mulchero To convert to bagging
or discharging:
o Open rear door and remove mulcher
plate. Store mulcher plate in a safe
place.
o You can now install catcher' or optional
clipping deflector.
, To return to mulching operation, install
mulcher plate into discharge opening of
mower.
CAUTION: Do not run your lawn mower
without mulcher plate in place or approved
clipping deflector or grass catcher in place..
Never attempt to operate the lawn mower
with the rear door removed or propped
open.
Mulcher
BEFORE STARTING MOTOR
= Mower will not run with battery charger
plugged in.
= Unplug charger from outlet, then remove
charger from motor.
• Close charging port door..
TO START MOWER
o Insert fuse.
° Hold operator presence control bar
down to the handle and press switch
button to start mower.
= To STOP motor, release operator
presence control bar.
8

MOWING TIPS
o Under certain conditions, such as very
tall grass, it may be necessary to raise
the height of cut to reduce pushing effort
and to keep from overloading the engine
and leaving clumps of grass clipping& It
may also be necessary to reduce
ground speed and/or run the lawn
mower over the area a second time.
,, For extremely heavy cutting, reduce the
width of cut by overlapping previously
cut path and mow slowly.
o When using a rear discharge lawn
mower in moist, heavy grass, clumps of
cut grass may not enter the grass
catcher. Reduce ground speed (push-
ing speed) and/or run the lawn mower
over the area a second time..
o tf a trail of clippings is left on the right
side of a rear discharge mower, mow in
a clockwise direction with a small
overlap to collect the clippings on the
next pass.
= Pores in cloth grass catchers can
become filled with dirt and dust with use
and catchers will collect less grass.. To
prevent this, regularly hose catcher off
with water and let dry before using.
° Keep top of engine around starter clear
and clean of grass clippings and chaff.
This will help engine air flow and extend
engine life.
Max 1/3
MULCHING MOWING TIPS
IMPORTANT: For best performance, keep
mower housing free of built-up grass and
trash. See CLEANING in Maintenance
section of this manual.
o The special mulching blade will recut the
grass clippings many times and reduce
them in size so that as they fall onto the
lawn they will disperse into the grass
and not be noticed. Also, the mulched
grass will biodegrade quickly to provide
nutrients for the lawn.
o Avoid cutting your lawn when it is wet.
Wet grass tends to form clumps and
interferes with the mulching action.. The
best time to mow your lawn is the early
afternoon. At this time the grass has
dried and the newly cut area will not be
exposed to the direct sun.
o For best results, adjust the lawn mower
cutting height so that the lawn mower
cuts off only the top one-third of the
grass blades. If the lawn is overgrown it
will be necessary to raise the height of
cut to reduce pushing effort and to keep
from overloading the motor and leaving
clumps of mulched grass. For extremely
heavy mulching, reduce your width of
cut, mow slowly and raise the rear of the
lawn mower one wheel adjuster setting
higher than the front.
• Certain types of grass and grass
conditions may require that an area be
mulched a second time to completely
hide the clippings. When doing a second
cut, mow across or perpendicular to the
first cut path.
= Change your cutting pattern from week
to week. Mow north to south one week
then change to east to west the next
week_ This will help prevent matting and
graining of the lawn.
9

CUSTOMER RESPONSIBULITIES
.... ,,r
¥ooCOMPLETE
REGULAR SERVICE RV!CE DATES
Check for Loose Fasteners I _/ _/'
Clean/Inspect Grass Catcher I
(If Equipped) I _/ _ e/
Clean Lawn Mower _,/ _,/
Check/Sharpen/Replace Btade _/' 1
LubricationChart _/'
Recharge t_ _/ I
LUBRICATION CHART
1 - Replace blades more often when mowing in sandy soil
GENERAL
RECOMMENDATIONS
Wheel
• Always observe safety rules when
performing arty maintenance.
= The warranty on this lawn mower does
not cover items that have been sub-
jected to operator abuse or negligence.
To receive full value from the warranty,
operator must maintain mower as
instructed in this manual.
= Some adjustments will need to be made
periodically to properly maintain your
unit.
= All adjustments in the Service and
Adjustments section of this manual
should be checked at least once each
season.
o Once a year check blade for wear.
o Follow the maintenance schedule in this
manual
• Before each use:
o Be sure batteryis fully charged.
° Check for loose fasteners.
LUBRICATION
Keep unit well lubricated (See "LUBRICA_
TION CHART").
(3:) Spray Lubricant
IMPORTANT: Do not oil or grease plastic
wheel bearings. Viscous lubricants will
attract dust and dirt and will shorten the life
of the self-lubricating bearings. If you feel
they must be lubricated, use only a dry,
powered graphite tube lubricant sparingly.
lO

PRODUCT SPECnF CA33ONS
MODEL NUMBER 917.386411
POWER 24V DC BATTERY / 17 AMP-HOUR
4O AMP FUSE
BLADE SPEED 3200 RPM
CUTTING WIDTH 20"
CHARGER 12-16 HOUR RECHARGE
BLADE BOLT TORQUE: 35-40 FT. LBS.
TIRES o Use block of wood between blade and
lawn mower housing and tighten the
blade bolt, turning clockwise.
° The recommended tightening torque is
35_40 ft.Ibs.
o Keep tires free of gasoline, oil, or insect
control chemicals which can harm rubber.
o Avoid stumps, stones, deep ruts, sharp
objects and other hazards that may
cause tire damage.
BLADE CARE
For best results, mower blade must be kept
sharp. Replace bent or damaged blades.
TO REMOVE BLADE
, Remove fuse and keep in a safe place
away from mower.
• Use a wood block between blade and
mower housing to prevent blade from
turning when removing blade boll
o Protect your hands with gloves and/or
wrap blade with heavy cloth.
o Remove blade bolt by turning counter-
clockwise. Use a box or open-end
wrench.
• Remove blade and attaching hardware
(bolt, lock washer and hardened washer).
o Remove the blade adapter and check the
key inside hub of blade adapter. The key
must be in good condition to work
properly. Replace adapter if damaged.
TO REPLACE BLADE
• Position the blade adapter on the
motorshaft. Be sure key in adapter and
motorshaft keyway are aligned.
o Position blade on the blade adapter
aligning the two (2) holes in the blade
with the raised lugs on the adapter.
• Be sure the trailing edge of blade
(opposite sharp edge) is up toward the
motor.
o Install the blade bolt with the lock washer
and hardened washer into blade adapter
and motorshafL
IMPORTANT: Blade bolt is grade 8 heat
treatedr
NOTE: We do not recommend sharpen-
ing blade, but if you do, be sure the blade
is balanced.
Blade Adapter
Motorshaft
Blade Key _ zKeyway
Blade
I -_ ,, _, J/-_. Blade
Lockwasher\, , "_ra',lino Adapter
Hardened Y
Washer Edge
TO SHARPEN BLADE
Care should be taken to keep the blade
balanced. An unbalanced blade will cause
eventual damage to lawn mower or motor.
• The blade can be sharpened with a file or
on a grinding wheel. Do not attempt to
sharpen while on the mower.
° To check blade balance, drive a nail intoa
beam or wall Leave about one inch of the
straight nail exposed. Place center hole of
blade over the head of the nail. If blade is
balanced, itshould remain in a horizontal
position.. If either end of the blade moves
downward, sharpen the heavy end until the
blade is balanced.
11

ASS CATCHER
he grass catcher may be hosed with
ater, but must be dry when used. Remove
rass catcher from mower before cleaning
;beck your grass catcher often for damage
r deterioration. Through r_ormaluse it will
lear. If catcher needs replacing, replace
,nly with a manufacturer approved
_=placement catcher. Give the lawn mower
nodel number when ordering.
CLEANING
CAUTION: Remove fuse from motor and
place it in a safe place away from mower:
,, Turn lawn mower on its side. Clean the
underside of your' lawn mower by scraping
to remove buitd-up of grass and trash.
o Keep finished surfaces and wheels free of
all gasoline, oil, etc.
o DO NOT use a garden hose to clean lawn
mower. Use a damp cloth to wipe grass and
dirt from mower.
UTION: Before performing any service or
_stments:
-3elease operator presence control bar and
;top motor.
,,lake sure the blade and all moving parts
lave completely stopped.
::lemove fuse from motor and keep in a
;ale place away from mower
AR DEFLECTOR
rear deflector, attached between the rear
_.elsof your mower, is provided to minimize
possibility that objects will be thrown out of
rear of the mower into the operator
Mng position. If the deflector becomes
,qaged, it should be replaced.
,ADJUST HANDLE
=rlawn mower handle can be raised or
ered for' your mowing comfort. Four (4)
;itions are available: high, medium high,
dium low and low. Handles are shipped
._nted in the medium low position.
_efore making adjustments, remove fuse.
o change from medium low to medium
_ighposition, the upper and lower handle
;ectionswill have to be tumed over.
:remove the controls and operator presence
.ontrol bar from the upper handle.
:lemove hairpin cotters.
)isconnect the lower handle from the
_andle brackets.
;urn the handle over and reassemble the
lairpin cotters that have been removed.
:leaasemble the controls and the operator
)resence control bar to the upper handle.
UTION: The operator presence control bar
=stpivot freely to permit switching off the
tor when controlbar is released. Do not
overtighten the fasteners holding the controls
to the upper handle.
o To change from medium low to high
position only the upper handle section will
have to be turned over:.
o To change from medium low to low position,
only the lower handle section will have to be
turned over°
Shipping Position
Medium _ Medium
Low _h
BATTERY
The battery in your mower is a recharge r`
able 24 volt sealed lead acid battery.
TO GET THE MAXIMUM BATTERY LIFE,
WE RECOMMEND THE FOLLOWING:
o Fully recharge battery prior to initial use.
12

, Rechargebatteryimmediatelyaftereach
use.
, Rechargebatterycontinuouslywhenmower
isnotinuse°
, Alwayschargebatteryindoorsinadry,
protectedplace.
, DONOTchargeinextremehotorcold
temperatures°Chargemowerbatteryina
locationwheretemperatureismorethan
50°F(10°C)butlessthan100°F(37°C).
BATTERYREPLACEMENT
Ifbatteryreplacementbecomesnecessary,
followtheinstructionsbelow,Readthese
instructionsintheirentiretybeforeproceeding
with disassembly, Battery
, Remove fuse and keep in a safe place Support
away from mower, Bracket
0 Carefully remove top gdlle from shroud,
Start at side rear comer of grille by pressing Batteries
inward and up to release grille from shroud,
, From underside of gdlte, unplug lead from
indicator board, Note the position and
routing of the lead for later reassembly,
, Remove screws securing shroud to battery
support bracket, Remove shroud from
mower.,
, Remove battery terminal leads from battery
(4 places). Note color and position of leads Controller
for later reassembly. Board
, Before removing the battery support
bracket, note how the front of the bracket
secures the controller board. Remove the
screws securing battery support bracket to
motor and remove the bracket, Black
o Remove batteries. Battery
Terminal
, Install new batteries by reversing the above
instructions. Lead
- Be sure controller board is secured
properly°
- Be sure all leads are routed and
installed properly.
- Be sure all hardware is tightened
securely,
Top Grille
Indicator _-'f-_
Board u,,,...._--_.__./jj_
(Under --J
Grille) Shroud
Battery
Terminal
Lead
ldicator
Board
Red Battery Lead
Terminal Lead
_,'_, TO PRESERVE NATURAL RESOURCES, PLEASE RECYCLE OR DISPOSE OF
% BATTERY PROPERLY THIS PRODUCT CONTAINS SEALED LEAD ACID BAT-
_TERIE& MUST BE DISPOSED OF PROPERLY. Local, state, or federal laws may
P_ prohibit disposal of lead-acid batteries in ordinary trash. Consult your local waste
authority for information regarding available recycling and/or disposal options. Most Sears
Automotive Centers accept lead-acid batteries for recycling.
WARNING: Upon removal, cover the battery's terminals with hea W duty adhesive tape. Do not
attempt to destroy or disassemble battery pact or remove any of its components. Also, never
[ouch both terminals with metal objects and/or body parts a short circuit may result. Keep away
from children. Failure to comply with these warnings could result in fire and/or sedeus injury.
13

Immediately prepare your lawn mower for
storage at the end of the season or if the
unit will not be used for 30 days or more.
LAWN rvIOWER
When lawn mower is to be stored for a
period of time, clean it thoroughly, remove
all dirt, grease, leaves, etc. Store in a
clean, dry area.
o Clean entire lawn mower (See "CLEAN-
ING" in the Maintenance section of this
manual)+
o Lubricate as shown in the Maintenance
section of this manual.
° Be sure that all nuts, bolts, screws, and
pins are securely fastened. Inspect
moving parts for damage, breakage and
wear. Replace if necessary.
° Touch up all rusted or chipped paint
surfaces and lightly sand before
painting.
HANDLE
You can fold your lawn mower handle for
storage.
° Unplug the switch plug box cord from
motor before folding handle (See 'q'o
Unfold Handle" in Assembly section of
this manual).
° Squeeze the bottom ends of the lower
handle toward each other until the lower
handle clears the handle bracket, then
move handle forward.
= Loosen upper handle mounting bolts
enough to allow upper handle to be
folded back.
IMPORTANT: When folding the handle for
storage or transportation, be sure to fold
the handle as shown or you may damage
the control cables.
o When setting up your handle from the
storage position, the lower handle will
automatically lock into the mowing
position.
Squeeze to
Fold
Lower Handle
Hairpin Cotter Mounting Pin
Operator Presence
Control Bar
Upper Handle
Fold Forward
for Storage
Mowing Position
Fold
Backward
Lower
Handle
BATTERY
= Recharge the battery to a full charge.
Do not store mower with a discharged
battery. Battery failure will occur in a
very short time if mower is stored
without having a full charge. We
recommend that you charge battery
continuously while in storage and during
the off season.
OTHER
= If possible, store your unit indoors and
cover it to give protection from dust and
dirt+
• Cover your unit with a suitable protective
cover that does not retain moisture. Do
not use plastic. Plastic cannot breathe
which allows condensation to form and
will cause your unit to rust.
14

TROUBLESHOOTING CHART
CAUSE_ROBLEM
)oesnotsta_
_oor performance
_oor cut - uneven
Excessive
/ibration
o Fuse has been
removed from mower
o Charger has net been
unplugged from mower
charge port
o Battery may need to be
recharged
o Blade does not rotate freely
or mower deck is clogged
• Grass too high or thick
(Overload light is on 25%
of the time)
• Low battery voltage (Low
power light stays on while
mowing)
o Worn, bent or loose blade.
• Wheel heights uneven°
o Buildup of grass, and trash
leaves, under mower.
o Worn, bent or loose blade.
o Bent motor motorshafL
CORRECTION
= install fuse
o Remove charger plug from
mower charge port
o Charge battery
o Remove fuse, turn mower
on itssideandcheckblade.
Make sure it is free to
rotate.
Also check for clogging.
• Raise mower cutting height
to cut 1/3 of grass length.
• Walk at a slower pace so
overload light stays off.
• Reduce cutting width if
needed.
o Remove fuse, check
deck for clogging, check
blade for sharpness.
• Reduce cutting load
o Walk at slower pace
o Reduce cutting width
o Raise cutting height
o Recharge batteries
° Remove fuse.
° Replace blade. Tighten
blade boll
• Set all wheels at same
height.
o Remove fuse and cleanun-
derside of mower housing.
o Remove fuse.
o Replace blade. Tighten
blade bolt.
o Contact an authorized
service center.
15

PROBLEM
Mower stops
Grass catcher
not filling
Hard to push
Mower Does Not
Stop when
Operator Presence
Control Bar is
Released
CAUSE CORRECTION
o If high current light stays
on momentarily after
mower stops, load is too
much for mower.
o If low power light stays
on, mower slows down,
then stops.
o Cutting height to low.
= Lift on blade worn off+
o Catcher not venting air.
° Grass is too high or wheel
height is too Iow_
= Rear of lawn mower
housing or blade dragging
in grass.
= Grass catcher too full.
o Handle height position not
right for you.
° Operator presence control
bar is damaged.
° Start switch button sticks
or damaged.
o Remove fuse and
turn mower on its side.
Make sure blade is free to
rotate. Also check mower
for clogging°
= Batteries may be low, near
the need of charging.
Recharge batteries.
• Grass may be too heavy
for remaining battery
capacity. Try the following:
• Walk slower:
• Reduce cutting width
= Raise mower cutting height
o Raise cutting height
° Replace blade.
° Clean grass catcher,
= Raise cutting height.
o Raise rear of lawn mower
housing one (1) setting
higher:
o Empty grass catcher
o Adjust handle height to
suit.
° Replace operator presenc_
control bar.
o Replace start switch
button.
16

ROTARY LAWN MOWER MODEL NUMBER 917.386411
(.o
(.o
Key Part
No. No.
1 154830
2 162061X479
3 150424
5 157061X479
7 131959
8 66426
9 51793
10 87692
11 161809
12 74350424
17 147613
18 700367X479
19 150050
21 54583
22 700063X479
23 88652
24 780363X479
25 144675X479
26 140657
28 1515t2X479
29 t51511X479
31 150076
32 750085X007
33 146630
34 128415
Description
Control Bar
Upper Handle
Mulcher Plug
Lower Handle
Handle Belt
Cable Clip
Hairpin Cotter
Handle Knob
Engine Zone Control Cable
Hex Head Bolt 1/4-20 x 1-1/2
Rear Door Assembly Kit
Back Plate
Self Tapping Screw 10-24 x 5/6
Hex Head Tapping Screw 1/4-20 x 1/2
Rear Baffle
Hinge Screw 1/4-20 x 1-1/4
Side Baffle
Discharge Baffle
Rear Deflector
Handle Bracket Assembly (Left)
Handle Bracket Assembly (Right)
Screw 5/16-18 x 3/4
Wheel Adjusting Bracket
Spacer
Pop Rivet
Key Part Description
No. No.
35 701037
35 700331X004
37 145935X004
38 62336
39 142746
40 151157
42 83923
43 77400
44 85463
45 150406
46 161857
47 751592
50 700938X479
51 851084
52 850263
53 851074
54 156716
55 851514
57 751663
58
59 88614
-- 161856
-- 154328
-- 154826
Selector Knob
Selector Spring
Axle Arm Assembly
BelleviUe Washer
Shoulder Bolt
Wheel and Tire Assembly
Hex Flange Locknut
Hubcap
Danger Decal
Hex Head Thread Rolling Screw 3/8-16 x 1
Lawn Mower Housing (Incl. Key #18, 22, 24,
44, 50)
Locknut 3/8-16
Front Baffle
Hex Head Machine Screw 3/8-24 x 1-3/8
(Grd. 8)
Helical Lockwasher 3/8
Washer
Blade 20"
Blade Adapter
Grass Bag
Motor Electric ( See Breakdown)
Model No.143.980000
Throat Frame
Owner's Manual
Battery Charger 24 Volt
Fuse for Motor

MOTOR ASSEMBLY MODEL NUMBER 143.980000
17
KEY PART
NO. NO. DESCRIPTION
1 90000A Motor Assembly
2 90020 BatteryAssembly
(includes 13, 15)
3 90002 Controner Board
4 90003 Indicator Board
5 90004 Lead Wire Assembly
6 90031 Bracket, Battery Support
7 90006 Bracket, Lower
8 30200 Screw, Shroud
9 650737 Screw, Bracket
10 90007 Battery, Box
11 90008 Charger, Port Cover
12 90009 Gdll
13 90010 Screw, Battery
14 90011 Wire, Assembly
15 90012 Clip, Battery
16 90014A Shroud
17 90023 Battery Charger
18 90016 Fuse, 40 Amp
19 90017 Decal
20 650767 Screw
21 90021 LED, Lens Cap
22 90022 Fuse Decal
NOTE: All component dimensions given in U_S.
inches 1 inch = 25.4 mm
34

therepairorreplacement parts you need
ivered directly to your home
17 am - 7 pm, 7 days a week
800=366=PART
B00-366-7278)
ra ordenar piezas con entrega a
micilio - 1-800-659-7084
r in--house major brand repair service
tl24 hours a day, 7 days a week
8OO=4=REPARR
B00-473-7274)
ra pedir servicio de reparaci6n a
micilio - 1-800-676-5811
r the location of a Sears Parts and
pair Center in your area
U24 hours a day, 7 days a week
800=488-1222
information on purchasing a Sears
:intenance Agreement or to inquire
)ut an existing Agreement
il 9 am - 5 pm, Monday-Saturday
800=827=6655
len requesting service or ordering
rts, always provide the following
ormation:
'roduct Type =Part Number
/Iodel Number • Part Description
Amenca's Repair Specia/ists
/,_1856 11o12.97 VB Printed in U.S.A.
/