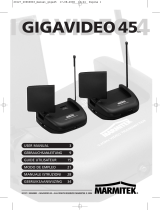
Marmitek TV ANYWHERE User manual

Category
AV extenders
Type
User manual
ANALOGUE
T
V ANYWHER
E
20422/20111128 • ANALOGUE TV ANYWHERE
ALL RIGHTS RESERVED MARMITEK ©
Analogue
TV Anywhere
Wireless sender for all your Analogue TV Channels
USER MANUAL 3
GEBRAUCHSANLEITUNG 11
GUIDE UTILISATEUR 19
MODO DE EMPLEO 27
MANUALE D’ISTRUZIONI 35
GEBRUIKSAANWIJZING 43
SAFETY WARNINGS
This product should only be used indoor and only in dry areas. Do not expose the
components to rain or moisture. Do not use the product close to a bath,
swimming pool etc.
Do not cover or expose the components of your systems to extremely high
temperatures
Do not open the product
In case of improper usage or if you have opened, altered and repaired the product
yourself, all guarantees expire. Marmitek does not accept responsibility in the case
of improper usage of the product or when the product is used for purposes other
than specified.
Adapters: Only connect the adapter to the mains after checking the mains voltage
is the same as the values on the identification tags. Never connect an adapter or
power cord when it is damaged.
Batteries: keep batteries out of the reach of children. Dispose of batteries as
chemical waste. Never use old and new batteries or different types of batteries
together. Remove the batteries when you are not using the system for a longer
period of time. Check the polarity (+/-) of the batteries when inserting them in the
product.
1 SET CONTENT
1x TV Anywhere transmitter
1x TV Anywhere receiver
2x Power adapters
1x Infrared extender cable with 1 LED
2x RCA cables (RCA-RCA)
2x SCART adapter
1x Coax cable
1x Instruction manual
1. THE TV ANYWHERE SYSTEM
The TV Anywhere system includes a transmitter with built-in tuner and a receiver for
antenna signals and A/V signals. With the TV Anywhere system, you can transmit
audio and video signals throughout your house to a remote (2nd) TV, without
additional coaxial cables. The built-in tuner converts the antenna signal into a standard
audio/video signal. This A/V signal is transmitted by the unit on a 5,8 GHz frequency.
The TV Anywhere transmitter can be connected directly to your antenna wall socket.
The receiver is connected to the A/V input of your remote (2nd) Television.
3ANALOGUE TV ANYWHERE
ENGLISH
Place your TV wherever you want, without having to worry about the
location of the aerial point.
See chapter 2.1
Additional A/V equipment can be connected to the transmitter as well (e.g. HDD
recorder, DVD player). The source can be selected with the remote control supplied,
even from another room. The TV Anywhere has a built-in IR (infrared) extender to use
your original IR remotes as well.
Extra connections for a HDD recorder or DVD player etc,.
See chapter 2.2
2. INSTALLING THE SYSTEM
Attention: During set up, install the TV Anywhere transmitter and receiver in the same
room with a TV connected. After successful installation the receiver can be placed to
wherever you wish to connect your remote (2nd) TV.
2.1 Installing the TV Anywhere transmitter
1. Connect the coax cable supplied [A] to your antenna connection point (e.g. the
point at which this comes into your home). Connect the other end of this cable to
the ‘ANT IN’ [1] input on the TV Anywhere transmitter.
RADIO/ TV
A 3
4
2 1
RADIO/ TV
RADIO/ TV
HDD / DVD
TV1
TV2
4 © MARMITEK
2. If you would like to connect a local TV via cables, you can connect this (existing)
coax cable to the ‘TO TV’ [2] output on the transmitter.
3. Connect the power adapter to the TV Anywhere transmitter [3].
4. Switch the transmitter on by pressing the ‘POWER’ [4] button on the back.
5. Try to locate the TV Anywhere transmitter in a free-standing position, without
other objects around it. Try not to locate the transmitter on top of your audio and
video equipment.
2.2 Installing an extra A/V device
In this configuration, you can use your TV Anywhere as a video transmitter and
transmit, for example, the signal from your HDD recorder, DVD player or another A/V
device wirelessly to your (second) TV in addition to watching TV channels.
1. First, connect the TV Anywhere transmitter according to chapter 2.1
2. Connect a set of RCA cables [B] to the audio/video input [5] on the back of the
transmitter. Take note of colour coding when doing so; the yellow plug is for the
video signal, the red and white are for the audio signal.
3. Connect the other end of the RCA cable to the output [6] on you’re A/V source
(e.g. HDD recorder). If you’re A/V source also has a SCART output, you can use the
SCART adapter [C] supplied (with the label ‘Transmitter’).
RADIO/ TV
HDD / DVD
TV1
C
B
A
6
5
5ANALOGUE TV ANYWHERE
ENGLISH
Install the infrared extender cable if you wish to operate the device from
another room.
1. Connect the infrared extender cable [D] to the back of the TV Anywhere
transmitter [7].
2. Use the sticker strip provided to position the LED in the right place.
3. Place the infrared LED on the IR sensor on the extra A/V device that has been
connected. If necessary, use a torch to find the right location of the sensor on your
device.
2.3 Installing the TV Anywhere receiver
1. Connect a set of RCA cables [E] to the audio/video output [7] of the TV Anywhere
receiver. Take note of colour coding when doing so; the yellow plug is for the
video signal, the red and white are for the audio signal.
2. Connect the other end of the RCA cable to your television set [8]. If your device
also has a SCART input, you can use the SCART adapter supplied [F] (with the
label ‘Receiver’).
3. Connect the power adapter to the TV Anywhere receiver [9].
4. Switch the receiver on by pressing the ‘POWER’ button [10] on the back.
5. Try to locate the TV Anywhere receiver in a free-standing position, without other
objects around it.
! To receive the signals from your TV Anywhere, switch the TV connected to your TV Anywhere
receiver (remote TV) on to the A/V channel (on some TV’s use channel “0”).
TV2
E
9
F
7
10
8
HDD / DVD
00.00.00 12:3 4
D
7
IR LED
6 © MARMITEK
2.4 Universal Remote Control
1. Open the battery compartment on the back of the remote.
2. Insert 2 batteries (AAA size, not included). Note the correct polarity/position.
3. Close the battery compartment.
4. Remove the protective film (prevents scratching) on top of the remote control
3. TV ANYWHERE CHANNEL SETUP
3.1 Installing TV channels automatically
1. Press the ‘MENU’ button on the remote control and choose from the following
options:
AUTOMATIC PROGRAMMING
MANUAL DOWN SEARCHING
MANUAL UP SEARCHING
SORTING PROGRAMS
2. Use the ‘CH’ buttons to select ‘AUTOMATIC PROGRAMMING’ and confirm this
selection by pressing the ‘OK’ button.
3. The text ‘CHANNEL SCANNING’ will appear on the screen. The TV Anywhere is
now searching for all available channels and these will be stored in a random
order. This process may take several minutes.
4. As soon as all channels have been stored, the TV Anywhere automatically switches
to channel ‘CH00’. This is the TV channel that is stored first.
5. Press the ‘CH’ buttons to run through all of the TV channels that have been
stored.
! Because the tuner will also cover weak channels, there is a chance that the list will contain some
“empty” channels. If you see any of these channels, you can delete them by pressing the DEL button
on your remote control. If you press this button, the word “DELETED” will be displayed on the
screen. 4 seconds later the TV channel will be deleted from the list.
3.2 Installing TV channels manually
1. Use the ‘CH’ or ‘0-9’ buttons to select the position at which you would like to
manually install a TV channel.
2. Press the ‘MENU’ button.
3. Select ‘MANUAL DOWN SEARCHING’ or ‘MANUAL UP SEARCHING’ with the
CH’ buttons and press ‘OK’ to search for the channel you would like to
programme.
3. Once you have found the correct TV channel, press the ‘OK’ button to confirm.
4. Repeat steps 1 to 3 until all channels have been stored at the appropriate
locations.
7ANALOGUE TV ANYWHERE
ENGLISH
3.3 Putting TV channels in the desired order
1. Press the ‘MENU’ button.
2. Select ‘SORTING PROGRAMS’ with the ‘CH’ buttons and press ‘OK’.
3. The text ‘INPUT OBJECT, PRESS OK EXC.’ will appear on the screen.
4. Use the ‘0-9’ buttons to enter the channel number on which you would like to
store the TV channel and then press ‘OK’.
5. Repeat steps 1 to 4 until all channels have been stored at the appropriate
locations.
!The easiest way to sort channels is to first search for the TV channel you wish to store on channel
1, then the TV channel you wish to store on channel 2 and so on.
3.4 Fine tuning
You may be able to improve the picture quality of the channels you have found using
manual fine tuning. Press the ‘+ fine –‘ buttons on the remote control to fine tune
channel frequency.
4. USAGE
4.1 Moving the receiver to its final location
You can now place the TV Anywhere receiver in its definitive location. The maximum
distance depends on local conditions such as the use of wireless equipment and the
materials through which the wireless signal has to pass.
4.2 Optimising picture and sound quality
In order to optimise TV Anywhere’s range, picture and sound quality, follow the
instructions below:
1. Set up the antennae from the transmitter and the receiver to give the best possible
result.
2. Select another wireless frequency on the front of the TV Anywhere transmitter and
receiver by pressing the ‘CH’ button (there are four different frequencies). Note:
you must do this on both the transmitter and the receiver.
3. Moving the transmitter and/or receiver a few centimetres can make a significant
difference in terms of range.
5. FREQUENTLY ASKED QUESTIONS
Poor picture quality on all TV channels
1. Disturbances in the signal can sometimes affect the transmission quality. Move the
TV Anywhere transmitter or receiver a few centimetres to solve the problem.
2. Change the channel settings (CH) for both the transmitter and the receiver. The
channel setting on the transmitter must match the setting on the receiver.
8 © MARMITEK
Poor picture quality on some of the TV channels
1. Check the antenna connection of the TV Anywhere transmitter. You can check the
signal on the transmitter side by directly connecting a TV to the antenna
connection. It is especially important to check your antenna system, as high
frequency channels contain more noise that lower frequency channels.
2. If the TV channel found is not tuned properly, use the + FINE - buttons to fine tune
the TV channel.
The infrared extender does not work
1. Is the infrared extender cable connected to the TV Anywhere transmitter? Is the
infrared LED stuck directly in front of the infrared sensor on the device concerned
(if in doubt, experiment with the position of the infrared LED).
2. If you are using wireless headphones, wireless speakers or other equipment using
433.92MHz transmission, this could affect the range of the infrared extender
function dramatically. Switch these devices off to improve the range.
Do you still have questions?
Please check out www.marmitek.com for more information.
6. TECHNICAL SPECIFICATIONS.
Operating range: Up to 100m free field, up to 30m through
walls and ceilings
Power: 100/240 VAC 50/60Hz, 5V/1000mA
Built in cable tuner: VHF low, VHF high, UHF
Standard: PAL BG & PAL I
Compatibility: +/- channel compatible for use in all countries
using PAL
Memory: 100 channel
Transmitter: 5,8 GHz - 4 channels
Infrared extender: built in 433,92 MHz transmitter and receiver
Specifications may be modified without prior notice.
9ANALOGUE TV ANYWHERE
ENGLISH
Environmental Information for Customers in the European Union
European Directive 2002/96/EC requires that the equipment bearing this symbol on the product and/or
its packaging must not be disposed of with unsorted municipal waste. The symbol indicates that this
product should be disposed of separately from regular household waste streams. It is your responsibility to dispose
of this and other electric and electronic equipment via designated collection facilities appointed by the
government or local authorities. Correct disposal and recycling will help prevent potential negative consequences
to the environment and human health. For more detailed information about the disposal of your old equipment,
please contact your local authorities, waste disposal service, or the shop where you purchased the product.
7. TECHNISCHE GEGEVENS
Bereik: Tot 100m vrije veld, tot 30m door vloeren
en muren
Voeding: 100-240VAC 50/60Hz, 5V/1000mA
Ingebouwde tuner: VHF laag, VHF hoog, UHF
Standaard: PAL B/G & PAL I
Compatibiliteit: +/- kanaal compatibel voor gebruik
in alle PAL gebieden
Geheugen: 100 kanalen
Zender: 5,8 GHz - 4 kanalen
Infrarood extender: Ingebouwde 433,92 MHz zender en ontvanger
Specificaties kunnen wijzigen zonder voorafgaande melding hiervan.
Milieu-informatie voor klanten in de Europese Unie
De Europese Richtlijn 2002/96/EC schrijft voor dat apparatuur die is voorzien van dit symbool op het
product of de verpakking, niet mag worden ingezameld met niet-gescheiden huishoudelijk afval. Dit
symbool geeft aan dat het product apart moet worden ingezameld. U bent zelf verantwoordelijk voor de
vernietiging van deze en andere elektrische en elektronische apparatuur via de daarvoor door de landelijke of
plaatselijke overheid aangewezen inzamelingskanalen. De juiste vernietiging en recycling van deze apparatuur
voorkomt mogelijke negatieve gevolgen voor het milieu en de gezondheid. Voor meer informatie over het
vernietigen van uw oude apparatuur neemt u contact op met de plaatselijke autoriteiten of
afvalverwerkingsdienst, of met de winkel waar u het product hebt aangeschaft.
Copyrights
Marmitek is a trademark of Pattitude B.V.. Analogue TV Anywhere is a trademark of Marmitek B.V. Home
Networks is a registered trademark of Marmitek B.V. All rights reserved. Copyright and all other proprietary rights
in the content (including but not limited to model numbers, software, audio, video, text and photographs) rests
with Marmitek B.V. Any use of the Content, but without limitation, distribution, reproduction, modification,
display or transmission without the prior written consent of Marmitek is strictly prohibited. All copyright and other
proprietary notices shall be retained on all reproductions.
50 © MARMITEK
  • Page 1 1
  • Page 2 2
  • Page 3 3
  • Page 4 4
  • Page 5 5
  • Page 6 6
  • Page 7 7
  • Page 8 8
  • Page 9 9
  • Page 10 10
  • Page 11 11
  • Page 12 12
  • Page 13 13
  • Page 14 14
  • Page 15 15
  • Page 16 16
  • Page 17 17
  • Page 18 18
  • Page 19 19
  • Page 20 20
  • Page 21 21
  • Page 22 22
  • Page 23 23
  • Page 24 24
  • Page 25 25
  • Page 26 26
  • Page 27 27
  • Page 28 28
  • Page 29 29
  • Page 30 30
  • Page 31 31
  • Page 32 32
  • Page 33 33
  • Page 34 34
  • Page 35 35
  • Page 36 36
  • Page 37 37
  • Page 38 38
  • Page 39 39
  • Page 40 40
  • Page 41 41
  • Page 42 42
  • Page 43 43
  • Page 44 44
  • Page 45 45
  • Page 46 46
  • Page 47 47
  • Page 48 48
  • Page 49 49
  • Page 50 50
  • Page 51 51
  • Page 52 52

Marmitek TV ANYWHERE User manual

Category
AV extenders
Type
User manual

Ask a question and I''ll find the answer in the document

Finding information in a document is now easier with AI