En-10
Even if these items are checked, when the unit does not recover from the
trouble, stop using the air conditioner and consult your dealer.
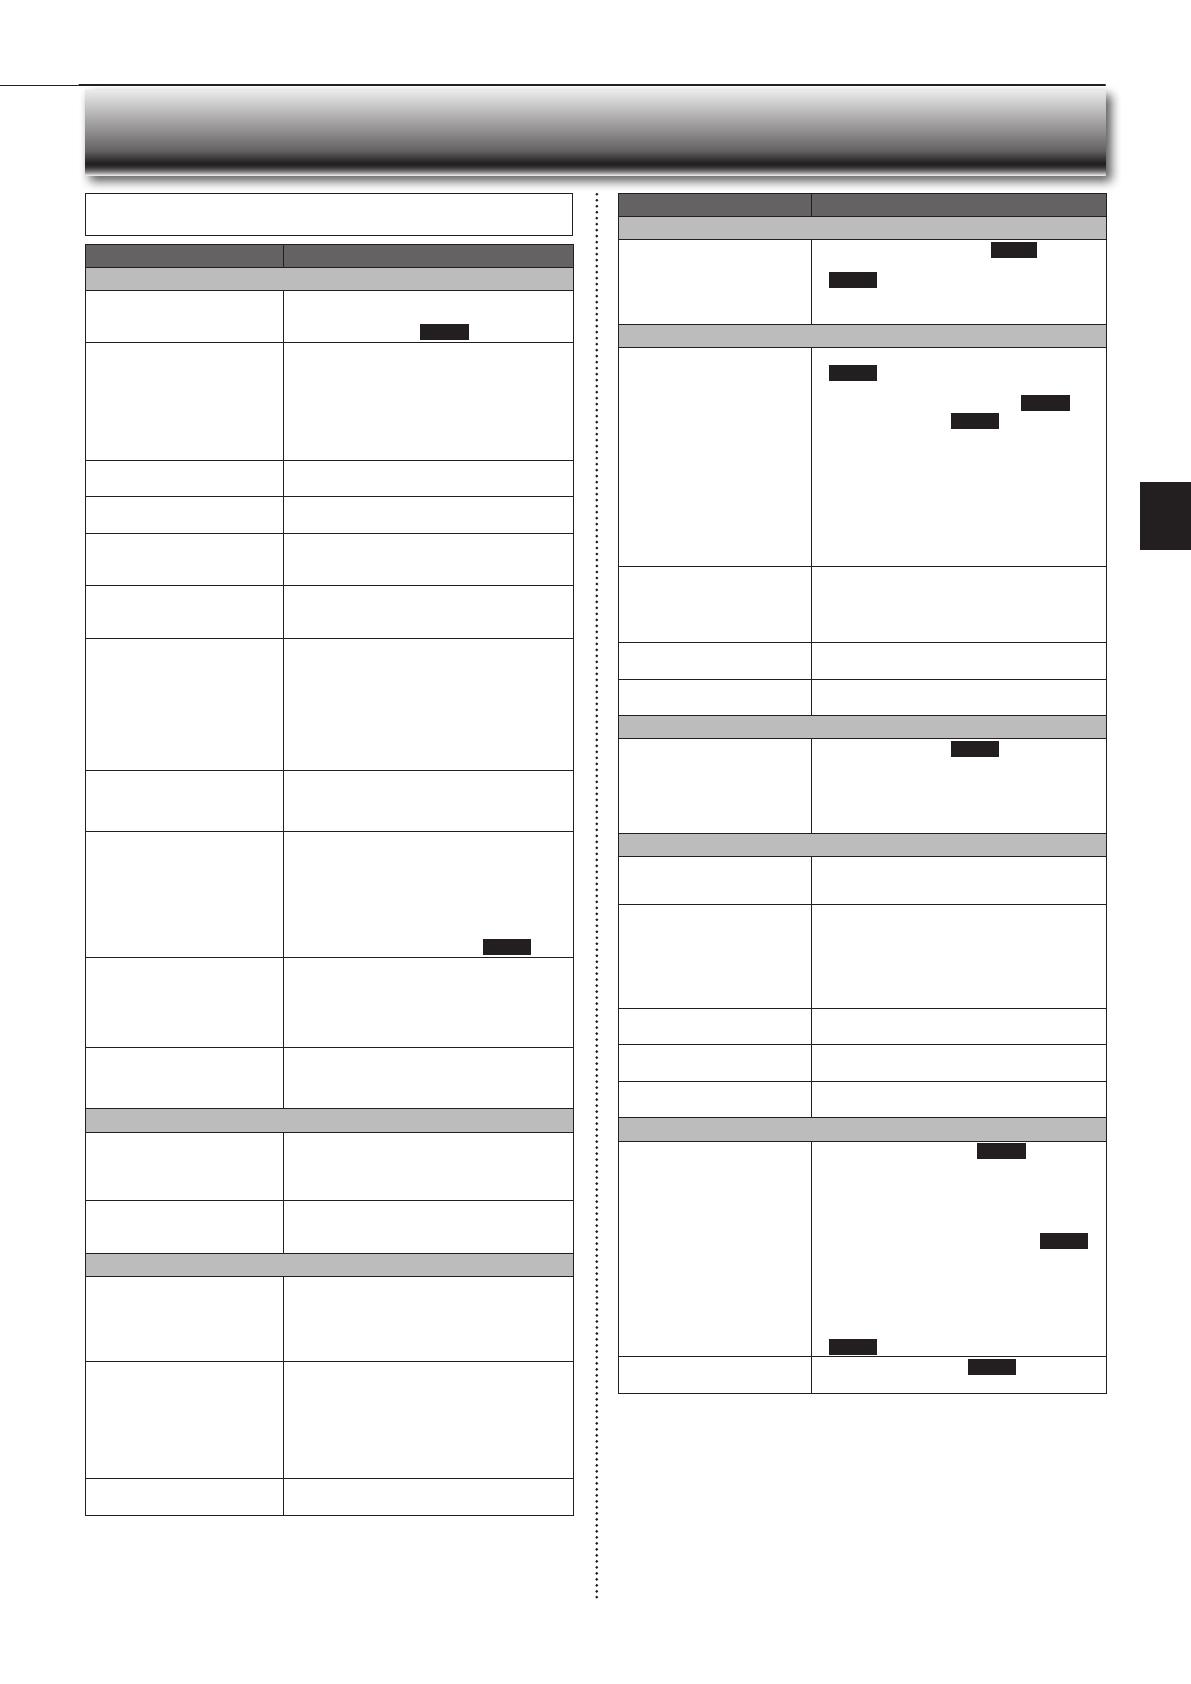
Symptom Explanation & Check points
Indoor Unit
The unit cannot be operated.
• Is the breaker turned on?
• Is the power supply plug connected?
• Is the ON timer set? Page 7
The horizontal vane does not
move.
• Are the horizontal vane and the vertical vane
installed correctly?
• Is the fan guard deformed?
• When the breaker is turned on, the horizontal
vanes’ position will be reset in about a minute.
After the reset has completed, the normal hori-
zontal vanes’ operation resumes. The same is
true in the emergency cooling operation.
The unit cannot be operated for
about 3 minutes when restarted.
• This protects the unit according to instructions
from the microprocessor. Please wait.
Mist is discharged from the air
outlet of the indoor unit.
•
The cool air from the unit rapidly cools moisture
in the air inside the room, and it turns into mist.
The swing operation of the HOR-
IZONTAL VANE is suspended
for a while, then restarted.
• This is for the swing operation of the HORIZON-
TAL VANE to be performed normally.
When SWING is selected in
COOL/DRY/FAN mode, the lower
horizontal vane does not move.
• It is normal that the lower horizontal vane does
not move when SWING is selected in COOL/
DRY/FAN mode.
The airfl ow direction changes
during operation.
The direction of the horizontal
vane cannot be adjusted with
the remote controller.
• When the unit is operated in COOL or DRY
mode, if the operation continues with air blow-
ing down for 0.5 to 1 hour, the direction of the
airfl ow is automatically set to upward position
to prevent water from condensing and dripping.
• In the heating operation, if the airfl ow tem-
perature is too low or when defrosting is being
done, the horizontal vane is automatically set
to horizontal position.
The operation stops for about
10 minutes in the heating
operation.
• Outdoor unit is in defrost.
Since this is completed in max.10 minutes,
please wait. (When the outside temperature is
too low and humidity is too high, frost is formed.)
The unit starts operation by
itself when the main power is
turned on, but hasn’t received
sign from the remote control-
ler.
• These models are equipped with an auto
restart function. When the main power is
turned off without stopping the unit with the
remote controller and is turned on again, the
unit starts operation automatically in the same
mode as the one set with the remote control-
ler just before the shutoff of the main power.
Refer to “Auto restart function”. Page 5
The two horizontal vanes touch
each other. The horizontal vanes
are in an abnormal position. The
horizontal vanes do not return to
the correct “close position”.
Perform one of the following:
•
Turn off and on the breaker. Make sure the hori-
zontal vanes move to the correct “close position”.
• Start and stop the emergency cooling operation
and make sure the horizontal vanes move to the
correct “close position”.
The indoor unit discolors over
time.
• Although plastic turns yellow due to the infl uence
of some factors such as ultraviolet light and
temperature, this has no effect on the product
functions.
Multi system
The indoor unit which is not
operating becomes warm and
a sound, similar to water fl ow-
ing, is heard from the unit.
• A small amount of refrigerant continues to fl ow
into the indoor unit even though it is not operat-
ing.
When heating operation is
selected, operation does not
start right away.
• When operation is started during defrosting of
outdoor unit is done, it takes a few minutes (max.
10 minutes) to blow out warm air.
Outdoor Unit
The fan of the outdoor unit
does not rotate even though
the compressor is running.
Even if the fan starts to rotate,
it stops soon.
• When the outside temperature is low during
cooling operation, the fan operates intermittently
to maintain suffi cient cooling capacity.
Water leaks from the outdoor
unit.
• During COOL and DRY operations, pipe or pipe
connecting sections are cooled and this causes
water to condense.
• In the heating operation, water condensed on
the heat exchanger drips down.
• In the heating operation, the defrosting operation
makes ice forming on the outdoor unit melt and
drip down.
White smoke is discharged
from the outdoor unit.
• In the heating operation, vapor generated by the
defrosting operation looks like white smoke.
Symptom Explanation & Check points
Remote controller
The display on the remote
controller does not appear
or it is dim. The indoor unit
does not respond to the
remote control signal.
• Are the batteries exhausted? Page 4
• Is the polarity (+, -) of the batteries correct?
Page 4
• Are any buttons on the remote controller of other
electric appliances being pressed?
Does not cool or heat
The room cannot be cooled
or heated suffi ciently.
• Is the temperature setting appropriate?
Page 5
• Is the fan setting appropriate? Please change
fan speed to High or Super High. Page 6
• Are the fi lters clean? Page 9
• Is the fan or heat exchanger of the indoor unit
clean?
• Are there any obstacles blocking the air inlet or
outlet of the indoor or outdoor unit?
• Is a window or door open?
• It may take a certain time to reach the setting
temperature or may not reach that depending on
the size of the room, the ambient temperature,
and the like.
The room cannot be cooled
suffi ciently.
• When a ventilation fan or a gas cooker is used
in a room, the cooling load increases, resulting
in an insuffi cient cooling effect.
• When the outside temperature is high, the cooling
effect may not be suffi cient.
The room cannot be heated
suffi ciently.
• When the outside temperature is low, the heating
effect may not be suffi cient.
Air does not blow out soon in
the heating operation.
• Please wait as the unit is preparing to blow out
warm air.
Airfl ow
The air from the indoor unit
smells strange.
• Are the fi lters clean? Page 9
• Is the fan or heat exchanger of the indoor unit
clean?
• The unit may suck in an odor adhering to the
wall, carpet, furniture, cloth, etc. and blow it out
with the air.
Sound
Cracking sound is heard.
• This sound is generated by the expansion/con-
traction of the front panel, etc. due to change in
temperature.
“Burbling” sound is heard.
• This sound is heard when the outside air is
absorbed from the drain hose by turning on the
range hood or the ventilation fan, making water
fl owing in the drain hose to spout out.
This sound is also heard when the outside air
blows into the drain hose in case the outside
wind is strong.
Mechanical sound is heard
from the indoor unit.
• This is the switching sound in turning on/off the
fan or the compressor.
The sound of water fl owing
is heard.
• This is the sound of refrigerant or condensed
water fl owing in the unit.
Hissing sound is sometimes
heard.
• This is the sound when the fl ow of refrigerant
inside the unit is changed.
Timer
Weekly timer does not oper-
ate according to settings.
• Is the ON/OFF timer set? Page 7
• Transmit the setting information of the weekly
timer to the indoor unit again. When the infor-
mation is successfully received, a long beep will
sound from the indoor unit. If information fails to
be received, 3 short beeps will be heard. Ensure
information is successfully received. Page 8
• When a power failure occurs and the main power
turns off, the indoor unit built-in clock will be
incorrect. As a result, the weekly timer may not
work normally.
Be sure to place the remote controller where
the signal can be received by the indoor unit.
Page 3
The unit starts/stops the
operation by itself.
• Is the weekly timer set? Page 8
In the following cases, stop using the air conditioner and consult your
dealer.
• When water leaks or drips from the indoor unit.
• When the left operation indicator lamp blinks.
• When the breaker trips frequently.
• The remote control signal is not received in a room where an electronic ON/OFF
type fl uorescent lamp (inverter-type fl uorescent lamp, etc.) is used.
• Operation of the air conditioner interferes with radio or TV reception. An ampli-
fi er may be required for the affected device.
• When an abnormal sound is heard.
• When any refrigerant leakage is found.
WHEN YOU THINK THAT TROUBLE HAS OCCURRED
JG79Y038H02_en.indd 10 2016/06/15 16:52:20


