dewenwils HIDT12W User manual

Category
Electrical timers
Type
User manual

The dewenwils HIDT12W In-wall Digital Timer lets you automate your home lighting and appliances. It features 7 ON/OFF settings, random ON/OFF to deter intruders, and Daylight Savings Time adjustment. With a built-in battery, it retains settings for up to 30 days in case of a power failure.

The dewenwils HIDT12W In-wall Digital Timer lets you automate your home lighting and appliances. It features 7 ON/OFF settings, random ON/OFF to deter intruders, and Daylight Savings Time adjustment. With a built-in battery, it retains settings for up to 30 days in case of a power failure.

Please pay attention to the warning signs
Read the instructions with caution before operating
and keep it properly
SKU: HIDT12W
V20607
[Instruction Manual]
In-wall Digital Timer
OFF
To reduce the risk of fire, electric shock or personal injury, please strictly
follow the instructions.
1. Do not connect any devices which may exceed the maximum ratings of
this timer.
2. Avoid use in areas Of high humidity.
3. Children are not allowed to use the timer without supervision.
4. Do not attempt to disassemble or repair; only authorized service
personnel should service this product.
5. To replace an existing switch, please make sure that the neutral wire is
available in the wall outlet.
6. Check that all wire connections are secure.
WARNING:
Package Includes:
01
OFF
Note: This switch can not be used if there is no neutral wire (usually white)
in the electrical box.
To avoid fire or electrical shock, make sure the power is off before wiring.
If you are unsure or uncomfortable with installation, contact a licensed
electrician.
Installing:
PART DESCRIPTION QUANTITY
In-wall Digital Timer 1
Screwless Wall Plate 2
Wall Box Screw 2
Wire Cup
Figure 1
4
A
B
C
D
02
1. Turn power off at the circuit breaker to avoid electrical shock.
2. Remove existing switch,
3. Connect the wires according to the Figure1.
4. Carefully fold wire into wall box and mount timer into wall box with screws,
then attach the wall plate.
5. Restore power by fipping the breaker to the "ON" position.
- Current Time Setting
lf the timer screen is completely blank before programming,
all settings should be reset. The reset button is just located below the
MANUAL" button. Use a paper clip or ball point pen to push it as shown in
Figure 2.
1. Keep the "CLOCK" button being pressed during the entire seting operation.
2. Press the "DAY" button to select the correct day of the week. 3. Press the
"HOUR" button to set hours, please pay attention to the AM/PM.
4. Press the MIN" button to set the minutes.
5. Release the CL .OCK" button. The time will be set.
- ON/0FF Program Setting
1. Press the PROG" button once. Figure 3 will appear.
2."1 TIMER ON" is the first setting. There are a total of7 ON/OFFsettings.
3. Press the DAY" button to select the day(s).
4. Press the "HOUR" and "MIN" buttons to set ON time.
Operations:
Figure 2
03
04
Figure 3 Figure 4
5. Press the PROG" button to save and proceed to the "1 OFF " screen.
As shown in Figure 4.
6. Repeat steps 1-5 to set OFF time and other 6 ON/OFF stings.,
-Multiple Weekday Groups
When programming ON/OFF events, all days are indicated by default. If
you want to change day selection, press the DAY" button and the display
will change as folows:
Follow the above steps to complete programming.
- Manual Override
Pressing the "MANUAL" button will alternate the unit between ON or OFF.
Close the cover when you have completed setup. You can also press the
cover directly and the timer can be used as a manual light switch, and the
program settings will still work. The timer will turn on/off automatically at
your set times.
If you would like to tum off the timer function, you can press the "PROG"
button until desired program is displayed. Press the MANUAL" button and
"--:--" will display. When finished, press "CLOCK" button to return to current
time and day. The program will be suspended. When you want to restore
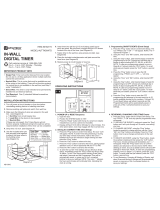
- Input Voltage: 125VAC, 60Hz
- Max Power Rating: 1875W Resistive
- 1000W Tungsten1/2HP
Specifications:
One Year Limited Warranty
Supported by our professional R&D team and QC team, we provide One
Year Warranty for materials and workmanship from the purchase date.
Please note that the warranty does not cover damage caused by personal
misuse or improper installation.
Please attatch your Order ID and Name so that our dedicated customer
service team can help you better.
05
the timer function, press the "PR0G" button and find the "--:--", then Press
the "MANUAL" button, the suspended timer function will beactivated.
- Random ON/OFF Setting
Random is a feature that will tumn on/off within 2-30 minutes of your
programmed settings and make it appear as if you're still at home to deter
intruders.
To activate Random Function, press DAY and HOUR button simultaneously
until TIMER flashes on display. Press again to cancel.
- Daylight Savings Time Function
Adds 1 hour to current time to adjust for Daylight Savings Time. Press
MIN and HOUR buttons simultaneously until DST is on display. Press MIN
and HOUR buttons again to go back 1 hour.
- Power Back-up Feature
In the event of power failure, the timer will retain its settings for up to 30
days if the built-in battery is fully charged.
  • Page 1 1
  • Page 2 2
  • Page 3 3
  • Page 4 4
  • Page 5 5
  • Page 6 6

dewenwils HIDT12W User manual

Category
Electrical timers
Type
User manual

The dewenwils HIDT12W In-wall Digital Timer lets you automate your home lighting and appliances. It features 7 ON/OFF settings, random ON/OFF to deter intruders, and Daylight Savings Time adjustment. With a built-in battery, it retains settings for up to 30 days in case of a power failure.

Ask a question and I''ll find the answer in the document

Finding information in a document is now easier with AI