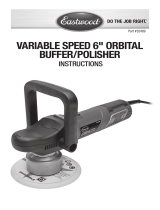
VonHaus 3500023 User manual

Category
Power tools
Type
User manual

The VonHaus 3500023 is a 600W dual-action polisher that can be used for a variety of tasks, including polishing paintwork, buffing aluminium and stainless steel, and polishing tiles. It has a variable speed control with six settings, so you can choose the right speed for the job. The polisher comes with a range of accessories, including three polishing pads, a microfibre cloth, and a polishing mitten, so you can get started straight away.

The VonHaus 3500023 is a 600W dual-action polisher that can be used for a variety of tasks, including polishing paintwork, buffing aluminium and stainless steel, and polishing tiles. It has a variable speed control with six settings, so you can choose the right speed for the job. The polisher comes with a range of accessories, including three polishing pads, a microfibre cloth, and a polishing mitten, so you can get started straight away.

600W DUAL
ACTION POLISHER
WITH ACCESSORY
SET
3500023 - Instruction Manual
CONTENTS
Safety Instructions 1
Safety Instructions 2
Safety Instructions/Safety Symbols 3
Technical Specification/Product Specification 4
Before First Use 5
Before First Use 6
Operation 7
Adjusting the Rotation Speed/Applications 8
Handling Techniques 9
Polishing Tips/Common Mistakes to Avoid 10
Cleaning & Maintenance/Troubleshooting 11
Warranty 12
GENERAL SAFETY INFORMATION.
WARNING! Read all safety warnings
and all instructions. Failure to follow the
warnings and instructions may result in
electric shock, fire and/or serious injury.
Please retain all warnings and instructions
for future reference.
The term “power tool” in the warnings
refers to your mains-operated (corded)
power tool or battery-operated (cordless)
power tool.
WORK AREA SAFETY.
Keep your work area clean and well lit.
Cluttered or dark areas invite accidents.
Do not operate power tools in explosive
atmospheres such as in the presence of
flammable liquids, gases or dust. Power
tools create sparks which may ignite the
dust or fumes.
Keep bystanders, children and animals
away while operating the power tool.
Distractions can cause you to lose control.
ELECTRICAL SAFETY.
Power tool plugs must match the outlet.
Never modify the plug in any way. Do
not use any adaptor plugs with earthed
(grounded) power tools. Unmodified
plugs and matching outlets will reduce risk
of electric shock.
Avoid body contact with earthed or
grounded surfaces such as pipes,
radiators, ranges and refrigerators. There
is an increased risk of electric shock if your
body is earthed or grounded.
Do not expose power tools to rain or wet
conditions. Water entering the power tool
will increase the risk of electric shock.
Do not abuse the cord. Never use the
cord for carrying, pulling or unplugging
1
the power tool.
Keep the cord away from heat, oil, sharp
edges and moving parts. Damaged or
entangled cords increase risk of electric
shock.
When operating a power tool outdoors,
use an extension cord suitable for outdoor
use to reduce the risk of electric shock.
PERSONAL SAFETY.
Stay alert, watch what you are doing and
use common sense when operating a
power tool. Do not use a power tool while
you are tired or under the influence or
drugs, alcohol or medication. A moment
of inattention while operating power tools
may result in serious personal injury.
Use personal protective equipment.
Always wear eye protection. Protective
equipment such as a dust mask, non-
skid safety shoes, hard hat, or hearing
protection used for appropriate
conditions will reduce personal injuries.
Prevent unintentional starting. Ensure
the switch is in the off position before
connecting to the power source and/
or battery pack, picking up or carrying
the tool. Carrying power tools with
your finger on the switch or energising
power tools that are switched on invites
accidents.
Remove any adjusting key or wrench
before turning the power tool on. A
wrench or key left attached to a rotating
part of the power tool may result in
personal injury.
Do not overreach. Keep proper footing
and balance at all times. This enables
better control of the power tool in
unexpected situations.
Dress appropriately. Do not wear loose
clothing or jewellery. Keep your hair,
WARNING
PLEASE READ THESE INSTRUCTIONS CAREFULLY AND KEEP FOR FUTURE REFERENCE
WARNING
PLEASE READ THESE INSTRUCTIONS CAREFULLY AND KEEP FOR FUTURE REFERENCE
clothing and gloves away from moving
parts to prevent them from becoming
caught in the tool.
If devices are provided for the connection
of dust extraction and collection facilities,
ensure that these are connected and
properly used to reduce dust-related
hazards.
POWER TOOL USE AND CARE.
Do not force the power tool. Use the
correct power tool for your application.
The correct power tool will do the job
better and safer at the rate for which it
was designed.
Do not use the power tool if the switch
does not turn it on and off. A power tool
that cannot be controlled with the switch
is dangerous and must be repaired.
Disconnect the plug from the power
source and/or the battery back from
the power tool before making any
adjustments, changing accessories or
storing. Such preventative safety measures
reduce the risk of starting the power tool
accidentally.
Store idle power tools out of reach
of children and do not allow persons
unfamiliar with the power tool or these
instructions to operate the power tool.
Power tools are dangerous in the hands of
untrained users.
Maintain the power tool. Check for
misalignment or binding of moving parts,
breakage of parts and any other condition
that may affect the power tools operation.
If damaged, have the power tool repaired
before use. Many accidents are caused by
poorly maintained power tools.
This tool is not intended for use by
persons with reduced physical, sensory or
mental capabilities, or lack of experience
and knowledge, unless they have
been given supervision or instructions
concerning use of the tool by a person
responsible for their safety.
Children should be supervised to ensure
they do not play with the tool.
SERVICE.
Have your power tool serviced by a
qualified repair person using identical
replacement parts only to ensure that the
safety of the power tool is maintained.
ADDITIONAL SAFETY INFORMATION.
WARNING Know your Polisher. Do not
plug the tool into the power source
until you have read and understand
the information in this Instruction
Manual. Learn the tool’s applications
and limitations, as well as the specific
potential hazards related to this tool to
reduce the risk of electric shock, fire or
serious injury.
Always wear eye protection. Any power
tool can throw foreign objects into your
eyes and cause permanent eye damage.
Always wear safety goggles (not glasses)
that comply with ANSI safety standard
Z87.1. Every day glasses have only
impact resistant lenses. They are not
safety glasses.
WARNING Wearing glasses or goggles
not in compliance with ANSI Z87.1 when
operating this tool could cause serious
injury.
WARNING Only use accessories
designed for use with this Polisher.
WARNING
3
WARNING If any part is missing or
damaged, do not plug the tool into the
missing or damaged part is replaced.
Failure to follow this instruction could
result in serious personal injury.
SAFETY SYMBOLS
PLEASE READ & UNDERSTAND THESE INSTRUCTIONS CAREFULLY AND KEEP FOR FUTURE
REFERENCE
The use of improper accessories may
result in injury to the operator or damage
the tool.
Read and understand the
Instruction Manual before use.
Always refer to Instruction
Manual if in any doubt of
operation, maintenance and
care.
Always wear protective gloves.
Wear a dust mask
Always wear eye
protection.
Do not use in wet/adverse
weather conditions.
TECHNICAL SPECIFICATION
PRODUCT SPECIFICATION
230-240
V
VOLTAGE
600
W
RATED
POWER
1500-6800
min-1
NO LOAD
SPEED
1. Backing Plate
2. Soft Polishing Pad (Black)
3. Speed Adjuster (see page 8)
4. Front Grip
5. Power Switch
6. Adjustable ‘D’ Handle
7. Side Vents
50
FREQUENCY
Hz
1
8. Locking Spanner
9. Hex Bolts (x2)
10. Hex Key
11. Hard Polishing Pad (Red)
12. Medium Polishing Pad (Yellow)
13. Medium Polishing Pad (Yellow)
14. Spindle (see page 6)
15. Rotation Speed Dial (see page 8)
16. Microfibre Cloth (not shown)
17. Polishing Mitten - Dry Finish (not
shown)
2
45 6
7
8
910
11
12
13
15
BEFORE FIRST USE
ASSEMBLING THE ADJUSTABLE D HANDLE
The ADJUSTABLE D HANDLE (6) must be fitted to the machine before use:
Use the HEX BOLTS (9) provided to fit the ADJUSTABLE D HANDLE (6) via the fixing holes to either side
at the front of the Polisher.
Use the supplied HEX BOLTS (9) to tighten the bolts that secure the handle in position.
IMPORTANT Always ensure the Polisher is disconnected from the mains supply before
performing any maintenance, cleaning or assembly tasks.
6
9
5
10
FITTING THE BACKING PAD
The Backing Pad must be securely fitted to the SPINDLE (14) before use:
Use the LOCKING SPANNER (8) to hold the SPINDLE (14) thread secure
Rotate the BACKING PLATE (1) in a clockwise direction to secure the BACKING PAD (1) to the
SPINDLE (14) assembly.
To remove, use the LOCKING SPANNER (8) to hold the spindle thread secure. Rotate the
BACKING PAD (1) in an anti-clockwise direction to remove.
BEFORE FIRST USE
IMPORTANT Always ensure the Polisher is disconnected from the mains supply before
performing any maintenance, cleaning or assembly tasks.
8
1
14
OPERATION
WARNING Always use adequate protective equipment, including eye protection, respiratory protection
and hearing protection, when working with this tool.
Connect the machine to the mains power supply.
To start the machine, slide the POWER SWITCH (5) to the I (on position). The motor will start and take a
few moments to reach full operating speed.
To stop the machine, slide the POWER SWITCH (5) to the 0 (off position).
7
NOTE This Polisher is fitted with a Soft Start Function to help spread polish slowly before going to full
speed.
WARNING! Always wait until the machine has come to a standstill before putting it down to rest.
5
On
Off
ADJUSTING THE ROTATION SPEED
The speed of the machine is controlled using the ROTATION SPEED DIAL (15). A higher number indicates a
higher rotation speed.
WARNING Always set the rotation speed on
the control dial to the lowest setting to begin.
SPEED
CONTROL DIAL
SETTING TECHNIQUE
1
3-6
5-6
POLISHING
BUFFING
BUFFING/POLISHING
APPLICATIONS
APPLICATION
Vehicle paintwork. Be Cautious with plastic panels
Kitchen/Bathroom Tiles
Aluminium & Stainless Steel
WARNING When Polishing and detailing Vehicle surfaces, never apply too much pressure.
IMPORTANT Failure to adhere to this warning may result in damage to your vehicle.
15
NOTE Speeds 1-6 has a rotation
speed between 1500- 6800 RPM.
HANDLING TECHNIQUES
WORKING WITH CAR PAINT
Spend time centering the pad on the Pad Base.
Spin it at the lowest setting (1) to ensure it is properly centred. Higher speeds can give the illusion the pad
is centred as the centrifugal forces force the foam out slightly making it appear more central.
TECHNIQUE The Polisher should be moved with the right arm and the left hand should only be used to hold
the Polisher head to the paintwork and apply pressure. Practice one handed to ensure you are using the right
arm to move the polisher.
The Polisher should be moved from left to right in an arc.
By moving it to the right it naturally moves upwards. By moving to the left it naturally arcs downwards.
Your arm should move slowly and smoothly keeping the pad flat to the paint at all times.
NOTE Paint is thinner at the edges of panels so care must be taken. If polishing across edges (such as on a
car bonnet where the line of the bonnet meets the front wings) then tape off the edge of the panel not being
polished. Alternatively lift the bonnet up and have someone hold it so you can confidently polish up to the
edge without running over the edge of the front wing.
WORKING WITH PLASTICS
Plastics will not cope with the heat produced like a metal panel can. It can be easy to ‘over cook’ the painted
plastic causing the surface to wrinkle up. Once the plastic reaches a certain heat it It will wrinkle up rapidly and
without warning. This is irrecoverable.
It is recommended to test this on a plastic scrap pane so you can gauge the amount of Rotation Speed
required.
On curved panels this is not possible so more of the focus is on smooth, non jerky arm movements. This is
essential.
It is recommended to try and stand with your back straight ensuring that you don’t over
extend yourself, moving the ‘buffing arc’ a little wider than the distance between your shoulders.
It is often useful to spray a dry pad with a rapid detailer spray first to lubricate the pad and prevent too
much polish from soaking in. To take this one stage further spray a dry pad with detail spray and work it
onto a panel until the pad is warm and slightly moist. This will season the pad for more effective application.
PRESSURE The Polisher can for the most part work under its own weight or very light pressure from the left
hand. Stubborn swirls may need more pressure.
When working on side panels and curved panels, the left hand will need to support the
head of the polisher and will require the application of more pressure. More pressure will be needed here as the
pad will not have the weight of the polisher over it. Again, move the polisher in arc like strokes.
IMPORTANT Below will outline the correct procedures and precautions to take. Please read the
following guide to ensure correct usage of the Polisher.
IMPORTANT Stop after each pass and allow the plastic to cool before attempting another pass.
WARNING If too higher speed or pressure is used, there is a very high risk of burning through
paintwork which is irreparable. DOMU Brands cannot be held responsible for this.
9
COMMON MISTAKES TO AVOID
INCOMPLETE POLISH BREAKDOWN
A good indication of when Polish is fully broken down is when the polish has gone clear and is very easy to wipe
off.
IMPORTANT: Ensure any unbroken polish pushed to the outer edges of your work area are not picked up by
the pad in the final pass as this will not break down the polish resulting in holograms on the finish.
SWIRLS
Caused by using too harsh a polish that is not broken down properly. If this happens you may have used too
much polish or it may have dried.
If this happens try removing the polish residue from the panel, spritz the pad with Rapid Detailer only (no more
polish) and polish again using the remnants of the polish left in the pad to break it down properly.
HOLOGRAMS
Holograms or micro marring are again imparted due to polish that hasn’t been properly broken down or too
high speeds. Following the advice above should cure these.
BUFFER HOP
Buffer Hop is when the Rotary Polisher jumps across the paints surface usually due to insufficient polish and or
lubrication and as the foam pad ‘bites’ the paint it jumps.
Try spreading the polish more evenly across the pad, add more polish or Rapid Detailer.
SPLATTER
Splatter is a sign that you’ve used too much polish or the Rotation Speed needs reducing.
POLISHING TIPS
Ensure that the area to be polished is clean and dry.
Choose only polishing compounds that are compatible with the material to be polished, and with the
method of application. Read and understand all information supplied with your polishing compound before
use.
If using polishing sponges, apply polishing compound evenly to the polishing sponge and place the sponge
against the work surface.
Hold the machine securely, using both hands, by the handles provided.
The polishing sponge should make only light contact with the work surface
Switch on the machine, and work across the surface using a wide ‘sweeping’ motion. Stop and apply extra
compound as required. When the entire surface has been covered, stop the machine and allow the compound
to dry (follow manufacturer’s guidance)
Attach a clean polishing bonnet to the machine and work across the surface as before, until all visible
polishing compound is removed.
WARNING Always disconnect from the power supply
before carrying out any inspection, maintenance or cleaning.
CLEANING & MAINTENANCE
GENERAL INSPECTION
Keep your tool clean at all times. Dirt and dust will cause internal parts to wear quickly, and shorten the
Polisher’s service life.
Clean the body of your machine with a soft brush, or dry cloth.
Never use caustic agents to clean plastic parts. If dry cleaning is not sufficient, a mild detergent on a damp
cloth is recommended.
Water must never come into contact with the tool
Ensure the tool is thoroughly dry before using it
If available, use clean, dry, compressed air to blow through the ventilation holes (where applicable)
TROUBLESHOOTING
PROBLEM SOLUTION
Ensure the tool is switched on and connected to
mains power.
Activate the POWER SWITCH (5).
Check the fuse and replace if necessary.
Relieve some pressure on the polisher, do not exert
extra force. Let the polisher do the job.
If excessive noise continues, discontinue use and seek
repairs.
The material is too thick and is placing strain on the
motor.
Too much force is being exerted on the polisher, use
less force.
Allow the polisher to cool before using again.
THE TOOL WILL NOT START
THE TOOL KEEPS KICKING/STALLING
EXCESSIVE VIBRATION
EXCESSIVE NOISE
THE TOOL IS OVERHEATING
If you are having difficulty using your product and require support, please
NOTE Be especially careful to clean the machine thoroughly if used for both
wood and metal. Sparks from metal work can easily ignite wood dust.
11
DISPOSAL INFORMATION
COPYRIGHT
WARRANTY
Please recycle where facilities exist. Check with your local authority for recycling advice.
All material in this instruction manual are copyrighted by
DOMU Brands Ltd.
Any unauthorised use may violate worldwide copyright,
trademark, and other laws.
This new VonHaus product has a warranty period of 12
months beginning at the date of purchase. Please retain
a proof of purchase receipt or statement as proof of the
purchase date.
The warranty only applies if the product is used solely
in the manner indicated in the Warnings page of this
manual, and all other instructions have been followed
accurately. Any abuse of the product or the manner in
which it is used will invalidate the warranty.
Returned goods will not be accepted unless re-packaged
in its original packaging and accompanied by a relevant
and completed returns form. This does not affect your
statutory rights.
No rights are given under this warranty to a person
acquiring the appliance second-hand or for commercial or
communal use.
DECLARATION OF CONFORMITY
We:
DOMU Brands Ltd.
5th Floor The Tower
Deva City Office Park
Manchester
M3 7BF
Declare under our sole responsibility that the product:
SKU: 9100023
Description: VonHaus Random Orbital Polisher Kit.
To which this declaration relates is in conformity with the following directives:
2006/42/EC, 2011/65/EU, 2014/30/EU
Thank you for purchasing the 600W Dual Action Polisher.
VonHaus is a registered trademark of DOMU Brands Ltd.
Made in China for DOMU Brands Ltd, M24 2RW.
  • Page 1 1
  • Page 2 2
  • Page 3 3
  • Page 4 4
  • Page 5 5
  • Page 6 6
  • Page 7 7
  • Page 8 8
  • Page 9 9
  • Page 10 10
  • Page 11 11
  • Page 12 12
  • Page 13 13
  • Page 14 14
  • Page 15 15
  • Page 16 16

VonHaus 3500023 User manual

Category
Power tools
Type
User manual

The VonHaus 3500023 is a 600W dual-action polisher that can be used for a variety of tasks, including polishing paintwork, buffing aluminium and stainless steel, and polishing tiles. It has a variable speed control with six settings, so you can choose the right speed for the job. The polisher comes with a range of accessories, including three polishing pads, a microfibre cloth, and a polishing mitten, so you can get started straight away.

Ask a question and I''ll find the answer in the document

Finding information in a document is now easier with AI