Motorola MBP18 User manual

Category
TVs & monitors
Type
User manual

This manual is also suitable for

USER’S GUIDE
MBP18
BABY MONITOR
USER’S GUIDE
The features described in User's Guide are subject to
modifications without prior notice.
This User's Guide provides you with all the information you need
to get the most from your product.
Before you can use the baby monitor, we recommend you insert
and fully charge the battery in the parent unit, so that it continues
to work if you disconnect it from the power supply to carry it to
another location. Please read the Safety Instructions on page 6
before you install the units.
Got everything?
1 x Parent unit
1 x Baby unit
1 x Rechargeable Ni-MH battery pack for the Parent unit
1 x Power adapter for the Parent unit
1 x Power adapter(s) for the Baby unit
In multi-camera packs, you will find one or more additional
camera units with power adapter units.
Welcome...
to your new Motorola Baby Monitor!
Thank you for purchasing the MBP18. Now you can see and hear
your baby sleeping in another room or you can monitor your older
children in their playroom.
Please retain your original dated sales receipt for your records.
For warranty service of your Motorola product, you will need to
provide a copy of your dated sales receipt to confirm warranty
status. Registration is not required for warranty coverage.
For product related questions, please call:
US and Canada 1-888-331-3383
On the Web: www.motorola.com
Overview of the Parent Unit
Parent unit menu icons
1. Display (LCD screen)
2. Scroll Up/Volume+ Button
3.
Scroll Down
/
Volume- Button
4. Menu/OK Button
Press to open the menu options.
Press to confirm a selection.
Press to pan right in 2x zoom level.
5. Zoom Button
Z
Press once to switch to 2x zoom level.
Toggle again to return to normal mode
(1x).
6. Return/Switch Camera Button
Press to return to previous menu level.
Press to switch camera units (if paired
with more than one camera).
Press to pan left in zoom mode.
7. Video ON/OFF Button
V
Press to turn the LCD display ON or
OFF.
8. Power adaptor/ Battery LED Blue
when main adaptor power ON.
9. Unit ON/OFF LED (Green)
10. Audio Level LED
(Green, Orange, Red, Red)
11. Power Button
P
Press and hold to turn the unit
ON or OFF.
12. Power Adapter Connector
13. Speaker
14. Stand
15. Battery cover
1
Signal Level (5 Levels)
N
Night Vision Mode (Screen changes to Black/White)
B
Battery Level Control (4 Levels)
*
Volume Level Control (8 Levels)
&
Brightness Level Control (8 Levels)
Alarm Setting (6h, 4h, 2h, OFF)
View Camera
Add Camera
Delete Camera
Scan Camera
1
2
5
4
3
10
7
8
11
12
13
14
15
9
6
Overview of Your Baby Unit
Important guidelines for installing your Baby Monitor
To use your Video Monitor Baby and Parent Units together, you must
be able to establish a radio link between them, and the range will be
affected by environmental conditions.
Any large metal object, like a refrigerator, a mirror, a filing cabinet,
metallic doors or reinforced concrete between the Baby and Parent
Unit may block the radio signal.
The signal strength may also be reduced by other solid structures, like
walls, or by radio or electrical equipment, such as TVs, computers,
cordless or mobile phones, fluorescent lights or dimmer switches.
Use of other 2.4GHz products, such as wireless networks (Wi-Fi
®
routers), Bluetooth
®
systems, or microwave ovens, may cause
interference with this product, so keep the baby monitor away at least 5ft
(1 m) from these types of products, or turn them off if they appear to be
causing interference.
If the signal is weak, try moving the Parent and/or the Baby Unit to
different positions in the rooms.
1. ON/OFF Switch 6. Power LED
2. Pair Key 7. Infrared LEDs
3. Microphone 8. Power Adapter Connector
4. Photo Sensor (Night Vision Mode)
5. Camera Lens
1
2
3
5
6
7
8
4
.5
Table of contents 5
ENGLISH
Table of contents
1. Safety Instructions ......................................................................... 6
2. Getting Started ............................................................................... 8
2.1 Baby Unit Power Supply.................................................................8
2.2 Parent Unit Battery Installation .......................................................8
2.3 Parent Unit Power Supply ..............................................................9
2.4 Registration (Pairing)....................................................................10
3. Using the Baby Monitor MBP18 .................................................. 11
3.1 Setting up .....................................................................................11
3.2 Night Vision Mode ........................................................................11
3.3 Video ON/OFF..............................................................................11
4. MBP18 Parent Unit Menu Options .............................................. 12
4.1 Volume .........................................................................................12
4.2 Brightness.....................................................................................12
4.3 Zoom, Pan and Tilt .......................................................................12
4.4 Alarm ............................................................................................12
4.5 Camera Control ............................................................................12
4.5.1 Add (pair) a camera .......................................................12
4.5.2 View a camera ...............................................................13
4.5.3 Delete a camera .............................................................13
4.5.4 Scan camera ..................................................................13
5. Disposal of The Device (environment) ....................................... 14
6. Cleaning ........................................................................................ 15
7. Help................................................................................................ 16
8. General Information ..................................................................... 18
6 Safety Instructions
1. Safety Instructions
WARNING
This baby monitor is compliant with all relevant standards regarding
electromagnetic fields and is, when handled as described in the User's
Guide, safe to use. Therefore, always read the instructions in this User's
Guide carefully before using the device.
Adult assembly is required. Keep small parts away from children when
assembling.
This product is not a toy. Do not allow children to play with it.
This baby monitor is not a substitute for responsible adult supervision.
Keep this user's guide for future reference.
Do not place the baby unit or cords in the crib or within reach of the
baby (the unit should be 3 feet away).
Keep the cords out of reach of children.
Do not cover the baby monitor with a towel or blanket.
WARNING:
STRANGULATION HAZARD - Keep the unit and adapter cord
NEVER place camera or cords within the crib.
Secure the cord away from baby's reach.
Never use extension cords with AC Adapters. Only use the AC
Adapters provided.
CAMERA SET UP & USE:
Determine a location for the BABY UNIT that will provide the best
view of your baby in his crib.
Place the BABY UNIT on a flat surface, such as a dresser, bureau,
or shelf.
NEVER place baby unit or cords within crib.
more than 3 feet from the crib and out of baby's reach.
more than 3 feet
and cords more than
Safety Instructions 7
ENGLISH
Never use extension cords with power adapters. Only use the power
adapters provided.
Test this monitor and all its functions so that you are familiar with it
prior to actual use.
Do not use the baby monitor near water.
Do not install the baby monitor near a heat source.
Only use the chargers and power adapters provided. Do not use other
chargers or power adapters as this may damage the device and
battery pack.
Only insert a battery pack of the same type.
Do not touch the plug contacts with sharp or metal objects.
The socket-outlet shall be installed near the equipment and shall be
easily accessible.
CAUTION
Risk of explosion if battery is replaced by an incorrect type.
Dispose of used batteries according to the instructions.
8 Getting Started
2. Getting Started
2.1 Baby Unit Power Supply
1. Connect the small plug of the power adapter to the baby unit and the
other end to the electrical outlet.
NOTE
Only use the enclosed power adapter (6V DC / 500mA).
2. Slide the ON/OFF switch to the ON position. The power LED will
light up in orange.
3. Slide the ON/OFF switch to the OFF position to turn the Baby Unit off.
2.2 Parent Unit Battery Installation
1. Insert the wire tab of the rechargeable battery pack into the contact
slot as shown above and fit the battery pack into the compartment.
2. Replace the battery cover over the compartment and gently tighten
the screw in a clockwise direction using a Small cross head or Flat
end screw drivers.
Black
Red
Small cross head or
Flat end screw driver.
Getting Started 9
ENGLISH
2.3 Parent Unit Power Supply
IMPORTANT
Installing the rechargeable battery pack and charging it fully before use is
recommended. This will allow the unit to operate on battery in the event
of a power failure.
1. Connect the small plug of the power adapter to the parent unit and
the other end to the electrical outlet. Only use the enclosed power
adapter (6V DC/500mA).
2. Press and hold the
P POWER ON/OFF button for 1 second to
turn ON the parent unit.
3. Once the baby and parent units are switched on, the display on the
parent unit will show the video captured by the baby unit.
4. If there is no connection or you are out of range, the video display
will go off and the words will be shown on the LCD display, and
the unit will beep every 9 seconds. Move the parent unit closer to the
baby unit until the link is re-established.
5. Press and hold the
P POWER ON/OFF button, until the progress
bar finishes scrolling, to turn OFF the parent unit.
NOTE
The battery icon turns RED to indicate that the battery is low, and it
gives a beep every 16 seconds. The battery needs to be recharged. The
battery pack takes about 16 hours to charge fully.
When charging
1. During power OFF, when adapter is plugged in, a adapter logo will
display on screen and then a flashing battery logo will display for 60 sec.
The Blue LED at top left corner light up indicates adapter is plugged in.
0
10 Getting Started
2. During power ON, when adapter is plugged in, the battery icon on
screen's top right corner will show that the battery is charging. The
Blue LED at the top left corner light up indicates adapter is plugged in.
2.4 Registration (Pairing)
The Baby monitor is pre-registered to your Parent Unit. You do not need
to register it again unless the Baby Unit loses its link with the Parent Unit.
To re-register your Baby Unit, or register a new Baby Unit, follow the
procedure below:
1. Press the button of the parent unit and then press the
- DOWN
button to select ADD CAMERA icon , and press the button to
confirm.
2.
1
/
2
/
3
/
4
will pop up, press the + UP button or - DOWN button
to select the desired Camera unit and press the button to start
searching for a camera unit. The unit ON/OFF LED (Green) will flash
rapidly while searching.
3. Press the button to confirm.
4. Press and hold the PAIR button underneath the baby unit until the parent
unit finds the camera, beeps and the video from the camera appears.
NOTE
If a particular Baby Unit was registered previously, registering this current
Baby Unit again will overwrite the old registration.
Using the Baby Monitor MBP18 11
ENGLISH
3. Using the Baby Monitor MBP18
3.1 Setting up
Place the baby unit in a convenient location (e.g. on a table) and point
the camera lens towards the area you want to monitor.
Adjust the baby unit's head angle by rotating the camera up, down, left
and right until you are satisfied with the image in the parent unit.
NOTE
Do not place the baby unit within baby's reach! If there is interference with
the picture or sound, try moving the units to different locations, and
ensure they are not close to other electrical equipment.
3.2 Night Vision Mode
The baby unit has 8 high-intensity infrared LEDs for picking up clear images
in the dark. When the built-in photo sensor detects a low level of ambient
light, the LEDs will automatically activate and the screen on the parent unit
will display in black and white. The
N icon will be displayed on the screen.
3.3 Video ON/OFF
Press V VIDEO ON/OFF button to turn the LCD display on or off, but will
still leave the audio monitor on.
12 MBP18 Parent Unit Menu Options
4. MBP18 Parent Unit Menu Options
4.1 Volume
1. Press the + UP button or - DOWN button to select the desired
volume level from level 1 ~ 8. (The default volume level setting is
level
4.)
4.2 Brightness
1. Press the button and the menu bar will pop up.
2. Select the BRIGHTNESS icon
& and press the button to confirm.
3. Press the
+ UP button or - DOWN button to select the desired
brightness level from level 1 ~ 8. (The default brightness level setting
is level
4.)
4.3 Zoom, Pan and Tilt
1. Press the ZOOM button Z to select
1X
or
2X
Zoom. (The default
setting is
1X
.)
2. Press the
+ UP button or - DOWN button to tilt the display, and
buttons to pan the display left and right.
3. Toggle ZOOM button
Z to return to normal mode.
4.4 Alarm
1. Press the button and the menu bar will pop up.
2. Select the ALARM icon and press the button to confirm.
3. Press the
+ UP button or - DOWN button to select the alarm time
(
6h
,
4h
,
2h
). (The default setting is Alarm OFF.)
If an alarm time is selected, the parent unit will beep for about 45
seconds after every 6, 4 or 2 hour period, and the alarm icon will
flash red.
4.5 Camera Control
4.5.1 Add (pair) a camera
1. Press the button and the menu bar will pop up.
2. Press the
- DOWN button to select ADD CAMERA icon and
press the button to confirm.
3.
1
/
2
/
3
/
4
will pop up, press the + UP button or - DOWN button to
select the desired Camera unit, and press the button to start
searching for a camera unit. The unit ON/OFF LED (Green) will flash
rapidly while searching.
MBP18 Parent Unit Menu Options 13
ENGLISH
4. Press and hold the PAIR button underneath the baby unit until the parent
unit finds the camera, beeps and the picture from the camera appears.
NOTE
A camera can only be registered to one parent unit at any one time.
4.5.2 View a camera
1. Press the button and the menu bar will pop up.
2. Press the
- DOWN button to select VIEW CAMERA icon and
press the button to confirm.
3.
1
/
2
/
3
/
4
will pop up, press the + UP button or - DOWN button
to select the desired Camera unit, and press the button to view
the picture from that camera.
TIP
Quick Method to View Cameras instead of entering into the menu bar.
Directly press repeatedly to select
Camera 1 - 4
or .
4.5.3 Delete a camera
1. Press the button and the menu bar will pop up.
2. Press the
- DOWN button to select DELETE CAMERA icon
and press the button to confirm.
3.
1
/
2
/
3
/
4
will pop up, press the + UP button or - DOWN button to
select the desired Camera unit, press button then press the
-
DOWN button again to select DELETE CAM icon .
4. Press button to confirm the deletion or RETURN button to exit.
NOTE
You are not allowed to delete the camera if it is the only camera paired in
the system.
4.5.4 Scan camera
1. Press the button and the menu bar will pop up.
2. Press the
- DOWN button to select VIEW CAMERA icon and
press the button to confirm. Press the button for scan
selection.
3. The screen will then display images from different registered
cameras in a loop, changing about every 12 seconds.
TIP
Quick Method to View Cameras instead of entering into the menu bar.
Directly press repeatedly to select
Camera 1 - 4
or .
14 Disposal of The Device (environment)
5. Disposal of The Device
(environment)
At the end of the product lifecycle, you should not dispose
of this product with normal household waste. Take this
product to a collection point for the recycling of electrical
and electronic equipment. The symbol on the product,
user's guide and/or box indicates this.
Some of the product materials can be reused if you take
them to a recycling point. By reusing some parts or raw materials from
used products you make an important contribution to the protection of the
environment.
Please contact your local authorities in case you need more information
on the collection points in your area.
Dispose of the battery pack in an environmentally-friendly manner
according to your local regulations.
Cleaning 15
ENGLISH
6. Cleaning
Clean the MBP18 with a slightly damp cloth or with an anti-static cloth.
Never use cleaning agents or abrasive solvents.
Cleaning and care
Do not clean any part of the product with thinners or other solvents
and chemicals –- this may cause permanent damage to the product
which is not covered by the warranty.
Keep your MBP18 away from hot, humid areas or strong sunlight, and
don't let it get wet.
Every effort has been made to ensure high standards of reliability for
your MBP18. However, if something does go wrong, please do not try
to repair it yourself –- contact Customer Service for assistance.
16 Help
7. Help
Display
No display
Try recharging or replacing the battery pack.
Reset the units. Disconnect the battery pack of the parent unit and
unplug both the units' electrical power, then plug them back in.
Is the unit turned on?
Press and hold the ON/OFF button
P on the parent unit to turn it
ON.
Is the correct camera selected?
Change the camera number, if necessary.
Is the video display turned on?
Press the VIDEO ON/OFF button
V to turn it on.
When operating using batteries, only the Display will go blank after 2
minutes to save power. The unit is still active and will give you audio
alerts. You can reactivate the screen by pressing any button.
Registration
If the Baby Unit has lost its link with the Parent Unit
Try recharging or replacing the battery pack.
If the Baby Unit is too far away it may be going out of range, so move
the Baby Unit closer to the Parent Unit.
Reset the units by disconnecting them from the battery and electrical
power. Wait about 15 seconds before reconnecting. Allow up to one
minute for the Baby Unit and the Parent Unit to synchronize.
See 2.4 Registration (Pairing), if there is a need to re-register the
units.
Help 17
ENGLISH
Interference
Noise interference on your parent unit
Your baby and parent units may be too close. Move them farther apart.
Make sure there is at least 3 to 6 feet between the 2 units to avoid
audio feedback.
lf the baby unit is too far away it may be out of range, so move the
baby unit closer to the parent unit.
Make sure the baby and parent units are not near other electrical
equipment, such as a television, computer or cordless/mobile telephone.
Use of other 2.4GHz products, such as wireless networks (Wi-Fi
®
routers), Bluetooth
®
systems, or microwave ovens, may cause
interference with this product, so keep the baby monitor away at least
5ft (1.5m) from these types of products, or turn them off if they appear
If the signal is weak, try moving the Parent and/or Baby Unit to
different positions in the rooms.
to be causing interference.
18 General Information
8. General Information
lf your product is not working properly....
1. Read this User's Guide or the Quick Start Guide.
2. Visit our website:
www.motorola.com
3. Contact Customer Service:
To order a replacement battery pack, contact customer service or visit our
website.
Consumer Products and Accessories Limited
Warranty ("Warranty")
Thank you for purchasing this Motorola branded product manufactured
under license by Binatone Electronics International LTD ("BINATONE").
What Does this Warranty Cover?
Subject to the exclusions contained below, BINATONE warrants that this
Motorola branded product ("Product") or certified accessory
("Accessory") sold for use with this product that it manufactured to be
free from defects in materials and workmanship under normal consumer
usage for the period outlined below. This Warranty is your exclusive
warranty and is not transferable.
Who is covered?
This Warranty extends only to the first consumer purchaser, and is not
transferable.
What will BINATONE do?
BINATONE or its authorized distributor at its option and within a
commercially reasonable time, will at no charge repair or replace any
Products or Accessories that does not conform to this Warranty. We may
use functionally equivalent reconditioned/ refurbished/ pre-owned or new
Products, Accessories or parts.
US and Canada 1-888-331-3383
General Information 19
ENGLISH
What Other Limitations Are There?
ANY IMPLIED WARRANTIES, INCLUDING WITHOUT LIMITATION
THE IMPLIED WARRANTIES OF MERCHANTABILITY AND FITNESS
FOR A PARTICULAR PURPOSE, SHALL BE LIMITED TO THE
DURATION OF THIS LIMITED WARRANTY, OTHERWISE THE
REPAIR OR REPLACEMENT PROVIDED UNDER THIS EXPRESS
LIMITED WARRANTY IS THE EXCLUSIVE REMEDY OF THE
CONSUMER, AND IS PROVIDED IN LIEU OF ALL OTHER
WARRANTIES, EXPRESS OF IMPLIED. IN NO EVENT SHALL
MOTOROLA OR BINATONE BE LIABLE, WHETHER IN CONTRACT
OR TORT (INCLUDING NEGLIGENCE) FOR DAMAGES IN EXCESS
OF THE PURCHASE PRICE OF THE PRODUCT OR ACCESSORY, OR
FOR ANY INDIRECT, INCIDENTAL, SPECIAL OR CONSEQUENTIAL
DAMAGES OF ANY KIND, OR LOSS OF REVENUE OR PROFITS,
LOSS OF BUSINESS, LOSS OF INFORMATION OR OTHER
FINANCIAL LOSS ARISING OUT OF OR IN CONNECTION WITH THE
ABILITY OR INABILITY TO USE THE PRODUCTS OR ACCESSORIES
TO THE FULL EXTENT THESE DAMAGES MAY BE DISCLAIMED BY
LAW.
Some jurisdictions do not allow the limitation or exclusion of incidental or
consequential damages, or limitation on the length of an implied
warranty, so the above limitations or exclusions may not apply to you.
This Warranty gives you specific legal rights, and you may also have
other rights that vary from one jurisdiction to another.
20 General Information
Exclusions
Normal Wear and Tear. Periodic maintenance, repair and replacement
of parts due to normal wear and tear are excluded from coverage.
Batteries. Only batteries whose fully charged capacity falls below 80% of
their rated capacity and batteries that leak are covered by this Warranty.
Abuse & Misuse. Defects or damage that result from: (a) improper
operation, storage, misuse or abuse, accident or neglect, such as
physical damage (cracks, scratches, etc.) to the surface of the product
resulting from misuse; (b) contact with liquid, water, rain, extreme
humidity or heavy perspiration, sand, dirt or the like, extreme heat, or
food; (c) use of the Products or Accessories for commercial purposes or
subjecting the Product or Accessory to abnormal usage or conditions; or
(d) other acts which are not the fault of MOTOROLA or BINATONE, are
excluded from coverage.
Use of Non-Motorola branded Products and Accessories. Defects or
damage that result from the use of Non-Motorola branded or certified
Products or Accessories or other peripheral equipment are excluded from
coverage.
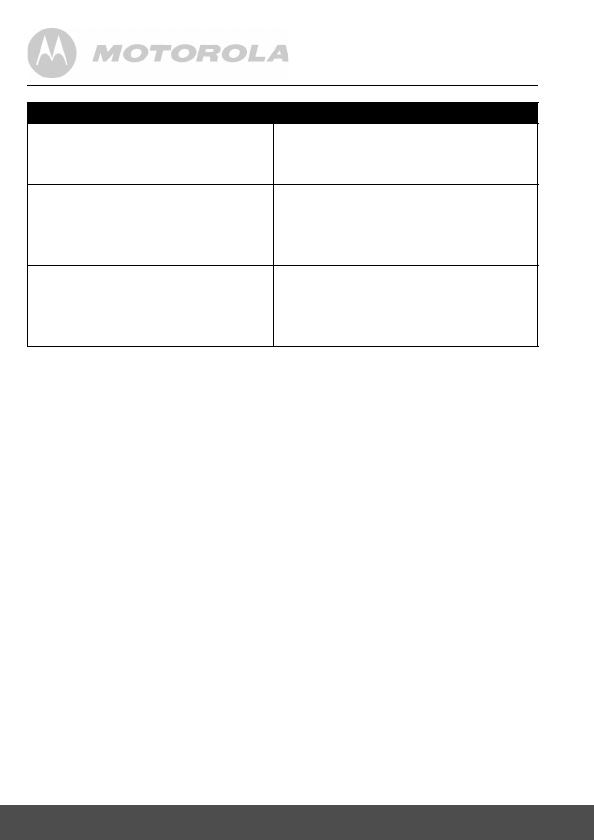
Products Covered Length of Coverage
Consumer Products One (1) year from the date of the
products original purchase by the first
consumer purchaser of the product.
Consumer Accessories Ninety (90) days from the date of the
accessories original purchase by the
first consumer purchaser of the
product.
Consumer Products and
Accessories that are Repaired
or Replaced
The balance of the original
warranty or for Ninety (90) days
from the date returned to the
consumer, whichever is longer.
  • Page 1 1
  • Page 2 2
  • Page 3 3
  • Page 4 4
  • Page 5 5
  • Page 6 6
  • Page 7 7
  • Page 8 8
  • Page 9 9
  • Page 10 10
  • Page 11 11
  • Page 12 12
  • Page 13 13
  • Page 14 14
  • Page 15 15
  • Page 16 16
  • Page 17 17
  • Page 18 18
  • Page 19 19
  • Page 20 20
  • Page 21 21
  • Page 22 22
  • Page 23 23
  • Page 24 24
  • Page 25 25

Motorola MBP18 User manual

Category
TVs & monitors
Type
User manual
This manual is also suitable for

Ask a question and I''ll find the answer in the document

Finding information in a document is now easier with AI