Installation Instructions
Split System Indoor Coils
DESCRIPTION
These instructions are primarily intended to assist
qualifi ed individuals in the proper installation of this
appliance. Some local codes require licensed installa-
tion/service personnel for this type of equipment. Read
all instruction carefully before starting the installation.
INTRODUCTION
This kit is designed to allow the Cased Coils to be
mounted in the horizontal right or the horizontal left
position. (Position determined by airfl ow direction when
looking at the front of the unit)
INSTALLATION
NOTE: Before converting the Cased Coil to a horizontal
confi guration, determine if the installation is a horizon-
tal left or right application. (See Figure 1.) The kit must
be installed before the refrigerant lines have been
connected.
PROCEDURE
1) Remove the coil access doors.
2) Slide the coil straight out the front of the unit.
4) The coil will have two sets of 1/4" knockouts to be
used for either horizontal left or horizontal right
applications. Remove the knockouts that are on the
side of the coil delta plate in which the horizontal
drain pan will be on. (See Figures 3,4.)
5) For 26" or 30" tall cabinets, skip to step 7.
6) To prepare the horizontal drain pan, attach the
stick-on clips. First, use the alcohol wipe supplied
with the kit to clean the 1" x 5/8" recessed areas in
the bottom of the pan. Then peel off the sticky back
cover on the clips and place them in the cleaned
recessed area of the pan. The clips should open
towards the inner raised area in the bottom of the
pan as shown. (See Figure 3)
7) To place the coil support rod, insert the ends of the
rod into the knocked out holes.
NOTE: The END of the coil support rod with the
crimped tabs should go on the front of the coil and
should clear the copper parts of the coil when installed
with the drain pan on the next step.
8) Attach the horizontal drain pan to the coil as shown.
9) Insert the extra plastic plug into the open hole in
the bottom drain pan to block bypass air fl ow.
10) Place the insulation sheet from the kit inside the
coil cabinet to support the horizontal drain pan as-
sembly.
11) Slide the coil and the drain pan assembly into the
cabinet.
12) For cabinets that are 20” tall, slip the bottom fl ange
of the drain pan extension under the coil support
rod in the drain pan. Make sure the side tabs fi t in-
side the drain pan on each side between the drain
pan inside wall and the coil support rod (See Figure
5.)
13) For cabinets that are 26 or 30” tall, the holes in the
drain pan extension should be pressed over the
nibs molded into the drain pan. Which pair of holes
is used will depend on whether the unit is installed
horizontal left or horizontal right. Verify proper posi-
tioning for clearance thru the top of the coil cabinet
before affi xing.
NOTE: The drain pan extension should stick into the
exiting ductwork several inches.
NOTE: The drain pan extension can be installed and
removed after the ductwork has been attached to the
cased coil. However, it is easier to do so before.
14) Replace the doors and their screws.
Horizontal Conversion Kit
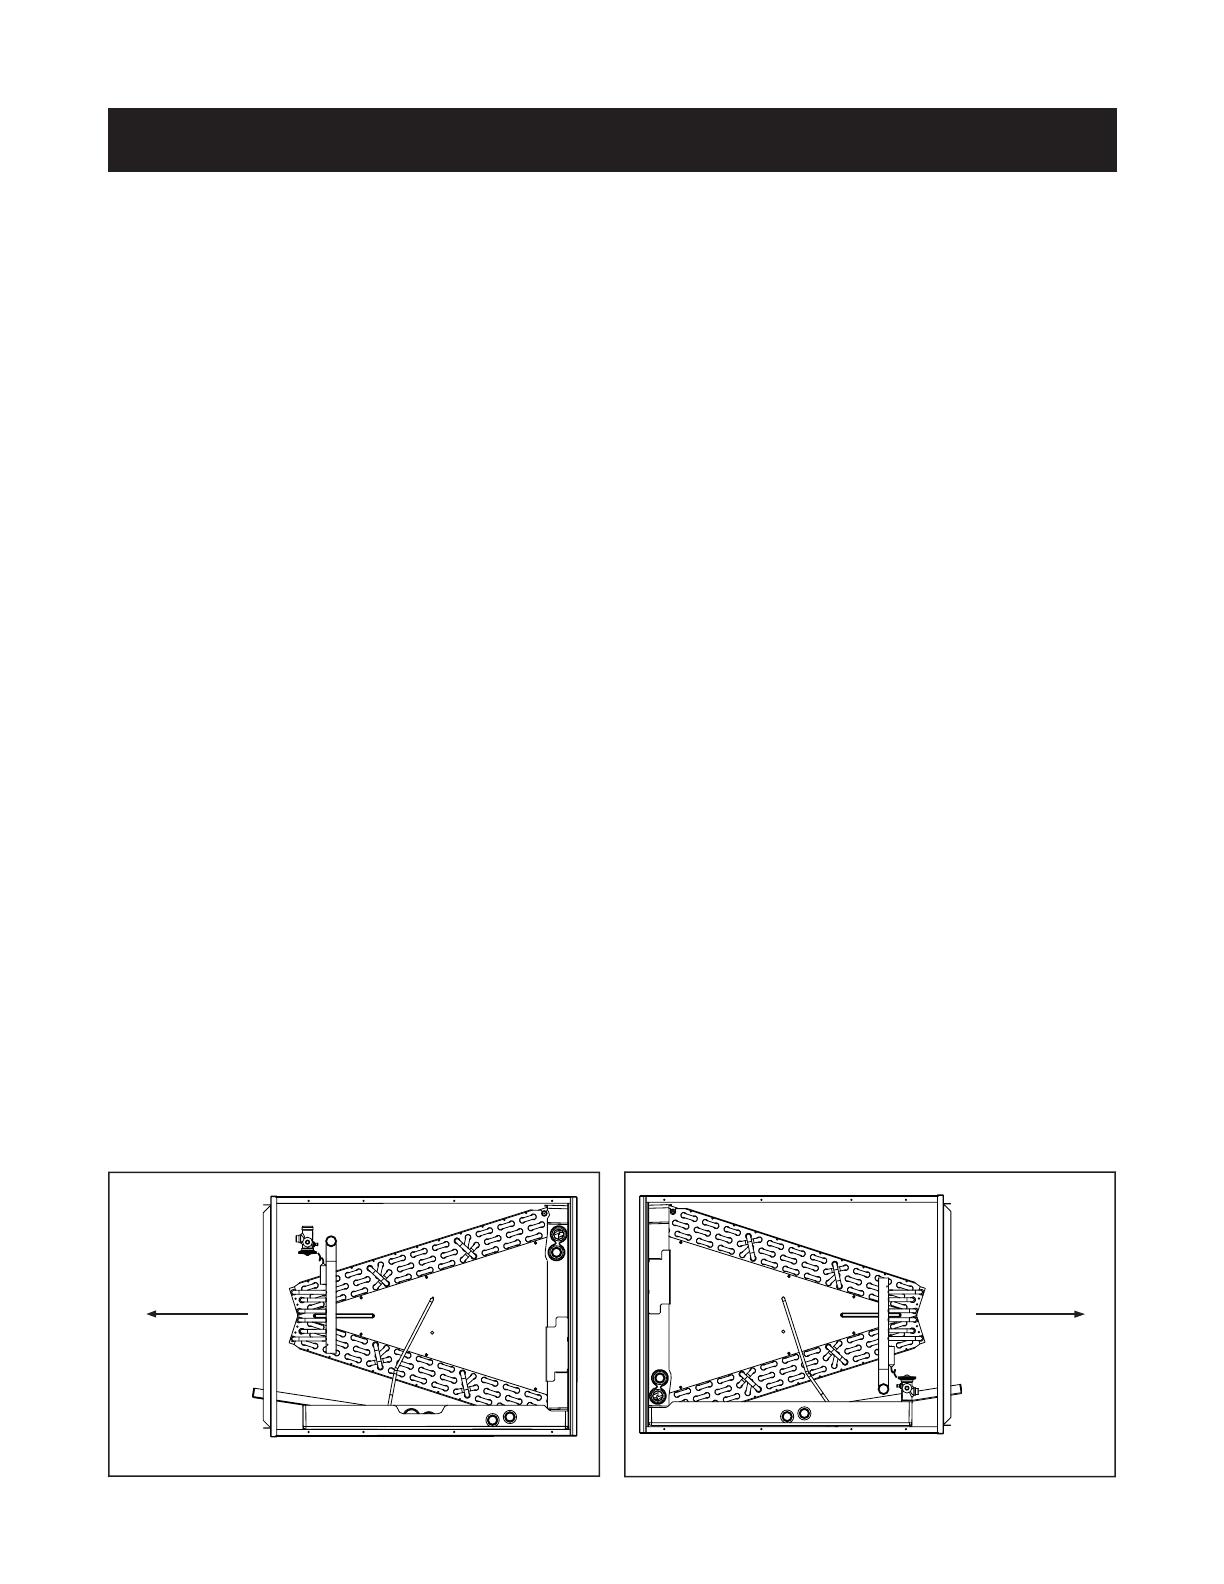
Figure 1. C6 Horizontal Left Confi guration
with Drain Pan Extension
Figure 2. C6 Horizontal Right Confi guration
with Drain Pan Extension
Air Flow
Air Flow

