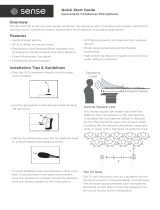
Page is loading ...

Bitte vor Inbetriebnahme des Gerätes lesen!
Please read the manual before using the equipment!
Veuillez lire cette notice avant d’utiliser le système!
Prima di utilizzare l’apparecchio, leggere il manuale!
Antes de utilizar el equipo, lea por favor el manual!
Por favor leia este manual antes de usar o equipamen
to!
C 420
Bedienungshinweise. . . . . . . S. 2
User Instructions . . . . . . . . . p. 12
Mode d’emploi . . . . . . . . . . . p. 22
Istruzioni d’uso. . . . . . . . . . . p. 32
Modo de empleo . . . . . . . . . p. 42
Instruções de uso . . . . . . . . p. 52

12
1 Description
1.1 General
1.2 Versions
C 420:
C420 L:
C 420/B-lock:
The C 420 is a head-worn miniature condenser
microphone with a convenient behind-the-neck
headband. The microphone has a cardioid polar
pattern and therefore “prefers” sounds arriving
from in front of it (from the user’s mouth).
The microphone case containing the condenser
transducer is shock mounted on the microphone
arm in order to suppress cable and mechanical
noise. The microphone arm will place the micro-
phone in front of the corner of your mouth to mini-
mize pop noise and protect the microphone from
contamination. The supplied windscreen makes
the microphone even less susceptible to wind and
pop noise.
The C 420 is available in three versions:
With 3-pin XLR connector with integrated adapter
for 9 to 52 V universal phantom power.
With locking mini XLR connector for use with the
new version B 29 battery power supply, new ver-
sion MPA II phantom power adapter, or AKG
bodypack transmitters.
With locking mini jack plug for use with the old
version B 29 battery power supply or old version
MPA II phantom power adapter.

13
1 Description
1.3 Standard
Accessories
1.4 Optional
Accessories for
C 420
1.5 Optional
Accessories for
C 420 L,
C 420 B/lock
2.1 C 420
All C 420 versions are supplied with:
W 44 foam windscreen
B 18 battery supply
N 62 E, N 66 E AC power
supplies
MK 9/10 10-m (33-ft.)
connecting cable
B 29 battery supply
MPA II phantom power adapter
The C 420 is a condenser microphone and there-
fore needs a power supply.
1. Connect the phantom power adapter on the
microphone cable to a balanced XLR micro-
phone input with phantom power.
2. Switch the phantom power on. (Refer to the
instruction manual of the unit to which you
connected your C 420.)
3. If your mixer provides no phantom power,
connect an AKG phantom power supply
(N 62 E, N 66 E, B 18) between the microphone
and the mixer.
You may connect AKG phantom power sup-
plies to balanced or unbalanced inputs.
2 Interfacing

14
2 Interfacing
2.2 C 420 L
2.3 C 420 B/lock
2.4 B 29 Battery
Supply
2.5 MPA II
Phantom Power
Adapter
2.6 External
Phantom Power
Supplies
Important!
1. Plug the mini XLR connector on the micro-
phone cable all the way into one of the two mini
XLR sockets on the B 29, the mini XLR socket
on the connecting cable of the MPA II, or the
input socket on the bodypack transmitter.
The connector will lock automatically.
2. Connect the B 29 or MPA II to the desired
input.
This version is identical to the C 420 L except that
it uses a screw-in mini jack plug that you can
connect directly to the old versions of the B 29,
MPA II, or AKG bodypack transmitters. (Refer to
the instruction manual of the unit you are using.)
The optional B 29 battery supply allows you to
connect two microphones to a common balanced
or unbalanced input in order to save on mixer
inputs.
The optional MPA II phantom power adapter lets
you connect the C 420 to any phantom power
source or XLR input with 9 to 52 V phantom power.
For phantom powering the C 420 L and C 420
B/lock with MPA II we recommend the optional
N 62 E or N 66 E AC power supply or the B 18 bat-
tery supply (also optional) from AKG.
Using any power supply other than those
recommended by AKG may damage your
microphone and will void the warranty.

15
2 Interfacing
2.7 Connecting
Cables
To connect to a balanced (XLR) input, use a
standard XLR cable.
To connect to an unbalanced input (mono jack),
use a cable with a female XLR connector and
TS jack plug (see fig. 1 below):
1. On the XLR connector, use a wire bridge to
connect pin 1 to pin 3 and the cable shield.
2. Connect the inside wire of the cable to pin 2 on
the XLR connector and the tip contact of the
jack plug.
Fig. 1: Connecting cable for unbalanced micro-
phone inputs.

16
3 Operating Notes
3.1 Putting the
Microphone on
1. Adjust the temple pieces so that the behind-
the-neck headband will rest securely against
your head.
Fig. 2: Adjusting the temple pieces.
2. Put the behind-the-neck headband on as
shown in figs. 3 through 5.
Fig. 3: Behind-the-
neck headband.
Fig. 4 Fig. 5

Fig. 8:
5. Bend the gooseneck so that the microphone
will sit to one side in front of the corner of your
mouth.
6. Reeve the microphone cable through the three
slots in the cable clip and clamp the cable clip
on your shirt collar. This takes the pull of the
cable off the microphone and the microphone
will fit your head securely and lightly.
17
3 Operating Notes
Readjusting the
Temple Pieces:
Aligning the
Microphone:
Strain Relief:
Fig. 6 Fig. 7
3. If the behind-the-neck headband does not fit
snugly, readjust the temple pieces as shown in
fig. 6. Slide the cable holder so as to slacken
the cable a little (refer to fig. 7).
4. Should the micro-
phone still fit loo-
sely, bend the
behind-the-neck
headband slightly
inward referring to
fig. 8.

18
3 Operating Notes
3.2 Windscreen If (for instance, in outdoor use) excessive wind or
pop noise becomes audible, attach the supplied
windscreen to the microphone.
1. Slide the windscreen onto the microphone
capsule.
2. Pull the windscreen over the outer edge of the
microphone capsule.
4 Specifications
4.1 Microphone
Type: Pre-polarized condenser microphone
Polar pattern: Cardioid
Frequency range: 20 Hz to 20,000 Hz
Sensitivity: 5 mV/Pa (-46 dBV re 1 V/Pa)
Electrical Impedance at 1000 Hz: 200 Ω
Recommended load impedance: >2000 Ω
Max. SPL for 1% / 3% THD: 126 dB / 130 dB
Equivalent noise level: 33 dB (to DIN 45412)
Supply voltage:
C 420: 9 to 52 V universal phantom power
C 420 L: 9 V battery supply through B 29 or body-
pack transmitter, or 9 to 52 V universal
phantom power through MPA II adapter
C 420 B/lock: 9 V battery supply through B 29 or 9 to
52 V universal phantom power through
MPA II adapter
Current consumption: Approx. 2 mA
Connector: 3-pin male XLR
Finish: Matte black
Size: 130 mm (5.2 in.) in dia.
Cable length: 3 m (10 ft.)
Net weight: 30 g (1.1 oz.) exc. of connector

4.4 Polar
Diagram
5 Cleaning
4.3 Frequency Response
Clean metal surfaces with (industrial grade)
methylated spirits or alcohol.
Clean the foam windscreen in mild soap suds. You
can use the windscreen again as soon as it has
dried.
19
4 Specifications
4.2 Declaration
of Conformity
When connected to equipment with a CE sign, this
product conforms to EN 50 082-1.

20
6 Troubleshooting
Problem
1. Microphone does
not work:
2. Headset does not
fit securely;
microphone arm
wobbles:
3. Loud pop, wind,
and/or breath
noise:
4. Microphone
sound becomes
duller by and by:
Possible Cause
No supply voltage.
Headband is not ad-
justed correctly.
Microphone sits too
close to mouth or
nose.
Internal or W 44
external windscreen
when soiled
attenuates high fre-
quencies.
Remedy
C 420: Check phan-
tom power source.
C 420 B/lock: Check
batteries in the
B 29 or PT 300.
C 420 L: Check bat-
teries in the body-
pack transmitter.
Adjust headband
exactly as described in
section 3.1, referring
particularly to fig. 9.
Align microphone
sound entry with
corner of mouth and
move microphone just
far enough away from
mouth and nose to
stop breath noise.
1. Clean W 44 wind-
screen with soap
suds.
2. Refer cleaning of
internal windscreen
to nearest AKG
Service Center.
ATTENTION: Do not
open microphone
case yourself. This
would void the war-
ranty.

21
6 Troubleshooting
Problem
5. Microphone
sounds “thin”,
feedback sets in
at low levels:
Possible Cause
Microphone sits too
far away from mouth
or nose.
Remedy
Move microphone
closer to corner of
mouth.

Mikrofone · Kopfhörer · Drahtlosmikrofone · Drahtloskopfhörer · Kopfsprechgarnituren · Akustische Komponenten
Microphones · Headphones · Wireless Microphones · Wireless Headphones · Headsets · Electroacoustical Components
Microphones · Casques HiFi · Microphones sans fil · Casques sans fil · Micros-casques · Composants acoustiques
Microfoni · Cuffie HiFi · Microfoni senza filo · Cuffie senza filo · Cuffie-microfono · Componenti acustici
Micrófonos · Auriculares · Micrófonos inalámbricos · Auriculares inalámbricos · Auriculares con micrófono · Componentes acústicos
Microfones · Fones de ouvido · Microfones s/fios · Fones de ouvido s/fios · Microfones de Cabeça · Componentes Acústicos
Printed in Austria on recycled paper. 09/99/9100 U 0918
Technische Änderungen vorbehalten. Specifications subject to change without notice. Ces caractéristiques sont susceptibles de modifications.
Ci riserviamo il diritto di effettuare modifiche tecniche. Nos reservamos el derecho de introducir modificaciones técnicas. Especificações sujeitas à mudanças sem aviso prévio.
AKG Acoustics GmbH
Lemböckgasse 21–25, P.O.B. 158, A-1230 Vienna/AUSTRIA
Tel: (43 1) 86 654-0*, Fax: (43 1) 86 654-516
Internet: http://www.akg-acoustics.com
AKG Acoustics, Harman Pro GmbH
Bodenseestraße 228, D-81243 München/GERMANY
Tel: (089) 87 16-0, Fax: (089) 87 16-200
e-mail: [email protected]
Arbiter Pro Audio
Wilberforce Road, London NW9 6AX/ENGLAND
Tel: (0181) 202 1199, Fax: (0181) 202 7076
AKG ACOUSTICS, U.S.
1449 Donelson Pike, Nashville, TN 37217, U.S.A.
Tel: (615) 360-0499, Fax: (615) 360-0275
Studer Japan Ltd.
2-43-7, Uehara, Shibuya-ku, Tokyo 151-0064/JAPAN
Tel: (813) 3465-2211, Fax: (813) 3465-2214
Erikson Pro Audio
620 McCaffrey, St-Laurent, Quebec, H4T 1N1, CANADA
Tel: (514) 738-3000, Fax: (514) 737-5069
Internet: www.jam-ind.com/eriksonpro
/