Page is loading ...

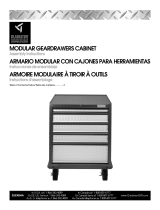
PREMIER 27" - 7 DRAWER
ROLL-AWAY
Assembly Instructions
ARMARIO CON RUEDECILLAS DE CALIDAD
SUPERIOR DE 27" CON 7 CAJONES
Instrucciones de ensamblaje
ARMOIRE DE HAUTE QUALITÉ DE 27"
SUR ROULETTES AVEC 7 TIROIRS
Instructions d'assemblage
TABLE OF CONTENTS/ÍNDICE/TABLE DES MATIÈRES
CABINET/LOCKER SAFETY .......................2
ASSEMBLY INSTRUCTIONS.......................2
WARRANTY ..................................................4
SEGURIDAD DEL ARMARIO .....................5
INSTRUCCIONES DE ENSAMBLAJE ........5
GARANTÍA ....................................................8
SÉCURITÉ DE L’ARMOIRE......................... 9
INSTRUCTIONS D’ASSEMBLAGE ............. 9
GARANTIE .................................................. 12
W10253735B
IT'S TIME TO RETHINK THE GARAGE.
®
ES TIEMPO DE VOLVER A PENSAR EN EL GARAGE.™
LE GARAGE REPENSÉ.™
GATC26P6WG
GATC26P3WG
GATR27P7WG
GATR27P7WG

2
CABINET/LOCKER SAFETY
ASSEMBLY INSTRUCTIONS
Tools and Parts
Gather the required tools and parts before starting assembly.
Tools Needed:
Parts Supplied:
Cabinet Use Requirements
■ Intended for use in a garage.
■ Maximum weight limit is 1000 lbs (455 kg) for the cabinet.
■ Maximum weight limit is 50 lbs (22.7 kg) for each drawer.
■ Maximum weight limit is 645 lbs (293 kg) for the top of the
cabinet (combined load weight of the 6 drawer and 3 drawer tool
chests).
You can be killed or seriously injured if you don't immediately
You
can be killed or seriously injured if you don't
follow
All safety messages will tell you what the potential hazard is, tell you how to reduce the chance of injury, and tell you what can
happen if the instructions are not followed.
Your safety and the safety of others are very important.
We have provided many important safety messages in this manual and on your appliance. Always read and obey all safety
messages.
This is the safety alert symbol.
This symbol alerts you to potential hazards that can kill or hurt you and others.
All safety messages will follow the safety alert symbol and either the word “DANGER” or “WARNING.”
These words mean:
follow instructions.
instructions.
DANGER
WARNING
■ 10 mm Wrench ■ 14 mm Wrench
■ Corner bumpers (4)
■ 6 mm Allen bolts (8)
■ Washers (8)
■ Push handle
■ 10 mm hex head bolts (4)
■ Washers (4)
■ Keys
■ Rigid casters (2)
■ Swivel brake casters (2)
■ 14 mm bolts (16)
■ Spacers (16)
■ Drawer liners (7)
■ Top pad (1)
■ 6 mm Allen wrench
WARNING
Excessive Weight Hazard
Use two or more people to move, assemble or install
cabinet.
Failure to do so can result in back or other injury.
WARNING
Tip Over Hazard
A child or adult can tip the tool chest and be killed.
Open only one drawer at a time.
Firmly close and lock drawers before moving the tool
chest.
Tool chests are designed to fit together. Use tool
chests as listed in your assembly instructions.
Failure to do so can result in serious injury or death.

3
■ The Gladiator
®
Garageworks Premier 7 Drawer Roll-Away is
designed to support a Gladiator
®
Premier 3 Drawer Intermediate
Chest and a Gladiator
®
Premier 6 Drawer Chest stacked on top,
as shown on the cover.
■ Remove the tools from the drawers before stacking and
unstacking, and use two or more people to lift the tool
chests.
■ While using the tool chests, open only one drawer at a time
to avoid tipping.
■ Before moving the Roll-Away cabinet or Roll-Away cabinet
stacked with tool chests to a different location, make sure all
the drawers are closed and locked. Use the push handle to
move the Roll-Away cabinet.
Unpack the Cabinet
NOTE: Keep the packing materials to cushion the cabinet during
assembly and then dispose of/recycle all packaging materials.
1. Remove the cabinet, parts and fasteners.
2. Verify contents. See “Parts Supplied.”
Install the Bumpers
NOTE: Two of the bumpers are designed to match the contour of the
front of the cabinet and two bumpers are designed to match the
contour of the back of the cabinet.
1. Using two or more people, place the cabinet on its top so that
the bottom of the cabinet is facing up, as shown.
2. Using 6 mm Allen head bolts and washers, fasten a matching
bumper to each corner of the cabinet.
3. Completely tighten all the fasteners.
NOTE: To keep from stripping the bolts, do not overtighten.
Install the Casters
IMPORTANT:
■ Both of the swivel casters with brakes must be installed on the
same side of the cabinet.
■ The swivel casters and the push handle must be installed on the
same side of the cabinet.
1. Determine which side of the cabinet you want to install the swivel
casters.
2. Align the holes in the caster plate with the four holes in the corner
of the cabinet.
3. Using four 14 mm bolts and spacers for each caster, fasten the
caster plates to the bottom of the cabinet.
4. Repeat steps 2 and 3 to install the remaining casters.
5. Completely tighten the bolts. Using two or more people, stand
the cabinet upright.
Install the Push Handle
IMPORTANT: Install the push handle to the cabinet so that the
handle is on the same side as the swivel casters.
1. Insert the brackets on each end of the push handle into the slots
on the cabinet side.
2. Align the holes in the cabinet side with the holes in the brackets.
3. Using four 10 mm hex head bolts, fasten the handle brackets to
the cabinet.
Complete the Installation
1. Unroll the drawer liners and place a liner in each of the drawers.
2. Place the pad on the top of the cabinet.
Use, Remove and Replace the Drawers
NOTES:
■ The key locks the roll-away cabinet and all of the drawers.
■ Use the drawer liners to avoid scratching or damaging the
drawer finish.
A. Bumper
B. Washer
C. Allen head bolt
A
B
C
A. 14 mm bolts
B. Swivel caster with
brake
C. Caster plate
D. Spacer
A. Push handle
B. Handle bracket
C. Slot
D. 10 mm hex head bolt
E. Washer
A
B
C
D
D E
A
C
B

4
Removing the Drawer
1. Unload the contents from the drawer.
2. Slide out the drawer as far as it will go.
3. Press the lever down on the right-hand track and lift the lever up
on the left track to release the drawer. Pull the drawer out the rest
of the way.
Replacing the Drawer
1. Align the drawer guides with the receiving glides.
2. Hold the receiving glides firmly and insert the drawer guide.
NOTE: It is normal for the drawer to close tightly the first time
after it has been removed.
3. Push the drawer in completely.
GLADIATOR
®
GARAGEWORKS
PREMIER MODULAR CABINET WARRANTY
LIFETIME LIMITED WARRANTY
For the life of the product, when the Modular GearBox, GearBin or GearDrawer cabinet is used and maintained according to the
instructions attached to or furnished with the product, Gladiator
®
GarageWorks will pay for replacement or repair of the defective
product or parts to correct defects in materials or workmanship.
Gladiator
®
GarageWorks will not pay for:
1. Service calls to correct the installation of any Gladiator
®
GarageWorks products or to instruct you on how to use or install them.
2. Damage resulting from improper handling or shipping of products, or products damaged by accident, misuse, abuse, fire, flood,
improper installation, acts of God, neglect, corrosion, modification or mishandling.
3. Shipping or freight fees to deliver replacement products or to return defective products.
4. Repairs or replacement when your product is used in other than normal, single-family household use, such as a commercial
environment or handled in any way inconsistent with the installation instructions included with the product.
5. Cosmetic damage including scratches, dings, dents or cracks that do not affect the structural or functional capability of the
product.
6. Replacement parts or product for Gladiator
®
GarageWorks products operated outside the United States or Canada.
7. In Canada, travel or transportation expenses for customers who reside in remote areas.
8. Any labor costs during the limited warranty period.
9. Damage resulting from improper loading beyond the specified maximum weight capacity outlined in the assembly instructions
provided with the product, including overloading of hooks, baskets, shelves, cabinets, and other Gladiator
®
GarageWorks
accessories used with the product.
10. Surfaces damaged due to chemical interaction resulting in corrosion of paint or metal.
11. Replacement keys or locking mechanism.
12. Loss of product contents due to theft, fire, flood, accident or acts of God.
DISCLAIMER OF IMPLIED WARRANTIES; LIMITATION OF REMEDIES
IMPLIED WARRANTIES, INCLUDING TO THE EXTENT APPLICABLE WARRANTIES OF MERCHANTABILITY OR FITNESS FOR A
PARTICULAR PURPOSE, ARE EXCLUDED TO THE EXTENT LEGALLY PERMISSIBLE. ANY IMPLIED WARRANTIES THAT MAY BE
IMPOSED BY LAW ARE LIMITED TO ONE YEAR, OR THE SHORTEST PERIOD ALLOWED BY LAW. SOME STATES AND PROVINCES
DO NOT ALLOW LIMITATIONS OR EXCLUSIONS ON HOW LONG AN IMPLIED WARRANTY OF MERCHANTABILITY OR FITNESS
LASTS, SO THE ABOVE LIMITATIONS OR EXCLUSIONS MAY NOT APPLY TO YOU. THIS WARRANTY GIVES YOU SPECIFIC LEGAL
RIGHTS, AND YOU MAY ALSO HAVE OTHER RIGHTS WHICH VARY FROM STATE TO STATE OR PROVINCE TO PROVINCE.
Outside the 50 United States and Canada, this warranty does not apply. Contact your authorized Gladiator
®
GarageWorks dealer to
determine if another warranty applies.
If you need service, call the Gladiator
®
GarageWorks Customer eXperience Center, 1-866-342-4089 (toll-free), from anywhere in the
U.S.A. In Canada, contact your Whirlpool Canada LP designated service company or call 1-800-807-6777.
In the United States, Gladiator
®
GarageWorks means Whirlpool Corporation, Benton Harbor, Michigan 49022. In Canada, Gladiator
®
GarageWorks means Whirlpool Canada LP, Mississauga, ON L5N 3A7. 9/07
A. Lever
A

5
Keep this book and your sales slip together for future
reference. You must provide proof of purchase or installation
date for in-warranty service.
Write down the following information about your Modular
GearBox, GearBin or GearDrawer cabinet to better help you
obtain assistance or service if you ever need it. You will need to
know your complete model number and serial number. You can
find this information on the model and serial label located on the
back of the product.
Dealer name____________________________________________________
Address ________________________________________________________
Phone number__________________________________________________
Model number __________________________________________________
Serial number __________________________________________________
Purchase date __________________________________________________
SEGURIDAD DEL ARMARIO
INSTRUCCIONES DE ENSAMBLAJE
Herramientas y piezas
Reúna todas las herramientas y piezas necesarias antes de
comenzar el ensamblaje.
Herramientas necesarias:
Piezas suministradas:
Si no sigue las instrucciones de inmediato, usted puede
morir o sufrir una lesión grave.
Si no sigue las instrucciones, usted puede morir o sufrir
una lesión grave.
Todos los mensajes de seguridad le dirán el peligro potencial, le dirán cómo reducir las posibilidades de sufrir una lesión y lo que
puede suceder si no se siguen las instrucciones.
Su seguridad y la seguridad de los demás es muy importante.
Hemos incluido muchos mensajes importantes de seguridad en este manual y en su electrodoméstico. Lea y obedezca siempre
todos los mensajes de seguridad.
ADVERTENCIA
PELIGRO
Este es el símbolo de advertencia de seguridad.
Este símbolo le llama la atención sobre peligros potenciales que pueden ocasionar la muerte o una lesión a
usted y a los demás.
Todos los mensajes de seguridad irán a continuación del símbolo de advertencia de seguridad y de la palabra
“PELIGRO” o “ADVERTENCIA”. Estas palabras significan:
■ Llave de 10 mm ■ Llave de 14 mm
■ Parachoques de esquina (4)
■ Pernos Allen de 6 mm (8)
■ Arandelas (8)
■ Manija de empuje
■ Pernos de cabeza hexagonal
de 10 mm (4)
■ Arandelas (4)
■ Llaves
■ Ruedecillas rígidas (2)
■ Ruedecillas giratorias con freno
(2)
■ Pernos de 14 mm (16)
■ Espaciadores (16)
■ Revestimientos de cajones (7)
■ Almohadilla superior (1)
■ Llave Allen de 6 mm
/