Page is loading ...

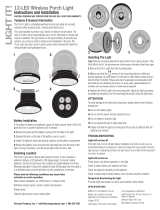
QUICK START GUIDE
Item #1001318516
1001311061
Model #DFI-5985-BZ
DFI-5985-WH
MOTION SECURITY LIGHT
This guide is not comprehensive. It shows a common installation. For complete information and instructions, download the PDF of the owner’s manual
at www.homedepot.com.
PLANNING INSTALLATION
Before installing the light xture, ensure that all parts are present (see Hardware Included and Package Contents). If any part is missing or damaged, do
not attempt to assemble, install, or operate this light xture.
Estimated installation time: 30 minutes
TOOLS REQUIRED
Phillips screwdriver Flathead screwdriver Wire strippers/cutters Circuit tester Mobile device
Work gloves Silicone sealant Ladder Safety goggles
HARDWARE INCLUDED
AA BB CC
DD EE
FF
FRONT
GG HH
PACKAGE CONTENTS
Part Description Quantity
AA Rubber plug 1
BB Small mounting bolt 1
CC Mounting bracket screw 2
DD Mounting bracket screw 2
EE Mounting bracket screw 2
FF Large mounting bolt (pre-installed) 1
GG Mounting bracket (not to scale) 1
HH Mini screwdriver (not to scale) 1
Part Description Quantity
A Lamp head 2
B Light xture 1
C Motion sensor 1
D
1-2- asy Connect™
1
Questions, problems, missing parts? Before returning to the store,
call Deant Customer Service 8 a.m. - 7 p.m., EST, Monday - Friday, 9 a.m. - 6 p.m., EST, Saturday
1-866-308-3976
HOMEDEPOT.COM
Installation
1
Installing the mounting bracket
WARNING: Turn the power off at the circuit breaker or fuse. Place tape over the
circuit breaker switch and verify power is off at the light xture.
□ Remove the existing light xture.
□ Install the mounting bracket (GG) with the stamped word “FRONT”
facing away from the junction box. Use the mounting bracket
screws (CC, DD, or EE) that best t the junction box.
FRON T
FRONT
2
Installing the 1-2- asy Connect™
□ Remove the 1-2- asy Connect™ (D) from the rear of the light
xture.
□ Route the junction box wires through the large hole in the
1-2- asy Connect™ (D).
□ Place the 1-2- asy Connect™ (D) against the junction box.
□ When mounting to a wall, the “UP” arrow must point upward.
□ When mounting to an eave, the “UP” arrow must point toward
the building.
□ Insert the small mounting bolt (BB) through the 1-2- asy
Connect™ (D) hole located below the threaded hole, and thread it
into the center hole of the mounting bracket (GG). Tighten the bolt
(BB) securely.
FRONT
N (White/
Blanc/Blanco)
GND
Terre
Tierra
UP/Haut/Arriba
L (Black/
Noir/Negro)
FRO NT
N (White/
Blanc/Blanco)
GND
Terre
Tierra
UP/Haut/Arriba
L (Black/
Noir/Negro)
3
Making the electrical connections
□ Insert the junction box wires into the side of the terminal block
and around the ground screw. Tighten terminal block screws
using the mini-screwdriver (HH) and ground screw to secure the
wires.
□ Insert the white wire from the junction box into the terminal
marked “N (White)”.
□ Insert the black wire from the junction box into the terminal
marked “L (Black)”.
□ Connect the bare or green ground wire from the junction box
to the ground screw (marked with “GND”).
N (White/
Blanc/Blanco)
GND
Terre
Tierra
UP/Haut/Arriba
L (Black/
Noir/Negro)
4
Mounting the light fixture
NOTICE: The two pins on the rear of the light xture must be inserted into the terminal
block for the light to work.
□ Align the bottom edge of the light xture (B) with the bottom edge
of the 1-2- asy Connect™ (D) and tilt the light xture (B) toward the
1-2- asy Connect™ (D). Ensure the light xture (B) is centered on the
1-2- asy Connect™ (D).
□ Tighten the large mounting bolt (FF) securely through the center
of the 1-2- asy Connect™ (D). Do not overtighten.
□ Push the rubber plug (AA) rmly into the mounting bolt hole on
the light xture (B).
CC, DD, or EE
GG
HOMEDEPOT.com Please contact 1-866-308-3976 for further assistance.
C
A
D
B
FF
AA
D
B
D
D
BB
GG
207907-03A
IMPORTANT:
READ BEFORE
INSTALLATION

HOMEDEPOT.com Please contact 1-866-308-3976 for further assistance. HOMEDEPOT.com Please contact 1-866-308-3976 for further assistance.
Operation
1
Downloading the Defiant
®
mobile app
□ Download the Deant
®
mobile app from the Apple
®
or Android
®
app store (search for “Deant Control”).
□ Turn on the Bluetooth
®
in the device settings.
□ Open the Deant app and touch “Begin”.
Configuring your light settings with a mobile
device requires Bluetooth connectivity.
Before proceeding, ensure your mobile device’s
Bluetooth is turned on. The Bluetooth indicator
icon should appear somewhere on the screen.
If it does not, go into your mobile device’s Settings
menu and turn it on.
TURN ON BLUETOOTH
Begin
7:15 AM
68%
Configuring your light settings with
a mobile device requires Bluetooth
connectivity.
Before proceeding, ensure your
mobile device’s Bluetooth is turned
on. The Bluetooth indicator icon
should appear somewhere on the
screen. If it does not, go into your
mobile device’s Settings menu and
turn it on.
TURN ON BLUETOOTH
Begin
ATT
100%9:25 PM
Android iOS
2
Pairing the light to the mobile app
□ Ensure the power to the light is turned ON.
□ Touch “Scan for lights” to search for existing lights.
NOTE: During the scanning process, the app will locate ALL Bluetooth
®
lights
in the area. Lights previously paired to other devices should already be named.
Scan for lights
SELECT A LIGHT
No lights configured
7:15 AM
68%
My Lights All
My Lights All
Scan for lights
SELECT A LIGHT
No lights configured
ATT
100%9:25 PM
Android iOS
3
Beginning the pairing process
The new light will be shown in a yellow circle indicating it is not paired.
□ Touch the new light to begin the pairing process.
SELECT A LIGHT
New Light
7:15 AM
68%
My Lights All
My Lights All
SELECT A LIGHT
ATT
100%9:25 PM
New Light
Android iOS
4
Finishing the pairing process
□ Touch “Set Up” and enter a name and password for the light (the
password must be 4 to 6 alpha-numeric characters).
□ Either touch “Save” to continue or “Add Photo” to add an optional
picture (the photo may be an existing photo or a new photo may
be taken of the light).
NOTE: A preview of the light will not show until the “Save” button is touched.
Set Up
7:15 AM
68%
Cancel
Save
Add Photo
Please create a password
Password
Enter name
Name This Light
Verify password
Verify Password
Add Image
ATT 100%
9:25 PM
Set UpBack
Name This Light
Password
Verify Password
Add Image
Add Photo
Cancel Save
Please create 4 character password
Android iOS
Operation (continued)
5
Adjusting the light settings
After the light is paired to the mobile app, the yellow circle around the
light will change to green.
□ Touch the light icon.
□ Touch “Settings” to adjust the light controls.
□ Touch “Save” after all adjustments have been made. Setup is
complete.
NOTE: Changes made to one light’s settings will not affect another light’s
settings.
Settings
7:15 AM
68%
Cancel
Save
ON time
5 minutes
Sensitivity
Medium
DualBrite time
3 hours
Full ON brightness level
DualBrite dimming level
75%
25%
ATT
100%
9:25 PM
SettingsPorch
ON Time: 5 Minutes
Full ON Brightness Level: 85%
Sensitivity: Medium
DualBrite Dimming Level: 25%
Cancel Save
20 Minutes1 Minute
5 Minutes
HighLow
Medium
DualBrite Time: 3 Hours
Dusk to Dawn
6 HoursOff 3 Hours
Android iOS
The “ON-TIME” option determines the amount of time the light will stay
on “Full ON Brightness Level” after all motion has stopped.
The “Full ON Brightness Level” option determines the light brightness
level after the light has been turned on by motion.
The “Sensitivity” option increases and decreases the size of the
detection area.
The “DualBrite” option determines the amount of time the lights stay on
at a reduced light level after sundown. Switching this setting to “OFF”
will not affect the “ON-TIME” setting.
The “DualBrite Dimming Level” option determines the light brightness
level of the reduced light level after sundown.
NOTE: The motion sensor (C) is more sensitive to motion moving across the front
of the sensor. The motion sensor (C) is less sensitive to motion moving directly
toward the front of the sensor.
NOTE: The higher the “Sensitivity” setting, the greater the possibility of false
triggering. To reduce false triggering, select a lower setting.
NOTE: The “Dusk-to-Dawn” setting keeps the lights on at an accent level from
sundown to sun up.
NOTE: If the “DualBrite” option is set to OFF, changing the dimming level will
have no affect on the light.
6
Adding additional mobile devices
Additional mobile devices may be added to control the light xture.
□ On the new device follow steps 1 and 2 above.
□ After scanning for lights, select the “All” tab.
□ Touch the desired light on the screen and enter the previous user-
dened password.
NOTE: The light settings and name are stored in the light xture. The light photo
will need to be added separately.
This light is configured on another
smartphone
Enter the light’s password to gain normal
access:
Password
7:15 AM
68%
Deck
Restore Factory Defaults
Next
ATT 100%9:25 PM
DeckBack
Password
This light is configured on
another smartphone
Enter the light’s password to gain
normal access:
Next
Restore Factory Defaults
Android iOS
7
Using manual mode
Manual mode overrides the motion sensor (C) and “ON-TIME” control so the
light will operate at the preset
“Full ON Brightness Level”
. This feature only
works at night and only for one night at a time. The motion sensor (C) will
reset to motion sensing mode at sunrise.
□ Slide the switch under “Manual Override” to the right.
□ To return the light to the original settings, slide the switch to the
left.
NOTE: If the power to the light xture is off for more than 5 seconds, allow the
motion sensor to warm up prior to switching to manual mode.
My Lights All
SELECT A LIGHT
Side Door
Garage Front
Porch
Deck
OFF
OFF
Manual
Override
7:15 AM
68%
ON
ATT
100%
9:25 PM
SELECT A LIGHT
Side Door
Garage Front
Porch
Deck
My Lights All
Manual
Override
Android iOS
/