Page is loading ...

HP 28642A HP-PB SCSI
HP 28655A HP-PB SCSI/
Parallel

HP
HP
5960-3126 El091

@Hewlett-Packard Company, 1991. AI1 rights rcservcd,
Hewlett-hckard Company makes
M
wsmmty of any kind with regard to this material, btcb~dittg. but not Ihttited lo. the
implied warranties of merchantability and iitncsr for a panicular purpose. Hewlett-Packard shall My be liable for ertccs
contained he-rein or for incidental or consequential damages iu connection with the fumishing, performan~. or use of
thismamiai.
This document cowins proprietary infommticm, which is protected by copyright. No pan of this document may be
photocopied, reproduced, or translated into another language witbout the prior written consent of Hewlett-PacM.
The
inform&m umbined in thii document is subject to change without notice.
Print History
Edition 1, October 1991
Safety Considerations
The product and related documentadou must he reviewed for familiarization with safety markings and
irtt~ctions before installation and operation.
Safety Symbois
A
!
lnstntclion manual symbol. If the product is marked with tbis symbol. refer to the
produc1 mamtals to protect the product againsl damage.
WARNING
CAUTION
A WARNING denotes a hazard that can cause petsonal injury.
A CAUTION denotes a hazard that can damage equipment.
Do not proceed beyond a WARNING or CAUTION notice until you have understood the
hazardous conditions and have taken appropriate steps.
Grounding:
Tbe computer in which thii product is installed is a safety class I product and has a protective earthing
terminal. There must be an uninterruptible safety earth ground from the main power source to Ihe
product’s input wiring terminals, power cord, or supplied power cord set. Whenever il is likely that the
Protection has been impaired, dionuect the power cord until the ground has been
restored.
servkblg:
Any servicing, adjustment. maintenance. or repair must be performed only by autborizcd service-trained
-1.
Hewlett-Packard Company
Roseville Networks Division, Roseville, CA 95678

Installation and S&vice
HP28642A HP-PB SCSI
HP 28655A HP-PB SCSI/Parallel

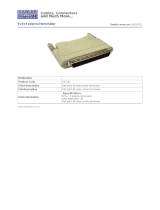
HP 28642A and HP 28655A at a Glance
A-
Extractor lever.
B - Retaining (captive) screw.
C - Self-Test Fail LED (yellow), normally off.
D - SCSI port, SO-pin high-density connector, single-ended signals.
E - SCSI bus termination resistors, single in-line packages (SIPS).
F- PROM, socket location U52.
G - HP-PB backplane connector.
H - Switch pack of four switches, SW1
I- Termination power fuse.
J-
Term Power LED (green), normally on.
K - Parallel port, not supported on MPE XL systems.
2

Product Description
The HP 2S642A/HP 2S655A HP-PB adapter is a computer interface card for use in
HewIett-Packard computers that use the HP-PB (HP Precision Bus) backplane. The HP
2S642A product is for MPE XL systems. The HP 2S655A product is for HP-UX systems.
The adapter card provides a SCSI port (Small Computer System Interface) for connecting
up to seven SCSI peripherals. In addition, the adapter card provides a standard HP
parallel port for connecting an output-only device. The parallel port is not supported for
use on MPE XL systems.
Hardware Supplied
HP 28642A’
l
SCSI/parallel adapter card (2865540001)
m SCSI bus external terminator (1252.3920)
m SCSI port cable, 1 meter (5062-3383)
l
This Znstallation and Service Manual (5960-3126)
*Note: The parallel port is not supported for use on MPE XL systems.
HP28655A
n
SCWparaIlel adapter card (2865560001)
n SCSI bus external terminator (1252-3920)
m SCSI port cable, 1 meter (5062-3383)
m Parallel port cable, 2 meter (51804010)
m This Znstallation and Service Manual (5960-3126)
Tools and Accessories Not Supplied
n
Screwdriver, Torx T-10 or 3/164nch flat blade
n
HP-PB slot divider (5062-3336)
n
Loopback hood, single-ended SCSI signals (5061-6565)

In This Book
This manual contains installation and service information for the:
n
HP 28642A HP-PB SCSI adapter for MPE XL systems, and
I
HP 28655A HP-PI.3 SCSI/Parallel adapter for HP-UX systems.
Thii manual is organized as follows:
Chapter 1 provides installation instructions. It describes, in detail, the steps that you
should follow to install this product.
Chapter 2 contains service information as well as technical specifications. If you have
problems with your card, refer to this chapter for test procedures or general service
information.
This manual is limited to installation of the adapter card only. We assume that you have
your computer system and periphera1 manuals to complete the installation.
4

Table of Contents
Chapter 1. Installing the HP 2s642Al28655A Adapter
1, Prepare to Install the Adapter Card
.........................
1-3
Observe Antistatic Precautions
..........................
l-3
Verify Product Contents
.............................
l-3
Record Adapter Card Identification Information
...............
14
Gather Tools and Accessories Needed
.....................
14
Slot Divider
...................................
l-5
SCSI Cables
...................................
l-5
2. Shut Down the System and Switch Off the Computer
...............
l-6
3. Check the Card’s Hardware Configuration
.....................
l-7
Set the Desired Parity-Checking Capability
...................
l-8
SettheSCSIBusAddress
.............................
l-9
Verify that Resistor Packs are Properly Installed
................
l-10
4. Install and Connect the Card
.............................
l-11
Select an Appropriate Slot
............................
l-11
Record the Slot Number
.............................
l-13
Prepare the Slot For Use
.............................
1-14
Removing Slot Covers
..............................
1-14
Removing Filler Cards
.............................
l-15
Installing a Slot Divider
............................
l-15
Insert the Card into the Slot
...........................
1-17
Attach the Card Cables
..............................
1-18
5. Connect Your Peripheral Device(s)
.........................
l-19
Connect Your Single-Ended SCSI Device(s)
..................
1-19
Terminate the SCSI Bus
..............................
l-20
A SCSI Cable Length Example
........................
1-21
Connect Your Parallel Device, if Applicable
..................
1-23
Reassemble Your Computer
...........................
l-23
6. Turn Power On to Peripherals, Then to the Computer
..............
l-26
7. Set Up the Operating System
............................
l-27
HP-UXSystems
..................................
1-27
MPE XL Systems
.................................
1-27
8. VerifyOperation
...................................
l-28
5

Chapter 2. Service Information
Field Replaceable Units
.................................
2-3
Exchange Assembly
................................
2-3
Board Components
................................
24
Other FRUs
....................................
24
Troubleshooting Tools
..................................
2-5
Self-Test Failure LED
...............................
2-6
TERMPWR LED
.................................
2-6
SCSIPBA and CENTPBA Diagnostics
.....................
2-7
Troubleshooting Checklist
............................
2-7
Removal/Replacement Instructions
..........................
2-9
Removal/Replacement of the Card
.......................
2-10
Removal/Replacement of Card Components
..................
2-11
PROM and Termination SIPS
........................
2-11
Termination Power Fuse
............................
2-12
Reshipment Guidelines
.................................
2-14
Technical Specifications
.................................
2-15
Glossary
Index
6

1
Installing the
HP 28642A/28655A Adapter

lnstalllng the HP 28642A/28655A Adapter
This chapter contains installation instructions for the HP 28642A/28655A HP-PB
SCSI/Parallel adapter card. Figure l-l illustrates a
typical
installation,
The instructions are organized into the eight primary steps listed below. Each step is
described in detail in this chapter. If the adapter card has already been installed and
configured at the factory, you may proceed directly to step 5.
1. Prepare to Install the Adapter Card.
2. Shut Down the System and Switch Off the Computer.
3. Check the Card’s Hardware Configuration.
4. Install and Connect the Card.
5. Connect Your Peripheral Device(s).
6. Turn Power On to Peripherals, Then to the Computer.
7. Set Up the Operating System.
8. Verify Operation.
SCSI Devices
(such as disk drives)
HP PA-RISC Computer
with HP-PB Backpla
is not supported witi
MPE XL)
Figure l-l. Typical Use of the SCSI/Parallel Adapter
1-2 Installing the Adapter

1. Prepare to Install the Adapter Card
Before installing the SCSI/parallel adapter card, perform the following:
1. Observe antistatic precautions.
2. Verify product contents.
3. Record adapter card identification information.
4. Gather tools and accessories needed.
Observe Antlstatic Precautions
Thii product contains electronic components that can be damaged by static electricity. To
avoid damage, follow these guidelines:
n
Store printed circuit assemblies in their conductive plastic bags until you are ready
to install them.
m If possible, work in a static-free area.
m Handle printed circuit assemblies only by the edges. Do not touch electronic
components or electrical traces. We strongly recommend that you use a
grounding wrist strap that is connected to the metallic chassis of the host
computer. If you do not have a wrist strap, touch the chassis before handling
assemblies and frequently thereafter to equalize. any static charge.
Verify Product Contents
Unpack and identify a11 items supplied with the product:
n
SCSI/parallel adapter card
28655-60001
l
External SCSI terminator
1252-3920
l
SCSI port cable, 1 meter
5062-3383
m Parallel port cable, 2 meter’
5180-0010
l
Znsfaliution and Service manual
5960-3126
l
Parallel port cable is not supplied with HP XXX. The parallel port is not
supported on MPE XL systems.
Installing the Adapter l-3

Record Adapter Card Identification Information
Should your card require service, its part number and date code may be needed by HP
service personnel. This information is provided on a labeled sticker on the card. An
example of a labeled sticker is illustrated in figure 1-2.
Figure 1-2. Identification Sticker Example
n
The number in the upper left (28655-6xx~cx) is the adapter card assembly part
number.
l
The 5-digit alphanumeric string (A-m) is the card version and date code.
m Other numbers (such as YYYY) are for factory use only.
Record the card’s part number and date code for future reference. Once the card is
installed, this information will be more diflicult to obtain.
Gather Tools and Accessories Needed
Check the hardware installation manuals for your particular computer model for any
special tools or accessories needed to access the I/O card cage. The following items may be
needed for card installation:
D Screwdriver, Torx T-10 or 3/164nch flat blade.
n
Slot divider (5062-3336), described below.
m SCSI cables, described below.
1-4 Installing the Adapter

Note
You should have all of your system and peripheral device manuals
available for refirence. There may be special system or device
dependent requirements that are not noted here.
Slot Divider
Since this adapter card is a “single-high” card, it requires a single-high slot (Eurocard
standard slot size 3U). A double-high (6U) slot can be converted into two single-high slots
using a slot divider. Slot divider installation is described later in this chapter.
This product does not include a slot divider. Slot dividers are normally preinstalled in the
computer, and it is unlikely that you will need one. However, if one is necessary, you can
order it through the near&t HP Sales and Support Office.
SCSI Cables
SCSI cables may be purchased separately. Table l-l lists a variety of Hewlett-Packard
cables that can be used with this product, depending on the devices supported with your
system. For the most recent information, refer to your system configuration guides, or
consult the nearest HP Sales and Support OMice.
Table l-l. SCSI Cables
Lengths
(meters)
Peripheral to 92222A
Peripheral 92222B
92222C
Description
SO-pin, high-density, male connector with
thumbscrews (to host adapter), and 50-pin
low-density male connector with bail-lock.
50-pin, low-density, male connectors with
bail-lock on both ends.
50-pin, low-density, female-to-male bail-lock
connectors.
Installing the Adapter 1-5

2. Shut Down the System and SwZtch Off the Computer
1.
Before installing the card, ensure that the operating system is shut down. Consult
your computer system manuals for proper shutdown procedures to avoid
corruption or loss of data.
2.
Ensure that power to the host computer is off. Unplug the power cord from the
power source.
WARNING
Unless otherwise noted in your computer system manuals,
failure to properly shut down the system and remove power may
create a personnel hazard, or may result in hardware damage or
data corruption,
l-6 Installing the Adapter

3. Check the Card’s Hardware Configuration
Hardware settings for the SCSI/parallel adapter apply to the SCSI port only. There are no
hardware settings for the parallel port. Figure 1-3 shows the applicable hardware. To
check the card’s hardware, perform the following:
1. Set the desired parity-checking capability.
2. Set the SCSI bus address.
3. Verify that resistor packs are properly installed.
The SCSI/parallel adapter contains switches for setting the parity-checking capability and
the SCSI bus address of the card. The default switch settings are “all switches open”,
rcsllting in:
n
parity-checking is enabled, and
= SCSI bus address is 7.
In addition, the card contains resistor packs for terminating one end of the SCSI bus.
Figure I-3. Switches and Termination Resistors
Installing the Adapter 1-7

Set the Desired Parity-Checking CapabUity
AU devices on a SCSI bus must have the same parity-checking capability. If any device on
the SCSI bus does not generate parity, then all devices on the bus, including the adapter,
must not check parity. (Although parity-checking is selectable, the adapter always
generates parity.)
Note
If there is a SCSI device that cannot match the parity-checking capability
of other devices on the bus, you must add a separate SCSI bus for that
device. An additional SCSI adapter card may be needed for this purpose.
As shown in figure 1-4, the factory setting is “parity-checking enabled”, that is, with switch
4 in the “open” position. The “closed” position will deactivate parity-checking.
Parity-Checking,
Default = Enabled
[Switch 4 is Open)
SCSI Bus Address,
Default = 7
(Switches 3,2,1, is Open)
Figure l-4. Default Switch Settings
l-8 Installing the Adapter

Set the SCSI Bus Address
There may be up to eight devices (which includes the SCSI adapter) connected to a SCSI
bus. Each device must have a unique address, from 0 to 7. The bus address determines the
device’s priority on the bus. Seven is the highest priority and zero is the lowest priority.
Switches 3,2, and 1 are used to set the adapter’s address on the SCSI bus. In binary, switch
3 represents the most significant digit. When shipped from the factory, the address is set to
7 (switches 3,2, and 1 are each set to “l”, that is, in the “open” position) as shown in figure
l-4.
For most applications, “7” is the best choice for the adapter’s SCSI bus address. Table l-2
shows switch positions for other possible addresses. Be sure all devices on the bus have a
different address.
Table 1-2. SCSI Address Switch PositIons
Switch SCSI Bus 1
Address
3
2 1
0
0 0
0
0
0 1
1
0
1 0
2
0
1 1
3
1
0 0
4
1
0 1
5
1
1 0
6
1
1 1 7 (Defauh)
0 = “closed”
1 = “open”
Installing the Adapter l-9

Verify that Resistor Packs are Properly Installed
A SCSI bus has two ends between which SCSL devices are attached. Each end of a SCSI
bus must be terminated with a resiitor network, or “terminator”. The adapter card contains
two resistor packs mounted in sockets on the card. These resistor packs act as a terminator
for one end of the SCSI bus.
Note
The SCSI port is supported for use only on the end of a SCSI bus. The
two resistor packs must be installed.
Visuaily verify that the two resistor packs are installed with the proper orientation. The
resistor packs are marked with a dot on one end and should be oriented as shown in figure
1-5.
Termination Resistors,
Figure l-5. Proper Resistor Pack Orientation
l-10 installing the Adapter

4. Install and Connect the Card
The HP-PB cardcage accommodates two sixes of cards: single-high (Eurocard standard
3U) or double-high (6U). The SCSI/parallel adapter is a single-high (3U) card and
requires a single-high slot. HP computers are normally shipped with single-high slots.
However, this section contains information on converting a double-high slot to two
single-high slots.
To install and connect the SCWparallel adapter into the host computer, read the steps
described below:
1. Select an appropriate slot.
2. Record the slot number.
3. Prepare the slot for use.
4. Insert the card into the slot.
5. Attach the card cables.
Select an Appropriate Slot
Before you install the SCSI/parallel adapter into the host computer, you should understand
the following information for your particular computer model:
l
How to gain access to your computer’s l/O card slots.
You may need to remove various covers or panels to expose the slots.
If your
computer’s I/O slots are not readily accessible, refer to your computer installation
or hardware reference manuals to gain access.
m Proper orientation of an If0 card into the cardcage.
The HP-PB connectors are designed to prevent improper connections.
installing the Adapter l-l 1
/