2. SAFE INSTALLATION REQUIREMENTS
Installation and servicing of air-conditioning equipment can
be hazardous due to system pressure and electrical
components. Only trained and qualified personnel should
install, repair, or service air-conditioning equipment.
Untrained personnel can perform basic maintenance
functions of cleaning coils and filters. All other operations
should be performed by trained service personnel. When
working on air-conditioning equipment, observe
precautions inthe literature, tags, and labels attached to the
unit, and other safety precautions that may apply.
Follow all safety codes. Wear safety glasses and work
gloves. Use quenching cloth for unbrazing operations.
Have fire extinguisher available for all brazing operations.
FIRE AND ELECTRICAL SHOCK HAZARD
Improper installation, adjustment, alteration, service,
maintenance, or use can cause fire or an explosion
which could result in personal injury or unit damage.
Consult a qualified installer, service agency, or gas
supplier for information or assistance. The qualified
installer or agency must use only factory-authorized kits
or accessories when modifying this product.
FIRE, AND ELECTRICAL SHOCK HAZARD
Failure to follow this warning could result in personal
injury, death and/or property damage.
Before performing service or maintenance operations
on unit, turn off gas supply to unit. Then turn off unit main
power switch and install lockout tag.
Recogniz_ safety information. This is the safety-alert
symbol/£k. When you see this symbol in instructions or
manuals, be alert to the potential for personal injury.
Understand the signal words DANGER, WARNING,
CAUTION, and NOTE. These words are used with the
safety-alert symbol. DANGER identifies the most serious
hazards which will result in serious injury or death.
WARNING signifies a hazard which could result in serious
injury or death. CAUTION is used to identify unsafe
practices which may result in minor personal injury or
product and property damage. NOTE is used to highlight
suggestions which will result in enhanced installation,
reliability, or operation.
FIRE, AND ELECTRICAL SHOCK HAZARD
Failure to carefully read and follow all instructions in this
manual could result in furnace malfunction, personal
injury, death and/or property damage.
Installation or repairs made by unqualified persons can
result in hazards to you and others. Installation MUST
conform with local building codes or, in the absence of
local codes, with the National Electrical Code
NFPA70-2005 or in Canada the CSA C.22.1 - Canadian
Electrical Code Part 1.
The information contained in this manual is intended for
use by a qualified service technician familiar with safety
_rocedures and equipped with the proper tools and test
instruments.
SAFETY CONSIDERATIONS
• Install this unit only in a location and position as specified
in section 3 of this manual.
•Always install unit to operate within the unit's intended ex-
ternal static pressure within the allowable range, as
specified in section 6. Refer to unit rating plate for the al-
lowable external static pressures.
•All connecting ductwork to the unit (supply and return)
must be sealed to the unit casing as specified in section 5.
•Check to see that filters are installed correctly and are the
proper type an size.
NOTE: It is the personal responsibility and obligation of the
customer to contact a qualified installer to ensure that the
installation is adequate and conforms to governing codes
and ordinances.
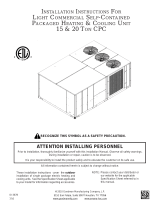
INTRODUCTION
The PAX3 unit is a fully self-contained, electric cooling unit
designed for outdoor installation (See pages 2 for unit
dimensions). All unit sizes have return and discharge
openings for both horizontal and downflow configurations,
and are factory-shipped with all downflow duct openings
covered.
Units may be installed either on a rooftop, cement slab, or
directly on the ground if local codes permit.
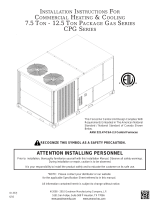
3. LOCATING THE UNIT
ACCESS PANELS
See Figure 1 for a general view of unit and location of
access panels.
CLEARANCES
The location MUST allow for minimum clearances and
should not be adjacent to a patio or other area where the
unit's operating sound level might be objectionable. The
combustion air inlet openings MUST not be obstructed (see
Figure 1). In addition, local codes MUST be observed.
NOTE: Units with available filter racks ( 3-1/2 to 5 ton), need
a 26" minimum clearance at side of unit for removal of
filters. See Minimum Clearances below if unit is going to be
placed near combustible construction or materials.
While minimum clearances are acceptable for safety
reasons, they may not allow adequate air circulation around
the unit for proper operation inthe cooling mode. Whenever
possible, it is desirable to allow additional clearance,
especially around the condenser inlet and discharge
openings.
141