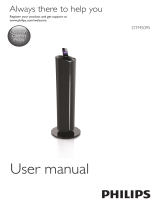
Philips BTM8010 User manual

Category
Home audio sets
Type
User manual

Philips BTM8010 is a Bluetooth Micro music system that lets you enjoy audio from various sources and listen to FM radio. Play music from discs, Bluetooth-enabled devices, USB storage devices, or connect external audio devices via a 3.5mm jack. Enhance your listening experience with sound effects like Digital Sound Control, Dynamic Bass Boost, and Full sound.

Philips BTM8010 is a Bluetooth Micro music system that lets you enjoy audio from various sources and listen to FM radio. Play music from discs, Bluetooth-enabled devices, USB storage devices, or connect external audio devices via a 3.5mm jack. Enhance your listening experience with sound effects like Digital Sound Control, Dynamic Bass Boost, and Full sound.

www.philips.com/welcome
User manual
Always there to help you
Register your product and get support at
Question?
Contact
Philips
BTM8010
1EN
Contents
1 Important 2
Safety 2
Notice 3
2 Your Bluetooth Micro music system 5
Introduction 5
What's in the box 5
Overview of the main unit 6
Overview of the remote control 7
3 Before use 9
Connect the FM antenna 9
Connect power 9
Install/replace the remote control batteries 9
4 Get started 11
Know the LED indicator status 11
Set clock 11
Turn on 11
5 Play 12
Play a disc 12
Play from a USB storage device 12
Control play 12
Play from Bluetooth-enabled devices 13
6 Listen to FM radio 15
Tune to an FM radio station 15
Program radio stations automatically 15
Program radio stations manually 15
Tune to a preset radio station 15
Display RDS information 16
7 Other features 17
Set alarm timer 17
Set sleep timer 17
Listen to an external audio device 17
Listen through headphone 18
8 Adjust sound 19
Adjust volume level 19
Mute sound 19
Adjust default sound settings 19
9 Adjust system settings 20
10 Product information 21
Specications 21
USB playability information 22
Supported MP3 disc formats 22
RDS program types 22
11 Troubleshooting 23
2 EN
1 Important
Safety
Information for Europe:
Know these safety symbols
The 'exclamation mark' calls attention to
features for which you should carefully read the
supplied literature to prevent operating and
maintenance problems.
The 'lightening bolt' symbol indicates
uninsulated components within the product
that can cause an electric shock.
Toreducetheriskofreorelectricshock,do
not expose the product to rain or moisture and
donotplaceanyobjectslledwithliquids,such
asvases,ontheproduct.
a Read these instructions.
b Keep these instructions.
c Heed all warnings.
d Follow all instructions.
e Do not use this product near water.
f Clean only with dry cloth.
g Do not block any ventilation openings.
Install in accordance with the
manufacturer's instructions.
h Do not remove the casing of this product.
i Only use this product indoors. Do
not expose the product to dripping /
splashing water, rain or high humidity.
j Keep this product away from direct
sunlight, naked ames or heat.
k Do not install near any heat sources
such as radiators, heat registers, stoves,
or other electrical equipment (including
ampliers).
l Do not place any other electrical
equipment on the product.
m Do not place any sources of danger
on the product (e.g. objects containing
liquids, burning candles).
n This product may include batteries. Please
refer to safety and disposal instructions
for batteries in this user manual.
o Where the mains plug or an appliance
coupler is used as the disconnect device,
the disconnect device shall remain readily
operable.
Warning
Never remove the casing of this apparatus.
Never lubricate any part of this apparatus.
Never place this apparatus on other electrical
equipment.
Keepthisapparatusawayfromdirectsunlight,naked
amesorheat.
Ensure that you always have easy access to the power
cord,plugoradaptortodisconnectthisapparatusfrom
the power.
Information about the use of batteries:
Caution
Riskofleakage:Onlyusethespeciedtypeofbatteries.
Do not mix new and used batteries. Do not mix
different brands of batteries. Observe correct polarity.
Remove batteries from products that are not in use for
a longer period of time. Store batteries in a dry place.
Risk of injury: Wear gloves when handling leaking
batteries. Keep batteries out of reach of children and
pets.
Risk of explosion: Do not short circuit batteries. Do
not expose batteries to excessive heat. Do not throw
batteriesintothere.Donotdamageordisassemble
batteries. Do not recharge non-rechargeable batteries.
Risk of swallowing batteries: The product/remote
controlmaycontainacointypebattery,whichcanbe
swallowed. Keep the battery out of reach of children
at all times!
3EN
Risk of overheating! Never install this apparatus
inaconnedspace.Alwaysleaveaspaceof
at least four inches around this apparatus for
ventilation. Ensure curtains or other objects
never cover the ventilation slots on this
apparatus.
Hearing safety
Listen at a moderate volume.
• Using headphones at a high volume can
impair your hearing. This product can
produce sounds in decibel ranges that may
causehearinglossforanormalperson,
even for exposure less than a minute. The
higher decibel ranges are offered for those
that may have already experienced some
hearing loss.
• Sound can be deceiving. Over time your
hearing 'comfort level' adapts to higher
volumes of sound. So after prolonged
listening,whatsounds'normal'canactually
be loud and harmful to your hearing. To
guardagainstthis,setyourvolumetoasafe
level before your hearing adapts and leave
it there.
To establish a safe volume level:
• Set your volume control at a low setting.
• Slowly increase the sound until you can
hearitcomfortablyandclearly,without
distortion.
Listen for reasonable periods of time:
• Prolongedexposuretosound,even
atnormally'safe'levels,canalsocause
hearing loss.
• Besuretouseyourequipmentreasonably
and take appropriate breaks.
Be sure to observe the following guidelines
when using your headphones.
• Listen at reasonable volumes for
reasonable periods of time.
• Be careful not to adjust the volume as your
hearing adapts.
• Do not turn up the volume so high that
you can't hear what's around you.
• You should use caution or temporarily
discontinue use in potentially hazardous
situations.
Notice
Anychangesormodicationsmadetothis
device that are not expressly approved by
WOOX Innovations may void the user’s
authoritytooperatetheequipment.
Compliance
Hereby,WOOXInnovationsdeclaresthat
this product is in compliance with the
essentialrequirementsandotherrelevant
provisions of Directive 1999/5/EC. You
canndtheDeclarationofConformityon
www.philips.com/support.
This apparatus includes this label:
Class II equipment symbol:
CLASSIIapparatuswithdoubleinsulation,and
no protective earth provided.
4 EN
Care of the environment
Your product is designed and manufactured
withhighqualitymaterialsandcomponents,
which can be recycled and reused.
When this crossed-out wheeled bin symbol is
attached to a product it means that the product
is covered by the European Directive 2002/96/
EC.
Please inform yourself about the local separate
collection system for electrical and electronic
products.
Please act according to your local rules and
do not dispose of your old products with your
normal household waste. Correct disposal of
your old product helps to prevent potential
negativeconsequencesfortheenvironmentand
human health.
Your product contains batteries covered by
theEuropeanDirective2006/66/EC,which
cannot be disposed with normal household
waste.Please inform yourself about the local
rules on separate collection of batteries
because correct disposal helps to prevent
negativeconsequencesfortheenvironmental
and human health.
Environmental information
All unnecessary packaging has been omitted.
We have tried to make the packaging easy to
separateintothreematerials:cardboard(box),
polystyrene foam (buffer) and polyethylene
(bags,protectivefoamsheet.)
Your system consists of materials which can
be recycled and reused if disassembled by
a specialized company. Please observe the
local regulations regarding the disposal of
packagingmaterials,exhaustedbatteriesandold
equipment.
Trademark notice
Philips and the Philips’ Shield Emblem are
registered trademarks of Koninklijke Philips N.V.
and are used by WOOX Innovations Limited
under license from Koninklijke Philips N.V.
The Bluetooth
®
word mark and logos are
registered trademarks owned by Bluetooth
SIG,Inc.andanyuseofsuchmarksbyWOOX
Innovations is under license.
© 2013 CSR plc and its group companies.
The aptX
®
mark and the aptX logo are
trade marks of CSR plc or one of its group
companies and may be registered in one or
more jurisdictions.
The N Mark is a trademark or registered
trademarkofNFCForum,Inc.intheUnited
States and in other countries.
Copyright
Specicationsaresubjecttochangewithout
notice. WOOX reserves the right to change
products at any time without being obliged to
adjust earlier supplies accordingly.
Note
The type plate is located on the back of the system.
5EN
2 Your Bluetooth
Micro music
system
Congratulationsonyourpurchase,and
welcometoPhilips!Tofullybenetfromthe
supportthatPhilipsoffers,registeryourproduct
at www.philips.com/welcome.
IfyoucontactPhilips,youwillbeaskedforthe
model and serial number of this product. The
model number and serial number are on the
back of the main unit. Write the numbers here:
Model No. __________________________
Serial No. ___________________________
Introduction
With this device, you can:
• enjoyaudiofromdiscs,Bluetooth-enabled
devices,USBstoragedevices,orother
external devices;
• listen to FM radio stations.
You can enrich sound output with these sound
effects:
• Digital Sound Control (DSC)
• DBB (Dynamic Bass Boost)
• Full sound
The device supports these media formats:
What's in the box
Check and identify the contents of your
package:
• Main unit
• Remote control and two AAA batteries
• FM antenna
• AC power adaptor
• Printed materials
6 EN
Overview of the main unit
a Display panel
• Show the current status of the device.
b VOL+/VOL-
• Increase or decrease the volume level.
c /
• Skip to the previous or next track.
• Press and hold to search within a track.
• Tune to a radio stations.
d
• Press to eject the disc from the disc
compartment.
b
c
d
g
h
i
j
k
l
m
n
o
p
f
e
a
e NFC area
• Touch with an NFC compatible device
to set up Bluetooth connection
automatically.
f Disc compartment
g AUDIO-IN
• Connect to the 3.5mm audio output
socket of an external device.
h Bluetooth SETUP button/indicator
• (Press and hold) remove the existing
pairing information.
• Indicate the Bluetooth connection
status.
7EN
i
• Connect a USB storage device.
j
• Connect a headphone with a 3.5-mm
connector.
k
• Stop music play.
l
• Start,pause,orresumeplay.
m SOURCE
• Press repeatedly to select an audio
source.
n button/indicator
• Turn on the device.
• Switch the device to eco power
standby mode or normal standby
mode.
• Indicate the power status.
o DC IN
• Connect to the AC power adaptor.
p FM ANT
• Connect to the FM antenna.
Overview of the remote
control
a
• Turn on the device.
• Switch the device to eco power
standby mode or normal standby
mode.
b OPEN/CLOSE
• Press to eject the disc from the disc
compartment.
c TUNER/AUDIO IN
• Switch the source between FM tuner
and the 3.5mm audio input.
a
b
c
d
e
f
g
h
i
j
k
l
m
n
o
p
q
r
s
8 EN
d PRESET/ALBUM /
• Skip to the previous or next album.
• Select a preset radio station.
e /
• Skip to the previous or next track.
• Press and hold to search within a track.
• Tune to a radio station.
f
• Start,pause,orresumeplay.
g Bluetooth
• Switch to the Bluetooth source.
h MENU/
• Stop music play.
i Numeric keypad
j REPEAT/SHUFFLE
• Select a play mode.
k SETTINGS
• Access the menu of system settings.
l SOUND
• AccessthesoundsettingforDSC,
DBB,andfullsoundcontrol.
m SLEEP /SNOOZE
• Set the sleep timer or alarm timer.
n PROG/CLOCK
• Program radio stations.
• Set the clock.
o VOL +/-
• Increase or decrease the volume level.
p
• Mute or restore volume.
q DISPLAY/RDS
• Display play information.
• For selected FM radio stations: display
RDS information.
r USB
• Select the USB source.
s CD
• Switch to the CD source.
9EN
3 Before use
Connect the FM antenna
Note
Foroptimalreception,fullyextendtheantennaand
adjustitsposition,orconnectanoutdoorantenna.
This product does not support MW (medium wave)
radio reception.
• Connect the FM antenna to the FM ANT
socket on the back panel.
Connect power
Caution
Risk of product damage! Make sure that the power
supply voltage matches the voltage printed on the back
of the main unit.
Risk of electric shock! When you unplug the AC power
adaptor,alwayspulltheplug,neverthecord.
BeforeyouconnecttheACpoweradaptor,makesure
that you have completed all the other connections.
• Connect the AC power adaptor to
• the DC INsocketonthebackpanel,
and
• the wall outlet.
Install/replace the remote
control batteries
Caution
Riskofexplosion!Keepbatteriesawayfromheat,
sunshineorre.Neverdiscardbatteriesinre.
1 Open the battery compartment.
2 Insert 2 AAA batteries with correct
polarity (+/-) as indicated.
10 EN
3 Close the battery compartment.
Note
Before you press any function button on the remote
control,rstselectthecorrectsourcewiththeremote
control instead of the main unit.
If you do not use the remote control in a coming long
time,removethebatteries.
Forbetterreception,pointtheremotecontroldirectly
at the IR sensor on the front of the main unit.
11EN
4 Get started
Caution
Use of controls or adjustments or performance of
procedures other than herein may result in hazardous
radiation exposure or other unsafe operation.
Know the LED indicator status
LED indicator in the button
Indicator Status
(Solid) In standby mode
(Off) In operation or eco power
standby mode
LED indicator in the Bluetooth SETUP button
Indicator Status
(Blinking) Ready for Bluetooth pairing
(Solid) Connected through Bluetooth
Set clock
Note
Duringsetting,ifnoactionistakenwithin90seconds,
the device exits clock setting without saving the
previous operations.
You can also enter the hour and minute digits with the
numeric keypad.
1 Innormalstandbymode,pressPROG/
CLOCK to activate clock setting.
» 24HOUR (24-hour time format) blinks.
2 Press / to select 24HOURor
12HOUR(12-hourtimeformat),andthen
press PROG/CLOCKtoconrm.
» The hour digits blink.
» If you select 12HOUR as the time
format,PM or AM is displayed.
3 Press / repeatedly to set the
hour digits.
4 Press PROG/CLOCKtoconrm.
» The minute digits blink.
5 Press / repeatedly to set the
minute digits.
6 Press PROG/CLOCKtoconrmtheclock
setting.
» The set clock is displayed.
Tip
You can also synchronize the system clock with an
RDS radio station that transmits time signals (see
'Synchronize clock with RDS' on page 15).
Turn on
• Press .
» The unit switches to the last selected
source.
Switch to standby mode
• Press again to switch the unit to standby
mode.
» The clock (if set) is displayed on the
panel.
To switch to ECO standby mode:
• Press and hold for more than three
seconds.
» The display panel is dimmed.
Note
The unit switches to Eco Power Standby mode after 15
minutes in standby mode.
To switch between standby mode and ECO
standby mode:
• Press and hold for more than three
seconds.
12 EN
5 Play
Play a disc
Caution
Never insert any object other than a disc of 12-cm
diameter into the disc compartment.
1 Press SOURCE repeatedly to switch the
source to DISC.
• You can also press CD on the remote
control to switch the source.
2 Insert a disc into the disc compartment
with the printed side facing you.
» Play starts automatically after a few
seconds.
• Ifplaydoesnotstartautomatically,
Press to start play.
Play from a USB storage
device
Thisdeviceplays.mp3and.wmalesthatare
copied onto a supported USB storage device:
• Flash drive
• Memory card reader
• HDD: hard disc drive (This product
can detect only a portable HDD with
USB power peak current no more than
500 mA.)
Note
WOOX Innovations does not guarantee compatibility
with all USB storage devices.
NTFS(NewTechnologyFileSystem)lesystemisnot
supported.
1 Connect the USB storage device to the
socket.
2 Press SOURCE repeatedly to switch the
source to USB.
• You can also press USB on the remote
control to switch the source.
» Play starts automatically.
If play does not start automatically,
1 Press / to select a folder.
2 Press / toselectale.
3 Press to start play.
Control play
Duringplay,followtheinstructionsbelowto
control play.
Buttons Functions
Pause or resume play.
Stop play.
13EN
Buttons Functions
/ Skip to the previous or
next track.
Press and hold to rewind a
track or search forward fast
within a track.
/ Skip to the previous or
next album when one or
more album exit.
Enter the number of a track
to play it.
REPEAT/SHUFFLE Select an available play
mode.
• RPT 1: repeat the cur-
rent track
• RPT ALL: repeat all
tracks
• SHUFFLE: play tracks
randomly
• NORMAL: play tracks in
sequence
Play from Bluetooth-enabled
devices
Note
The effective operation range between the speaker
and your Bluetooth enabled device is approximately 10
meters (30 feet).
Any obstacle between the speaker and the Bluetooth
enabled device can reduce the operational range.
Compatibility with all Bluetooth devices is not
guaranteed.
The speaker can memorize up to 8 previously
connected Bluetooth devices.
Toenjoymusicthroughthespeakerwirelessly,
you need to pair your Bluetooth enabled device
with the speaker.
Choose your best Bluetooth pairing method
based on the preconditions listed below.
Precondition Pairing method
Your Bluetooth device sup-
ports both NFC (Near Field
Communication) and A2DP
(Advanced Audio Distribu-
tionProle).
Choose Option 1
(recommended)
or Option 2.
Your Bluetooth device only
supports A2DP (Advanced
AudioDistributionProle).
Choose Option
2.
• Beforepairingandconnection,youneed
to:
a press SOURCE on the speaker
repeatedly to select the Bluetooth
source.
Pair and connect
Option 1: Pair and connect through NFC
Near Field Communication (NFC) is a
technology that enables short-range wireless
communication between various NFC
compatibledevices,suchasmobilephonesand
IC tags.
WiththeNFCfunction,datacommunication
can be achieved easily just by touching the
relevant symbol or designated location on NFC
compatible devices.
Note
Compatibility with all NFC devices is not guaranteed.
1 Enable the NFC feature on your Bluetooth
enabled device (see the user manual of the
device for details).
2 Touch the NFC area of the external device
with the NFC area of the speaker until you
hear a beep.
» Aftersuccessfulpairingandconnection,
the indicator turns solid blue.
14 EN
Option 2: Pair and connect manually
1 OntheBluetoothenableddevice,search
for Bluetooth devices that can be paired
(see the user manual of the device).
2 Select 'Philips BTM8010' on your
Bluetooth enabled device and if necessary
input '0000' as the paring password.
» Aftersuccessfulpairingandconnection,
the Bluetooth SETUP indicator on the
topofthespeakerturnssolidblue,and
the speaker beeps.
Stream music through Bluetooth
• Play audio on the Bluetooth device
connected to the speaker.
» Audio streams from your Bluetooth
enabled device to the speaker.
Tip
If the Bluetooth enabled device also supports AVRCP
(AudioVideoRemoteControlProle),youcanuse
some basic operation buttons of the speaker (such
astheplay/pause,stopandprevious/nextbuttons)to
control music play.
To disconnect the Bluetooth-enabled device:
• Deactivate Bluetooth on your device; or
• Move the device beyond the
communication range.
To clear Bluetooth pairing history:
• Press and hold Bluetooth SETUP on the
speaker for three seconds.
» The current Bluetooth connection is
disconnected.
15EN
6 Listen to FM
radio
Tune to an FM radio station
Note
Make sure that you have connected and fully extended
the FM antenna.
1 Press SOURCE or TUNER/AUDIO IN
repeatedly to switch the source to FM
tuner.
» FMandthecurrentfrequencyare
displayed.
2 Press and hold / until SEARCH +
or SEARCH - (Searching) is displayed.
» The FM tuner tunes to a station with
strong reception.
• Totunetoastationataspecic
frequency,press / repeatedly
untilthedesiredfrequencyisdisplayed.
Program radio stations
automatically
Note
You can program a maximum of 20 preset radio
stations.
• Press and hold PROG/CLOCK until
AUTO SRH (automatic search) is
displayed.
» All available stations are programmed
in the order of waveband reception
strength.
» Therstprogramedradiostationis
broadcast automatically.
Program radio stations
manually
Note
You can program a maximum of 20 preset radio
stations.
Tooverwriteaprogrammedradiostation,store
anotheronewithitssequencenumber.
1 Tune to a radio station.
2 Press PROG/CLOCK to activate
programming.
» PXX(XXindicatesthesequence
number) blinks.
3 Press PRESET/ALBUM / to allocate
asequencenumberfrom01to20to
thisradiostation,andthenpressPROG/
CLOCKtoconrm.
» Thepresetsequencenumberand
thefrequencyofthisradiostationare
displayed.
4 Repeat steps 1-3 to program more
stations.
Tune to a preset radio station
• Press PRESET/ALBUM / to select
thesequencenumberofthatpresetradio
station.
• Enteritssequencenumberwithnumeric
keypad.
16 EN
Display RDS information
RDS (Radio Data System) is a service
that allows FM stations to show additional
information.
1 Tune to an RDS radio station.
2 Press DISPLAY/RDS repeatedly to scroll
through available information:
• Station name
• Program type such as NEWS(news),
SPORT(sport),POP M (pop music)...
• Text messages
• RDS clock
• Frequency
Synchronize clock with RDS
You can synchronize system clock with an RDS
radio station.
1 Tune to an RDS radio station that
transmits time signals.
2 Press and hold DISPLAY/RDS until CT
SYNC is displayed.
» The system reads RDS time
automatically.
» Ifnotimesignalisreceived,NO CT is
displayed.
Note
The accuracy of the clock depends on the RDS radio
station.
17EN
7 Other features
Set alarm timer
You can use this system as an alarm clock.
Note
Make sure that you have set the clock correctly.
Ifotheralarmsourcesareunavailable,thisproduct
switches to FM mode automatically.
1 Innormalstandbymode,pressandhold
SLEEP/SNOOZE until DISC blinks.
2 Press / repeatedly to select an
alarm source.
3 Press SLEEP/SNOOZEtoconrm.
» The hour digits blink.
4 Press / repeatedly to set
thehourdigits,andthenpressSLEEP/
SNOOZEtoconrm.
» The minute digits blink.
5 Press / tosettheminutedigits,
and then press SLEEP/SNOOZE to
conrm.
» A (alarm) and the current time is
displayed.
• Tocheckthealarmtime,pressSLEEP/
SNOOZE in normal standby mode.
• Todeactivatethealarmtimer,press
SLEEP/SNOOZE repeatedly in
normal standby mode until A (alarm)
disappears.
• Tore-activatethealarmtimer,press
SLEEP/SNOOZE repeatedly in normal
standby mode until A (alarm) is
displayed.
• Topausethealarm,pressSLEEP/
SNOOZEonce.Afterveminutes,the
alarm sounds again.
• Tostopthealarm,pressandhold
SLEEP/SNOOZE until ALM STOP is
displayed.
Tip
You can set the hour/minute digits by the numeric
keypad.
Set sleep timer
• Inoperationmode,pressSLEEP/SNOOZE
repeatedlytoselectapresetperiod(30,
60,90,or120minutes).
• Todeactivatethesleeptimer,pressSLEEP/
SNOOZE repeatedly until SLEEPOFF is
displayed.
Listen to an external audio
device
Youcanlistentoanexternalaudiodevice,for
example,MP3playerthroughthisproduct.
1 Press TUNER/AUDIO IN repeatedly to
switch the source to AUDIO-IN.
2 Connect a 3.5mm audio cable to
• the AUDIO-IN socket on the top of
thedevice,and
• the headphone socket on the external
device(forexample,MP3player).
3 Play the external device. (See the user
manual of external device).
AUDIO IN
18 EN
Listen through headphone
• Plug a headphone with a 3.5mm plug into
the socket on the top panel.
19EN
8 Adjust sound
The following operations are applicable to all
supported media.
Adjust volume level
• Ontheremotecontrol,pressVOL +/-
repeatedly.
• Onthemainunit,pressVOL+/VOL-
repeatedly.
Mute sound
• Press to mute or restore the sound.
Adjust default sound settings
1 Press SOUND repeatedly to select one of
the setting menus.
• DSC:Selectapresetsoundequalizer.
• DBB: Select a DBB sound effect or
disable it.
• FULL SOUND: Enable to enjoy full-
range sound output.
2 Press / to select an option.
  • Page 1 1
  • Page 2 2
  • Page 3 3
  • Page 4 4
  • Page 5 5
  • Page 6 6
  • Page 7 7
  • Page 8 8
  • Page 9 9
  • Page 10 10
  • Page 11 11
  • Page 12 12
  • Page 13 13
  • Page 14 14
  • Page 15 15
  • Page 16 16
  • Page 17 17
  • Page 18 18
  • Page 19 19
  • Page 20 20
  • Page 21 21
  • Page 22 22
  • Page 23 23
  • Page 24 24
  • Page 25 25
  • Page 26 26

Philips BTM8010 User manual

Category
Home audio sets
Type
User manual

Philips BTM8010 is a Bluetooth Micro music system that lets you enjoy audio from various sources and listen to FM radio. Play music from discs, Bluetooth-enabled devices, USB storage devices, or connect external audio devices via a 3.5mm jack. Enhance your listening experience with sound effects like Digital Sound Control, Dynamic Bass Boost, and Full sound.

Ask a question and I''ll find the answer in the document

Finding information in a document is now easier with AI