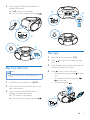
Philips AZ329 offers a versatile audio experience. Enjoy your favorite CDs, MP3s from USB or SD card, or simply tune in to FM radio stations. It also features a cassette deck for those who cherish their tape collection. With its compact size and ease of use, the AZ329 is an ideal music companion for any room.
Philips AZ329 offers a versatile audio experience. Enjoy your favorite CDs, MP3s from USB or SD card, or simply tune in to FM radio stations. It also features a cassette deck for those who cherish their tape collection. With its compact size and ease of use, the AZ329 is an ideal music companion for any room.


-
 1
1
-
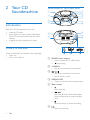
 2
2
-
 3
3
-
 4
4
-
 5
5
-
 6
6
-
 7
7
-
 8
8
-
 9
9
-
 10
10
-
 11
11
-
 12
12
-
 13
13
-
 14
14
-
 15
15
-
 16
16
-
 17
17
-
 18
18


Philips AZ329 offers a versatile audio experience. Enjoy your favorite CDs, MP3s from USB or SD card, or simply tune in to FM radio stations. It also features a cassette deck for those who cherish their tape collection. With its compact size and ease of use, the AZ329 is an ideal music companion for any room.
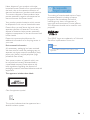
Ask a question and I''ll find the answer in the document
Finding information in a document is now easier with AI
