Page is loading ...

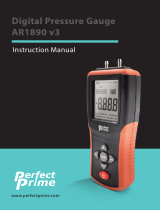
Digital Manometer
AR1890
Instruction Manual

CONTENTS
P. 1
1. Overview
2. Performance Index
3. Buttons Description
4. Display Description
5. Degree of Accuracy And
Range of Units
6. Operation
7. Error Codes
8. Battery Replacement
9. Safety Precaution And
Consideration
.................................................................................... 2
................................................................. 3
................................................................ 4
................................................................. 5
........................................................ 6
.
.............................................................................. 7 - 8
................................................................................. 9
.............................................................. 9
......................................................... 10

1. OVERVIEW
P. 2
The AR1890 digital manometer can measure dierent pressure levels
with high accuracy (details below). In addition, there are 11 units that
can be selected:
1. inH2O
5. kPa
9. ftH2O
Paired with a hose connection, the AR1890 can be used for:
Easy operation and clear reading are the major features of AR1890.
Therefore, it is doubtlessly an indispensable testing tool for HVAC
technician, maintenance engineers and science researchers.
1. Testing ventilation
2. Air conditioning system
3. Spot checking
4. Air conditions in a room
5. Any gas pressure system troubleshooting.
2. psi
6. inHg
10. cmH2O
3. bar
7. mmHg
11. kgcm
4. mbar
8. ozin2

2. PERFORMANCE INDEX
P. 3
Display
Accuracy
Reliability
Linearity/Hysteresis
Maximum Pressure
Response Time
Low Battery Indicator
Over Range Indicator
Under Range Indicator
Operating Temperatures
Storage Temperatures
Power Supply
Standard Accessories
Dual LCD
±0.3%FSO(25°C)
±0.2%FSO(Max+/-0.5%FSO)
±0.29%FSO
10 psi
0.5 seconds typical
Yes
Err.1
Err.2
32°F to 122°F (0 to 50°C)
14°F to 140°F (-1 to 60°C)
1 X 9V Battery (included) or
External 9VDC
Pouch & Tubing

Manometer
Auto-Off
UNITS
HOLD DIF
P. 4
3. BUTTONS DESCRIPTION
2
3
4
a
b
1UNITS
DIF
HOLD
ON/OFF
REC
BACKLIGHT
The meter has six buttons:
1
2
a
b
3
4

-55.00
00:00:05
1
4
5
6
3
4. DISPLAY DESCRIPTION
P. 5
2
3
4
5
6
7
8
1Hold Function
Dierential mode
Primary Data Screen
Record Mode
MAX/MIN/AVG
Low Battery Indicator
Pressure Unit Indicator
Relative Time Clock
8
7
2

Function Range Accuracy
inH2O
Psi
Mbar
kPa
inHg
mmHg
Ozin2
ftH2O
cmH2O
Kgcm2
Bar
±55.40
±2.000
±137.8
±13.79
±4.072
±103.4
±32.00
±4.612
±140.6
±0.140
±0.137
0.01
0.001
0.1
0.01
0.001
0.1
0.01
0.001
0.1
0.001
0.001
5. DEGREE OF ACCURACY AND
RANGE OF UNITS
P. 6

6. OPERATION
P. 7
1. ON/OFF button:
- Press the ON / OFF button to turn on/o manometer.
- When turned on, the screen will be displayed for about two
seconds and the normal measurement mode will appear
afterwards.
2. Clearance:
- If there is no input deferential pressure, the manometer will
not be clear the data automatically.
- When manually clearance is needed, press the HOLD button
for about ve Seconds,
→ the screen will show ---- then it will be cleared.
3. UNITS button:
- Press the UNITS button, units at the bottom of the screen will
change.
- These units include:
4. DIF button:
- Press the DIF button, the pressure value will subtract the
pressure value from the original value.
1. inH2O
5. kPa
9. ftH2O
2. psi
6. inHg
10. cmH2O
3. bar
7. mmHg
11. kgcm
4. mbar
8. ozin2

6. OPERATION
P. 8
5. HOLD button:
- Press the HOLD button, the current measurement result will
be kept.
- Press once more to exit HOLD function.
6. REC button:
- Press this button intermittently, the maximum, minimum,
average result from process of recording the measuring will
be displayed.
- Press and hold the button for about 5 seconds and it will
stop recording.
- Other function buttons are locked and can not be used
during recording.
7. Backlit button:
- Press this button, the backlight will turn on.
- Press the button again to turn o the backlight.
8. Automatic power-o function:
- The manometer will automatically power o if no buttons
has been pressed for 25 minutes.
- If you want to turn o function of automatic power-o:
1. Press HOLD button.
2. Press the ON / OFF button to start.
3. LCD will show "ON"
→ the function of automatic power-o turned o.

7. ERROR CODES /
8. BATTERY REPLACEMENT
P. 9
An error message will appear on screen if the meter fails an internal
diagnostic test.
1. Err. 1: Pressure value is over the read range.
2. Err. 2: Pressure value is below the read range.
ERROR CODES
When the battery power is low, “BAT” will display on the screen to
remind you to replace the 9V battery.
BATTERY REPLACEMENT

9. SAFETY PRECAUTION AND
CONSIDERATION
P.10
• If product operates abnormally, stop using immediately.
• Please test the manometer before usage to ensure proper
operation.
• Always ensure that the connecting hoses are free from kinks,
blockage or splits.
• While using the manometer, if you suspect gas is leaking or
smell gas:
1. Turn o gas supply and ventilate the aected areas.
2. Identify and iron out the source of leaking before using the
product again.
• Do not disassemble or modify the manometer in any way.
Otherwise, accident and injury may occur.

CUSTOMER SERVICE INQUIRIES
Your emails are important to us so we strive to reply all
inquiries and emails within 24 hours. In exceptional cases,
we may require more time to respond.
Thank you for your understanding.
For more information about our products and services,
please send us an email:
For B2B or project-based application, please send an email:
FOR MORE INFORMATION ABOUT PERFECTPRIME PLEASE VISIT
OUR ABOUT US PAGE AND FEEL FREE TO BROWSE.
Scan QR Code for the Product
Manual page (Multi-Language
available for certain products)
Scan QR Code for the Youtube
channel for video manual
Scan QR Code to register the
product for 1 year warranty

HORMES LIMITED
G/F UNIT 3, 61 GLENTHORNE ROAD,
LONDON W6 0LJ UNITED KINGDOM
+44 203 7695377
Retailer
Email
Address
Telephone
/


