Page is loading ...

1
v
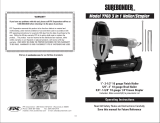
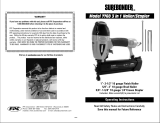
PNEUMATIC NAILER FOR COMPRESSOR

2
Security instructions
Caution
Read all safety warnings and all instructions. Failure to follow all warnings and
instructions may result in electrical shock, fire, and/or serious injury.
Note: Save all warnings and instructions for future reference. Due to our ongoing R&D&I program,
the specifications in this document are subject to change without notice.
• Keep children and pets away. All children must be kept away from the work area.
Don't let them use the tool.
• Wear safety glasses and ear protection. Pneumatic tool operators and others in
the work area should always wear proper safety PPE to prevent injury. Hearing
protection should also be worn, as noise could damage hearing. (See fig. 1.)
• Never use oxygen, fuel or any other cylinder gas as a power source or it could
cause an explosion and serious personal injury. (See figure 2.)
• Do not connect the tool to compressed air whose pressure exceeds 120 psi.
• Do not place the air hose too long in the work area to prevent the operator from
tripping unexpectedly. Make sure all connections are tight.
• Carry the tool by the handle only. Do not hold the safety trigger down to prevent
accidental firing.
• Keep the tool pointed away from yourself and others at all times and keep your
hands and any part of your body away from the rear to protect yourself from
possible injury.
• Disconnect the tool from the air supply before loading nails/staples to prevent
them from firing during connection. (See figure 3.)
• Do not keep the safety trigger depressed during charging to prevent accidental
firing and serious injury.
• Disconnect the tool from the air supply hose and shut off the compressor before
servicing, modifying accessories, or when not in operation.
• Do not use nails/staples on scaffolding, ladders, or similar construction.
• Do not drive nails/staples near the edge of the work piece. The workpiece will
split and the nail/staple will fly or ricochet causing personal injury.
• Do not install nails/staples over another nail/staple. There is a risk of ricochet and
cause personal injury.
• Never use a tool that has air leaks, missing or damaged parts, or requires repair.
Make sure all screws are tight.
• Perform daily inspections of the free movement of the trigger, the safety
mechanism and the spring to ensure that the tool can function properly.
• Use only manufacturer approved parts and accessories.

3
Safety rules for correct use
Double insulation for additional protection
Please read the instruction manual before use.
CE conformity.
Wear safety glasses, hearing protection and a dust mask.
Waste electrical products must not be disposed of with household waste.
Please recycle at the appropriate facilities. Check with your local
authority or retailer for recycling advice.
Security alert. Use only accessories supported by the manufacturer.
Other risks
Even when the power tool is used as prescribed, it is not possible to eliminate all residual
risk factors:
a. Health defects resulting from vibration emission if the power tool is used for a
longer period of time or if it is not managed and maintained properly.
b. Injuries and property damage due to broken fixtures breaking suddenly.
Caution
This power tool produces an electromagnetic field during operation. This field can, in
some circumstances, interfere with active or passive medical implants.
To reduce the risk of serious injury, we recommend that persons with medical implants
consult their physician before using this power tool.
If the cable is damaged or cut during work, do not touch the cable, immediately unplug
the tool. Do not use the machine with a damaged connection cable.
The machine must not be damp and must not be used in a humid environment.
Attention
Safe operation of this machine is only possible when the operating or safety
information is fully read and the instructions contained therein are strictly
followed.

4
Technical data
Data sheet
Load capacity
100 pcs
Nail length
15-50mm (5/8” – 2”)
Staple length
16-40mm (5/8”-1 5/8”)
Nail size
18Ga (1.25 x 1.00mm)
Staple size
18Ga (1.25 x 1.00mm)
Nailer pressure
4-7Bar (58-101.5PSI)
Air flow
1/4” NPT
Dimension
55x245x250mm
Weight
1.5kg
Set up
Instructions for use
• The TAT81501 drives Ga18 finishing nails from 15mm to 50mm in length and
Ga18 staples from 16mm to 40mm in length.
• 2-in-1 magazine, fires staples and finishes nails without adjustment.
• The large cast aluminum body provides more power to easily drive nails into
hardwood.
• Ergonomic rubber handle for better control and comfort even during prolonged
use.
• It features a 360 degree exhaust port that can be adjusted in any direction.
• The narrow tip is ideal for window and door trim, exterior trim and cabinetry, trim
paneling, decorative molding, furniture making, etc.
Air supply
• Use clean, dry, regulated compressed air at 4-7 bar (58-101.5 psi)
• Never exceed the maximum and minimum pressure. Too low or too high pressure
could cause noise, rapid wear or misfire.
• When connecting the air supply, always keep your hands and body away from
the discharge area of the tool.
• A filter-regulator-lubricator is required and should be located as close to the tool
as possible.
• Keep the air filter clean. A dirty filter will reduce air pressure to the tool, resulting
in reduced power and efficiency.
• For best performance, install a quick connector on your tool and a quick coupler
on the hose if possible.
• Make sure all air supply system connections are sealed to prevent air loss.

5
1. quick connector
2. quick coupler
3. Air hose
4. quick connector
5. Quick coupler
6. Lubricator
7. Regulator
8. Filter
Load and operation fastener
Caveat
Always disconnect the tool from compressed air before charging it. When you load the
tool, always point the tool away from yourself and others. Be sure not to hold the tool
with the trigger pulled while loading the tool.
• Insert a strip of nails/staples into the magazine keeping it down.
• Release latch and pusher, slide pusher against nails.
• Connect the tool to the air supply. Make sure the air pressure is in the correct
range indicated on the data sheet.
• Then test the drilling depth on a sample piece of wood before use. If the
nails/staples are driving too far or not far enough, adjust the regulator to provide
less air pressure or more air pressure.
• Never use the tool unless the safety tip is in contact with the work piece. Do not
use the tool without nails/staples or you may damage the tool.
• Never fire nails/staples into the air as they could injure the operator or bystanders
and may result in damage to the tool.
• The air tool is equipped with a safety support mechanism that disables the tool
unless the safety support is pushed against the work. Hold the nailer steady and
press the safety brace onto the workpiece where the nail/staple will be applied.
Pull the trigger to drive the nail/staple into the work piece.
• This operating procedure provides rapid nail/staple placement. Never use the tool
unless the safety support is in contact with the work piece.
Maintenance, cleaning and service
Maintenance and cleaning
Before doing any work on the machine itself, unplug the power cord.
• For safe and proper operation, always keep the machine and ventilation slots
clean.
• Should the machine fail despite careful manufacturing and testing procedures,
the repair must be carried out by an official dealer.
Neumatic
tools
Air
compresso
Cut valve

6
Caveat
Disconnect the tool from the air compressor before adjusting, clearing jams, servicing,
relocating, and when not in operation.
• Regular lubrication, if your tool does not use the automatic in-line oiler, put 2-6
drops of air tool oil into the air inlet before each working day or after 2 hours of
continuous use, depending on the characteristics of the tool. workpiece or type
of nails/staples.
• Check and replace all o-rings, seals, etc. worn or damaged. Tighten all screws
and covers to avoid material and personal injury.
• Inspect trigger and safety mechanism to ensure safe system is complete and
functional: no loose or missing parts, no glued or damaged parts.
• Keep the charger and tool tip clean and free of dirt, lint, or abrasive particles.
Problem solving
Caveat
If any of the following symptoms appear during operation, stop using the tool immediately
or serious personal injury may result. Only a qualified person or authorized service center
may repair or replace the tool.
Disconnect the tool from the air supply before attempting to repair or adjust it. When
replacing O-rings or cylinder, lubricate with air tool oil before assembly.
Symptom
possible problem
Solution
Air leak near top of
tool or trigger area
1. Damaged trigger valve o-ring.
2. Trigger valve head is damaged.
3. Damaged trigger valve stem, seals,
or o-ring.
1. Check and replace the o-ring.
2. Check and replace.
3. Check and replace trigger valve
stem, gaskets, or O-ring.
Air leak near bottom
of tool
1. Loose screws.
2. Worn or damaged O-rings or other
seals.
1. Tighten the screws.
2. Check and replace o-rings or
other gaskets.
Air leak between
cylinder body and
cylinder head
1. Loose screws.
2. Worn or damaged O-rings or other
seals.
1. Tighten the screw.
2. Check and replace o-rings or
other gaskets.
Nail/staple depth too
deep
1. Worn shock absorber.
2. Air pressure is too high.
1. Replace damper.
2. Adjust the air pressure.
The tool is not
working properly: it
cannot drive the
nail/staple or it is slow
1. Inadequate air supply.
2. Improper lubrication.
3. Worn or damaged O-rings or other
seals.
4. Compressor exhaust is clogged.
1. Check for adequate air supply.
2. Put 2 or 6 drops of oil on the air
inlet.
3. Check and replace o-rings or
other gaskets.
4. Replace damaged parts.

7
The tool jumps
nails/staples
1. Worn shock absorber or damaged
spring.
2. Dirt on faceplate.
3. Dirt or damage prevents nails/staples
from moving freely in the magazine.
4. Piston o-ring worn, dry or lack of
lubrication.
5. Leaking cylinder head gaskets.
1. Replace damper or drive spring.
2. Clean the transmission channel
in the faceplate.
3. The charger needs to be cleaned.
4. It is necessary to replace the O-
ring. And lubricate.
5. Replace gasket.
tool jam
1. Incorrect or damaged nails/staples.
2. Driver guide damaged or worn.
3. Magazine or tip screw is loose.
4. The charger is dirty.
1. Change and use the correct
nail/staple.
2. Check and replace.
3. Tighten the charger.
4. Clean the charger.
Environment
• Do not dispose of electric vacuum cleaners as unsorted municipal waste, use
separate collection facilities.
• Contact your local authority for information on available collection systems.
• If electric vacuum cleaners are disposed of in landfills, hazardous substances
can seep into the groundwater and enter the food chain, harming your health and
well-being.
• Recycle raw materials instead of disposing of them as waste.
• The machine, accessories and packaging must be sorted for environmentally
friendly recycling.
Exploded view

8
PNEUMATIC NAILER FOR COMPRESSOR
/