Page is loading ...

April 2010 Rev. 1, 3/18
©2010-2018 Fluke Corporation. All rights reserved.
All product names are trademarks of their respective companies.
Specifications are subject to change without notice.
1550C/1555
Insulation Tester
Users Manual

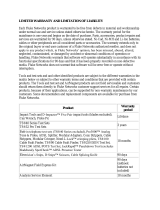
LIMITED WARRANTY AND LIMITATION OF LIABILITY
Each Fluke product is warranted to be free from defects in material and workmanship under normal use and service. The warranty period is three years and begins
on the date of shipment. Parts, product repairs, and services are warranted for 90 days. This warranty extends only to the original buyer or end-user customer of a
Fluke authorized reseller, and does not apply to fuses, disposable batteries, or to any product which, in Fluke's opinion, has been misused, altered, neglected,
contaminated, or damaged by accident or abnormal conditions of operation or handling. Fluke warrants that software will operate substantially in accordance with its
functional specifications for 90 days and that it has been properly recorded on non-defective media. Fluke does not warrant that software will be error free or operate
without interruption.
Fluke authorized resellers shall extend this warranty on new and unused products to end-user customers only but have no authority to extend a greater or different
warranty on behalf of Fluke. Warranty support is available only if product is purchased through a Fluke authorized sales outlet or Buyer has paid the applicable
international price. Fluke reserves the right to invoice Buyer for importation costs of repair/replacement parts when product purchased in one country is submitted for
repair in another country.
Fluke's warranty obligation is limited, at Fluke's option, to refund of the purchase price, free of charge repair, or replacement of a defective product which is returned
to a Fluke authorized service center within the warranty period.
To obtain warranty service, contact your nearest Fluke authorized service center to obtain return authorization information, then send the product to that service
center, with a description of the difficulty, postage and insurance prepaid (FOB Destination). Fluke assumes no risk for damage in transit. Following warranty repair,
the product will be returned to Buyer, transportation prepaid (FOB Destination). If Fluke determines that failure was caused by neglect, misuse, contamination,
alteration, accident, or abnormal condition of operation or handling, including overvoltage failures caused by use outside the product’s specified rating, or normal
wear and tear of mechanical components, Fluke will provide an estimate of repair costs and obtain authorization before commencing the work. Following repair, the
product will be returned to the Buyer transportation prepaid and the Buyer will be billed for the repair and return transportation charges (FOB Shipping Point).
THIS WARRANTY IS BUYER'S SOLE AND EXCLUSIVE REMEDY AND IS IN LIEU OF ALL OTHER WARRANTIES, EXPRESS OR IMPLIED, INCLUDING BUT
NOT LIMITED TO ANY IMPLIED WARRANTY OF MERCHANTABILITY OR FITNESS FOR A PARTICULAR PURPOSE. FLUKE SHALL NOT BE LIABLE FOR
ANY SPECIAL, INDIRECT, INCIDENTAL OR CONSEQUENTIAL DAMAGES OR LOSSES, INCLUDING LOSS OF DATA, ARISING FROM ANY CAUSE OR
THEORY.
Since some countries or states do not allow limitation of the term of an implied warranty, or exclusion or limitation of incidental or consequential damages, the
limitations and exclusions of this warranty may not apply to every buyer. If any provision of this Warranty is held invalid or unenforceable by a court or other decision-
maker of competent jurisdiction, such holding will not affect the validity or enforceability of any other provision.
11/99
Fluke Corporation
P.O. Box 9090
Everett, WA 98206-9090
U.S.A.
Fluke Europe B.V.
P.O. Box 1186
5602 BD Eindhoven
The Netherlands
ООО «Флюк СИАЙЭС»
125167, г. Москва, Ленинградский
проспект дом 37,
корпус 9, подъезд 4, 1 этаж

i
Title Page
Introduction. . . . . . . . . . . . . . . . . . . . . . . . . . . . . . . . . . . . . . . . . . . . . . . . . . . . . . . . . . . . . . . . . . . . . . . . . . . . . .1
How to Contact Fluke . . . . . . . . . . . . . . . . . . . . . . . . . . . . . . . . . . . . . . . . . . . . . . . . . . . . . . . . . . . . . . . . . . . . . .1
Safety Information . . . . . . . . . . . . . . . . . . . . . . . . . . . . . . . . . . . . . . . . . . . . . . . . . . . . . . . . . . . . . . . . . . . . . . . .2
Before You Start. . . . . . . . . . . . . . . . . . . . . . . . . . . . . . . . . . . . . . . . . . . . . . . . . . . . . . . . . . . . . . . . . . . . . . . . . .5
The Tester . . . . . . . . . . . . . . . . . . . . . . . . . . . . . . . . . . . . . . . . . . . . . . . . . . . . . . . . . . . . . . . . . . . . . . . . . . . . . .5
Pushbuttons. . . . . . . . . . . . . . . . . . . . . . . . . . . . . . . . . . . . . . . . . . . . . . . . . . . . . . . . . . . . . . . . . . . . . . . . . . .6
Power On/Off. . . . . . . . . . . . . . . . . . . . . . . . . . . . . . . . . . . . . . . . . . . . . . . . . . . . . . . . . . . . . . . . . . . . . . . . . .6
Display. . . . . . . . . . . . . . . . . . . . . . . . . . . . . . . . . . . . . . . . . . . . . . . . . . . . . . . . . . . . . . . . . . . . . . . . . . . . . . .7
Charge the Battery . . . . . . . . . . . . . . . . . . . . . . . . . . . . . . . . . . . . . . . . . . . . . . . . . . . . . . . . . . . . . . . . . . . . .7
Guard Terminal Use . . . . . . . . . . . . . . . . . . . . . . . . . . . . . . . . . . . . . . . . . . . . . . . . . . . . . . . . . . . . . . . . . . . .8
Measurements . . . . . . . . . . . . . . . . . . . . . . . . . . . . . . . . . . . . . . . . . . . . . . . . . . . . . . . . . . . . . . . . . . . . . . . . . . .9
Connect to the Circuit Under Test . . . . . . . . . . . . . . . . . . . . . . . . . . . . . . . . . . . . . . . . . . . . . . . . . . . . . . . . . .9
Before an Insulation Test. . . . . . . . . . . . . . . . . . . . . . . . . . . . . . . . . . . . . . . . . . . . . . . . . . . . . . . . . . . . . . . .10
Preset Test Voltage Selection . . . . . . . . . . . . . . . . . . . . . . . . . . . . . . . . . . . . . . . . . . . . . . . . . . . . . . . .10
Program a Test Voltage. . . . . . . . . . . . . . . . . . . . . . . . . . . . . . . . . . . . . . . . . . . . . . . . . . . . . . . . . . . . .10
Select a Ramp or Steady-State Test. . . . . . . . . . . . . . . . . . . . . . . . . . . . . . . . . . . . . . . . . . . . . . . . . . .11
Set a Timed Test . . . . . . . . . . . . . . . . . . . . . . . . . . . . . . . . . . . . . . . . . . . . . . . . . . . . . . . . . . . . . . . . . .11
Polarization Index (PI) . . . . . . . . . . . . . . . . . . . . . . . . . . . . . . . . . . . . . . . . . . . . . . . . . . . . . . . . . . . . . .11
Dielectric Absorption Ratio . . . . . . . . . . . . . . . . . . . . . . . . . . . . . . . . . . . . . . . . . . . . . . . . . . . . . . . . . .12
Capacitance. . . . . . . . . . . . . . . . . . . . . . . . . . . . . . . . . . . . . . . . . . . . . . . . . . . . . . . . . . . . . . . . . . . . . .12
Table of Contents

1550C/1555
Users Manual
ii
Insulation Test . . . . . . . . . . . . . . . . . . . . . . . . . . . . . . . . . . . . . . . . . . . . . . . . . . . . . . . . . . . . . . . . . . . . . . . 12
Store Test Results . . . . . . . . . . . . . . . . . . . . . . . . . . . . . . . . . . . . . . . . . . . . . . . . . . . . . . . . . . . . . . . . 13
View Test Results Stored in Memory. . . . . . . . . . . . . . . . . . . . . . . . . . . . . . . . . . . . . . . . . . . . . . . . . . 14
Download Test Results . . . . . . . . . . . . . . . . . . . . . . . . . . . . . . . . . . . . . . . . . . . . . . . . . . . . . . . . . . . . 15
Delete Test Results . . . . . . . . . . . . . . . . . . . . . . . . . . . . . . . . . . . . . . . . . . . . . . . . . . . . . . . . . . . . . . . 16
Maintenance . . . . . . . . . . . . . . . . . . . . . . . . . . . . . . . . . . . . . . . . . . . . . . . . . . . . . . . . . . . . . . . . . . . . . . . . . . . 16
Cleaning. . . . . . . . . . . . . . . . . . . . . . . . . . . . . . . . . . . . . . . . . . . . . . . . . . . . . . . . . . . . . . . . . . . . . . . . . . . . 16
Replaceable Parts and Accessories . . . . . . . . . . . . . . . . . . . . . . . . . . . . . . . . . . . . . . . . . . . . . . . . . . . . . . 17
General Specifications . . . . . . . . . . . . . . . . . . . . . . . . . . . . . . . . . . . . . . . . . . . . . . . . . . . . . . . . . . . . . . . . . . . 18
Environmental Specifications . . . . . . . . . . . . . . . . . . . . . . . . . . . . . . . . . . . . . . . . . . . . . . . . . . . . . . . . . . . . . . 18
Electrical Specifications . . . . . . . . . . . . . . . . . . . . . . . . . . . . . . . . . . . . . . . . . . . . . . . . . . . . . . . . . . . . . . . . . . 20
Principles of Measurement and Resistance . . . . . . . . . . . . . . . . . . . . . . . . . . . . . . . . . . . . . . . . . . . . . . . . . . . 21

1
Introduction
The Fluke 1550C and 1555 Insulation Testers (the Tester or Product)
are high-voltage insulation testers to validate general circuits, such as
switchgear, motors, and cables.
The Tester features:
•
Large liquid crystal display (LCD)
•
Preset test voltages: 250 V, 500 V, 1000 V, 2500 V, 5000 V,
(10 000 V 1555 only)
•
Programmable test voltages: 250 V to 10 000 V (50/100 V steps)
•
Resistance measurement: 200 kΩ to 2 TΩ
•
Polarization Index (PI)
•
Dielectric Absorption Ratio (DAR or DAR [CN])
•
Ramp mode that linearly increases (100 V/s) the applied test
voltage
•
Test timer and storage for test results with user-defined ID tag
•
Breakdown voltage indication
•
Rechargeable lead-acid battery
•
Auto shutoff after 30 minutes of inactivity
•
Infrared (IR) port for downloading test data
•
PC software (supplied)
How to Contact Fluke
To contact Fluke, use one of these telephone numbers:
•
USA: 1-800-760-4523
•
Canada: 1-800-36-FLUKE (1-800-363-5853)
•
Europe: +31 402-675-200
•
Japan: +81-3-6714-3114
•
Singapore: +65-6799-5566
•
China: +86-400-921-0835
•
Brazil: +55-11-3530-8901
•
Anywhere in the world: +1-425-446-5500
Or, visit Fluke's website at www.fluke.com.
To register your Product, visit http://register.fluke.com
.
To view, print, or download the latest manual supplement, visit
http://us.fluke.com/usen/support/manuals.

1550C/1555
Users Manual
2
Safety Information
A Warning identifies hazardous conditions and procedures that are
dangerous to the user. A Caution identifies conditions and procedures
that can cause damage to the Product or the equipment under test.
XW Warning
To prevent possible electrical shock, fire, or personal
injury:
•
Carefully read all instructions.
•
Read all safety information before you use the Product.
•
Do not alter the Product and use only as specified, or
the protection supplied by the Product can be
compromised.
•
Do not use the Product around explosive gas, vapor, or
in damp or wet environments.
•
Do not use the Product if it is altered or damaged.
•
Do not use the Product if it operates incorrectly.
•
Use Product-approved measurement category (CAT),
voltage, and amperage rated accessories (probes, test
leads, and adapters) for all measurements.
•
Do not exceed the Measurement Category (CAT) rating
of the lowest rated individual component of a Product,
probe, or accessory.
•
Do not use in CAT III or CAT IV environments without
the protective cap installed on test probe. The
protective cap decreases the exposed probe metal to
<4 mm. This decreases the possibility of arc flash from
short circuits.
•
Comply with local and national safety codes. Use
personal protective equipment (approved rubber
gloves, face protection, and flame-resistant clothes) to
prevent shock and arc blast injury where hazardous
live conductors are exposed.
•
Examine the case before you use the Product. Look for
cracks or missing plastic. Carefully look at the
insulation around the terminals.
•
Do not use test leads if they are damaged. Examine the
test leads for damaged insulation and measure a
known voltage.
•
Do not touch voltages >30 V ac rms, 42 V ac peak, or
60 V dc.
•
Do not apply more than the rated voltage between the
terminals or between each terminal and earth ground.
•
Measure a known voltage first to make sure that the
Product operates correctly.
•
Limit operation to the specified measurement category,
voltage, or amperage ratings.

Insulation Tester
Safety Information
3
•
Remove all probes, test leads, and accessories that are
not necessary for the measurement.
•
Keep fingers behind the finger guards on the probes.
•
Use the correct terminals, function, and range for
measurements.
•
Place test leads in proper input terminals.
•
Do not work alone.
•
Do not use in distribution systems with voltages higher
than 1100 V.
•
Use only recommended test leads.
•
Remove all power from the circuit under test and
discharge circuit capacitance before testing resistance
or capacitor with the tester.
•
Results of measurement can be adversely affected by
the impedances of additional operating circuits
connected in parallel or by transient currents.
•
Before and after testing, confirm that the Product does
not indicate the presence of a hazardous voltage. If a
hazardous voltage is shown on the display, remove
power from the circuit under test or allow the
installation capacitance to fully discharge.
•
Do not disconnect the test leads before a test has been
completed and the test voltage at the terminals has
returned to zero. This ensures that any charged
capacitance is fully discharged.
•
Use the guard terminal only as specified in this manual.
Do not allow other foreign objects to contact the guard
terminals as safety can be compromised.
•
Remove the input signals before you clean the
Product.
•
Use only specified replacement parts.
•
Repair the Product before use if the battery leaks.
•
Do not operate the Product with covers removed or the
case open. Hazardous voltage exposure is possible.
•
Have an approved technician repair the Product.

1550C/1555
Users Manual
4
Table 1 is a list of symbols used on the Product or in this manual.
Table 1. Symbols
Symbol Description Symbol Description
Consult user documentation.
Conforms to relevant South Korean EMC standards.
W
WARNING. RISK OF DANGER.
Conforms to relevant Australian EMC standards.
X
WARNING. HAZARDOUS VOLTAGE. Risk of
electric shock.
)
Certified by CSA Group to North American safety standards.
Earth
P
Conforms to European Union directives.
AC (Alternating Current)
Certified by TÜV SÜD Product Service.
Battery
T
Double Insulated
b
Electrical breakdown
M
Interference is present. Displayed value might be outside of
specified accuracy.
WARNING. Do not apply greater than 1100 Volts.
s
Ramp mode indicator
Measurement Category II is applicable to test and measuring circuits connected directly to utilization points (socket outlets and
similar points) of the low-voltage MAINS installation.
Measurement Category III is applicable to test and measuring circuits connected to the distribution part of the building’s low-voltage
MAINS installation.
Measurement Category IV is applicable to test and measuring circuits connected at the source of the building’s low-voltage MAINS
installation.
~
This product complies with the WEEE Directive marking requirements. The affixed label indicates that you must not discard this
electrical/electronic product in domestic household waste. Product Category: With reference to the equipment types in the WEEE
Directive Annex I, this product is classed as category 9 "Monitoring and Control Instrumentation" product. Do not dispose of this
product as unsorted municipal waste.

Insulation Tester
Before You Start
5
Before You Start
Table 2 is a list of the items included with your purchase. Carefully
unpack and inspect each of the items.
The Tester
This section is about the Tester and its operation. The Tester is shown
in Table 3.
Table 2. Pack List
Item Description
Quick Reference Guide and Safety Information
AC Power Cord
X Test Cables with Alligator Clips (red, black, green)
and Test Probes (red, black)
Heavy Duty Alligator Clips: Red, Black, Green
(1555 and kits only)
Available as optional accessory for 1550C,
PN TLK1550-RTLC
Soft Carrying Case (Kit includes Hard Case)
ir3000 FC BLE-IR Adapter with Quick Reference
Guide (FC kits only)
Infrared Adapter/Interface Cable with Installation Guide
5
6
4
2
1
7
3
Table 3. 1550C/1555 Insulation Tester
Item Description
LCD
Safety Shutter
AC Plug
Input Terminals
IR Port
Pushbuttons
Built-in Handle
1
2
4
5
6
7
3

1550C/1555
Users Manual
6
Pushbuttons
Use the pushbuttons to control the Tester, view test results, and scroll
through chosen test results. See Table 4.
Use
and to access these menu items:
1.X Insulation Functions:
1.1 Ramp off (default)
1.2 Ramp on
1.3 DAR T= 01-00
1.4 DAR/PI T= 10-00
1.5 DAR [CN]= 01-00
2 Time limit xx-xx
3 Show results
4 Delete results
Push
to make the selection.
Power On/Off
Push to turn on the Tester.
The Tester does a self-check, self-calibration, shows the software
version, and starts in the Test Voltage mode.
In Test Voltage mode, you can:
•
Change test parameters
•
Start an insulation test
•
View stored test results
•
Download test results
Push
again to turn off the Tester.
Table 4. Pushbuttons
Item Description
Power on/off.
Push to go to the Function menu. Push again to
exit the Function menu. To scroll within the Function
menu, use the arrow pushbuttons.
Scrolls through test voltages, stored test results, timer
duration, and changes test tag ID characters. Use to
answer “yes” to prompts.
After a memory location is set, displays the test
parameters, test results stored in memory. These
include voltage, capacitance, polarization index,
dielectric absorption ratio, and current.
Use to scroll through test voltages, stored test results,
timer duration, and memory locations. Use to answer
“no” to prompts.
Use for Test Voltage mode to start incrementally setting
the test voltage between 250 V and 10 000 V.
Starts and stops a test. Push and hold for 1 second to
start a test. Push again to stop a test.
ENTER
TEST
FUNCTION
1 2 3 4 5 6 7

Insulation Tester
The Tester
7
Display
Table 5 is a list of features for the display.
Charge the Battery
This Tester uses a rechargeable 12 V lead-acid battery for power.
Storing rechargeable lead-acid batteries in a low-charged state could
decrease their life and cause damage. Fully charge the battery before
storing it for extended periods and examine the charge at regular
intervals.
Charge the 12 V lead-acid battery with the ac power cord. Expect up
to 12 hours to fully charge the battery. Do not charge in very high or
low temperatures. Charge the battery if the Tester is not used for
extended periods. Figure 1 shows how to connect the Tester to a
power supply.
Figure 1. Power Supply Connections
To charge the battery with the ac power supply:
1.
Turn off the Tester.
2.
Disconnect the test leads from the Tester.
3.
Move the safety shutter to access the power supply connection.
4.
Connect the ac power cord to the IEC ac power socket on the
Test er.
5.
Connect the other end of the power cord to an ac power supply.
See General Specifications for ac charger input specifications.
The LCD displays CHARGING. You are able to download test
results while the Tester is in the charge mode.
Table 5. Display Features
Item Description
Interference present. Readings could be out of specified
accuracy range.
Polarization Index.
Dialectric Absorption Ratio.
Electrical breakdown in Ramp mode.
Ramp mode indicator.
Possible hazardous voltage is at the test terminals.
Voltage sourced by the Tester or from the circuit under
test at terminals of the Tester.
Test voltage selection (250 V, 500 V, 1000 V, 2500 V,
5000 V, or 10 000 V).
Battery charge status.
Bar graph display of insulation resistance.
Digital display of insulation resistance.
Text display. Shows voltage, test current, capacitance,
programmable test voltages, and menu options.
1
2
3
4
10
12
11
5
6
7
9
8
Safety Shutter
Safety Shutter

1550C/1555
Users Manual
8
Guard Terminal Use
Note
Insulation resistance is measured between the (+) and (-)
output connections. The Guard terminal (G) is at the same
potential as the negative (-) terminal but is not in the
measurement path.
For most tests, only two test leads are used. Connect the positive (+)
and negative (-) test leads to the corresponding inputs on the Tester.
Connect the test lead probes to the circuit under test. The Guard (G)
terminal is left unconnected.
For the best accuracy when you measure very high resistances, use
three-wire measurements and the Guard terminal. The Guard terminal
is at the same potential as the negative (-) terminal, and can be used
to prevent surface leakage or other unwanted leakage currents from
degrading the accuracy of the insulation resistance measurement.
Figure 2 shows how to measure the resistance from one of the
conductors to the outer shield. In this case, there is a leakage current
along the surface of the inner insulation near the cables end. This
leakage adds to the current that the negative terminal senses, and
causes the Tester to read a lower resistance than it should.
Figure 2. Surface Leakage Current
Figure 3 shows how to prevent surface current leakage with a lead
connected from the Guard terminal to a conductor that surrounds the
inner insulation. The surface leakage current is directed to the Guard
terminal. This removes the leakage current from the measurement
path between the positive and negative terminals, and improves the
accuracy of the test readings.
Figure 3. Guard Terminal Connection
Figure 4 shows how to make the measurement setup better. Connect
the Guard terminal to the unused wire and attach it to the inner
insulation. This ensures that the Tester measures the leakage
between the selected conductor and the outer shield, but removes the
leakage path between conductors.
Figure 4. Improved Guard Terminal Connection
Surface Leakage
Current
Shield
( )
( )
Shield
Surface Leakage
Current
Leakage
Current
G
Shield
( )
( )
( )
Optional
Shield
Leakage
Current
Optional
Leakage
Current
G
Shield
( )
( )
( )
Leakage
Current
Shield

Insulation Tester
Measurements
9
Measurements
Common measurement procedures are discussed in this section.
Connect to the Circuit Under Test
XW Warning
To prevent possible electric shock, fire or personal
injury:
•
Remove all power from the circuit under test and
discharge circuit capacitance before testing a circuit
with the Product.
•
Connect the common test lead before the live test lead
and remove the live test lead before the common test
lead.
•
Before and after testing, confirm that the Product does
not indicate the presence of a hazardous voltage, see
Table 5. If the Tester beeps continuously and a
hazardous voltage is shown on the display, remove
power from the circuit under test and disconnect test
leads.
To connect to the circuit under test:
1.
Move the safety shutter to access the input terminals.
2.
Put the test leads into the correct terminals shown, see Table 6.
3.
Connect the test leads to the circuit under test.
Note
The Tester is NOT specified for <200 kΩ. When the leads are
shorted and a test is performed, the Tester gives an
unspecified reading that is >0. This is normal for this input
circuitry configuration and does not change readings that are
in the specified accuracy range.
Table 6. Test Lead Connections
Item Description
(-) Negative Terminal
(+) Positive Terminal
Safety Shutter
2
3
1

1550C/1555
Users Manual
10
Before an Insulation Test
The Tester includes features and functions that let you adapt the test
to your requirements. These features let you:
•
define a test voltage
•
make a ramp test selection
•
set a time limit (duration) for the test
•
measure polarization index (PI)
•
measure dielectric absorption ratio (DAR or DAR[CN])
•
measure capacitance
Use these alone or in combination. Set, clear, or account for (as
appropriate) each feature before you start an insulation test. The
features are discussed in this section.
Preset Test Voltage Selection
To make a preset test voltage selection:
1.
With the Tester turned on, push to select TEST VOLTAGE.
2.
Push or to scroll through the preset test voltage options
(250 V, 500 V, 1000 V, 2500 V, 5000 V, and 10 000 V).
The test voltage selection shows in the upper-right of the
display.
Note
The actual test voltage can be up to 10 % higher than the
selected test voltage.
Program a Test Voltage
To set a test voltage in between the preset test voltages:
1.
Push or to scroll through the preset test voltage options
(250 V, 500 V, 1000 V, 2500 V, 5000 V, and 10 000 V). Select the
voltage closest to the level required.
2.
The selected test voltage appears in the upper-right of the
display.
3.
Push .
TV=xxxxV flashes in the lower-left of the display.
4.
Push or to increment and decrement the voltage.
5.
When the correct voltage level shows, push to go to the
function menu.
Do not push
. Doing so will return the test voltage to a
preset voltage selection.
Note
The test voltage can be up to 10 % higher than the test
voltage you select.
Test Voltage Display
Test Voltage Display

Insulation Tester
Measurements
11
Select a Ramp or Steady-State Test
The ramp-test function is an automated test that checks insulation for
a breakdown. During a ramp test, the output voltage starts at 0 V and
increases linearly (100 V/s) until it reaches the specified test voltage or
until a sudden drop in measured resistance is detected. Then, the
Ramp stops, the test voltage drops to zero, and the voltage at the
breakdown point is stored in memory on the Tester. All other test
results are declared invalid if the test does not reach the specified test
voltage.
If the test successfully meets compliance without breakdown, then the
only valid test results are test voltage and insulation resistance.
To enable or disable the ramp function:
1.
With the Tester turned on, push to enter the 1.X Function
Menu.
2.
Push to call the menu item.
3.
Push U or to toggle the Ramp on or off. When the ramp is
on, a blinking
shows in the upper left-hand corner of the
display.
4.
Push or to use the settings. starts the test.
Set a Timed Test
You can control the length of an insulation test by setting a timer. The
time (test duration) can be set in 1-minute increments up to
99 minutes. During a timed test, the time limit appears on the right
bottom of the display, and the elapsed time is shown in the middle of
the display. At the end of the elapsed time, the insulation test has been
completed and the test is terminated.
To set a test time limit:
1.
With the Tester turned on, push to enter the Function Menu.
2.
Push or to select the 2.Time Limit function.
3.
Push to call the menu item.
4.
Push or to select the time.
5.
Push or to use the settings. starts the test.
Polarization Index (PI)
As part of the insulation test, the Tester measures and stores
polarization index (PI), when appropriate. A polarization index test
requires 10 minutes to complete. Therefore, the Tester will start a
countdown at 10 minutes. When an insulation test is 10 minutes or
more, the polarization test is completed and stored. The results are
available for display during a test by pushing the
button or by
storing the test results and scanning the RESULTS fields. The field is
identified by:
Ramp
Indicator
Ramp
Indicator
PI =
R
@
10 min
R
@
1 min

1550C/1555
Users Manual
12
Dielectric Absorption Ratio
As part of the insulation test, the Tester measures and stores dielectric
absorption ratio (DAR), when appropriate. A DAR test requires
1 minute to complete. Therefore, it is measured and stored as invalid
data for all insulation tests <1 minute. When an insulation test is
≥1 minute, the DAR test is included in the results. The results are
available for display during a test by pushing the
button or by
storing the test results and scanning the RESULTS fields. The field is
identified by:
The Tester also does the DAR test in accordance to the Chinese
standards:
Capacitance
As part of the insulation test, the Tester measures and stores
capacitance when appropriate. The results are available for display
during a test by pushing the
button or by storing the test results
and scanning the RESULTS fields. The field is identified by C=.
Insulation Test
XW Warning
To prevent possible electric shock, fire, or personal
injury:
•
Be aware that insulation resistance measurement
requires the application of potentially dangerous
voltages to the circuit. This may include exposed
bonded metalwork.
•
Remove all power from the circuit under test and
discharge circuit capacitance before you do a circuit
test with the Product.
•
Before proceeding, ensure that the installation is wired
correctly and no personnel are endangered by any
tests.
•
Connect the test leads to the Product inputs before you
make connection to the circuit under test.
PI/DAR Limits:
•
Cap. Max >1 μF and Res. Max >100 MΩ
•
Res. Min <200 kΩ
•
Current min <50 mA
•
If a limit is exceeded, the Tester shows UNSPEC. on the display.
To perform an insulation test:
1.
With the Tester turned on, set the available measurement options
to meet the test requirements. These include:
•
Test Voltage
– Set range: 250 V to 1000 V (50 V steps)
– Set range: 1000 V to 10 000 V (100 V steps)
Note
5000 V max for 1550C.
•
Ramp Test – Toggle on or off
•
Time Limit – No limit or from 1 to 99 minutes
2.
Connect the probes to the circuit under test.
DAR =
R
@
1 min
R
@
30 sec
DAR [CN]=
R
@ 1 min
R
@ 15 sec

Insulation Tester
Measurements
13
XW Warning
Before and after a test, confirm that the Product does
not indicate the presence of a hazardous voltage. See
Table 5. If the Product beeps continuously and a
hazardous voltage is shown on the display, disconnect
test leads and remove power from the circuit under
test.
3.
Push for 1 second to start the insulation test.
The Tester beeps three times as the test begins, and X
flashes on the display to indicate potentially hazardous
voltages may be present on the test terminals.
The display indicates the measured insulation resistance after
the circuit has stabilized. The bar graph displays this value
continuously (in real time) as a trend, see Table 7.
Any of these conditions terminate an insulation test:
•
User stop (push )
•
Timer limit reached
•
Interference on the test circuit
•
Breakdown occurs with ramp test enabled
•
Battery depleted
If breakdown occurs with ramp test enabled, push
before
going to step 4.
After the termination of an insulation test, the Tester beeps
when a potentially hazardous voltage remains on the test
terminals due to charged-circuit capacitance or from the
presence of an external voltage.
4.
When the test is terminated, STORE RESULT? shows on the
display. If appropriate, store the test results. See Store Test
Results. Or, push to terminate the STORE RESULT?
prompt. The results are not stored.
Store Test Results
When the insulation test is complete, the Tester shows
STORE RESULT? as a prompt to save the measurement results for
future use. The Tester includes enough memory to store the results of
99 insulation tests.
To store the results of an insulation test:
1.
Push to save the measurement results. The Tester will
assign and display a sequential tag number (00 to 99) to identify
the measurement.
2.
If the tag number is acceptable, push again to store the
data. If a different tagging convention is required, proceed as
follows to provide a custom 4-character tag.
Notice that * is blinking on the display. This is the first of the four
characters available for tagging the test results.
3.
Repeatedly push to cycle through the character positions.
Table 7. Measured Insulation Resistance Display
Item Description
Digital Main Display
Bar Graph
2
1

1550C/1555
Users Manual
14
4.
At each character position use or to assign a character
(0-9, A-Z).
5.
Push to store the results.
View Test Results Stored in Memory
Note
Parameters not appropriate for a test are shown as INVALID.
The Tester can store 99 sets of test data, including:
•
Tags
•
Ramp on or off
•
Insulation Resistance
•
Timer reading at termination of test (Timer)
•
Test Voltage Selected (TV)
•
Actual Test voltage (V)
•
Capacitance I
•
Polarization Index (PI)
•
Dielectric absorption ratio (DAR or DAR[CN])
•
Test current (I)
•
Reason for ending the test
•
Limit – off or timer setting from 1 to 99 minutes (T. Limit)
To view stored test data, see Table 8:
1.
With the Tester turned on, push to call the Function menu.
2.
Push or to select 3. Show Results.
3.
Push to select the menu item.
Note
When a voltage is present at the terminals, that voltage is
always shown on the top-center of the display, regardless of
whether that voltage is sourced by the Tester or is from the
circuit under test.
4.
Push or to step through the stored locations.
5.
Stop at the location you want to view.
6.
Push to view the stored test data for a specific test. Test data
appears on the alphanumeric text display and on the LCD.
7.
Push to call the menu selection.
Table 8. Stored Test Data Display
Item Description
Voltage at terminals
Stored location
Stored test results
1
23

Insulation Tester
Measurements
15
Download Test Results
You can use Fluke Connect
Desktop software to update your
Product firmware and download all your stored test data to a PC.
Fluke Connect Desktop is available at http://en-us.fluke.com/support
/software-downloads/fluke-1550-1555-FC. An infrared cable
assembly is supplied for the Tester to PC connection.
With the ir3000 FC BLE-IR adapter option, you can use a smartphone
or tablet and the Fluke Connect
app to download test results as well
as view measurements simultaneously at the inspection site and from
the office or an off-site location.
Table 9 shows the IR port and options.
Note
Before the USB-IR cable can be used, software drivers must
be installed on your Windows PC. See the USB-IR
Installation Guide for more information.
IR Cable Assembly
To connect the Tester to the PC for use with FC Desktop software:
1.
Make sure the Tester is not in the test mode. When in test mode,
serial communications are disabled.
2.
Connect the USB-IR cable to an available USB port on the PC.
3.
Attach the USB-IR cable to the IR port on the Tester.
4.
Open FC Desktop software.
5.
Turn the Tester on.
6.
Follow the prompts in the software.
7.
Verify that the download was successful before deleting the
stored test results on the Tester.
Note
Results data stored in the Tester can be deleted from the PC
using the FC Desktop software.
Fluke Connect App
The Product supports the Fluke Connect
Wireless System (may not
be available in all regions). Fluke Connect
uses low-power 802.15.4
wireless radio technology to wirelessly connect to an app on your
smartphone or tablet. The wireless radio does not cause interference
with measurements. The app shows measurements on your
smartphone or tablet display, saves to Fluke Cloud™ storage, and
shares the information with your team.
Note
Changes or modifications to the wireless 2.4 GHz radio not
expressly approved by Fluke Corporation could void the
user’s authority to operate the equipment. For complete
information about radio frequency data, go to
www.fluke.com/manuals
and search for “Radio Frequency
Data Class A”.
Table 9. IR Port
Item Description
IR Port
IR Cable Assembly (included)
ir3000 FC BLE-IR Adapter (option-PN 4460451)
Power On/Off
21
4
3

1550C/1555
Users Manual
16
The Fluke Connect app works with Apple and Android mobile
products. The app is available for download from the Apple App Store
and Google Play.
To set up:
1.
Connect the ir3000 FC BLE-IR adapter to the IR port on the Tester.
2.
Turn on the adapter.
On your mobile device:
1.
Go to Settings > Bluetooth. Verify that Bluetooth is turned on.
2.
Go to the Fluke Connect app and in the list of connected Fluke
tools, select 155x FC.
3.
Follow the prompts in the app to continue.
Delete Test Results
To delete all saved test results:
1.
Push to call the Function menu.
2.
Push or to select the menu item DELETE RESULT.
3.
Push to call the menu item.
4.
Push . REALLY DEL? shows on the display.
5.
Push to confirm the deletion or push to return to
Test Voltage.
Note
The Delete function deletes all stored test results. Individual
test locations cannot be deleted but are overwritten.
Maintenance
XW Warning
To prevent possible electric shock, fire, or personal
injury:
•
Do not repair or service your Product beyond what is
described in this manual.
•
Have an approved technician repair the Product.
•
There are no user-replaceable parts inside the Product.
Cleaning
XW Warning
To prevent possible electric shock, fire, or personal
injury, remove excess water from the cloth before you
clean the Product to ensure that water does not enter
any terminal.
Periodically wipe the case with a damp cloth and mild detergent. Do
not use abrasives or solvents to clean the Product.
/