LG LG DP391B Owner's manual
- Category
- DVD players
- Type
- Owner's manual
This manual is also suitable for
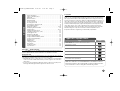
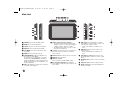
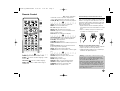
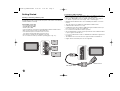
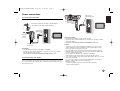
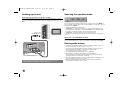
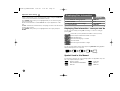
LG DP391B is a versatile multimedia player that allows you to enjoy movies, music, photos, and more. It supports playback of various disc formats including DVDs, CDs, and DivX movies. You can also connect USB flash drives and external memory cards to access your media files. The built-in speaker and earphone jack provide audio output options. Additionally, the DP391B features an LCD display for easy navigation and control.
LG DP391B is a versatile multimedia player that allows you to enjoy movies, music, photos, and more. It supports playback of various disc formats including DVDs, CDs, and DivX movies. You can also connect USB flash drives and external memory cards to access your media files. The built-in speaker and earphone jack provide audio output options. Additionally, the DP391B features an LCD display for easy navigation and control.


-
 1
1
-
 2
2
-
 3
3
-
 4
4
-
 5
5
-
 6
6
-
 7
7
-
 8
8
-
 9
9
-
 10
10
-
 11
11
-
 12
12
-
 13
13
-
 14
14
-
 15
15
-
 16
16
-
 17
17
-
 18
18


LG LG DP391B Owner's manual
- Category
- DVD players
- Type
- Owner's manual
- This manual is also suitable for
LG DP391B is a versatile multimedia player that allows you to enjoy movies, music, photos, and more. It supports playback of various disc formats including DVDs, CDs, and DivX movies. You can also connect USB flash drives and external memory cards to access your media files. The built-in speaker and earphone jack provide audio output options. Additionally, the DP391B features an LCD display for easy navigation and control.
Ask a question and I''ll find the answer in the document
Finding information in a document is now easier with AI
Related papers
Other documents
-
Palsonic DPF8128 Owner's manual
-
RCA DRC99370U User manual
-
Venturer VPF1010DL-BRW User manual
-
Minox DMP3 Operating instructions
-
Samsung DVD-L25 User manual
-
Philips MCD289 User manual
-
Philips MCD289/79 User manual
-
-
-
Philips MCD395/58 User manual