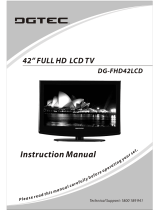
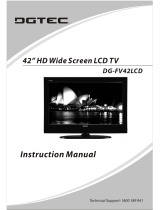
Palsonic TFTV3925FL Owner's manual

Category
LCD TVs
Type
Owner's manual

Palsonic TFTV3925FL comes with exceptional features that will redefine your home entertainment experience. This 39-inch television boasts a crystal-clear 1080p Full HDTV resolution, offering stunning visuals with vibrant colors and sharp details. With its HDMI, YPbPr, and AV connectivity options, you can effortlessly connect various devices such as DVD players, gaming consoles, or set-top boxes to enjoy a wide range of multimedia content on the big screen. Additionally, the USB port allows you to conveniently play movies, music, and photos from external storage devices.

Palsonic TFTV3925FL comes with exceptional features that will redefine your home entertainment experience. This 39-inch television boasts a crystal-clear 1080p Full HDTV resolution, offering stunning visuals with vibrant colors and sharp details. With its HDMI, YPbPr, and AV connectivity options, you can effortlessly connect various devices such as DVD players, gaming consoles, or set-top boxes to enjoy a wide range of multimedia content on the big screen. Additionally, the USB port allows you to conveniently play movies, music, and photos from external storage devices.

TFTV3925FL
1080p1080p
Full HDTV ResolutionFull HDTV Resolution
1
Table Of Contents
Important Safety Instructions....................................................................................................................................2
View of Unit..................................................................................................................................................................4
Front Panel .........................................................................................................................................................................................................4
Rear Panel...........................................................................................................................................................................................................5
Remote Control............................................................................................................................................................6
Remote Control Drawing..............................................................................................................................................................................6
Preparation of Remote Control...................................................................................................................................................................8
Using of Remote control ...............................................................................................................................................................................8
System Connections....................................................................................................................................................9
Connecting to the Power Supply...............................................................................................................................................................9
Connecting a USB Device ............................................................................................................................................................................. 9
Connecting to an External AV Signal Source(HDMI)...........................................................................................................................9
Connecting an External AV Signal Source (YP
b
P
r
)..............................................................................................................................10
Connecting to an External AV Signal Source (AV)..............................................................................................................................10
Connecting to Coaxial Digital Output....................................................................................................................................................11
Connecting to a PC .......................................................................................................................................................................................11
Connecting to Earphones...........................................................................................................................................................................12
Connecting to TV-Signal Input .................................................................................................................................................................12
Basic Operation .........................................................................................................................................................14
Turning the TV On and Off .........................................................................................................................................................................14
Source selecting.............................................................................................................................................................................................14
Channel Selection .........................................................................................................................................................................................14
The First Time Installation...........................................................................................................................................................................14
TV Operation and System Setup ..............................................................................................................................15
Picture Setting ................................................................................................................................................................................................15
Sound Setting .................................................................................................................................................................................................16
Channel .............................................................................................................................................................................................................17
Feature...............................................................................................................................................................................................................19
Setup ..................................................................................................................................................................................................................22
PVR Function .............................................................................................................................................................23
Time Shift Function.......................................................................................................................................................................................23
Recording program.......................................................................................................................................................................................23
Playing recorded program .........................................................................................................................................................................24
Schedule Recording......................................................................................................................................................................................24
EPG Function .............................................................................................................................................................25
TELETEXT Function....................................................................................................................................................26
NICAM Function.........................................................................................................................................................27
Media Playback .........................................................................................................................................................28
Media Playback...............................................................................................................................................................................................28
Function Buttons ...........................................................................................................................................................................................29
Troubleshooting........................................................................................................................................................30
Specifications ............................................................................................................................................................31
The images in this manual are for reference only and may differ from your model.
2
Important Safety Instructions
Thank you for choosing our product. Please read this manual carefully and observe all safety and
operating instructions. Store the manual in a safe place for later reference.
Caution
1. The product contains a low-power device. In order to ensure the safety of the laser device, do
not remove any cover and attempt to repair the unit. If any service is needed, please contact the
distributor or its authorised service centre.
2. To reduce the risk of electric shock, do not remove the cover (back). No user-serviceable parts
inside. Refer servicing to qualified service personnel. Unplug the product from the power source
before servicing or when it is unused for a long period of time.
3. The manufacturer will not be held responsible for the damage caused by any substitutions and
modification of the product without authorisation from the manufacturers or authorised
service agent.
WARNING
The apparatus shall not be exposed to dripping or splashing and that no objects filled with liquids,
such as vases, shall be placed on the apparatus.
The information symbol in the documentation indicates useful information and tips
for using and maintaining the device.
The information symbol in the documentation indicates cautions for operators to
avoid potential damages. Please note and remember.
This symbol indicates that dangerous voltage instituting a risk of electric shock is
present within this unit.
This symbol indicates that there are important operation and maintenance
instructions in the literature accompanying the appliance.
3
Important Safety Instructions
NOTES:
1. Read these instructions.
2. Keep these instructions.
3. Heed all warnings.
4. Follow all instructions.
5. Do not use near water.
6. Clean only with dry cloth.
7. Do not block any ventilation openings. Maintain well ventilated conditions around the product.
Do not put product on a bed, sofa or anything that blocks ventilation. Install according to the
manufacturers instructions.
8. Do not install near any heat sources such as radiators, heat registers, stoves or other apparatus
(including amplifiers) that produce heat.
9. Read, heed and follow all instructions to ensure correct and safe installation and
interconnection of the apparatus;
10. The apparatus shall not be exposed to dripping or splashing and that no objects filled with
liquids, such as vases, shall be placed on the apparatus.
11. The mains socket-outlet shall be installed near the apparatus and the mains plug shall remain
readily operable.
12. Protect the power cord from being walked on or pinched particularly at plugs, power sockets,
and the point where they exit from the apparatus.
13. Only use attachments/accessories specified by the manufacturer.
14. Use only with the stand, tripod, bracket, or table specified by the manufacturer, or sold with the
apparatus.
15. Unplug the apparatus during lightning storms or when unused for long periods of time.
16. Refer all servicing to qualified service personnel. Servicing is required when the apparatus has
been damaged in any way, such as power-supply cord or plug is damaged, liquid has been
spilled or objects have fallen into the apparatus, the apparatus has been exposed to rain or
moisture, does not operate normally, or has been dropped.
17. The apparatus shall be connected to a mains socket outlet with a protective earthing
connection.
Do not touch the color LED screen directly by hand.
4
View of Unit
Front Panel
1. Color TFT screen
Presents high resolution picture.
2. Remote Sensor
Remote sensor window for the remote control.
3. Power Indicator
In active mode, it is green; in standby mode, it turns red.
4.
POWER button
Press to switch on or off the device (enter or exit the standby mode).
5. VOL◄► buttons
Press to decrease or increase the volume.
When in setup menu, this button also serves the ◄► direction button.
6. CH ▲▼ buttons
Press to page up or down through programs in DTV or ATV mode.
When in setup menu, this button also serves the ▲▼ direction button.
7. MENU button
Press to enter or exit system setup menu.
8. INPUT button
Press to display a menu of all of the available input sources.
When in setup menu, this button also serves the OK button.
5
View of Unit
Rear Panel
1. Headphone Jack
When headphone is inserted, the
loudspeaker is switched off.
2. COAXIAL Jack
Output the coaxial digital audio signal.
3. RF Input Jack
Connected to external antenna to receive
the ATV/DTV program in ATV/DTV mode.
4. COMPOSITE IN Jacks (AV)
Connecting for AV signal input in AV mode.
5. HDMI1/HDMI2 Input Jacks
Connecting for HDMI signal.
6. COMPONENT IN Jacks (Y/P
b
/ P
r
)
Connecting for the Y/P
b
/P
r
input in YPBPR
mode.
Y/P
b
/ P
r
share the same audio jack with AV.
7. PC IN Jack
Connecting for VGA audio signal input.
8. VGA Jack
Connected to the VGA output jack on a
personal computer.
9. USB Port
Connect the USB device.
10. HDMI3 Jack
Connecting for HDMI signal.
6
Remote Control
Remote Control Drawing
1. POWER button
Press to enter or exit standby mode.
2. SOUND button
Press to select the sound mode: choose
from Standard, Movie, Music, Speech or
User.
3. PICTURE button
Press repeatedly to select the picture mode:
Standard, Mild, User or Dynamic.
4. CH.LIST button
Press to display the channel list.
5. SUBTITLE button
In DTV/DVD mode, press to select alternate
subtitle languages during view/playback of
a DTV program.
6. TV.RADIO button
Press to select DTV program playback or
Radio program playback in DTV mode.
7. Direction buttons (▲▼◄►)
In the setup menu, press the ▲▼ button
to select a desired item and press the ◄►
button to adjust or set.
8. OK button
Press to confirm selection in the setup
menu.
9. MENU button
Press to enter setup menu or return to the
previous menu.
10. 0~9 Number buttons
Press to select numbers such as TV
channel.
11. REC. button
In DTV mode, press to enter the recorder.
12. VOL+/- button
Press to increase or decrease the volume.
13.
Play/Pause button
Press to start or pause the playback.
When in DTV recorder, press to start or
pause the recording.
14. Red Coloured button
In Channel Manager, use the red button to
delete a program.
In teletext mode, it is the teletext color
button.
Other defined functions on the OSD menu.
15. Green Coloured button
In Channel Manager, use the green button
to lock a program.
7
Remote Control
In teletext mode, it is the teletext color
button.
Other defined functions on the OSD menu.
16. TV/TXT
Press to change the mode between TV and
Teletext
17. CANCEL button
Press this button to disable teletext display
and press again to resume.
18. (INDEX)/(HOLD) buttons
Press to search backward or forward in
media player.
In teletext mode, press INDEX button to
select the index page.
In teletext mode, press HOLD button to
hold the current page and press again to
resume.
19. MUTE button
Press to turn on or off the speaker output.
20. ASPECT button
Press to shift the aspect radio of the screen.
21. SLEEP button
Press the button repeatedly to select the
desired time to sleep or select Off to close
the function.
22. EPG button
Press to display the Program Guide menu
in DTV mode.
23. FAV button
Press to display the favorite list.
24. INPUT button
Press to enter the source selecting menu,
press the ▲▼ direction buttons or press
the INPUT button repeatedly to select
desired source and press the OK button to
enter the selected source.
25. EXIT button
Press to exit all the OSD on the screen.
26.
button
In ATV or DTV mode, press to return to the
channel previously viewed.
27. DISPLAY button
Press to display the reference information
of the current mode.
28. REC LIST button
Press to display the Record List.
29. CH▲▼ button
In ATV or DTV mode, press to select analog
program or digital program.
30. STOP button
Press to stop playback in media mode.
When in DTV recorder, press to stop the
recording.
31. Blue Coloured button
In Channel Manager, use the blue button
to swap programs.
In teletext mode, it is the teletext color
button.
Other defined functions on the OSD menu.
32. Yellow Coloured button
In Channel Manager, use the yellow button
to skip a program.
In teletext mode, it is the teletext color
button.
Other defined functions on the OSD menu.
33. NICAM/A2 button
Press to select audio language in DTV
mode. Press to select sound track in other
modes except DTV mode.
34. Reveal button
Press this button to display or remove
concealed information on the screen.
35. (SIZE)/(SUBPAGE) buttons
Press to return to the previous file or skip
to the next one in media player.
In teletext mode, press SIZE button first
time to double the size of teletext letters in
the upper half of the screen, second to
double the size of teletext letters in the
lower half of the screen and third to
resume normal status.
In teletext mode, press SUBPAGE button to
look at a sub-page.
8
Remote Control
Preparation of Remote Control
1. Softly push the back cover to open the
battery compartment.
2. Insert two batteries (1.5V, size AAA), please
make sure the polarity matches the marks
inside the compartment.
3. Softly press the back cover to close it.
Under normal use the battery
will last for six months.
Take out battery when the
remote is not in use for a long
time.
Using of Remote control
Point the remote control unit from no more
than about 7 meters from the remote control
sensor and within about 60 degrees of the front
of the unit.
The operating distance may vary
depending on the brightness in the room.
Do not point bright lights
directly at the remote control
sensor.
Do not place objects between
the remote control unit and
the remote control sensor.
Do not use this remote control
unit while simultaneously
operating the remote control
unit of any other equipment.
9
System Connections
Do not connect the power cord until all other connections have been made.
Ensure that you observe the color code when connecting audio and video cables.
Connecting to the Power Supply
Connect the plug of the power cord on the rear panel of the unit to the AC100~240V wall outlet.
Connecting a USB Device
This unit is designed with a USB port so that you can
connect your USB device for media play, record or software
upgrade. See the figure below:
Make sure that the desired file for media play or software upgrade is stored in the USB
device before connection.
Connecting to an External AV Signal Source(HDMI)
1. Connect an HDMI signal source
to one of the HDMI jacks on the
rear panel of the unit.
2. After connection, turn on the
power of the unit and the HDMI
signal source.
3. Press INPUT then direction
buttons to select HDMI 1, HDMI 2
or HDMI3 mode, and then press
the OK button to confirm.
10
System Connections
HDMI provides both audio and video signals and typically provides superior image
quality to AV and YPBPR.
Connecting an External AV Signal Source (YP
b
P
r
)
1. Use the AV cables to connect the
external AV signal source to the MINI AV
input jacks on the rear panel of the unit.
2. Use a component cable (not supplied)
to connect an external AV signal source
to the Y/PB /PR (Component) input jacks
on the rear panel of the unit.
NOTE: Match the jack colors (Y= green,
PB= blue, and PR= red).
3. After connection, turn on the power of
the unit and the external AV signal
source.
4. Press INPUT then direction buttons to
select YPBPR mode, and then press the OK button to confirm.
Connecting to an External AV Signal Source (AV)
Use the AV cables to connect the external AV
signal source to the AV input jacks on the rear
panel of the unit.
After connection, turn on the power of the unit
and the external AV signal source. Press INPUT
then direction buttons to select AV mode, and
then press the OK button to confirm.
11
System Connections
Connecting to Coaxial Digital Output
This unit is designed with a coaxial digital
audio jack, can be connected to the digital
amplifier, see the figure below.
This feature is available only for amplifiers equipped with coaxial digital audio input
connectors.
Connecting to a PC
The unit can be connected to a PC via the VGA cable and PC audio cable.
1. Connect one end of the VGA cable to the VGA jack on
the jack panel of the unit and the other end to the PC
VGA output.
2. Connect one end of the audio cables to the PC IN jack on
the jack panel of the unit and the other end to the PC
audio output jack.
3. Set the PC video resolution to match that of the
television (Native 1366 x 768@60Hz).
4. After connection, turn on the power of the unit and the
PC.
5. Press INPUT then direction buttons to select PC mode,
and then press the OK button to confirm.
12
System Connections
Connecting to Earphones
Connect earphones (headphones) to the
earphone jack on the rear panel of the unit
for listening to the audio output in seclusion.
The internal speakers output will turn off
automatically after the earphones have
been connected.
Excessively loud volume could damage your hearing. Turn down the volume before
you connect the earphones and then raise the volume to a comfortable level.
Connecting to TV-Signal Input
Connect the TV signal cable (the
antenna cable, for example) to the RF
Jack on the back of the unit so that you
can receive television programs.
1. Connect TV signal input source from the aerial to the RF jack on the rear panel of the unit.
2. After connection, turn on the power of the unit.
3. Then press the INPUT button and the direction buttons to select DTV or ATV mode, press the
OK button to confirm and conduct program selection.
13
System Connections
If you want to hang the machine on the wall, you must envelop the machine base firstly.
1. Use the screwdriver to remove base pillar stiffener.
2. Keep flat the machine with the screen toward the table softly and carefully and then put
the base panel to the port of the machine base.
3. Use the screwdriver to fix the base panel to the machine base with two screws and fasten.
14
Basic Operation
Turning the TV On and Off
Connect the power adaptor to wall AC Outlet. A front mounted indicator light will be
illuminated red indicating the TV has power.
Press the POWER button on the remote control or the TV set. The TVs indicator light will be
illuminated blue indicating the TV is turned ON.
Press the POWER button again to turn the TV off. A front mounted indicator light will be
illuminated red indicating the TV is off.
Source selecting
The unit incorporates multiple input sources which can be selected via the
INPUT button on the television or remote. Press the INPUT button to enter Input
menu, as shown right.
Use the direction buttons and the ▲▼ OK button
On the input menu, press the direction button to select the desired ▲▼
input source. After several seconds, the TV will enter the selected source.
Or after you selected the desired source press the OK button to enter the
selected source immediately.
Use the INPUT button and the OK button
On the input menu, press the INPUT button repeatedly to select the desired
input source. After several seconds, the TV will enter the selected source.
Or after you selected the desired source press the OK button to enter the
selected source immediately.
Channel Selection
1. Using CH▲▼ button
2. Use the CH.LIST button to display the channel list and press the button to select ▲▼
channel.
3. You have also quick access to the different TV channels by using the numeric buttons.
4. Using button on the remote control to view the last channel you were watching.
The First Time Installation
The first time you turn on the TV or after you reset all the settings to their original status, the
Auto Installation will start. Follow the prompts on the screen to set the Country, Language, Auto
Power Off and the Auto Search, then press OK button and the channel tuning starts
immediately.
All found TV programs will be saved into the channel list. You can load at the TV channel list by
press the CH.LIST button.
15
TV Operation and System Setup
Press the MENU button to display the setup menu. It includes different categories, such as
Picture, Sound, Channel, Feature and Setup.
You can change the category using the ▲▼ buttons and press OK button or the button to
enter it.
Using the ▲▼ buttons and press OK or button to enter the submenu of each option in the
category. Press the MENU button to exit the submenu and return to the previous menu.
To leave the system settings, press the EXIT button.
Picture Setting
PICTURE setting includes Picture Mode,
Brightness, Contrast, Sharpness, Colour,
Tint, Colour Temperature and Aspect Ratio.
Picture Mode
Press the ▲▼ buttons to select Picture Mode and then press OK or button, the available picture
modes will be listed on the screen.
With the ▲▼ buttons you can select Dynamic, Standard, Mild or User.
If you select User, you can set the level of the Brightness/ Contrast/ Sharpness/ Colour/ Tin as
you desired.
Brightness/ Contrast/ Sharpness/ Colour/ Tint
Press the ▲▼ button to select Brightness/ Contrast/ Sharpness/ Colour/ Tin and press OK or
button to enter the adjusting bar, then press the ◄► button to adjust the level.
Color Temperature
Press the ▲▼ buttons to select Color Temperature and then press OK or , the available Colour
Temperature will be listed on the screen.
With the ▲▼buttons you can select Standard, Cool or Warm.
Aspect Ratio
Press the ▲▼ buttons to select Aspect Ratio, then press OK or to enter it. With the ▲▼buttons
you can select your desired aspect ratio.
Note: In different input source, the available aspect ratios may vary.
16
TV Operation and System Setup
Noise Reduction
Press the ▲▼ buttons to select Noise Reduction, then press OK or to enter it. With the ▲▼
buttons you can select Off, Low, Middle or High.
Sound Setting
The sound settings include the options for
Sound Mode, Bass, Treble, Balance,
Surround, AVL and SPDIF.
Sound Mode
Press the ▲▼ buttons to select Sound Mode and then press OK or , the available Sound Modes
will be listed on the screen. With the ▲▼ buttons you can select Standard, Movie, Music, Speech or
User.
If you select User, you can set the levels of the Bass and Treble as you desired.
Bass & Treble
Press the ▲▼ buttons to select Bass/Treble and then press OK or to enter the adjusting bar.
With the ◄► buttons you can adjust the level of it.
Balance
Press the ▲▼ buttons to select Balance and then press OK or to enter the adjusting bar.
With the ◄► buttons you can adjust the level of balance.
Surround
Press the buttons to select Surround and ▲▼ then press OK or to list the available settings.
With the buttons you can select Off▲▼ or On.
AVL
Some times different TV stations volume level may be different from each other; this function will
normalize audio level from all channels.
Press the but▲▼ tons to select AVL and then press OK or . Use the ▲▼ buttons to select On to
activate this function or Off to deactivate this function.
SPDIF
Press the ▲▼ buttons to select SPDIF and press the OK or to list the available settings.
With the buttons▲▼ you can select Off, PCM or Auto.
17
TV Operation and System Setup
Channel
CHANNEL includes Channel Management,
Favorite Management, Country, Auto
Search, DTV Manual Search and ATV
Manual Search.
NOTE:
The Channel category is only active in DTV
and ATV mode.
When in DTV mode, the ATV Manual
Search is not available; and when in ATV
mode, the DTV Manual Search is not
available.
Channel Management
The option “Channel Management
includes Delete, Lock, Skip and Swap.
Delete a program:
1. With the ▲▼ buttons you can
choose a channel, which shall be
deleted.
2. Press the red coloured button to
delete it.
Lock a program
1. With the ▲▼ buttons you can choose a channel, which shall be locked.
2. Press the green coloured button to lock it.
Swap programs: (only for ATV programs)
1. With the ▲▼ button you can select a channel, which shall be moved.
2. Press the yellow coloured button.
3. Move the channel with the ▲▼ button on the position which you like.
4. Save the moving by pressing the MENU button.
Skip a program:
1. With the ▲▼ buttons you can select a channel, which shall be moved.
2. Press the blue coloured button.
3. Press the blue coloured button again to cancel.
NOTE: A skipped program is skipped when using the CH / buttons to browse the programs
but can be watched by selecting in the channel list or
us
ing the number buttons.
18
TV Operation and System Setup
Favorite Management
In the Favorite Manager, there are four
groups of your favorite programs: Fav1,
Fav2, Fav3 and Fav4.
With the ▲▼ buttons select a program
and press the different coloured button to
set it in different group.
Press red coloured button to set it in
group Fav1.
Press green coloured button to set it in
group Fav2.
Press yellow coloured button to set it in
group Fav3.
Press blue coloured button to set it in group Fav4.
Country
Select this item and press the OK or button to enter the country list. With the buttons▲▼ you
can select your desired country.
Auto Search
Select this item and press the OK or button to enter the submenu. Press the buttons to ▲▼
select the different search type: All, DTV or ATV. Press OK to start the auto search. A new window
appears on the screen, where the status of the searching is documented. The values of the found TV
broadcast programs of ATV, DTV and Radio are listed.
After finishing of the searching, all found TV programs will be saved into the channel list. You can
load at the TV channel list by press the CH.LIST button.
Press the EXIT button to exit.
NOTE: Please allow a few minutes for this feature to scan the entire range of available programs.
DTV Manual Search
1. Press the ▲▼ buttons to select DTV
Manual Search and press the OK or
button to enter the submenu. The
screen will display as shown on the
right:
2. In the submenu, you can define on
which channel shall be runs the search.
You can also set the frequency and
bandwidth.
3. Starts the searching by the press the
Start button in the submenu.
4. To leave the DTV Manual tuning, press the EXIT or MENU button.
19
TV Operation and System Setup
ATV Manual Tuning
1. Press the ▲▼ buttons to select AT V
Manual Search and press the OK or
button to enter the submenu. The
screen will display as shown on the
right:
2. Press the ▲▼ buttons to select
desired item, press the OK or
button to enter the submenu to set.
3. To leave the ATV Manual Search, press
the EXIT or MENU button.
Feature
The Feature settings include the options
for Lock, Language, Clock, Sleep Timer,
Auto Power Off, Hearing Impaired and
PVR/Timeshift.
Lock
Before you can change the settings, you have to insert the preset password to enter the menu.
The default is 0000.
The lock settings include the options for
Lock Enable, Parental Guidance, Change
Pin code and Hotel Mode.
Lock Enable
Press the OK or button to
enter the submenu. With the
▲▼ buttons to select On or Off.
Parental Guidance
With this option you can define
the level of the parental control.
Change Pin code
With this option you can change the preset password. Please insert the new password and
confirm it again.
Hotel Mode
This television is designed with hotel mode. With this option you can set it.
  • Page 1 1
  • Page 2 2
  • Page 3 3
  • Page 4 4
  • Page 5 5
  • Page 6 6
  • Page 7 7
  • Page 8 8
  • Page 9 9
  • Page 10 10
  • Page 11 11
  • Page 12 12
  • Page 13 13
  • Page 14 14
  • Page 15 15
  • Page 16 16
  • Page 17 17
  • Page 18 18
  • Page 19 19
  • Page 20 20
  • Page 21 21
  • Page 22 22
  • Page 23 23
  • Page 24 24
  • Page 25 25
  • Page 26 26
  • Page 27 27
  • Page 28 28
  • Page 29 29
  • Page 30 30
  • Page 31 31
  • Page 32 32
  • Page 33 33

Palsonic TFTV3925FL Owner's manual

Category
LCD TVs
Type
Owner's manual

Palsonic TFTV3925FL comes with exceptional features that will redefine your home entertainment experience. This 39-inch television boasts a crystal-clear 1080p Full HDTV resolution, offering stunning visuals with vibrant colors and sharp details. With its HDMI, YPbPr, and AV connectivity options, you can effortlessly connect various devices such as DVD players, gaming consoles, or set-top boxes to enjoy a wide range of multimedia content on the big screen. Additionally, the USB port allows you to conveniently play movies, music, and photos from external storage devices.

Ask a question and I''ll find the answer in the document

Finding information in a document is now easier with AI