Page is loading ...

User Manual
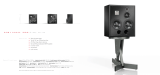
SERIES 6
LOUDSPEAKERS

2
Important Safety Instructions
1. READ INSTRUCTIONS - All safety and operating instructions should be read before
this product is operated.
2. RETAIN INSTRUCTIONS - The safety and operating instructions should be retained for
future reference.
3. HEED WARNINGS - All warnings on this product and in the operating instructions
should be adhered to.
4. FOLLOW INSTRUCTIONS - All operating and use instructions should be followed.
5. WATER & MOISTURE - Do not use this product near water - for example, near a
bathtub, washbowl, kitchen sink, laundry, tub, in a wet basement, near a swimming pool,
or the like
6. ATTACHMENTS - Do not use any attachments not recommended by the product
manufacturer as they may cause hazards.
7. ACCESSORIES - Do not place this product on an unstable cart, stand, tripod, bracket,
or table. The product may fall, causing serious injury to a child or adult, and serious
damage to the product. Use only with accessories recommended by the manufacturer.
8. WALL or CEILING MOUNTING - This product should be mounted to a wall or ceiling
only as recommended by the manufacturer.
9. HEAT - This product should be situated away from direct sunlight and heat sources such
as radiators, heat registers, stoves, or other equipment that produce heat.
10. CLEANING - This product should be cleaned only as recommended by the
manufacturer.
11. OBJECT & LIQUID ENTRY - Care should be taken so that objects do not fall and liquids
are not spilled onto the enclosure.
12. SERVICING - Do not attempt to service the product yourself, beyond what is described
in these operating instructions.
13. REPLACEMENT PARTS - When replacement parts are required, be sure the service
technician has used replacement parts specified by the manufacturer or have the same
characteristics as the original part.
14. SAFETY CHECK - Upon completion of any service or service of repairs to this product,
ask the service technician to perform safety checks to determine that the product is in
proper operating condition. All other servicing should be referred to qualified service
personnel.

3
SERIES 6 LOUDSPEAKERS
Contents
Safety Instructions .................................................................. 2
A word from our senior engineer.........................................4
What’s in the box ...................................................................... 5
Before you begin ......................................................................5
Merlin Rubber Feet ..................................................................5
Series 6 Stabilisers ..................................................................6
Installation ................................................................................. 7
Connections .............................................................................. 7
Placement ..................................................................................8
Room Tuning .............................................................................9
Care of your speaker ...............................................................9
Troubleshooting ......................................................................10
Service .......................................................................................10
Specifications ......................................................................11-12
Warranty ...................................................................................13
Thank you for purchasing this Richter Series 6 Speaker.
Please read the instructions and warnings carefully before use to
ensure safe and satisfactory operation of this product.

4
A word from our senior engineer
Series 6 is the sixth generation of these Legendary Richter
speakers and in this series we wanted to focus on delivering
Loudspeakers that meet today’s customer’s expectations and
equipment choices.
This meant raising the bar from a visual and performance
perspective.
New aesthetically pleasing cabinet designs including magnetic
mounting grills were drafted as well as the development of all
new Propriety drivers which allowed us to take a new cross over
design approach.
Staying true to the comment of the brands founder ‘I’m not
in the audiophile industry, I’m in the entertainment industry,’
the Series 6 range is designed to deliver an Exciting Engaging
Entertainment Experience. We’d like to get you digging through
that record and CD collection or start swiping for your favourites
from a streaming service.
New Drivers
New 6
1
/
2
” lightweight but extremely stiff paper coated Midrange and Bass drivers were
developed for the Series 6 Range effectively minimising breakup and roll off resonance,
along with an all New low distortion soft dome tweeter which has a resonance well below
900Hz and the desired phase characteristics of a gently inclined sound pressure level
frequency response to over 30Khz.
New Cross Overs
These new Drivers allowed a new crossover design approach to be taken using high quality
acoustic polypropylene caps, air core and ferrite core inductors as well as a huge laminated
core inductor feeding the bass on the new Wizard S6.
Cabinet and vents
All Series 6 cabinets have not only been designed to look great but are constructed from
sturdy MDF and have been designed for performance with bass Reflex ports that can
also be tuned with the supplied foam port plugs for even greater control of room and
equipment variables.
Dr Martin Gosnell B.E.(Hons.)
PhD (Physics)

5
SERIES 6 LOUDSPEAKERS
What’s in the box
MERLIN S6:
• 2 x MERLIN S6 BOOKSHELF SPEAKERS PER CARTON
• 2 x Magnetic Speaker Grills
• 2 x Ф 54 x 70mm Foam Port Plugs
• 8 x Ф 15 x 6mm Rubber Feet
• 1 x SERIES 6 Instruction Manual and Warranty Card
HARLEQUIN S6 or WIZARD S6
• 1 x HARLEQUIN S6 or WIZARD S6 FLOORSTANDING SPEAKER PER CARTON.
• 1 x Magnetic Speaker Grill
• 1 x Ф 75 x 70mm Foam Port Plug
• 1 x SERIES 6 Instruction Manual and Warranty Card
• 2 x S6 SPEAKER STABILISER bars
• 4 x Metal Floor Spikes and Floor placement disks
• 4 x Rubber Spikes
• 4 x Floor spike locking nuts
• 6 x M6 Ф Mounting screws and Spring washers
Before you begin
Carefully unbox the speakers on a clean soft surface being careful not to damage the
cabinet finish or drivers, If possible its always good to keep the carton box for future
repackaging and relocations. If there should be damage on the loudspeaker, please contact
your retailer.
Fitting Merlin S6 Rubber Feet
The MERLIN S6 Speakers are supplied
with 4 adhesive rubber feet, using the
foam packing lay the speaker on its side
or turn it over to position the 4 rubber
feat on its base

6
Fitting the S6 Floor Stabilisers
To attach the aluminium stabiliser bars, place the speaker on its back or upside down on a
clean soft surface or using the foam packaging from the carton to protect the speaker from
any accidental damage.
Place the stabiliser bar with the EVA seal side to the base of the speaker.
Align the fixing holes and ensure there’s an even amount of bar protruding from either
side of the speaker then use the supplied 6 x M6 screws with spring washers to secure the
Stabiliser bar to the base of the speaker. (Do not over tighten)
NOTE: When using the S6 Stabilisers on the Richter MKV range, or another brand, only
4 x M6 Screws will be required to attach the Stabiliser bars, but be careful not to over
tighten as this might pull the treaded lug from the bottom of the speaker.
There are both metal spikes with floor positioning discs and rubber spikes for you to select
from depending on your floor surface type. These options are provided to cater for the
many floor surfaces and to avoid any damage to hard floor surfaces.
Screw the locking nut all the way onto each spike and Screw each spike all the way into the
stabiliser bars.
Turn the speaker onto its feet and place it in final listening position. If the speaker wobbles
then adjust the needed spike little by little until the speaker becomes stable and use the
locking nut to secure the position.
IMPORTANT: The HARLEQUIN S6 and WIZARD S6 can be used both with and without
the supplied S6 Speaker Stabilisers. How-ever we strongly recommend fitting the
supplied S6 Floor Stabilisers which were designed to improve the stability and safety of
the speaker in the Home as well as the acoustic performance.
M6 Screws
Rubber Spike
Metal Spike
Locking Nut
Locking Nut
Plate Spacer

7
SERIES 6 LOUDSPEAKERS
Installation
CONNECTIONS
CAUTION: Make sure that all of the system’s electrical components are turned OFF
(and preferably unplugged from their AC outlets) before making any connections.
SPEAKER CONNECTION OPTIONS
Speakers and amplifiers have
corresponding positive and negative (“+”
and “–”) connectors. All Richter Series
6 speakers have connectors that are
marked “+” and “–” on the product label
below the terminal connectors.
Additionally, the “+” connectors have red
markings, while the “–” connectors have
black markings.
AMPLIFIER CONNECTION
To ensure correct polarity, connect each
“+” (red) connector on the back of the
amplifier or receiver to the respective
“+” (red) connector on each speaker.
Connect the “–” (black) connectors in
a similar way. Do not reverse polarities
(i.e., “+” to “–” or “–” to “+”) when
making connections. Doing so will cause
poor stereo imaging and diminished
bass performance.
IMPORTANT: Make sure the “+” and “–” wires or connectors do not touch each other
or the other terminal. Touching wires can cause a short circuit that can damage your
receiver or amplifier.
Richter Series 6 speakers use gold-plated speaker connectors which can accept a variety
of wire connector types: bare wire, pin connectors, spade connectors and banana plugs.
Bare wire or pin connectors
1. 2. 3.
Spade connectors
1. 2. 3.
Banana plugs
1. 2. 3. 4.

8
Placement
SPEAKER PLACEMENT 2.1 STEREO
For best results, place your speakers 6–10 feet (1.8m–3m) apart. Angling the speakers
toward the listening position can improve the stereo imaging. The speakers will produce the
most accurate stereo soundstage when the angle between the listener and the speakers
is between 40 and 60 degrees. Richter’s wide dispersion tweeters maximise flexibility in
speaker placement. (Tweeters are generally the most directional driver type.)
Generally, bass output will increase as the
speaker is moved closer to a wall or corner
but it may become ‘boomy’ if placed too
close. (Refer following page for Room Tuning)
For best performance, place your speakers
at least 51cm (20 inches) away from walls –
but each room is different so try different
positions and listen for yourself.
• If possible, position your speakers so the
tweeters are approximately at ear level.
Bookshelf models should be placed on a
raised surface or on an optional speaker
stands.
NB. For specific subwoofer placement
options, see Richter’s Thor subwoofer
User Manual.
SPEAKER PLACEMENT 5.1 HOME THEATRE
When you use rear speakers in a surround system, place them slightly behind your listening
position, facing each other. Ideally, they should be 90cm–120cm (3–4 feet) above the floor.
(Place them on a raised platform or use speaker stands).
An alternate location is on a wall behind
the listening position, facing forward using
optional wall brackets. (Consult your dealer
for suitable wall brackets.)
The surround speakers should not call
attention to themselves while they’re
playing. Experiment with their placement
until you hear a diffuse, ambient sound
accompanying the sounds that you hear
from the front and centre speakers.
NB. For specific subwoofer placement
options, see Richter’s Thor subwoofer User
Manual.
40º - 60º
OPTIONAL
CENTRE SPEAKER
FRONT
SPEAKERS
FRONT
SPEAKERS
SUB-
WOOFER
40º - 60º
OPTIONAL
CENTRE SPEAKER
FRONT
SPEAKERS
FRONT
SPEAKERS
MERLIN
SPEAKERS
MERLIN
SPEAKERS
SUB-
WOOFER
40º - 60º
OPTIONAL
CENTRE SPEAKER
FRONT
SPEAKERS
FRONT
SPEAKERS
SUB-
WOOFER
40º - 60º
OPTIONAL
CENTRE SPEAKER
FRONT
SPEAKERS
FRONT
SPEAKERS
MERLIN
SPEAKERS
MERLIN
SPEAKERS
SUB-
WOOFER

9
SERIES 6 LOUDSPEAKERS
Room Tuning
MECHANICAL ADJUSTMENT OF THE BOUNDARY FREQUENCY
By using the supplied bass damping plugs in the bass reflex ports, you can alter the
inroom frequency response of your speakers, particularly allowing you to tune the
speakers performance in small rooms or near walls and corners.
This gives you the flexibility to alter the sonic signature of your speakers and make them
work best within a variety of environments.
• PLUGS REMOVED Removing the reflex port plugs will increase the
efficiency of the speakers so that they produce higher sound pressure
levels, than with both ports plugged. This is great if you have a larger
listening room or a layout that just seems to soak up the bass. With
correct placement and no plugs in the ports, the speakers will provide
a “faster”, “rich” and “punchy” bass character.
• PLUGS INSERTED With both ports plugged, the air flow through
the vents is resisted thus changing the dynamics of the speakers
operation. It will tend to reduce the level of bass but can restore the
response to one having an ideal transient character or speed. This is
particularly relevant if placement is in a small room or against a wall
(or near a corner) as these conditions can tend to artificially boost the
response (boomy) and deteriorate the transient details or speed.
If one Speaker is placed near a room corner and creating a boomy
response. Inserting a port plug into one speaker only, may restore the
desired bass character.
NB. For more information and charts visit www.richter.com.au
Care of your speaker
Your new speakers do not require any regular maintenance or calibration. Normal dusting
or cleaning of the surface for appearance purposes is all that is required.
CABINET AND BAFFLE - Avoid using harsh detergents or chemicals when cleaning
the cabinet. Abrasives, detergents, or cleaning solutions may damage the finish on the
cabinet. We recommend using only a damp cloth or automotive grade “quick detailer”
designed for painted surfaces, plastics & vinyl trim, to clean the cabinet.
GRILL - The cloth grill may be carefully cleaned using a vacuum. Animal hair can be
removed using masking tape or similar. Avoid using brushes with stiff bristles that may
damage the grill cloth.
TWEETERS & WOOFERS - DO NOT use liquids, brushes or a vacuum to clean the drive
units.

10
Troubleshooting
If you should experience a problem with the operation of your speakers, please check all of
the following before seeking service. Following is a simple troubleshooting guide to assist
you.
1. Is the Amplifier volume control properly set and the correct source signal selected?
2. Are the speakers correctly connected to the amplifier by one of the means described
on page 7.
3. If the speakers exhibit a drastic change in sound, after you check the items above you
may wish to perform the additional steps below to assist in troubleshooting by verifying
the proper operation of both amplifier and speakers.
• Turn on your audio equipment,
• Prepare to play a 20Hz to 20KHz frequency sweep (test tone) from a CD/DVD test
disc, Youtube, smart phone, computer, or other signal source
• Adjust the volume of your equipment to a medium volume level and start playing the
test signal
• Prepare to carefully listen to the Speakers frequency output (make sure the room is
quiet)
• Turn down the volume or stop the test signal after a few seconds.
• The above process helps determine if the speakers drivers are functional.
• If there is no change and you are still unable to hear output from the speakers or
a driver then inspection by an authorised retailer or qualified technician may be
required.
The following conditions require service by an authorised Retailer:
• The unit has been exposed to liquid.
• The unit does not appear to operate normally or exhibits a marked change in
performance.
• Part of the cabinet or drivers have been physically damaged.
Service
WHERE TO SEND THE PRODUCT FOR A WARRANTY REPAIR
For service contact your retailer first or you can locate your nearest service centre at
www.richter.com.au/service-centres/
For questions regarding service, contact us at customer support from our website:
www.richter.com.au
Before transporting your product ALWAYS pack the product / part very carefully.
Unfortunately damages during transportation can be common. If the package is weak,
the transporting company does not compensate damages. Remember to always enclose
a copy of your receipt and a description of the defect.

11
SERIES 6 LOUDSPEAKERS
Specifications
MODEL MERLIN S6
Type: 2 Way Vented Bookshelf
Enclosure: Bass Reflex
Tweeter: 25mm soft dome neo
Mid/bass: 165mm (6 1/2") Composite Paper cone
Response: (-6dB) 44Hz-30KHz
Sensitivity: 88 dB (2.83Vrms, 1m on Axis)
Nominal Impedance: 6 Ohms (minimum 4.6 Ohms)
Rec Amplifier Power: H/T 50-100 2ch 20-150 Wrms
Dimensions: H320 x W219 X D289 (Including 9mm grill)
Net Weight: 7.3Kg Per Speaker
MODEL HARLEQUIN S6
Type: T.B.A.
Enclosure: Bass Reflex
Tweeter: 25mm soft dome neo
Mid/bass: 165mm (6 1/2") Composite Paper cone
Response: T.B.A.
Sensitivity: T.B.A.
Nominal Impedance: T.B.A.
Rec Amplifier Power: T.B.A.
Dimensions Cabinet Only: H895 x W219 X D289 (Including grill)
Dimensions including
Speaker Stabilisers:
H938 x W219 xD289 (Including 9mm grill)
Net Weight: T.B.A. Kg Per Speaker

12
MODEL WIZARD S6
Type: Vented Quasi 3 Way Floor Standing
Enclosure: Bass Reflex
Tweeter: 25mm soft dome neo
Midrange: 165mm (6 1/2") Composite Paper cone
Bass: 165mm (6 1/2") Composite Paper cone
Response: (-6dB) 25Hz-30KHz
Sensitivity: 90 dB (2.83Vrms, 1m on Axis)
Nominal Impedance: 4 Ohms (minimum 3.5 Ohms)
Rec Amplifier Power: H/T 100-200 2ch 40-200 Wrms
Dimensions Cabinet Only: H965 x W221 x D359 (Including grill)
Dimensions including
Speaker Stabilisers:
H1003 x W300 xD359 (Including grill)
Net Weight: 20.3Kg Per Speaker
Specifications subject to change without notice.

13
SERIES 6 LOUDSPEAKERS
Your Warranty
THE ENCLOSED TERMS AND CONDITIONS RELATE TO THE WARRANTY PROVIDED BY RICHTER AUDIO PTY LTD (“Richter
Audio”)(ABN 22 613 067 815) products purchased within Australia.
The warranty period is 5 years for Passive Loudspeakers and 2 Years for Active Speakers and Subwoofers, commencing from
the date of purchase (“Warranty Period”).
GENERAL TERMS AND CONDITIONS OF STANDARD WARRANTY
1 Our goods come with guarantees that cannot be excluded under the Australian Consumer Law. You
are entitled to a replacement or refund for a major failure and compensation for any other reasonably
foreseeable loss or damage. You are also entitled to have the goods repaired or replaced if the goods fail to
be of acceptable quality and the failure does not amount to a major failure.
2 The benefits to the consumer given by this Warranty are in addition to other rights and remedies of the
consumer under a law in relation to goods or services to which the warranty relates, being the Australian
Consumer Law.
3 Subject to Clause 1 above and the terms below, as your Standard Warranty, Richter Audio agrees to repair
or replace at cost the Richter product, and any accessory supplied with the product, purchased by you in
Australia when the product does not perform in accordance with the manufacturer’s specifications during the
Warranty period.
4 To make a claim under the Standard Warranty you will need to:
(a) Contact Richter Audio through our website www.richter.com.au for customer support.
(b) Refund or replacement via your Richter Audio’s Authorised Retailer is available for a period of 14 days
after purchase for goods that have been inspected and determined to have a major failure. Refund and
exchange is not applicable if you change your mind after purchase.
(c) Note that you will need to submit proof of purchase (e.g. delivery invoice or purchase receipt) with your claim.
5 Products presented for repair may be replaced by refurbished products of the same type rather than being
repaired. Refurbished parts may be used to repair the products. Replacement of the product or a part does
not extend or restart the Warranty Period.
6 If the product presented for repair is capable of retaining user-generated data, you are advised that repair
of the product may result in loss of the data. Richter Audio shall not be held responsible for any loss of such
data as a consequence of fault-find or repair process.
7 The product will be at the owner’s risk whilst in transit to and from the Richter Audio Service Centre, unless
transported by Richter Audio or 3rd party transport booked by Richter Audio.
8 Richter Audio will bear the expense of transport where transported by Richter Audio. Any other expense of
claiming the warranty will be covered by the owner of the goods.
9 Richter Audio may seek reimbursement of any costs incurred by them when the product is found to be in
good working order. The owner of the goods will cover any return transport cost.
10 Products returned to Richter Audio by a courier and are damaged in transit by insufficient packing will be
quoted and the cost of the repair will be covered by the owner of the goods.
EXCLUSIONS AND LIMITATIONS
11 Subject always to Clause 1 the Standard Warranty will not apply:
(a) if the product has not been installed, operated, maintained or used in accordance with the manufacturer’s
instructions or specifications provided with the product.
(b) to damage, malfunction or failure resulting from alterations, accident, misuse, abuse, fire, liquid spillage,
mis-adjustment of customer controls, use on an incorrect voltage, power surges and dips, thunderstorm
activity, acts of God, voltage supply problems, tampering or unauthorised repairs by any persons, use of
defective or incompatible accessories, the operation of a computer virus of any kind, exposure to abnormally
corrosive conditions or entry by any insect, vermin or foreign object in the product.
(c) to damage arising during transportation, installation or while moving the product, or to any transportation
costs of the product or any parts thereof to and from the owner, unless otherwise specified in this Warranty.
(d) to any third-party software or hardware not contained in the product as originally configured by the
manufacturer.
(e) to any failure, to the extent that the failure is not a failure of the product to perform in accordance with its
specifications.

14

15
SERIES 6 LOUDSPEAKERS

For support and warranty registration visit
www.richter.com.au
Our goods come with guarantees that cannot be excluded under the Australian Consumer Law.
You are entitled to a replacement or refund for a major failure and for compensation for any other
reasonably foreseeable loss or damage. You are also entitled to have the goods repaired or replaced
if the goods fail to be of acceptable quality and the failure does not amount to a major failure.
SERIES 6 | 01-AUG-19
/