Page is loading ...

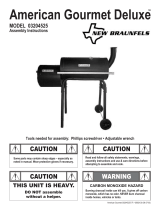
CAUTION WARNING
CARBON MONOXIDE HAZARD
Burning charcoal inside can kill you. It gives off carbon
monoxide, which has no odor. NEVER burn charcoal
inside homes, vehicles or tents.
Read and follow all safety statements, warnings,
assembly instructions and use & care directions before
attempting to assemble and cook.
CAUTIONCAUTION
Some parts may contain sharp edges – especially as
noted in manual. Wear protective gloves if necessary.
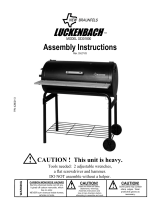
THIS UNIT IS HEAVY.
DO NOT assemble
without a helper.
Tools needed for assembly: Phillips screwdriver • Adjustable wrench
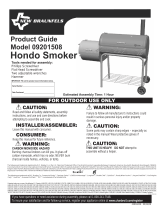
Hondo Deluxe
MODEL 03207245
Assembly Instructions
Hondo Deluxe 03207245 E / 42802128(02-12-03)
TM

STOP!
Missing a part?
No need to go back to the store!
The store where you made your purchase
does not stock parts for this item. If you
need parts, whether they are missing or
damaged, call the Customer Service toll
free Help Line.
Call us and we will gladly ship
the part you need
FREE OF CHARGE.
Call Our Help Line
PARTS LIST
ITEM DESCRIPTION QTY
55700342 SMOKE CHAMBER KIT 1
55700343 SMOKE CHAMBER LID ASSEMBLY 1
55700344 FIREBOX KIT 1
55700345 FIREBOX LID ASSEMBLY 1
55700346 HINGE KIT 1
55700347 FRONT SHELF KIT 1
55700348 AXLE KIT 1
55700349 WHEEL KIT 1
55700350 LEG BRACE KIT 1
55700351 SMOKE STACK KIT 1
55700352 SHORT LEG KIT 1
55700353 LONG LEG KIT 1
ITEM DESCRIPTION QTY
55700354 KNOCKOUT COVER KIT 1
55700355 DOOR LATCH KIT 1
55700356 LOGO PLATE KIT 1
55700357 BUTTERFLY DAMPER KIT 1
42000016 HARDWARE BAG 1
42802128 ASSEMBLY INSTRUCTIONS 1
45602003 LEG EXTENDER 2
40009927 CAST IRON COOKING GRATE, Small 1
40009928 CAST IRON COOKING GRATE, Large 1
40002811 GRATE SET (3) 1
46030090 WIRE SHELF 1
44830150 GREASE CAN HOLDER 1
BEFORE BEGINNING ASSEMBLY...GETAHELPER!
Pick a suitable location to work. Open the carton and slit the corners to
open like the illustration below. This will give you a protective work surface upon which to start the assembly.
This unit is heavy and
requires a second person for lifting and moving.

2
1
• Cart should be assembled in position
shown.
• Connect leg sections together as
shown.
•
Affix wire shelf as shown in section
• Attach leg braces to each side with
eight and eight
flange nuts.
• Thread wheel axle through both legs
on the right side as shown and attach
using a for each side.
• Snap hub cap into place as shown.
• Insert into bottom of
legs opposite of wheels.
Make sure short legs with axle holes
are on the same side.
• AA.
• Wire shelf must be attached before
leg brace assembly begins.
1/4 -20 x1-3/4 screws
1/4-20
wheel hitch pin
leg extenders
• With cart positioned as shown,
align holes on cart with those
on the smoke chamber bottom.
• Attach the smoke chamber
using four
screws and four flange
nuts per leg.
• Tighten all hardware.
1/4-20x1-3/4”
1/4-20
AA
DO NOT ASSEMBLE WITHOUT A HELPER.
Connect Leg Sections
(Repeat for Other Side)
Long Leg
Short Leg
(with Axle holes)
1
2
3
Attach Leg Braces
(Repeat for Other Side)
Attach Wire Shelf
Leg
Extenders
Attach
Wheel, Hitch Pin &
Hub Cap
(Repeat for other side)
Smoke Chamber
Lid not shown for clarity.
Slotted
Hole
Round
Hole

3
• Attach knockout cover to the firebox
chamber using two screws and
two
• With smoker turned onto its right side,
lower the firebox over the opening on
smoke chamber as shown. Align the holes
in the smoke chamber to those on the
firebox and insert six
and washers.
• Attach six to the backs
of each firebox screw and tighten.
8-32 x 1/2
8-32 keps nuts.
1/4 - 20 x 3/4 hex
head screws
1/4 - 20 flange nuts
Check to be sure that all screws and nuts
used so far are fully tightened.
• Have someone help you stand the unit
in the upright position.
4
Firebox
Smoke Chamber
(Left Side)
• Attach using two
and two
.
• Attach using three
and three
smokestack
1/4 - 20 x 1/2 screws
1/4 - 20 flange nuts
front shelf
1/4 - 20 x 3/4 screws
1/4 x 20 flange nuts.
Lid removed for clarity.
Attach
Smokestack
1
2
Attach
Front Shelf
Shelf Attachment
Knockout
Cover
1
1
Lids not shown
for clarity.
2

5
Lids removed for clarity.
• Insert wire and cast iron grates as
shown.
6
• Hang the grease can holder under the
smoke chamber on right side. Enter
through large hole first.
• An empty soup can is recommended to
hang from grease can holder.
Grease Can Holder

WARNING
MOST SURFACES ON THIS UNIT ARE HOT WHEN IN USE.
USE EXTREME CAUTION. KEEP OTHERS AWAY FROM UNIT.
ALWAYS WEAR PROTECTIVE CLOTHING TO PREVENT INJURY.
Limited Warranty
New Braunfels Smoker Co. warrants this grill/smoker for replacement or repair of parts and/or workmanship for a period of ninety (90)
days . Paint is not warranted and will require touchup.
These limited warranties are made exclusively to the original customer presenting proof of purchase. These warranties are limited to
non-commercial residential use only. Any returned goods must be shipped prepaid. These warranties do not cover normal wear and
tear or damages resulting from abuse or misuse. This warranty excludes incidental or consequential cost due to damages or losses or
property of any nature.
NOTICE: Some states do not allow the exclusion or limitation of incidental or consequential damages or limitations on how long an
implied warranty lasts, so the above limitations or exclusions may not apply to you. This warranty gives you specific legal rights and
you may also have other legal rights which may vary from state to state.
For further information, contact the New Braunfels Smoker Co., toll free at 1-800-232-3398.
HARDWARE LIST
Hardware is shown actual size. You may have spare hardware after assembly is complete.
1/4-20x1/2”
Machine Screw
Qty. 2
1/4-20x1-3/4”
Machine Screw
Qty. 12
1/4-20
Flange Nut
Qty. 23
1/4-20
Reverse Lock Nut
Qty. 2
1/4-20x3/4”
Hex-Head
Machine Screw
Qty. 8
1/4-20
Flat Washer
Qty. 10
1/4-20x 3/4”
Machine Screw
Qty. 3
#8-32
Keps Nut
Qty. 2
#8-32 x 1/2
Machine Screw
Qty. 2

Before you begin...
Familairize yourself with the major components and controls of
the unit.
Smokestack
Damper
Smoke
Chamber
Firebox
Firebox
Damper
Grilling
Barbequing
Slow Smoking
is a method of cooking directly over a fire, for foods
such as steaks, hamburgers, and hot dogs. Cooking
temperatures for grilling ranges from approximately 350° to
550°. Due to the high temperatures and direct proximity to the
fire, this type of cooking requires close attention.
is accomplished by using indirect heat, with a
temperature range from approximately 225° to 350°. Using an
offset firebox design, only the heat and smoke flow through the
smoke chamber, cooking the food without direct contact with the
fire. This method is ideal for chicken, ribs, fish, and vegetables.
can also be done with the offset firebox
design, using indirect heat and smoke. Similar to barbequing,
the food is placed in the smoke chamber, with the fire in the
firebox. However, slow smoking occurs in a temperature range
of approximately 140° to 225°, and requires an extended
cooking time. This type of cooking is ideal for turkey, ham, or
sausage.
With any type of live fire cooking, allow enough time to build a
fire and get the grill/smoker up to temperature.
Build a fire using either charcoal briquettes, lump charcoal, or
wood chunks. Briquettes offer a very good source of heat, and
are readily available in the marketplace. Most briquettes are
manufactured using a combination of wood charcoal, coal
powder, and a processing binder. Lump charcoal is a premium
form of charcoal because it is made of only wood. Lump
charcoal burns hotter and longer than briquettes, and imparts
no chemical flavors to the food being cooked. For a more robust
smoke flavor using briquettes or lump charcoal, try adding
several wood chunks to the fire. Wood chunks are available in a
variety of natural flavors, and can be used alone or in addition to
charcoal. As a general rule, any hardwood that bears a fruit or
nut is suitable for cooking. However, different woods have very
different tastes.
Pecan Hickory Mesquite
Apple White Oak Blackjack Oak
Peach Cherry Red Oak
Experiment with different woods to determine your personal
favorite, and always use well-seasoned wood. Green or fresh-
cut wood can turn food black, and tastes bitter.
, the following steps
should be taken to season the interior steel and cast iron grates.
This will seal the inside surfaces with wood smoke and resin,
helping to prevent corrosion. , brush all interior surfaces
and cast iron grates with vegetable oil. , build a small fire
on the fire grate inside the firebox, being sure not to lay coals
against the walls. After the fire becomes established, close both
lids and position both dampers approximately 1/4 open. Sustain
this fire for at least 2 hours.
Mild Flavor Medium Flavor Heavy Flavor
Prior to cooking on your grill/smoker
First
Next
The unit is now ready for
cooking!

Grilling
Position both fire grates in the smoke chamber. Build a fire on
top of the fire grates using either charcoal briquettes, lump
charcoal, or wood chunks. Keep the smoke chamber lid open,
and both dampers open, until the fire has established itself and
is ready for cooking. Spread out coals as required, insert
cooking grates, and start grilling. Remember, grilling is done
over the top of the fire. Use the dampers to regulate the fire and
heat. Open the dampers to increase temperature; close
dampers to decrease temperatures. The smoke chamber door
can remain open or closed. Refer to recipes for required
cooking times and temperatures.
Barbequing and Slow Smoking
Position both cooking grates in the smoke chamber. Position
one fire grate in the firebox. Build a fire on this fire grate using
either charcoal briquettes, lump charcoal, or wood chunks.
Keep the firebox lid open, and both dampers open until the fire
is established. Then, close the firebox lid (both lids should now
be closed) and you will begin to see smoke flow from the
smokestack. Adjust both dampers until the desired smoker
chamber temperature is achieved. Open the dampers to
increase temperature; close the dampers to decrease
temperatures. This process of adjusting the temperature can
take several minutes. Once the proper setting is obtained, only
occasional attention is required. Now, place the food in the
smoke chamber. Remember, this is indirect cooking, so the fire
is in the firebox, and the food is placed in the smoke chamber.
Keep both lids closed while cooking to prevent unnecessary
loss of heat and smoke. Refer to recipes for required cooking
times and temperatures. Add charcoal or wood chunks as
necessary to maintain the fire.
Maintenance
When finished cooking, and the unit has adequately cooled,
clean out all remaining ashes. Ashes collect moisture, which
can lead to premature rusting and decay. Periodically coating
the interior surfaces and cooking grates with vegetable oil will
aid in the protection of your unit. Also, occasional touch up of
the exterior paint will be required. Black, high-temperature spray
paint is recommended. Never paint the interior of the unit.
TOLL FREE 1-800-232-3398
Visit our web site at www.nbsmoker.com
1/8