Page is loading ...


2

3
INTRODUCTION/TABLEOFCONTENTS StepOne
The LVU800 Series is a general‐purpose ultrasonic level transmitter that provides a loop powered 4‐20 mA
output.The4‐20mAoutputcanbeusedtoprovidetheproportionallevelofliquidinanytankorvessel.The
signalcanbeconnectedtoanydevicethatacceptsalooppowered4‐20mAsignal,suchasaPLC,SCADA,DCS,
display,controller,etc.
NewFeatures
Simpleconfigurationwithpushbuttonconfiguration
AdjustableLoopFail‐Safe,HoldLast,Empty,Full,21mA,22mA
EasytoreversemAoutput,4‐20mAto20‐4mA
Increasedoutputfiltering
TableofContents
Introduction ...................................................................................................................................................3
Specifications ...................................................................................................................................................4
Dimensions ...................................................................................................................................................4
SafetyPrecautions:...........................................................................................................................................5
Aboutthismanual.................................................................................................................................5
Components..........................................................................................................................................6
GettingStarted..................................................................................................................................................7
FeatureGuide.......................................................................................................................................7
GettingAround.....................................................................................................................................8
HowtoentertheMENU.......................................................................................................................9
HowtoconfigureUNITS........................................................................................................................9
HowtoconfiguretheDISPLAY............................................................................................................10
Howtoconfiguretheoperationalrange(Height&Fill‐H).................................................................11
Howtoreversethecurrentoutput(RevmA).....................................................................................12
HowtosettheFail‐Safe(SAFE) settings.............................................................................................12
HowtosetTargetCalibration(TGCAL)..............................................................................................13
Wiring .................................................................................................................................................14
Installation .................................................................................................................................................16
MountingGuide..................................................................................................................................16
FittingSelection..................................................................................................................................17
Appendix .................................................................................................................................................20
SETUP .................................................................................................................................................20
Diagnostic(DIAG)parameters............................................................................................................20
Reset .................................................................................................................................................20
UserSettings.......................................................................................................................................21
Troubleshooting...............................................................................................................................
...22

4
SPECIFICATIONS/DIMENSIONS StepTwo
Range: LVU809:4"to9.8'
(10cmto3m)
LVU816:8"to18.0'
(20cmto5.5m)
LVU826:8"to26.4'
(20cmto8m)
LVU832:12"to32.8'
(30cmto10m)
Accuracy:±0.2%ofrange
Resolution: LVU809:0.019”(0.5mm)
LVU816/826:0.039”(1mm)
LVU832:0.078”(2mm)
Deadband: LVU809:4”(10cm)
LVU816/826:8”(20cm)
LVU832:12”(30cm)
Beamwidth: LVU809:2”(5cm)
LVU816/826/832:
3"(7.6cm)dia.
Configuration: Pushbutton
Memory: Non‐volatile
Displaytype: LCD,6‐digit
Displayunits: Inch,cm,Feet,morpercent
Supplyvoltage: 12‐28VDC
Loopresist.: 500Ohms@24VDC
Signaloutput: 4‐20mA,two‐wire
Signalinvert: 4‐20mA/20‐4mA
Signalfail‐safe: 4mA,20mA,21mA,22mA,
holdlast
Processtemp.: F:‐4°to140°
C:‐20°to60°
Temp.comp.: Automatic
Ambienttemp.: F:‐31°to140°
C:‐35°to60°
Pressure: MWP=30PSI
Enclosurerating: NEMA4X(IP65)
Encl.material: PC/ABSFR
Encl.hardware: Brassandstainless
Enclosurevent: Watertightmembrane
Conduitentrance:Dual,1/2”NPT
Trans.material: PVDF
Processmount: LVU809: 1”NPT/1”G
LVU816/826/832:
2”NPT/2”G
Mount.gasket: FKM
Classification: Generalpurpose
Compliance: CE,RoHS
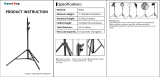
Dimensions:
SideView/LVU809Series
SideView/LVU816,LVU826andLVU832
Series

5
SAFETYPRECAUTIONS StepThree
AboutthisManual:PLEASEREADTHEENTIREMANUALPRIORTOINSTALLINGORUSINGTHISPRODUCT.This
manualincludesinformationontheLVU800SeriesUltrasonicLevelSwitchfromOMEGAENGINEERING.Please
refertothepartnumberlocatedontheswitchlabeltoverifytheexactmodel configuration,whichyouhave
purchased.
User’s Responsibility for Safety:OMEGA ENGINEERING manufactures a broad range of level sensing
technologies. While each of these sensors is designed to operate in a wide variety of applications, it is the
user’sresponsibilitytoselectasensormodelthatisappropriatefortheapplication,installitproperly,perform
tests of the installed system, and maintain all components. The failure to do so could result in property
damageorseriousinjury.
ProperInstallationandHandling:Onlyprofessionalstaffshouldinstalland/orrepairthisproduct.Installthe
switch with the included FKM gasket and never over tighten the switch within thefitting.Always
checkfor
leakspriortosystemstart‐up.
WiringandElectrical:Asupplyvoltageof12to28VDCisusedtopowertheLVU800Series.Electricalwiring
ofthetransmittershouldbeperformedinaccordancewithallapplicablenational,state,andlocalcodes.
Material Compatibility:The enclosure is made
of Polycarbonate (PC).The transducer is made of
PolyvinylideneFluoride(PVDF).Makesurethatthemodel,whichyouhaveselected,ischemicallycompatible
withtheapplicationmedia.
Enclosure: While the switch housing is liquid‐resistant the LVU800 Series is not designed to be operational
when immersed.It should be mounted in such a way that the enclosure and transducer do not come into
contactwiththeapplicationmediaundernormaloperationalconditions.
The enclosure has a flip cover with dual 1/2” NPT female conduit ports and an internal terminal strip for
wiring.Toopentheenclosure,youwillneeda
smallinsertiontoolsuchasascrewdriver.Loosenthelocking
screwlocatedatthetopfrontoftheenclosure.Rotatethehingedcoverupfor135°accesstothe faceplate
andterminalstrips.Beforeclosingtheenclosure,makesurethattheenclosuregasketisproperlyseated,and
thatanyconduitfittings,cableconnectorsorplugsareinstalledcorrectlyandsealed.
HandlingStatic‐SensitiveCircuits/Devices:Whenhandlingthetransmitter,thetechnicianshouldfollowthese
guidelines to reduce any possible electrostatic charge build‐up on the technician’s body and the electronic
part.
1. Always touch a known good ground source before handling the part. This should be repeated while
handling the part and more frequently aftersitting down from a standing position, slidingacross the
seatorwalkingadistance.
2. Avoidtouchingelectricalterminalsofthepartunlessmakingconnections.
3. DONOTopentheunitcoveruntilitistimetocalibrate.

6
SAFETYPRECAUTIONS StepThree
MakeaFail‐SafeSystem:Designafail‐safesystemthataccommodatesthepossibilityofswitchand/orpower
failure.OMEGAENGINEERING recommends theuse of redundant backupsystemsand alarms inadditionto
theprimarysystem.
Flammable, Explosive or Hazardous Applications:LVU800 Series should not be used within classified
hazardousenvironments.
Warning: Always use the FKM gasket when installing the LVU800 Series, and make sure that all electrical
wiringoftheswitchisinaccordancewithapplicablecodes.
Components: LVU800 Series is offered in three different models. Depending on the model purchased, you
may or may not have been shipped all
the components shown below.You do however, need an LVU800
SeriesandFKMgaskettoconfigure,installandoperateLVU800Series.
LVU800Series
o LVU809 –9.8’(3m)range, Type4Xencl., 1”NPT
o LVU809‐G –9.8’(3m)range, Type4Xencl., 1”G
o LVU816
–18.0’(5.5m)range, Type4Xencl., 2”NPT
o LVU816‐G –18.0’(5.5m)range, Type4Xencl., 2”G
o LVU826 –26.2’(8m)range, Type4Xencl., 2”NPT
o LVU826‐G –26.2’(8m)range, Type4Xencl., 2”G
o LVU832 –32.8’(10m)range, Type4Xencl., 2”NPT
o LVU832‐G –32.8’(10m)range, Type4Xencl., 2”G
FKMGasket
o Part#220128–forLVU809seriesonly
o Part#220129–forLVU816,LVU826andLVU832series
Manual

7
GETTINGSTARTED StepFour
LVU800 Series can be configured before installation.The switch features non‐volatile memory, so the set
pointsconfiguredbeforeinstallationwillnotbelostwhentheswitchispowereddown.Tostart,allyouneed
isthefollowinginformation:
BasicTankInformation:
o HEIGHT–Distancefromthetransducerfacetothebottomof
thetank.
o FILL‐H–Maximumfillheightoftheliquidfromthebottomof
thetank.
o Thesevalueswillallbeinthesamedistancevalue(inches,
centimeters,feetormeters)andwillallbemeasuredfromthe
bottomofthetank.
Power:
o Provide12to28VDCinputpowertotheLVU800Series.
FeatureGuide:
FEATURE ACCESSBY
EasytouseMENU Press and hold SELECT key until MENU is displayed
approximately 5 seconds.The MENU items will rotate
throughdisplay,pressSELECTtochangeanitem.
ManyUNITSof
measurement.
IntheMENU mode,pressSELECT whenUNITSisdisplay,
then select INCHES, CM (centimeter), FEET, METERS or
PERCENT.
No cumbersome measure
required.Set point
distances are relative to
thetankbottom.
In MENU mode, select the TANK item and set the
HEIGHT of the tank from the transducer face to the
bottom of the tank.Set the Fill Height (FILL‐H) to the
maximumfillheightoftheliquid
fromthebottomofthe
tank.Now allof the setpoints are from the bottomof
thetankup.
OptionalTargetCalibration Usethisfeatureifthetankisattheemptyorfullsetting.
This will accept the current level as either empty (TG
CALEMPTY)offull(TGCALFULL).
Fail‐Safety Use the SAFE function to preset the output to either
Empty (4 mA), Full (20 mA, 21 mA or 22 mA) or Hold
LastValueincasethetransmitterlosesitssignal(LOST).

8
GETTINGSTARTED(continued) StepFour
GettingAround:
LVU800Seriesisconfiguredbytheuseofthreepushbuttons(UP,DOWNandSELECT)andaLCDdisplay.Asa
lockout feature, the buttons are inactive until the SELECT button is held down for 5 seconds, and then the
displaywillbegintoscrollthroughthetoplevel
oftheconfigurationmenu.
StepsforBasicConfiguration:
1. SelectandSettheunitsofoperationintheUNITSmenu.
2. ConfiguretheSensorHeightandFill‐HundertheTANKmenu.
3. SettheSAFEvalue.
TopLevel
TheConfigurationmenuwillcontinuetoscrollthroughtheitemsbelowuntiltheSELECTbuttonispressed.
UNITS–TANK–SAFE–TGCAL–VALUES‐HELP–RUN.
ToreturntotheOperationalmodeofLVU800Series,pressSELECTwhileRUNappearsinthedisplay.
UNITS – Allows end user to select the units for
configuration and operation.Select between Inches,
Centimeters,Feet,MetersorPercent.PressEXITtoreturntotheTopLevelmenu.
TANK–Allowstheendusertoconfiguretheoperationalrangefortheswitch.
o HEIGHT–Distancefromthetransducerfacetothebottomofthetank.
o FILL‐H–Maximumfillheightoftheliquidfromthebottomofthetank.
o REVMA – Allowsthe transmitter toreversethe current outputsuch that4 mA isat FULLand 20
mAisatEMPTY.
o PressExittoreturntotheToplevelMenu.
o Note:ifUNITSissettoPercent,thenTANKwillnotappear.ToviewTANK,setUNITStoanyofthe
following:Inches,Centimeters,FeetorMeters.
SAFE–Thefail‐safefortheLVU800Seriescanbepresettothecustomer’srequirement.
o 22mA–Overfillfail‐safe
setting.
o 21mA–Overfillfail‐safesetting.
o 20mA–Fullfail‐safesetting.
o 4mA–Emptyfail‐safesetting.
o HOLD–Keepstheoutputatitslastcurrentreadingwhenfail‐safeconditionoccurs.
TGCAL–TargetCalibration(allowsforthesensortoacceptthecurrentlevelaseitherEMPTYorFULL.
VALUES–Providessetupinformation,theabilitytoresettheLVU800Seriesandasimulationmodetotest
therelayfunction.
o SETUP–WilldisplaythesettingforallfunctionsofLVU800Series.
o DIAG – This is a production test feature used by the factory to confirm operation.This mode
shouldonlybeusedwhensupervisedbyanOmegaEngineeringrepresentative.
o RESET–WillresettheLVU800Seriesbacktoitsoriginalfactorysetting.
HELP–ProvidesinformationforcontactingOmegaEngineeringno‐line.
RUN–Returnstheunittonormalmeasurementandcontrolmode.

9
GETTINGSTARTED(continued) StepFour
HowtoentertheMENU:
1. PressandholdSELECTkey(approximately5seconds)untilMENUisdisplayed.
2. Themenuitemswillrotatethroughdisplay.
3. PressSELECTtochangeanitem.
HowtoconfigureUNITS:
1. IntheMENUmode,pressselectwhenUNITS isdisplay.
2. PressSELECTtochoosebetweenINCHES,CM(centimeter),
FEET,METERSorPERCENT.
3. SelectEXITtoreturntotheTopLevelMenu.
Note:ReadingthelevelofliquidinPercent:
Omega Engineering recommends that when selecting PERCENT, configure the HEIGHT and FILL‐H
settings before selecting PERCENT in order
to span the LVU800 Series for your application
requirements.
WheninPERCENT,theoperationalspanwill bebaseduponthelastTANKsettings,typicallythefactory
settingsforHEIGHTandFILL‐H.
LVU800Series HEIGH
T
F
ILL‐
H
LVU809Series 118.1”(300cm) 114.1”(290cm)
LVU816Series 216.5”(550cm) 208.5”(530cm)
LVU826Series 314.9”(800 cm) 307.1”(780cm)
LVU832Series 393.7”(1000cm) 381.9”(970cm)
WhenPERCENTisselected,theTANKsettings(HEIGHTandFILL‐H)willbedisabled.

10
GETTINGSTARTED(continued) StepFour
DISPLAY‐AIRModevs.LIQUIDMode:
The display can be made to display either the height of liquid in the
tank(LIQUIDmode)ortheamountofairinthetank(AIRmode).
AIRmode–Willdisplaythedistancefromthebottomofthesensorto
thesurfaceoftheliquid.
LIQUID mode – Will display the height of liquid measured from the
bottomofthetank.
Howtochangethedisplaymode:
1. IntheMENUmode,pressselectwhenUNITSisdisplay.
2. PressSELECTwhenDISPLAYappears.
3. PressSELECTtochoosebetweenAIRorLIQUID.
4. WhenEXITappears,pressSELECTreturntoTopLevelMenu.

11
GETTINGSTARTED(continued) StepFour
HowtoconfiguretheOperationalrangeofLVU800Series:
No cumbersome measurement is required via Target Calibration to
establish set points.Set point distances are relative to the tank
bottom.
1. InMENUmode,selecttheTANKitem.
2. WhenHEIGHTappears,pressSELECT.
3. Using the UP and DOWN buttons, set the HEIGHT of thetank
fromthetransducerfacetothebottomofthe tank.
4. To enter the value, press and hold SELECT (Approximately 2
seconds)untilSAVEDisdisplayed.
5. WhenFILL‐Happears,pressSELECT.
6. UsingtheUPandDOWNbuttons,settheFillHeight(FILL‐H)to
the maximum fill height of the liquid from the bottom of the
tank.
7. PressandholdSELECT(2seconds)toenterthevalue.
8. WhenEXITappears,pressSELECTreturntoTopLevelMenu.
SensorHeight
Fill‐Height
Note:
OmegaEngineeringrecommendsthatwhenselectingPERCENT,configuretheHeightandFill‐Hsettings
beforeselectingPERCENTinordertospantheLVU800Seriesforyourapplicationrequirements.
WhenPERCENTisselected,theTANKsettings(HeightandFill‐H)willbedisabled.

12
GETTINGSTARTED(continued) StepFour
HowtosetaReversetheCurrentOutput:
ThedefaultforLVU800 Series istohave4mAatEmptyand20mAat
Full.Thisisthenormal(NORM)setting.Theoutput can bereversed
(REV)with20mAatEmptyand4mAatFull.
1. InMENUmode,selecttheTANKitem.
2. WhenREVMAappears,pressSELECT.
3. WhenREVappears,pressSELECT.
4. WhenEXITappears,pressSELECTreturntoTopLevelMenu.
LVU800 Series is now in the Reverse mode.To switch back to the
Normal mode, follow the instructions above and select NORM under
step3.
HowtosettheSAFEsetting:
ThedefaultforFail‐Safety(LOST)canbepreset.Thechoicesare4mA,
20mA,21mA,22mAandHOLD.
1. InMENUmode,selecttheSAFEitem.
2. Whentherequiredsettingappears,pressSELECT.
3. WhenEXITappears,pressSELECTreturntoTopLevelMenu.

13
GETTINGSTARTED(continued) StepFour
HowtosetusingTargetCalibration(Empty):
Instead of measuring for Empty tank, the Empty distance can be set
automatically.ThismethodrequiresthatthetankbeEmptyoratthe
level that is considered Empty in the application.To set TG Empty,
followtheinstructionsbelow.
1. Before beginning, make sure the level is tank is at the Empty
level.
2. InMENUmode,selecttheTGCALitem.
3. When EMPTY appears, press SELECT.This sets the current
distanceasthenewEmptysetting.
4. WhenEXITappears,pressSELECTreturntoTopLevelMenu.
HowtosetusingTargetCalibration(Full):
Instead of measuring for Full tank, the Full distance can be set
automatically.This method requires that the tank be Full or at the
level thatis consideredFull in the application.To set TG Full,follow
theinstructionsbelow.
1. Beforebeginning,makesurethelevelistankisattheFulllevel.
2. InMENUmode,selecttheTGCALitem.
3. When FULL appears, press SELECT.This sets the current
distanceasthenewFullsetting.
4. WhenEXITappears,pressSELECTreturntoTopLevelMenu.
Note:Whensetting eithertheTGEMPTYorTGFULL,makesure thereflectivesurfaceisperpendicular tothe
LVU800Seriesandnotatanangle.Becarefulifthetankhasaslopedorconebottomandthebottomofthe
tankisexposedtoair.

14
WIRING StepFive
BelowisaquickreviewofwiringtheLVU800Seriestocommondisplay,controllersandPLC’s.
ProportionalLevelControlle
r
LVCN‐51Series
JWAmode(FactorySetting)
ProportionalLevelControlle
r
LVCN‐51Series
JWBmode
GenericLoop
PoweredDisplay
GenericPL
C

15
WIRING(continued) StepFive
Generalnotesforelectricalconnections,usageandsafety:
Where personal safety or significant property damage can occur due to a spill, the installation must
havearedundantbackupsafetysysteminstalled.
Wiringshouldalwaysbecompletedbyalicensedelectrician.
Supplyvoltageshouldneverexceed28VDC.
Thesensormaterialsmustbechemicallycompatiblewiththeliquidstobemeasured.
Designafail‐safesystemforpossiblesensorand/orpowerfailure.
NeverusethesensorinenvironmentsclassifiedasHazardous.
TestingtheTransmitter
1. Connectamultimeterinserieswiththeblackwiretoreadthecurrentoutput.
2. Verifythatthecurrentincreases(tankfilling)anddecreases(tankemptying)appropriatelyinthe
calibratedspan.
3. Ifnot,carefullyobserveandattempttocorrelateanyinstallation,levelorapplicationeventformore
specifictroubleshootingdirection.
VoltageOutput
LVU800Seriescanbeusedasa0
to5or0to10VDCoutputdevice.Aresistorwillneedtobeaddedtothe
circuittoenableavoltageoutput(refertothewiringdiagrambelow).
0‐5VDCoutput
o Adda250Ohmresistor
o Actualoutputwillbe0.8to5VDC
0‐10VDCoutput
o Adda500Ohmresistor
o Actualoutputwillbe2to10VDC

16
INSTALLATION StepSix
The LVU800 Series should always be mounted perpendicular to the liquid surface and installed using the
providedFKMmountinggasket.Makesurethatthefittingandtransmitterthreadsarenotdamagedorworn.
Always hand‐tighten the transmitter within the fitting.Perform an installed leak test under normal process
conditionsprior
tosystemstartup.Note:ThepreferredmountingfittingfortheLVU809seriesisaplastic2”
thread(orslip)x1”threadreducerbushing.
MountingGuide
1. Donotmountatanangle
2. Liquidshouldneverenterthedeadband
3. SideWall:
a. ForLVU809Series‐mountatleast2”fromthesidewall
b. ForLVU816,LVU826&LVU832Series‐mountatleast3”fromthesidewall
4. Donotmountwhereobstacleswillintrudeonsensor’sbeamwidth
a. SeeSpecificationsonpage4
5. Donotmountinavacuum
6. Avoidmountingin
thecenterofadometoptank.
7. Inconebottomtank,positionthesensoroverthedeepestpartofthetank.
Donotinstallat
anglerelativetothe
liquid.
Donotinstallwithin
3”oftanksidewall.
Donotinstallwith
objectsinthebeam.
Donotinstallin
applicationswith
vacuum.
Installationinexistingfittings
If the existing fitting is larger than the threads of the LVU800 Series, select a reducer bushing such as a 2”
threadx1”thread,a2”slipx1”thread,3”threadx2”threador3”slipx2”thread.
MetalTanks(LVU809seriesonly)
OmegaEngineeringultrasonictransmittershavebeenoptimizedforuseinnon‐metallicfittings.
1. Forbestperformance,avoidtheuseofmetallicfittings.
a. Useaplastic2”x1”reducerbushing(suchasLVU800‐2N80),oraplastic1”tankadapter(such
asLVU800‐1B).
2. While installations directly
into a 1” metal fitting are not recommended, acceptable results may be
obtained if the 1” fitting is a half coupling in form and the outer diameter of the coupling is tightly
wrappedinvinyltapetodampenvibrations.

17
INSTALLATION(continued) StepSix
Fitting Selection: Check the part number to determine the required fitting mount size and thread type.
LVU800Seriesiscommonlyinstalledintankadapters,flanges,bracketsor standpipes.Note: Always include
thegasketwheninstallingtheLVU800Series.
1. TankAdapter:Selectatankadapterfitting,suchasa1”adapterfortheLVU809seriesora2”adapter
fortheLVU816,LVU826&LVU832series.
a. Forbestresults,selecta2”tankadapterandadda2”x1”reducerbushing.
b. Avoid tank adapter (thread x thread) styles and/or pipe stops forward of the installed
transducer.
c. Alwaysmountthetankadaptersothemajorityoffittingisoutsidethetank.
i. Never mount the tank adapter upside down or the bulk of the material is inside the
tank.
2”TankAdapter
SocketxThread
(LVU800‐2Bshown)
TankAdapter (LVU800‐2B)
w/ReducerBushing
(LVU800‐2N80shown)
2”TankAdapter
ThreadxThread
Donotusethreadxthread
2. Riser:Installationswithtall,narrowriserscanimpedetheacousticsignal.
a. LVU816,LVU826&LVU832Series:2” (5 cm) diameter risersshouldbenotaller than 5” (12.7
cm).Largerdiameterrisersshouldbenotallerthan12”(30.5cm).
b. LVU809Series:
Note:Donotexceedthedimensionslistedabove

18
INSTALLATION(continued) StepSix
3. Flange(LVU809series):Ifinstallingonaflange,selectaflangewithathreadthatisabovetheplaneof
theflange.
a. TheLVU816,LVU826&LVU832seriesworkswellwithFlangeinstallations.
b. Avoidtheuseofblindflangeswithtappedthreadsorflangeswherethethreads
areevenwith
theplaneoftheflange,suchastheBanjo1"PolyANSIFlange(seriesAF100).
c. Useaflangewitha2”threadandadda2”to1”reducerbushingtocompletetheinstallation.
2”Flangew/
threadoutofplane
(LVU800‐2Fshown)
2”Flangew/
threadinplane
2”Flangew/
ReducerBushing
(LVU800‐2N80shown)
Donotusethreadinplane
4. Side Mount Bracket: For installations in open tanks and sumps, use the LVM‐30 or
LVM‐31seriessidemountbracket.
a. FortheLVU809series,ordertheLVM‐31sidemountbracket.
b. FortheLVU816,LVU826&LVU832,series,ordertheLVM‐30sidemountbracket.

19
INSTALLATION(continued) StepSix
5. Stand Pipe:A standpipe maybe used to dampen turbulence or when foam is present in the
application.
a. Pipecanbemadeofanymaterial.
b. Selectaminimum3”IDpipeforthestandpipe.
i. A2”pipeisusablewiththeLVU809series,butistheminimum.
ii. Pipeslargerthan3”canalsobeused.
c. UseacouplingandreducerbushingtoattachtheLVU800Seriestothepipe.
i. WiththeLVU809series,besuretouseaplasticreducingbushingsuchasthe2”Thread
x1”Threadfitting(ex:LVU800‐2N80)or2”Slipx1”Threadfitting(ex:LVU800‐2S80).
ii. With the LVU816, LVU826 or LVU832 series, be sure to use a plastic reducing bushing
suchasthe3”Threadx2”Threadfitting(ex:LVU800‐3N80)or3”Slipx2”Threadfitting
(ex:LVU800‐3S80).
d. Thepipe length shouldrun themeasurement spanandthe bottom ofthepipe shouldremain
submergedatalltimestopreventfoamfromenteringthepipe.
e. Cuta45°notchatthebottomofthepipeanddrill a1/4”pressureequalizationholeinthedead
band.
f. Thepumpsshouldnotdriveliquidpasttheopenendofthestandpipewhichcausestheliquid
inthepipetooscillate.

20
APPENDIX StepSeven
Setup:
YoucanviewhowtheLVU800Seriesisconfigur ed.
1. FromthemainMENUlevel,pressSETUPwhenVALUESappears.
2. WhenSETUPappears,presstheSELECTkey.
3. Setupwilldisplaythefollowinginformation:
a. Units,Display,RevmA,Safe,Height,Fill‐H
4. Whencompleted,pressSELECTwhenEXITappearstoreturntothemainprogramlevel.
Diagnostics(DIAG)Parameters:
This mode runs diagnostic tests that confirm operation of LVU800 Series.Thismode should only be used
whensupervisedbyanOmegaEngineeringrepresentative.
Reset:
LVU800 Series enables the end user to reset the entire configuration back to the original factory settings.
FollowtheinstructionsbelowtoresetLVU800Series:
1. FromthemainMENUlevel,pressSELECTwhenVALUESappears.
2. WhenRESETappears,presstheSELECTkey.
3. WhenYESappears,pressSELECTkeytoresetLVU800Series.
a. Tocancelthereset,pressSELECTwhenNOappears.
4. Whencompleted,pressSELECTwhenEXITappearstoreturntothemainprogramlevel.
FactorySettings:
LVU800Series
H
EIGH
T
FILL‐
H
LVU809Series 118.1”(300cm) 114.1”(290cm)
LVU816Series 216.5”(550cm) 208.5”(530cm)
LVU826Series 314.9”(800cm) 307.1”(780cm)
LVU832Series 393.7”(1000cm) 381.9”(970cm)
/