Get Started with BrightLink Pro
BrightLink Pro is a meeting room and classroom productivity tool that allows you to create a digital whiteboard
wherever you need it. Add new blank pages and keep writing instead of erasing your ideas. Insert images, project
your content from smartphones, tablets, or laptops, and add annotations. Save your notes and ideas, and share them
via email without a computer.
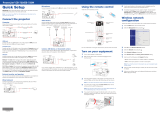
Using the Home screen
Use the Home screen to quickly access Whiteboard mode, switch the
active source, and select other options. You can access the Home
screen at any time by using the Home button on the remote. See the
online BrightLink Pro User's Guide for more information.
EPSON is a registered trademark, Epson iProjection is a trademark, and EPSON Exceed Your Vision is a registered logomark of Seiko Epson Corporation. BrightLink and
PrivateLine are registered trademarks of Epson America, Inc.
Mac is a trademark of Apple Inc., registered in the U.S. and other countries. App Store is a service mark of Apple Inc.
Android and Google Play are trademarks of Google inc.
General Notice: Other product names used herein are for identification purposes only and may be trademarks of their respective owners. Epson disclaims any and all rights in
those marks.
This information is subject to change without notice.
© 2017 Epson America, Inc., 8/17 CPD-54275
Printed in XXXXXX
BrightLink
®
Pro 1470Ui
Interact with your computer
1
Connect your computer to the control pad using the
provided USB cable.
2
Tap the Source Select icon to select the computer's
source.
3
Select the PC Interactive icon to use the interactive
pen or your finger as a mouse.
Install Easy Interactive Driver (Mac)
To use the pen or finger as a mouse, Mac users must
install the Easy Interactive Driver. To install the software,
download it from the Epson support site.
Launch programs
Use the pen to launch any program on your computer and
navigate your file system, right on the screen.
Browse the web
Browse the web in any browser; view web pages,
download files, and view videos.
Play videos
Play videos on your computer and display them
on the screen.
Use the pen/finger as a mouse
Mouse command Pen action
Click Tap
Double-click Double tap
Click and drag Tap and drag
Move cursor Hover over board
Right-click Press pen button
Tap and hold finger
for 3 seconds
Need help?
The Epson
®
PrivateLine
®
service is for you!
All you have to do is call (800) 637-7661. This service
is available for the duration of your warranty period.
You may also speak with a projector support specialist by
dialing (562) 276-4394 (U.S.) or (905) 709-3839 (Canada).
Support hours are 6 am to 8 pm, Pacific Time, Monday
through Friday and 7 am to 4 pm, Pacific Time, Saturday.
Days and hours of support are subject to change without
notice. Toll or long distance charges may apply.
To access the online User’s Guide, get FAQs, and more,
visit www.epson.com/brightlinkdownloads (U.S.),
www.epson.ca/brightlinkdownloads (Canada), or
www.epson.com.jm/support (Latin America) and select
your product.
What would you like to do?
Note: Some features of BrightLink Pro require additional software or prior configuration by the installer or
network administrator. For more information, see the online BrightLink Pro User’s Guide.
Start writing
Draw on the projected screen with the interactive
pen or your finger.
Use your mobile device
Connect your mobile device and display your
content on the screen.
Project from any source
Import content from a connected device directly to your
whiteboard.
Interact with your computer
View your desktop and use the interactive pen as a
mouse.