TOOLS NEEDED FOR ASSEMBLY
(not included)
Quesons, problems, missing parts? Before returning to your retailer, call
our customer service department at 844.404.4242, 8:00 a.m. - 5 p.m., MT,
Monday - Friday or email us at: support@novaoinc.com
Phillips
Hot
Flexible
Hose
Cold
Flexible
Hose
TROUBLESHOOTING TIPS
Finish is changing color or is shiny
Abrasive cleaners, soaps or other
factors constantly in contact with it.
Soluon
Stop using abrasives; Replace parts
Issue Reason
New faucet needed; Tighten supply lines
Cracked casing inside; Supply lines
may be loose
Leaking from under the body
Remove ceramic cartridge, check for cracksCartridge may be defecveWater will not shut o completely
Tighten locking nut; Remove cartridge,
check for cracks
Lock nut has come loose; Ceramic
cartridge may be defecve
Leakage under the handle
Please Note:
• Review and abide by all building and plumbing codes
• Standard codes for Novao faucets: cUPC/CSA/AB1953
• Novao faucets need to be installed by a professional
• A 1.5” faucet hole is needed for installaon
• Max counter thickness 2”
• Turn the handles on both the hot and cold water supply lines o so
water will not be running through the pipes. These pipes will be located
under the sink in the cabinet.
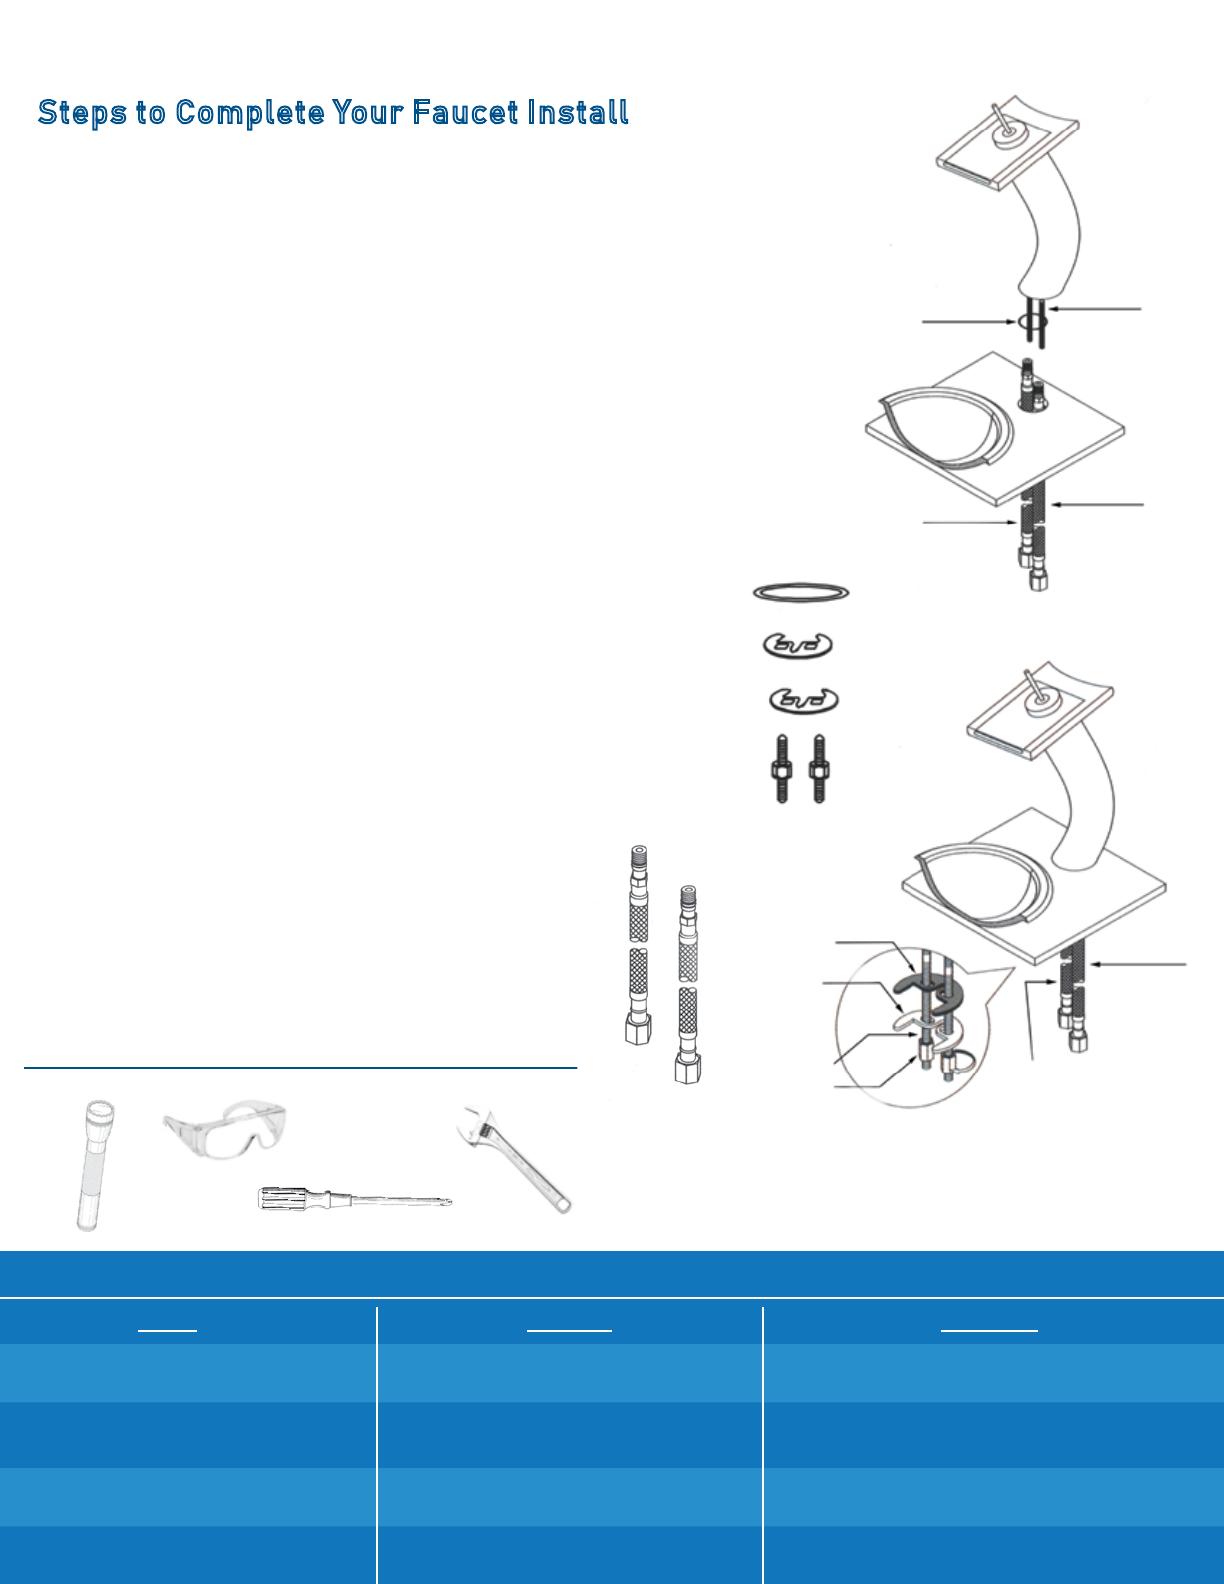
• Fasten the two bolts into the two threaded holes in the faucet.
Make sure the O-ring is on the base of the faucet.
Fasten the hot and
cold exible hoses into the water supply holes on the boom of the faucet
if necessary.
Lower into the faucet hole.
• Holding the faucet in place at the desired posion, slide the half moon
rubber washer and metal washer up the bolts. Take the two lock nuts
and ghten accordingly.
• Aach the exible hose to the supply line source. The exible hose on
the right should be aached to the cold water supply line. The exible
hose on the le should aach to the hot water supply line. Tighten
these connecons accordingly.
• With the faucet’s lever wide open, slowly turn the
handles on the hot and cold water supply lines to the open posion to
your desired ow rate. Allow the waterfall faucet to run for a couple
minutes to get rid of any air pockets in the pipes
TYPE TWO ASSEMBLY
Steps to Complete Your Faucet Install
Hot Hose
Lock Nut
Metal Washer
Rubber Washer
Cold Hose
Long Bolt
Hot Hose
O-Ring
Cold Hose
Long Bolts
O-Ring
Metal
Washer
Long Bolts
and Lock Nuts
Rubber
Washer
Applicable for the following faucet series:
GF-001
GF-002
GF-010
GF-011
GF-057
NBF-084


